85km
8 days, 7 nights
Tasmania
December 2025
Grade 4 walk
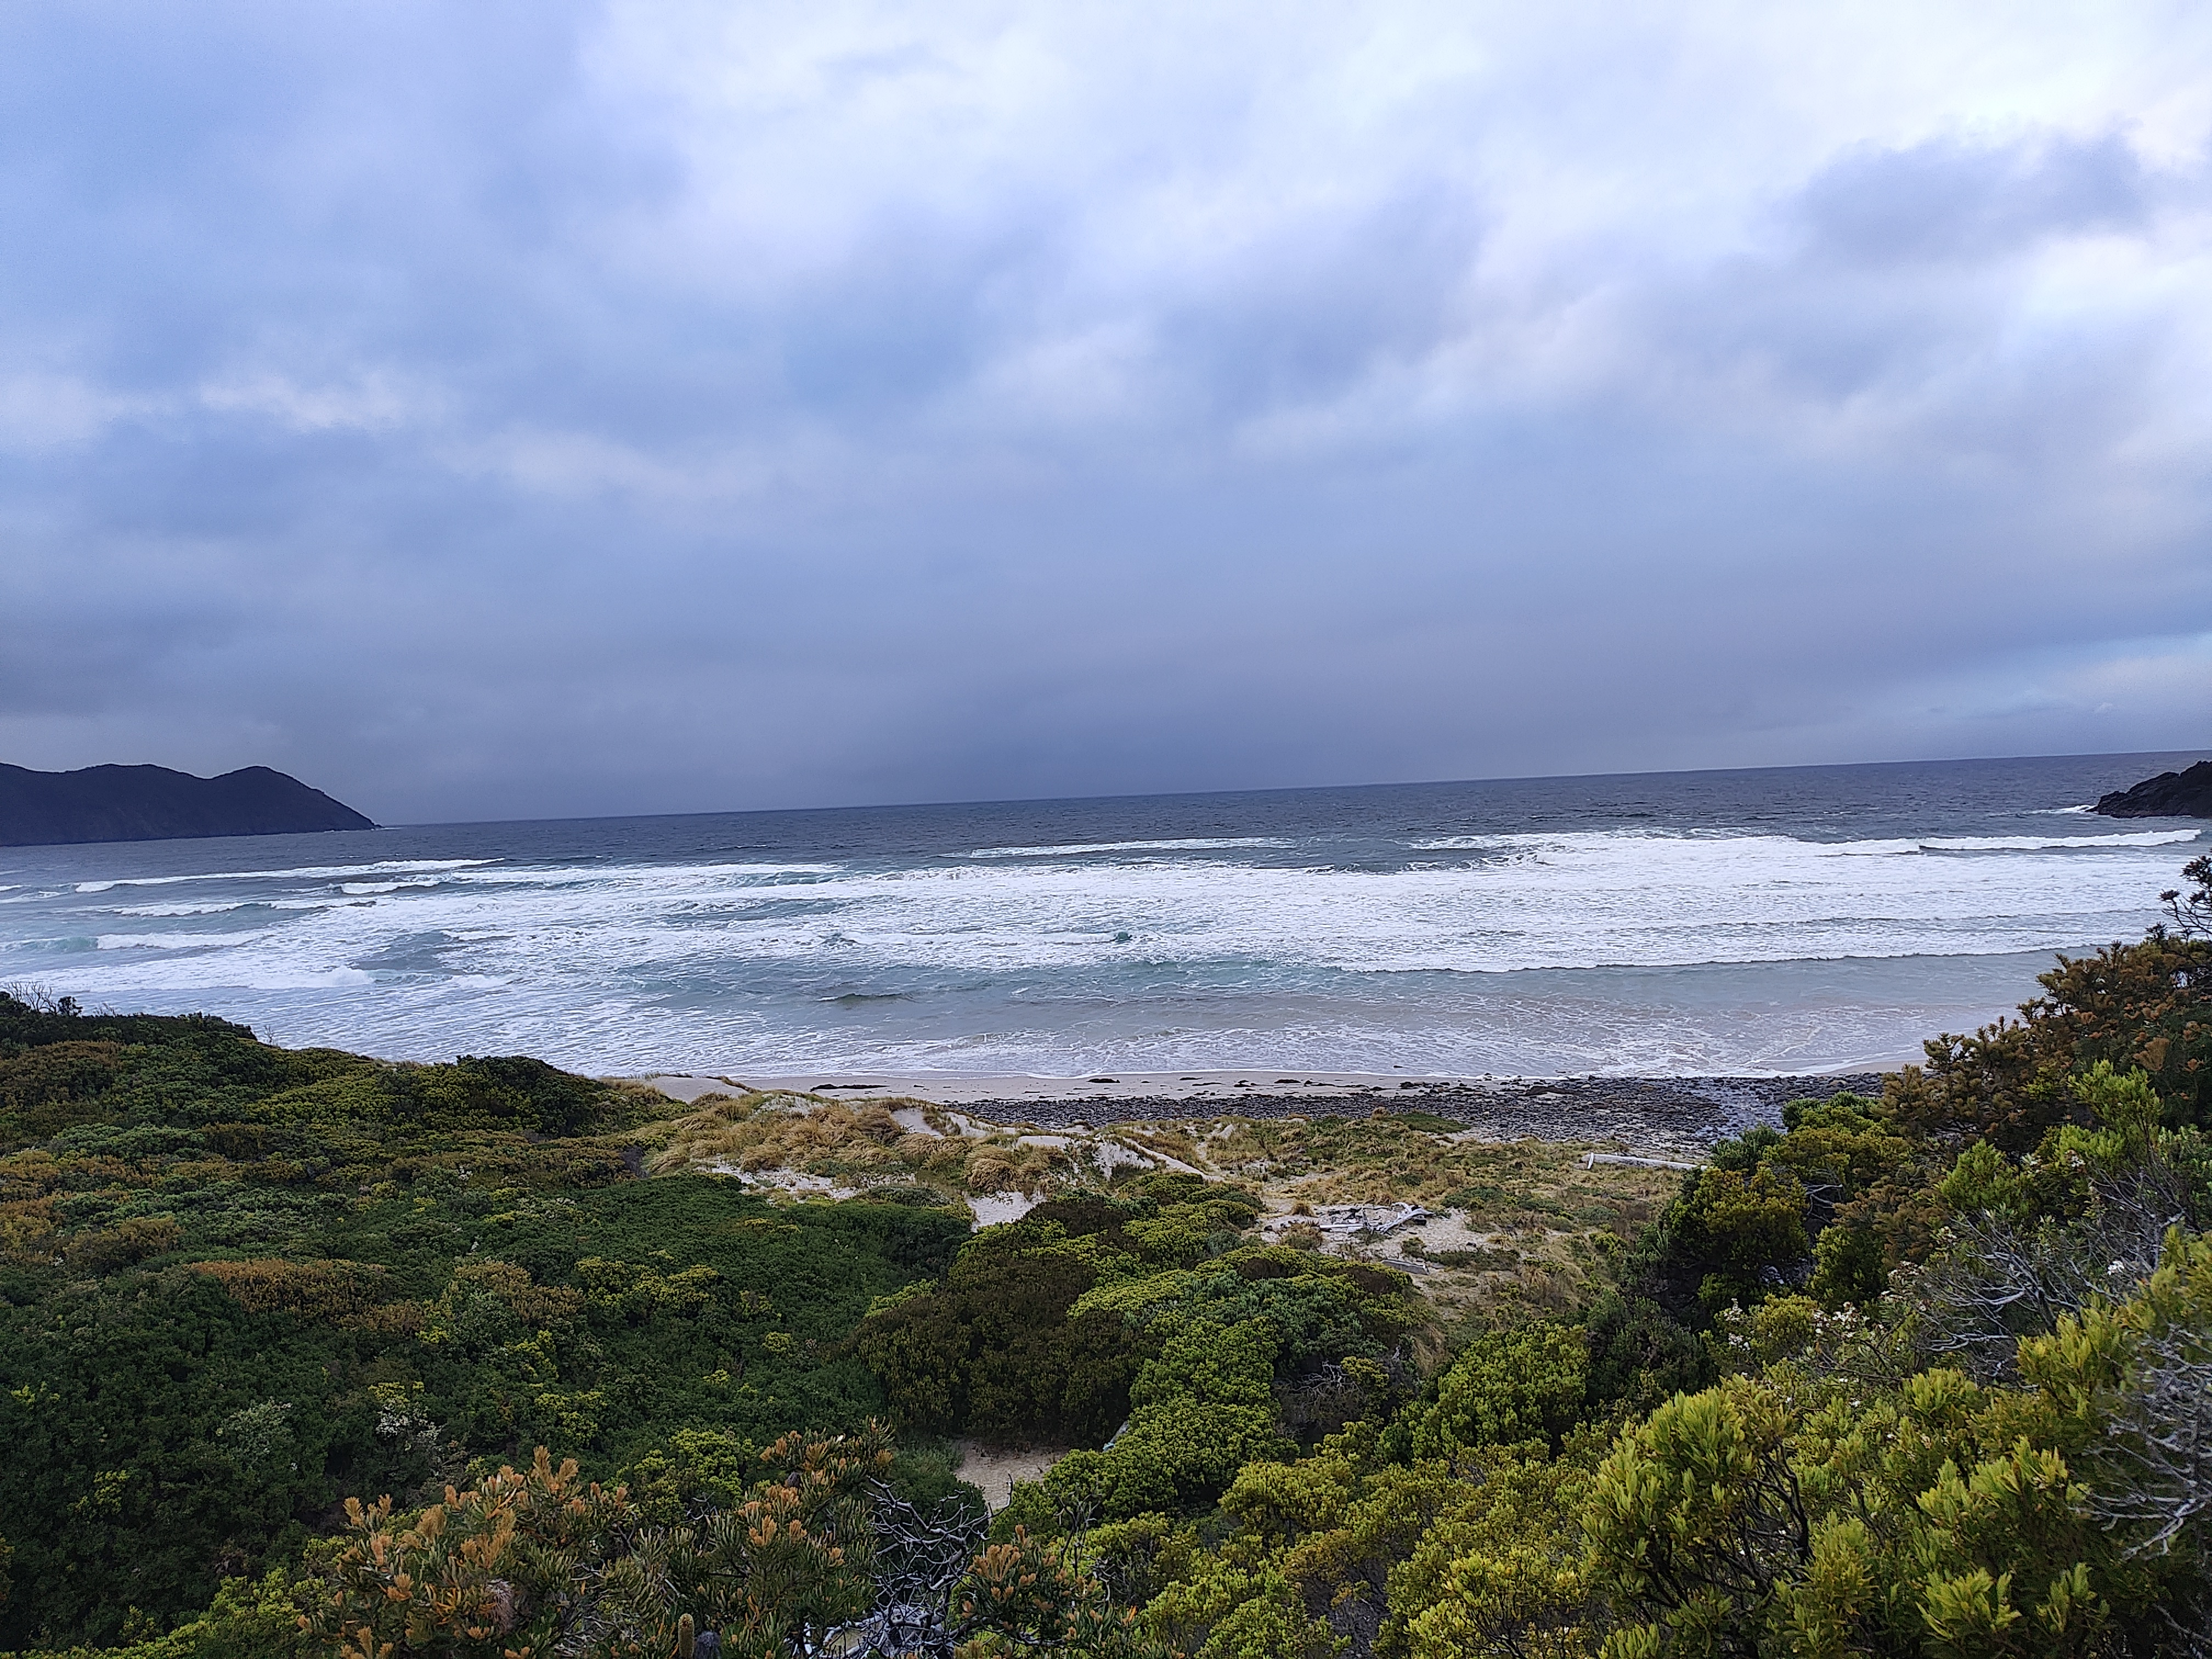
The South Coast Track is an epic 85km adventure through Lutruwita’s (Tasmania’s) largest national park, South West National Park. Nestled within the UNESCO recognised Tasmanian Wilderness World Heritage Area, and comprising 10% of the state (Tourism Tasmania, 2026), South West National Park is infamous for its wilderness and endless opportunities for adventure.
Between mountainous ranges, fast-flowing river crossings, scrambling up headlands and the rugged coastline of the southern ocean, this walk is a true epic. The South Coast Track is special for its towering ancient quartzite landscape, buttongrass plains, wild beaches and rugged ranges. Even more special, it is only in this south western corner at Melaleuca that you can spot the rare and critically endangered orange-bellied parrot (Tasmania Parks & Wildlife Service, 2022). The harsh landscape and wild ocean also hold stories of seafarers, some of which fell victim to ships wrecked on this coastline.
First Nations peoples having been living in this area for eons, connected to the landscape and spirit of country through culture and generations of stories. There is a deep and incredibly intricate history of invasion and colonisation in Tasmania, and from what I can understand, the area of the south-west national park is of particular significance to the traditional people of this area. Standing in the remoteness of this wilderness offers a quiet moment to reflect on the history of this place, and pay respect to those who have cared for this land for thousands of years. Remembering (or learning) about the history and how we contribute to the legacy is an important responsibility as we lay footprints on land that was never ceded. If you’re interested in Aboriginal heritage and archaeology of this area, a detailed literature review can be found here.
Known for its mud and unpredictable weather, this walk is remote – so remote that it starts with a light plane that drops you on a lonely airstrip, with no cars or roads for several days. While it offers incredible views, untouched landscapes and pristine beaches, and daily kilometers seem deceptively achievable, this walk is a hard trek, and is for experienced hikers. If you’re looking for a true adventure, with an array of challenges and hazards, (and testing out your survival skills), this may be the trek for you – but please do your research to make sure it’s safe and achievable for you/your group. There is also the option to do the walk in a guided expedition option which may make the walk more accessible for some.
This walk tested our grit and perseverance, as well as our balance, strength and courage as we navigated a slippery and obstacle-ridden track, and wild, wet and windy weather.
What’s Ahead:
Click the links to jump ahead:
- Getting to & from the Trail
- Route
- Navigation
- Conditions & Terrain
- Safety
- Packing List
- Campsites
- Day 0: Hobart
- Day 1: Hobart to Melaleuca to Point Eric
- Day 2: Point Eric to Louisa River
- Day 3: Louisa River to Little Deadmans Bay
- Day 4: Little Deadmans Bay to Prion Boat Crossing
- Day 5: Prion Boat Crossing to Surprise Bay
- Day 6: Surprise Bay to Granite Beach
- Day 7: Granite Beach to Lion Rock
- Day 8: Lion Rock to Cockle Creek
- Reflections: Peaks & Pits
- Grit Step Ratings
Getting to & from the Trail
As a thru-hike, there are only a couple of options in and out. You can either fly in by small plane or arrive by private boat into Melaleuca, and then drive out of Cockle Creek. The walk can be done in either direction, so of course this can be reversed. We walked West to East, so we flew into Melaleuca and then caught the charter bus from Cockle Creek back to Hobart.
The direction for walking is an early decision, as you’ll need to book spots on the plane. This also means you’re locked into dates, so consider how may days you plan to take and whether you want to include a rest day before booking.
As we were travelling from interstate, there was some additional logistical planning. We arrived in Hobart about midday the day before our plane to Melaleuca was scheduled to avoid risk of any flight delays setting us back.
Melaleuca End / Flight:
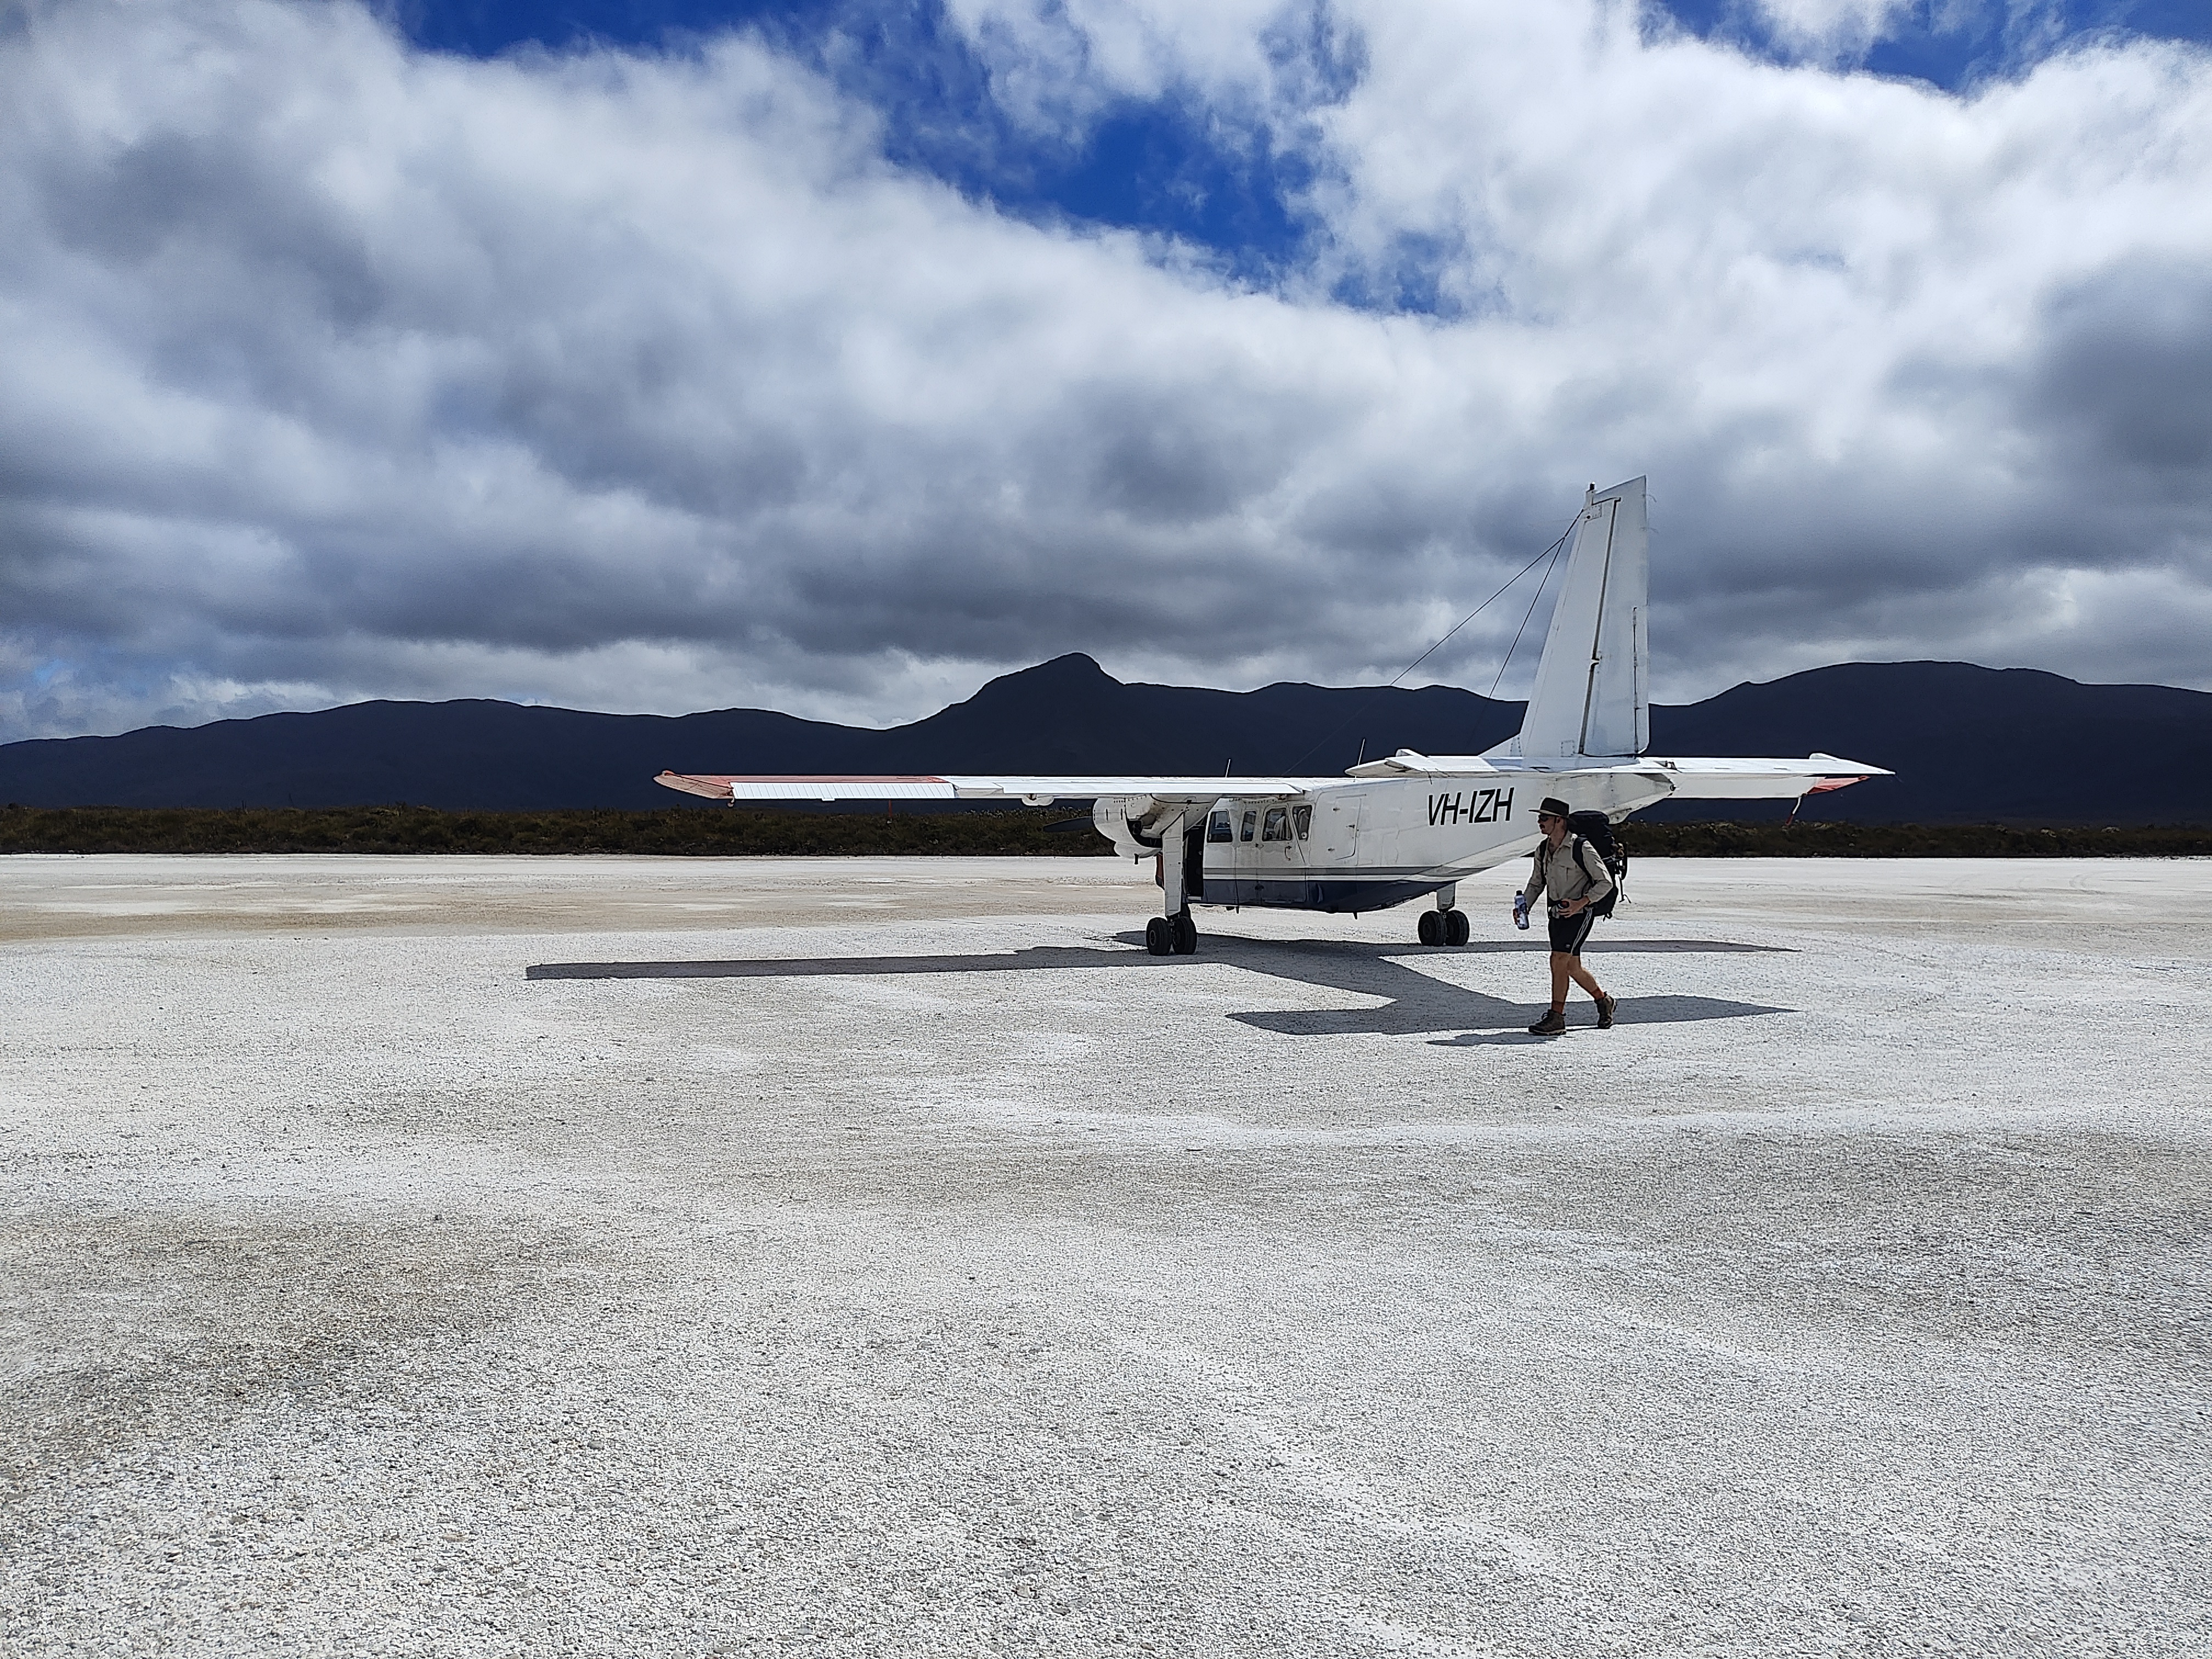
Par Avion operate the flight service for access to the southwest of Tasmania from Hobart, including access to the South Coast Track. Par Avion airport is based in Cambridge near Hobart airport. The flights provide drop-off and pick-up at Bathurst Harbour airstrip in Melaleuca.
The flights are subject to weather. We received communication from Par Avion in the few days before our flight saying there was bad weather coming and that the flight would potentially be rescheduled. Our flight ended up going to plan, but we met several other hikers who ended up doing the walk the opposite direction as their flight to Melaleuca was cancelled.
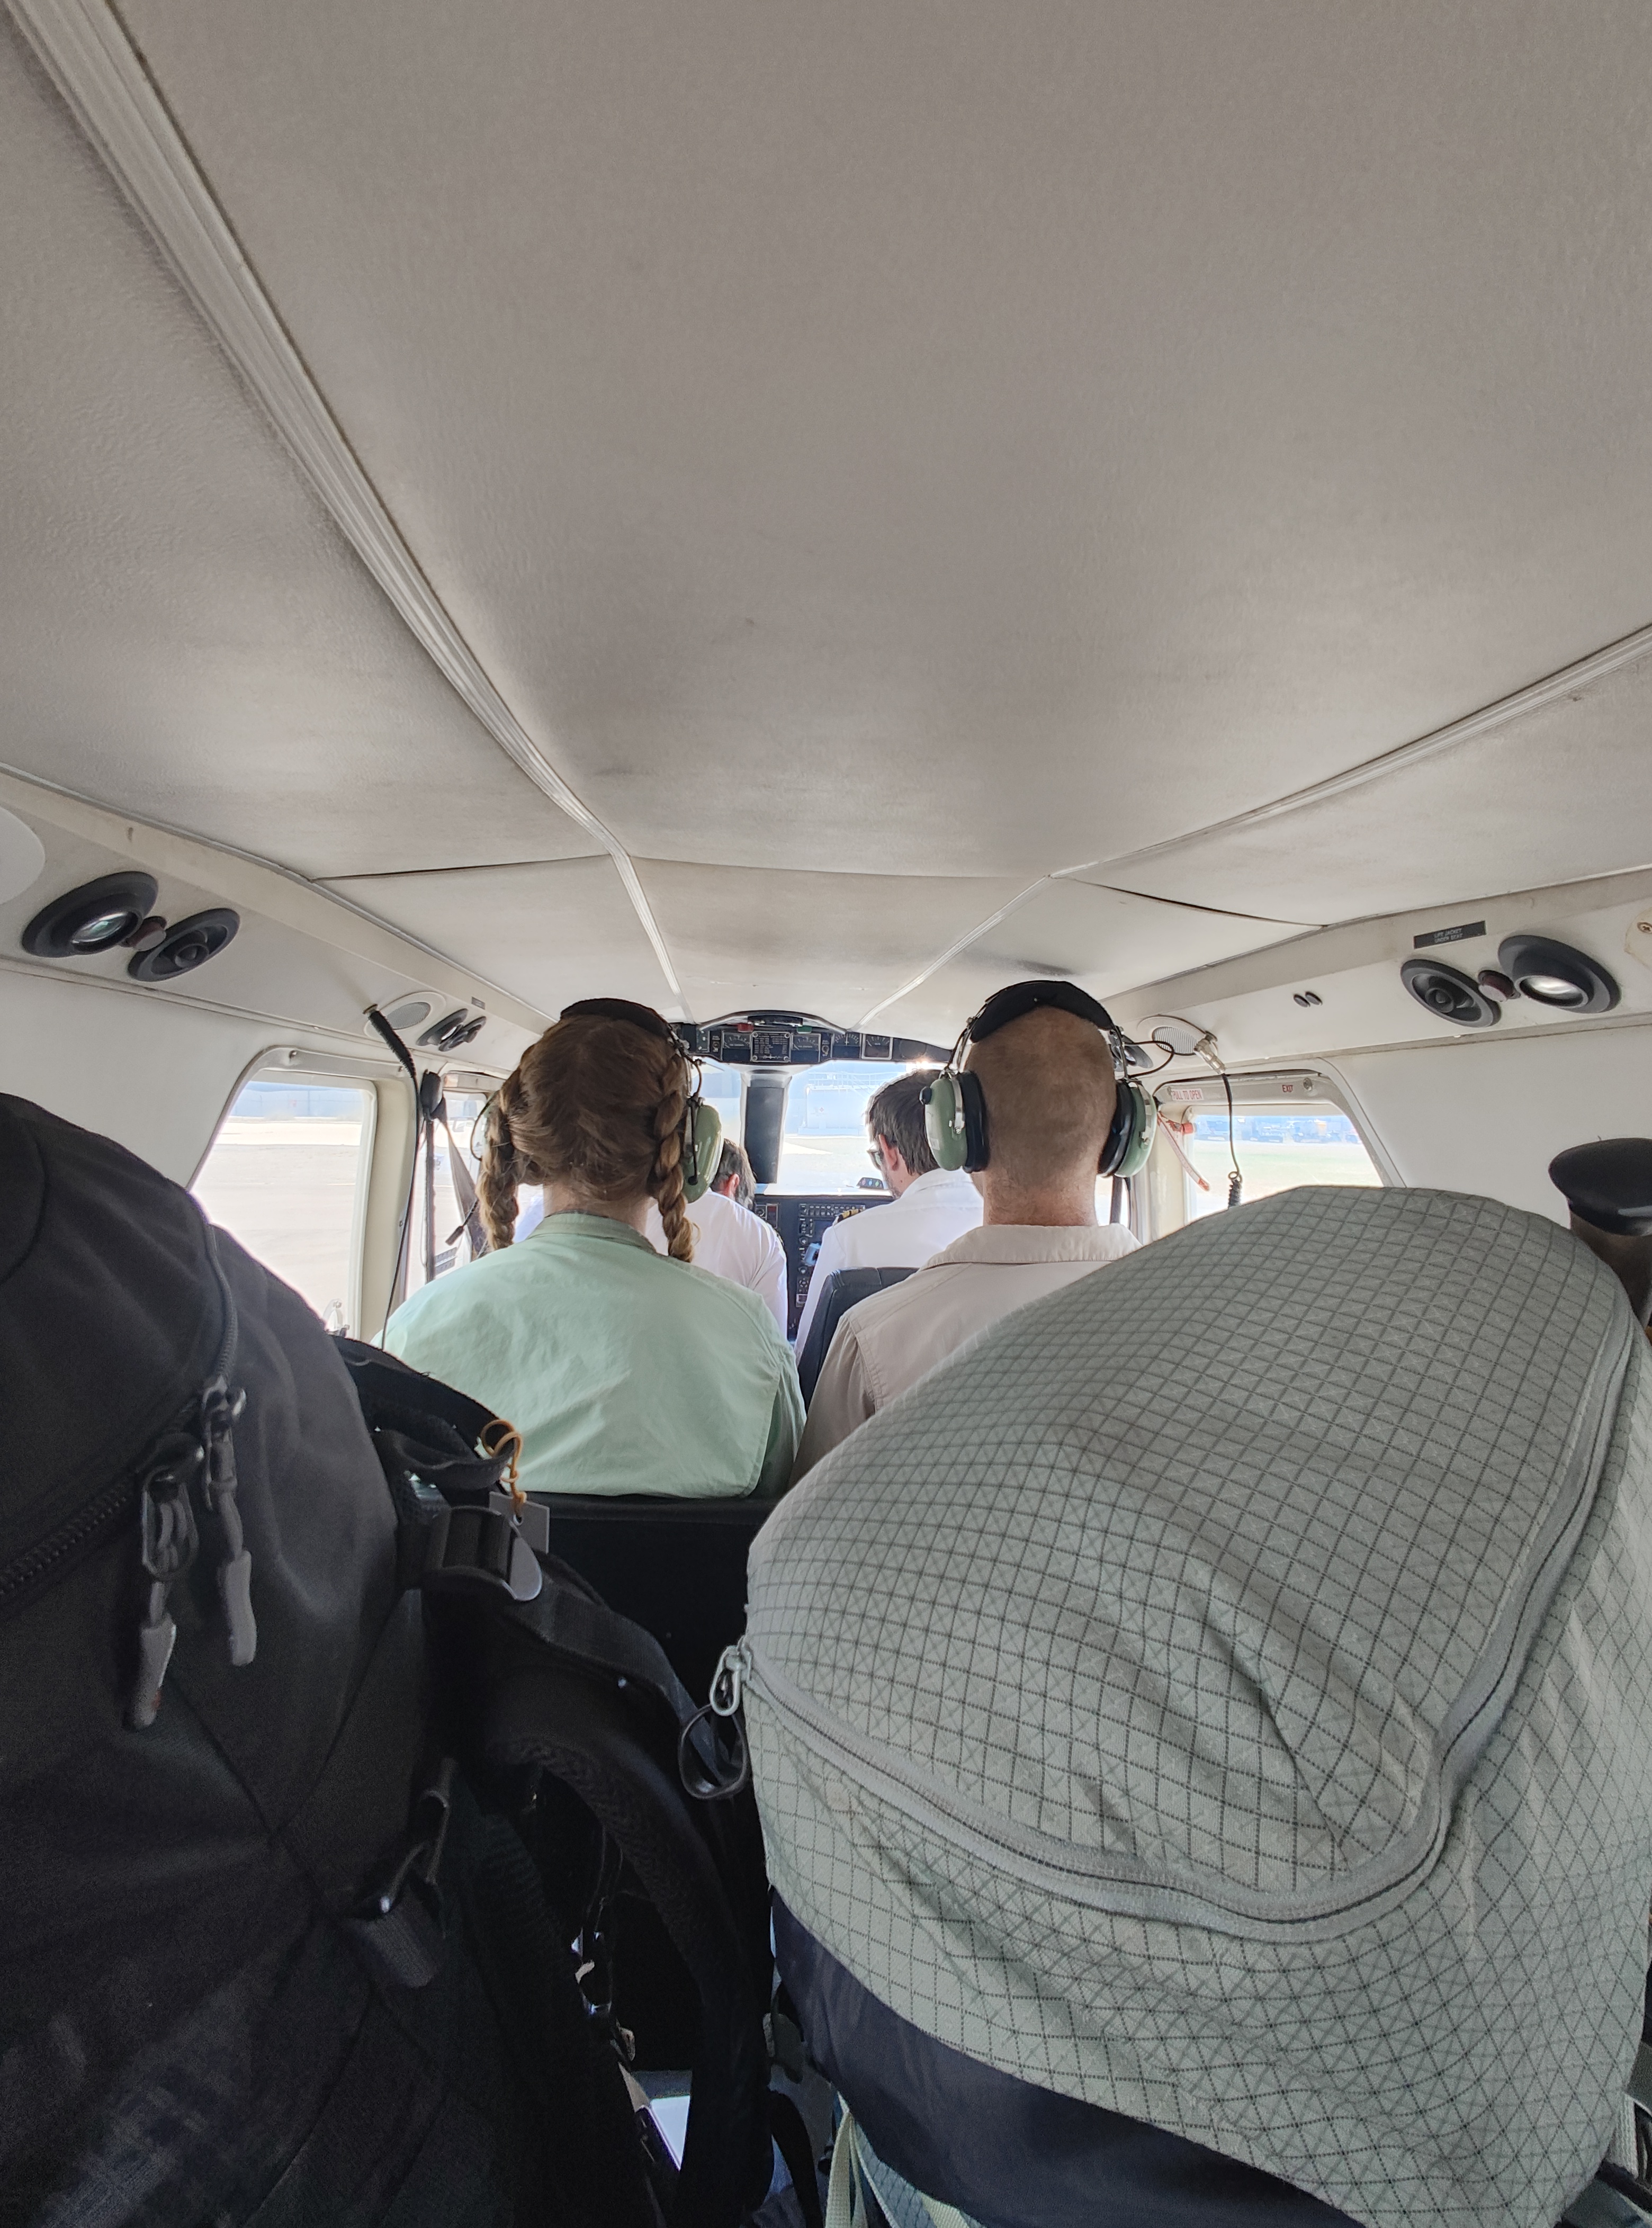
Flights can easily be booked online and cost us $350 per person when we booked in 2025. From memory, the flight was almost an hour which is pretty decent value for what is essentially a scenic flight over Tassie plus transport of our bags. It’s a small plane that seated 7 people (including two pilots) and all our gear. If you’re scared of heights or flying, this may be a little bit scary, but the views were incredible and it was amazing to fly over the terrain we’d be experiencing first-hand over the next week!
You can purchase National Parks passes and gas from the Par Avion airport. This was really handy, as you can’t take gas on the flight. If you’re ending the walk at Melaleuca and flying home, you can leave gas canisters with remaining gas at the hikers hut for future walkers to use.
There is a weight limit of 20kg, and there is a $7 charge for every kg over that weight. If flying from Hobart, you do not need to fill your water before the flight, as there are water tanks at Melaleuca where you can fill up before walking.
A couple of notes for preparing your pack for the flight:
- You are required to take any matches or lighters out of your pack and keep them on your person during the flight.
- I’d suggest keeping a jumper out as it gets quite cold up in the air.
- We left our mats strapped to the outside of our packs for the flight and this wasn’t an issue.
Cockle Creek End / Car
Cockle Creek is the end of the road to the south west. Accessible by boat and car, it’s the beginning or end point for the South Coast Track.
If you’re lucky enough to be from Tassie or have friends/family there, you can get dropped off/picked up from here.
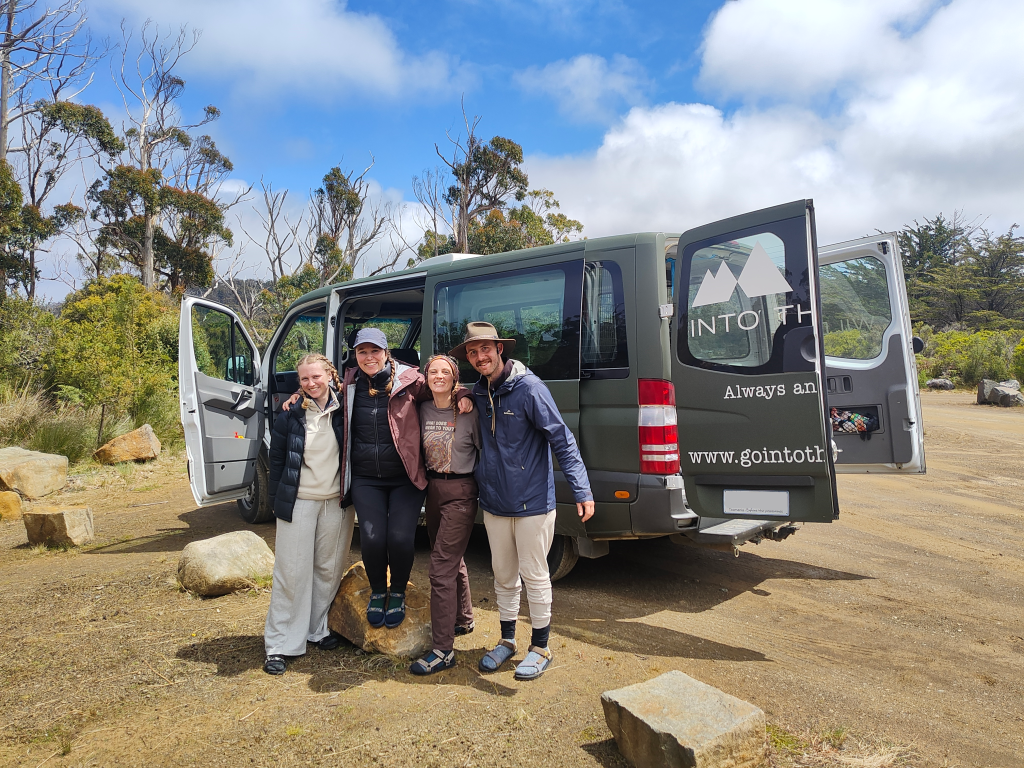
For the rest of us, it’s either a taxi or charter bus. We booked the charter bus through Tasmanian Wilderness Experiences which was $110 per person. The bus was clean and comfortable, with lots of space for our gear in the back. The drive is a couple of hours, so the driver stopped at a bakery halfway through so we could get something to eat and use the bathroom. We were dropped off at our accommodation in Hobart.
The charter requires a minimum of 4 people to operate. If you have less than 4 people, you can agree to pay the additional fare to guarantee the service runs. We initially booked as 3 people, and received a confirmation email when a fourth person booked so we knew the transfer would definitely run.
The charter bus arrives at Cockle Creek at 12:30pm, but the website indicates that you may be able to request a different time if needed. The Tasmanian Wilderness Experiences website also outlines its safety procedure and process if bushwalkers don’t arrive in time for the shuttle which is worth reading.
There is a pay phone at Cockle Creek and we also had some limited phone reception. I heard from another hiker that they called a taxi after completing the walk, but I have no idea how much it would cost to make it back to Hobart! But taxi is another option if you need or would prefer.
Route
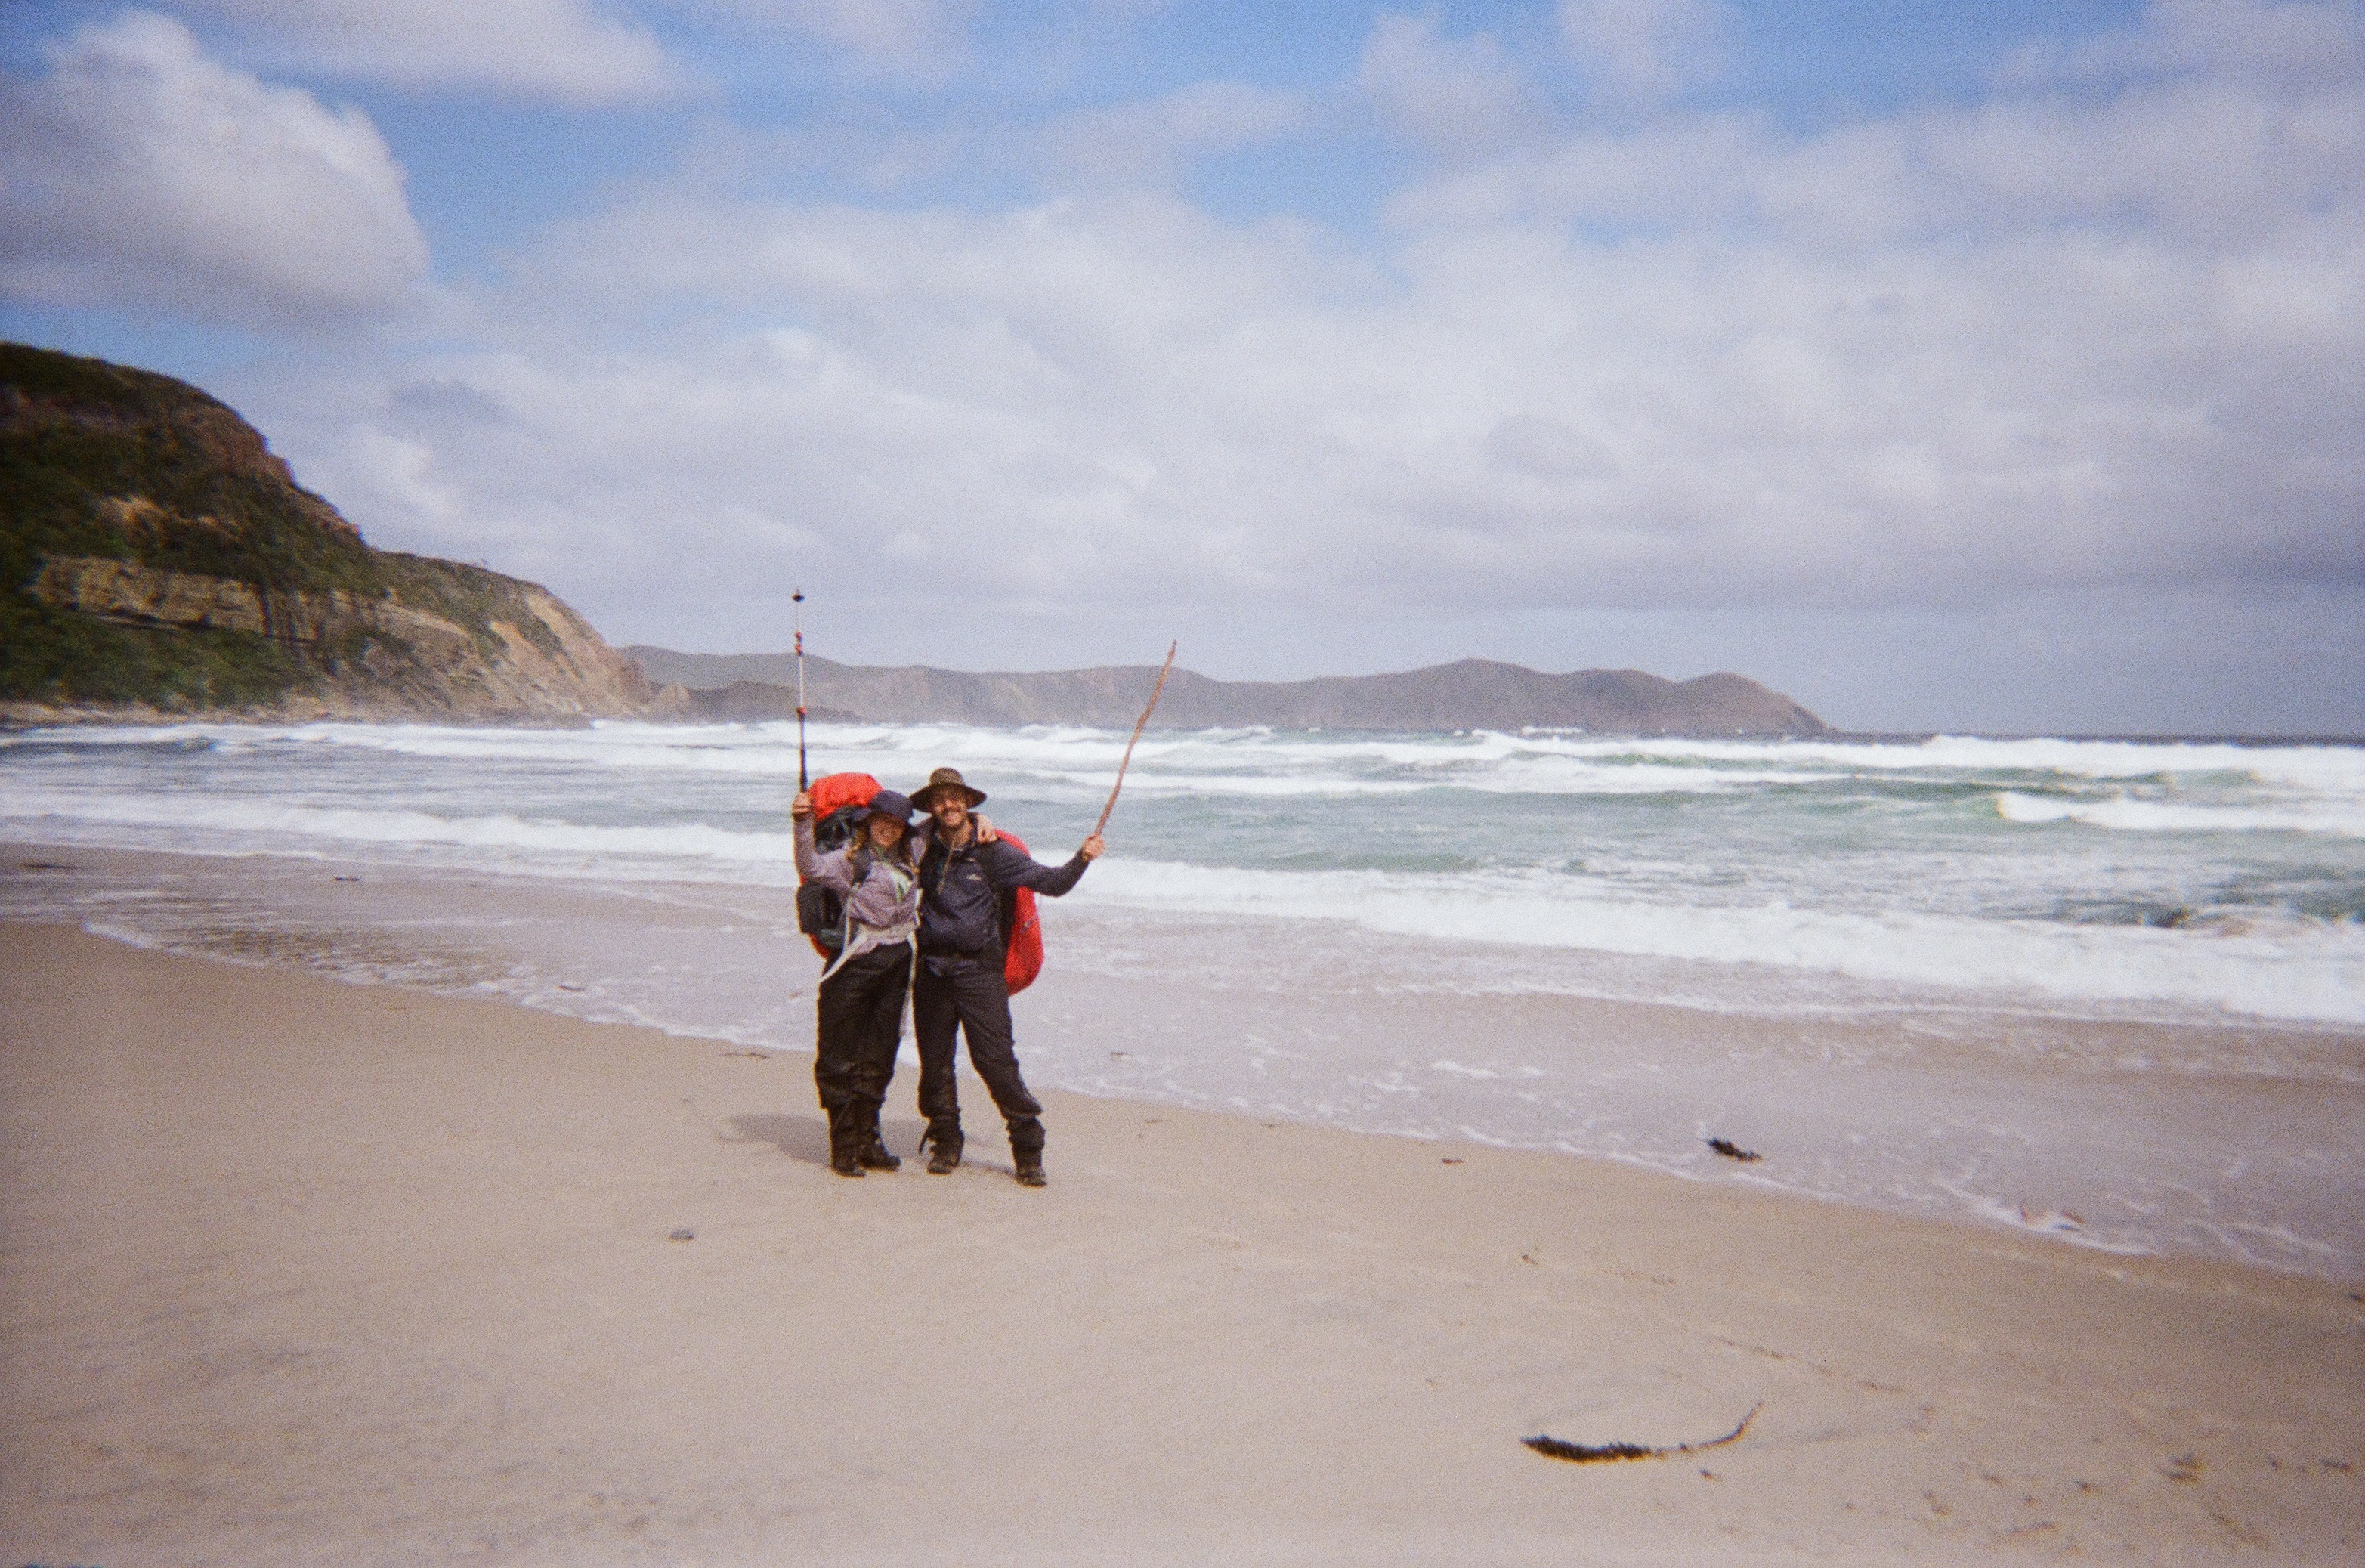
The South Coast Track can be done in either direction. We opted to walk west to east, which meant starting at Melaleuca and finishing at Cockle Creek. As described above, despite best laid plans, weather may end up determining your route as flights are weather dependent.
We went into this walk with a general but flexible plan for walking days and campsites, but this plan did change slightly due to weather and fatigue. When we first booked the trip, we expected to stay in Melaleuca the first night and start the walk the following day. We ended up deciding that due to daylight savings we could start the walk after arriving by plane, which meant starting at around 4pm. This essentially gave us an extra day up our sleeve which we used for a rest day on Christmas day. While this was a bit of an accident, I’d suggest planning for an extra day so you have some leeway if something doesn’t go to plan.
There are a few good resources which offer potential itineraries to help plan your trip:
- Tasmania Parks and Wildlife Service website – Walk Notes
- TasMap South Coast – Walk Map and Notes
- John and Monica Champman’s South Coast Track guidebook
- South Coast Track Information website
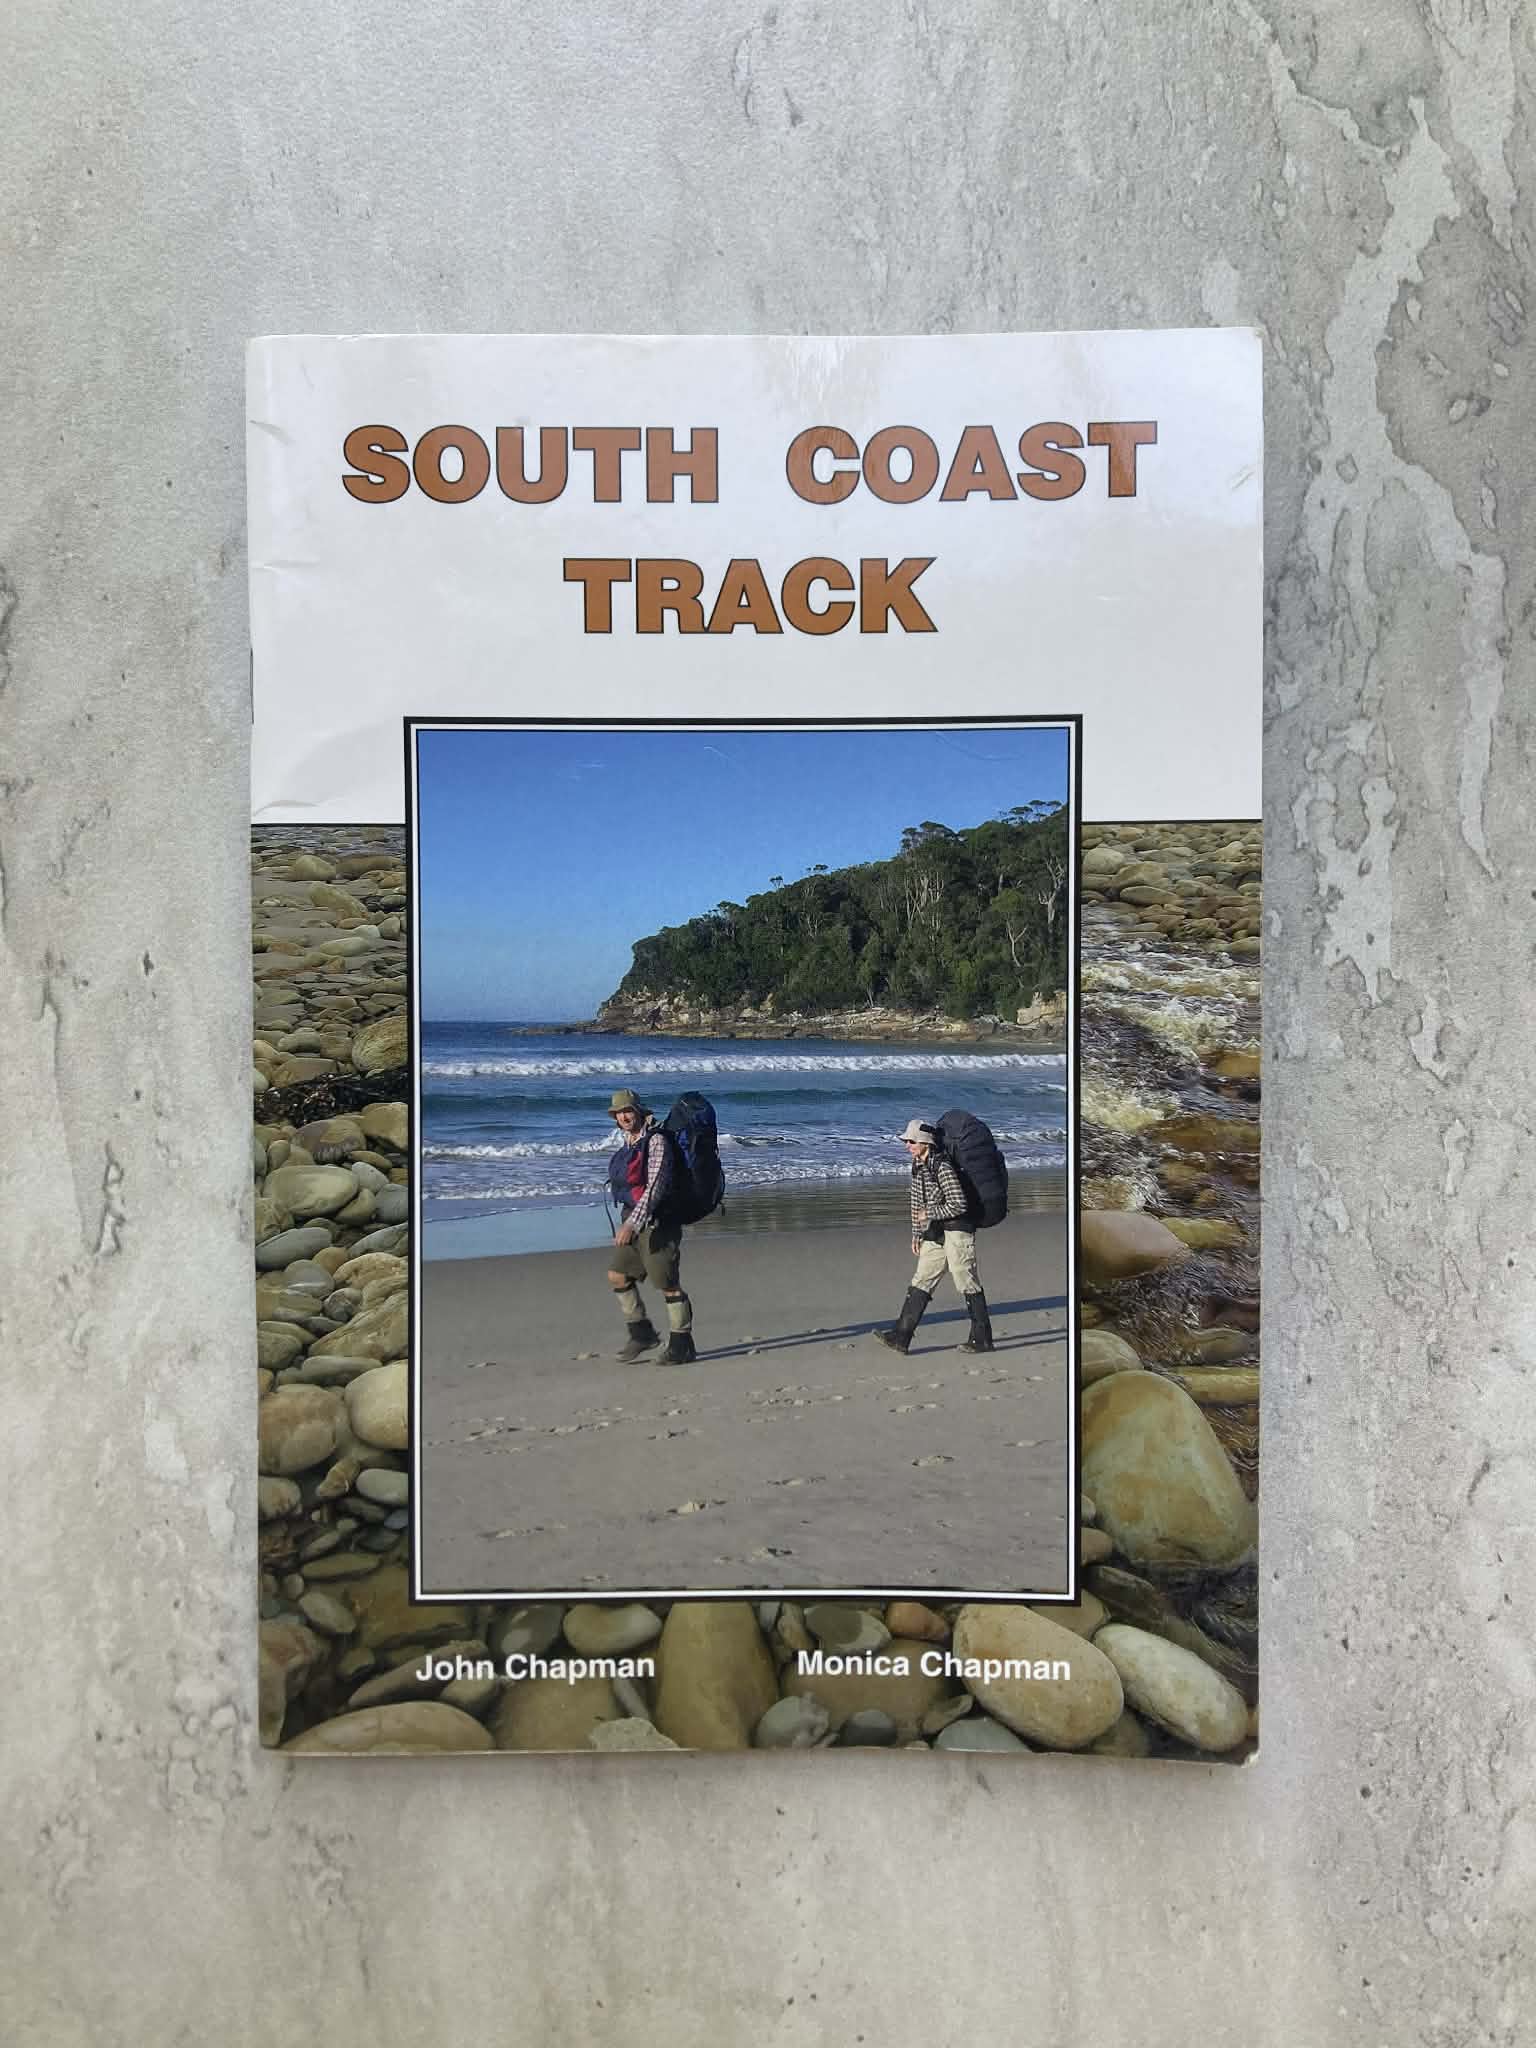
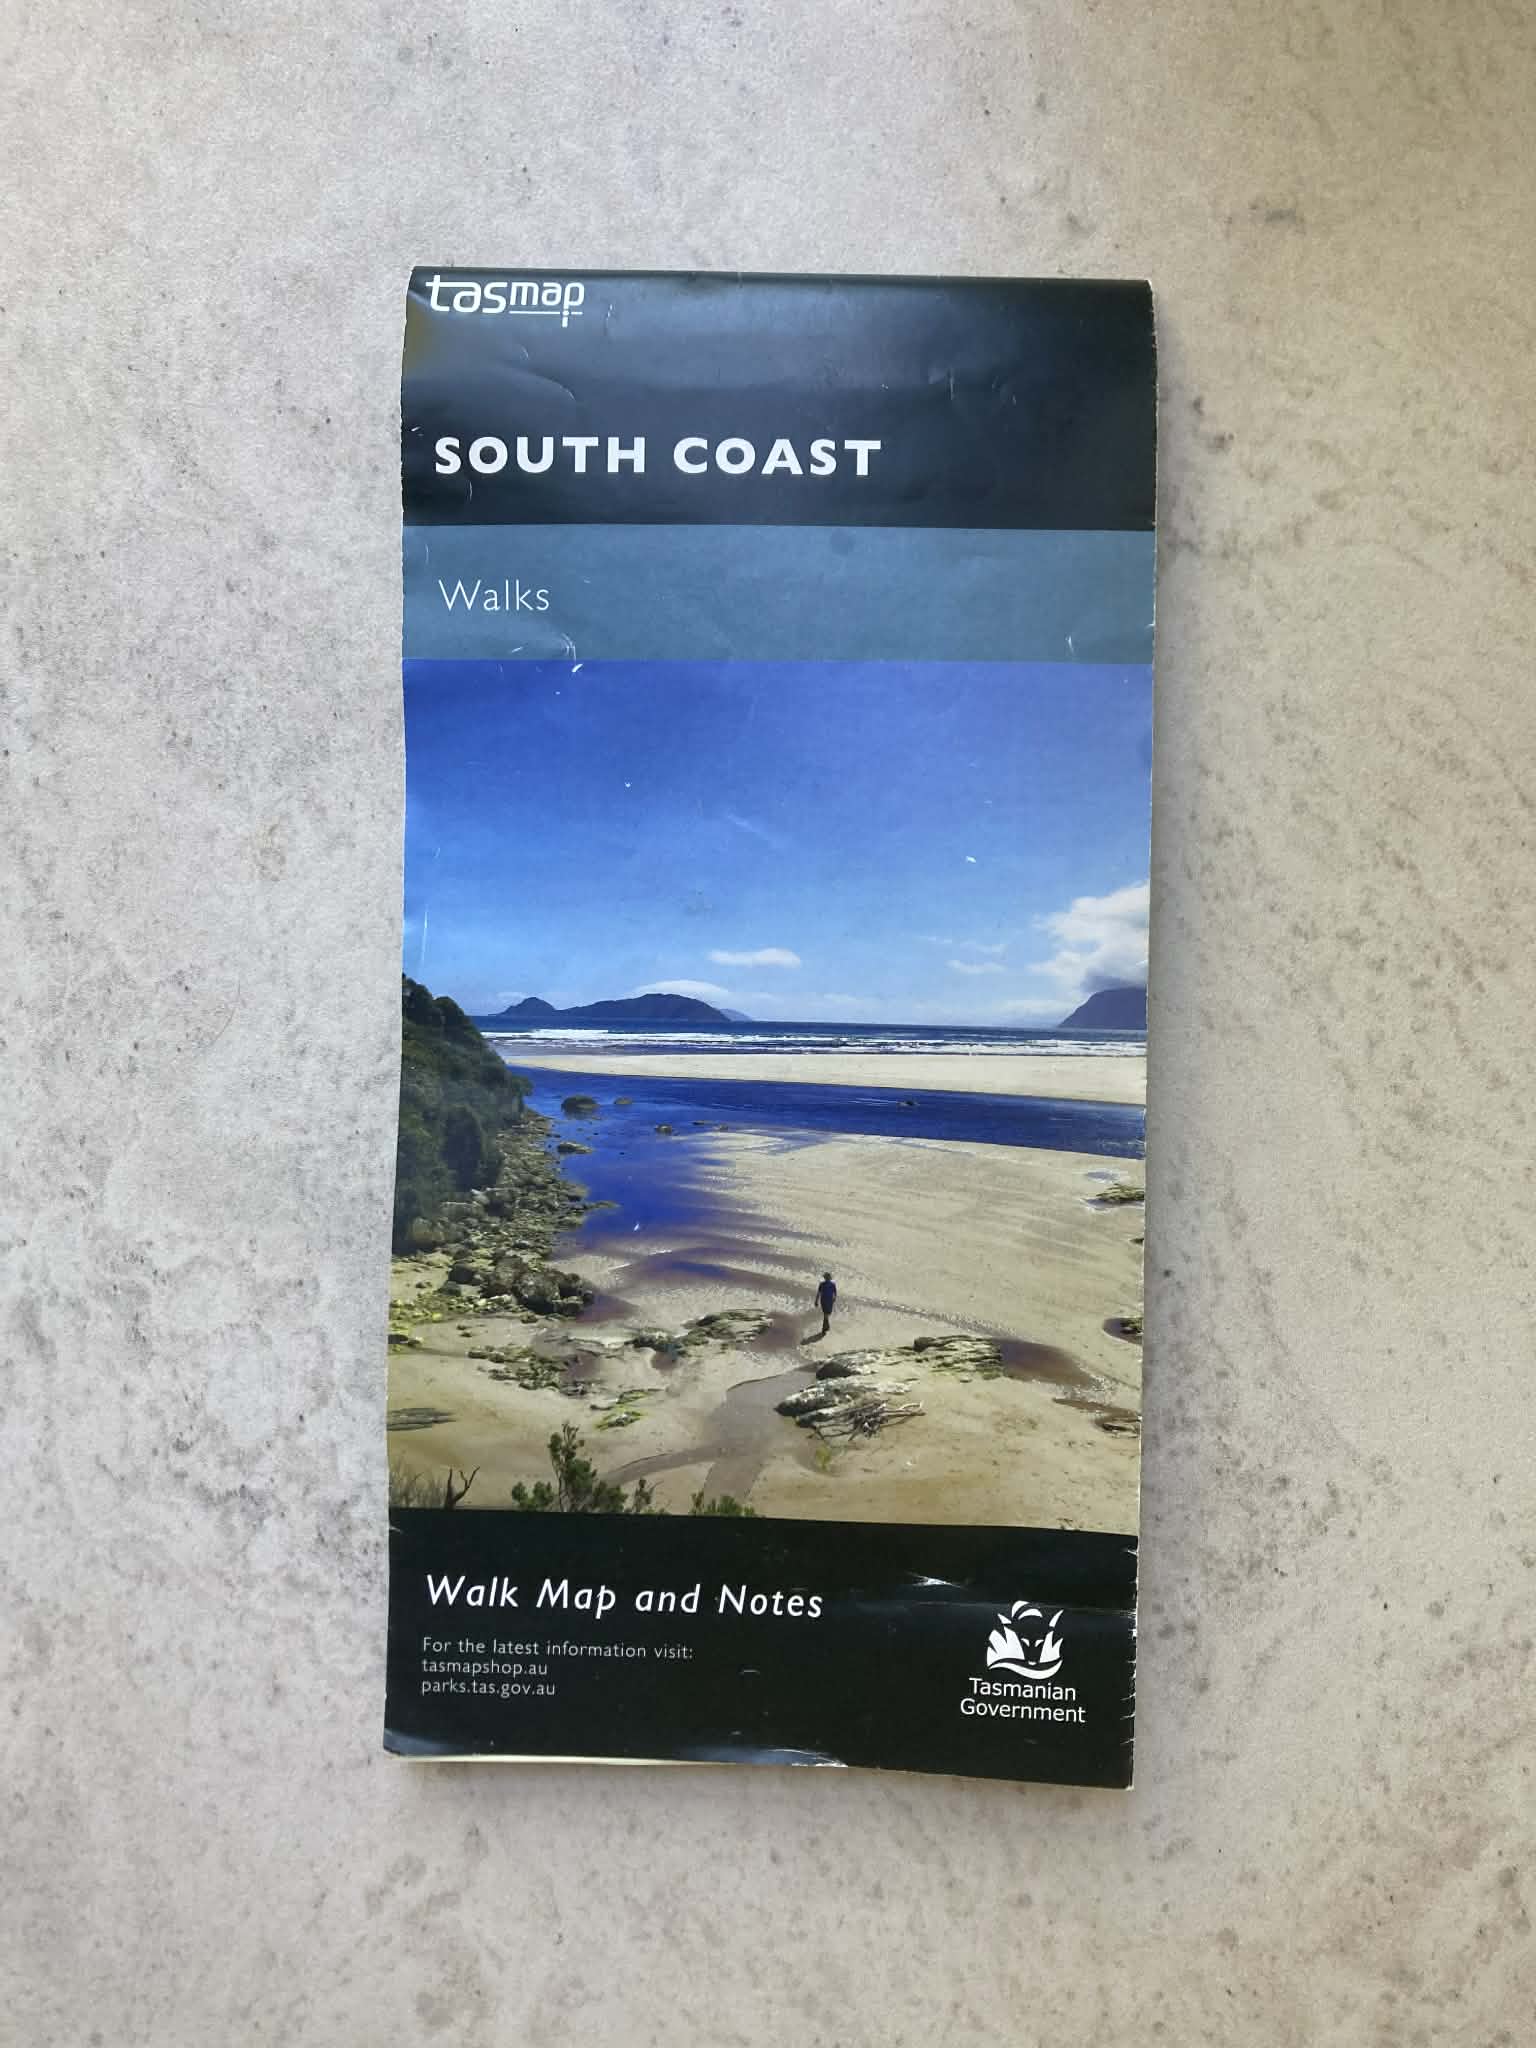
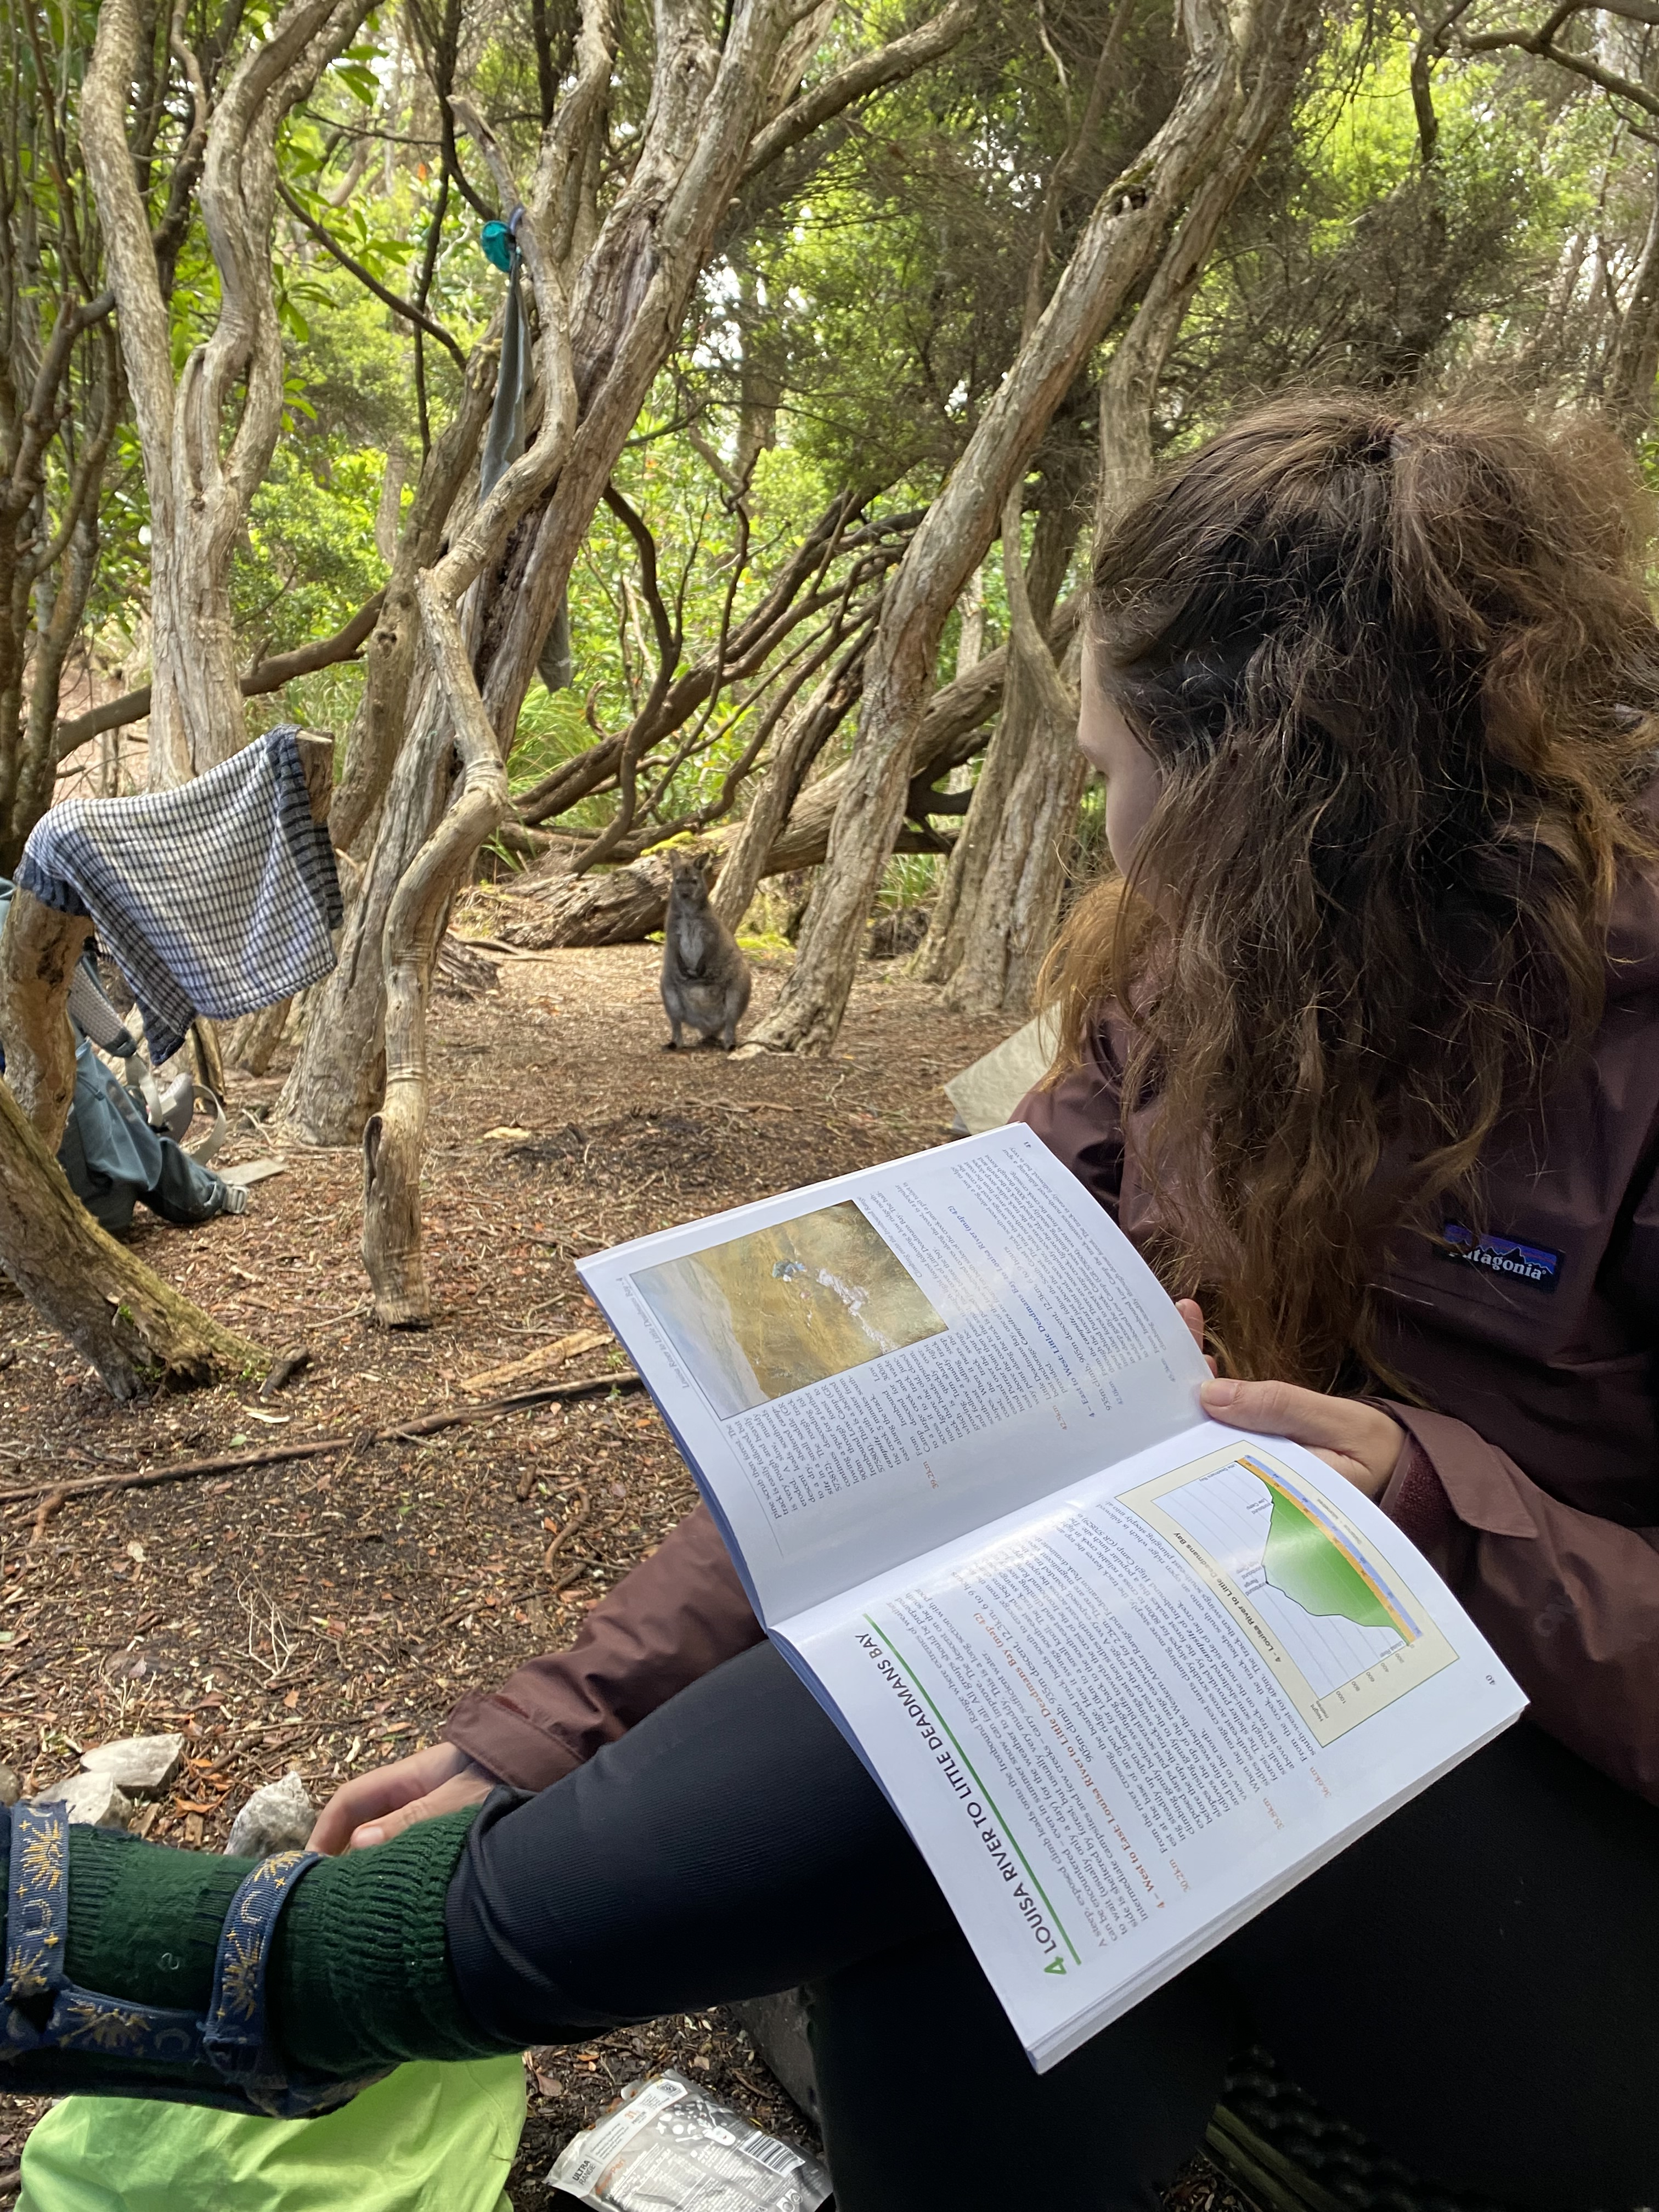
We purchased the TasMap, the Chapman guidebook and used the Parks and Wildlife website, as well as reading other online blogs. They each offered slightly different suggested routes, but it was helpful to understand all the possible options. One thing to note is that we often found walking times in the Chapman guidebook were much faster than we were walking.
We thought that maybe it was just us and that we were very slow, but at the final hikers hut we saw the below signs which felt like some vindication:
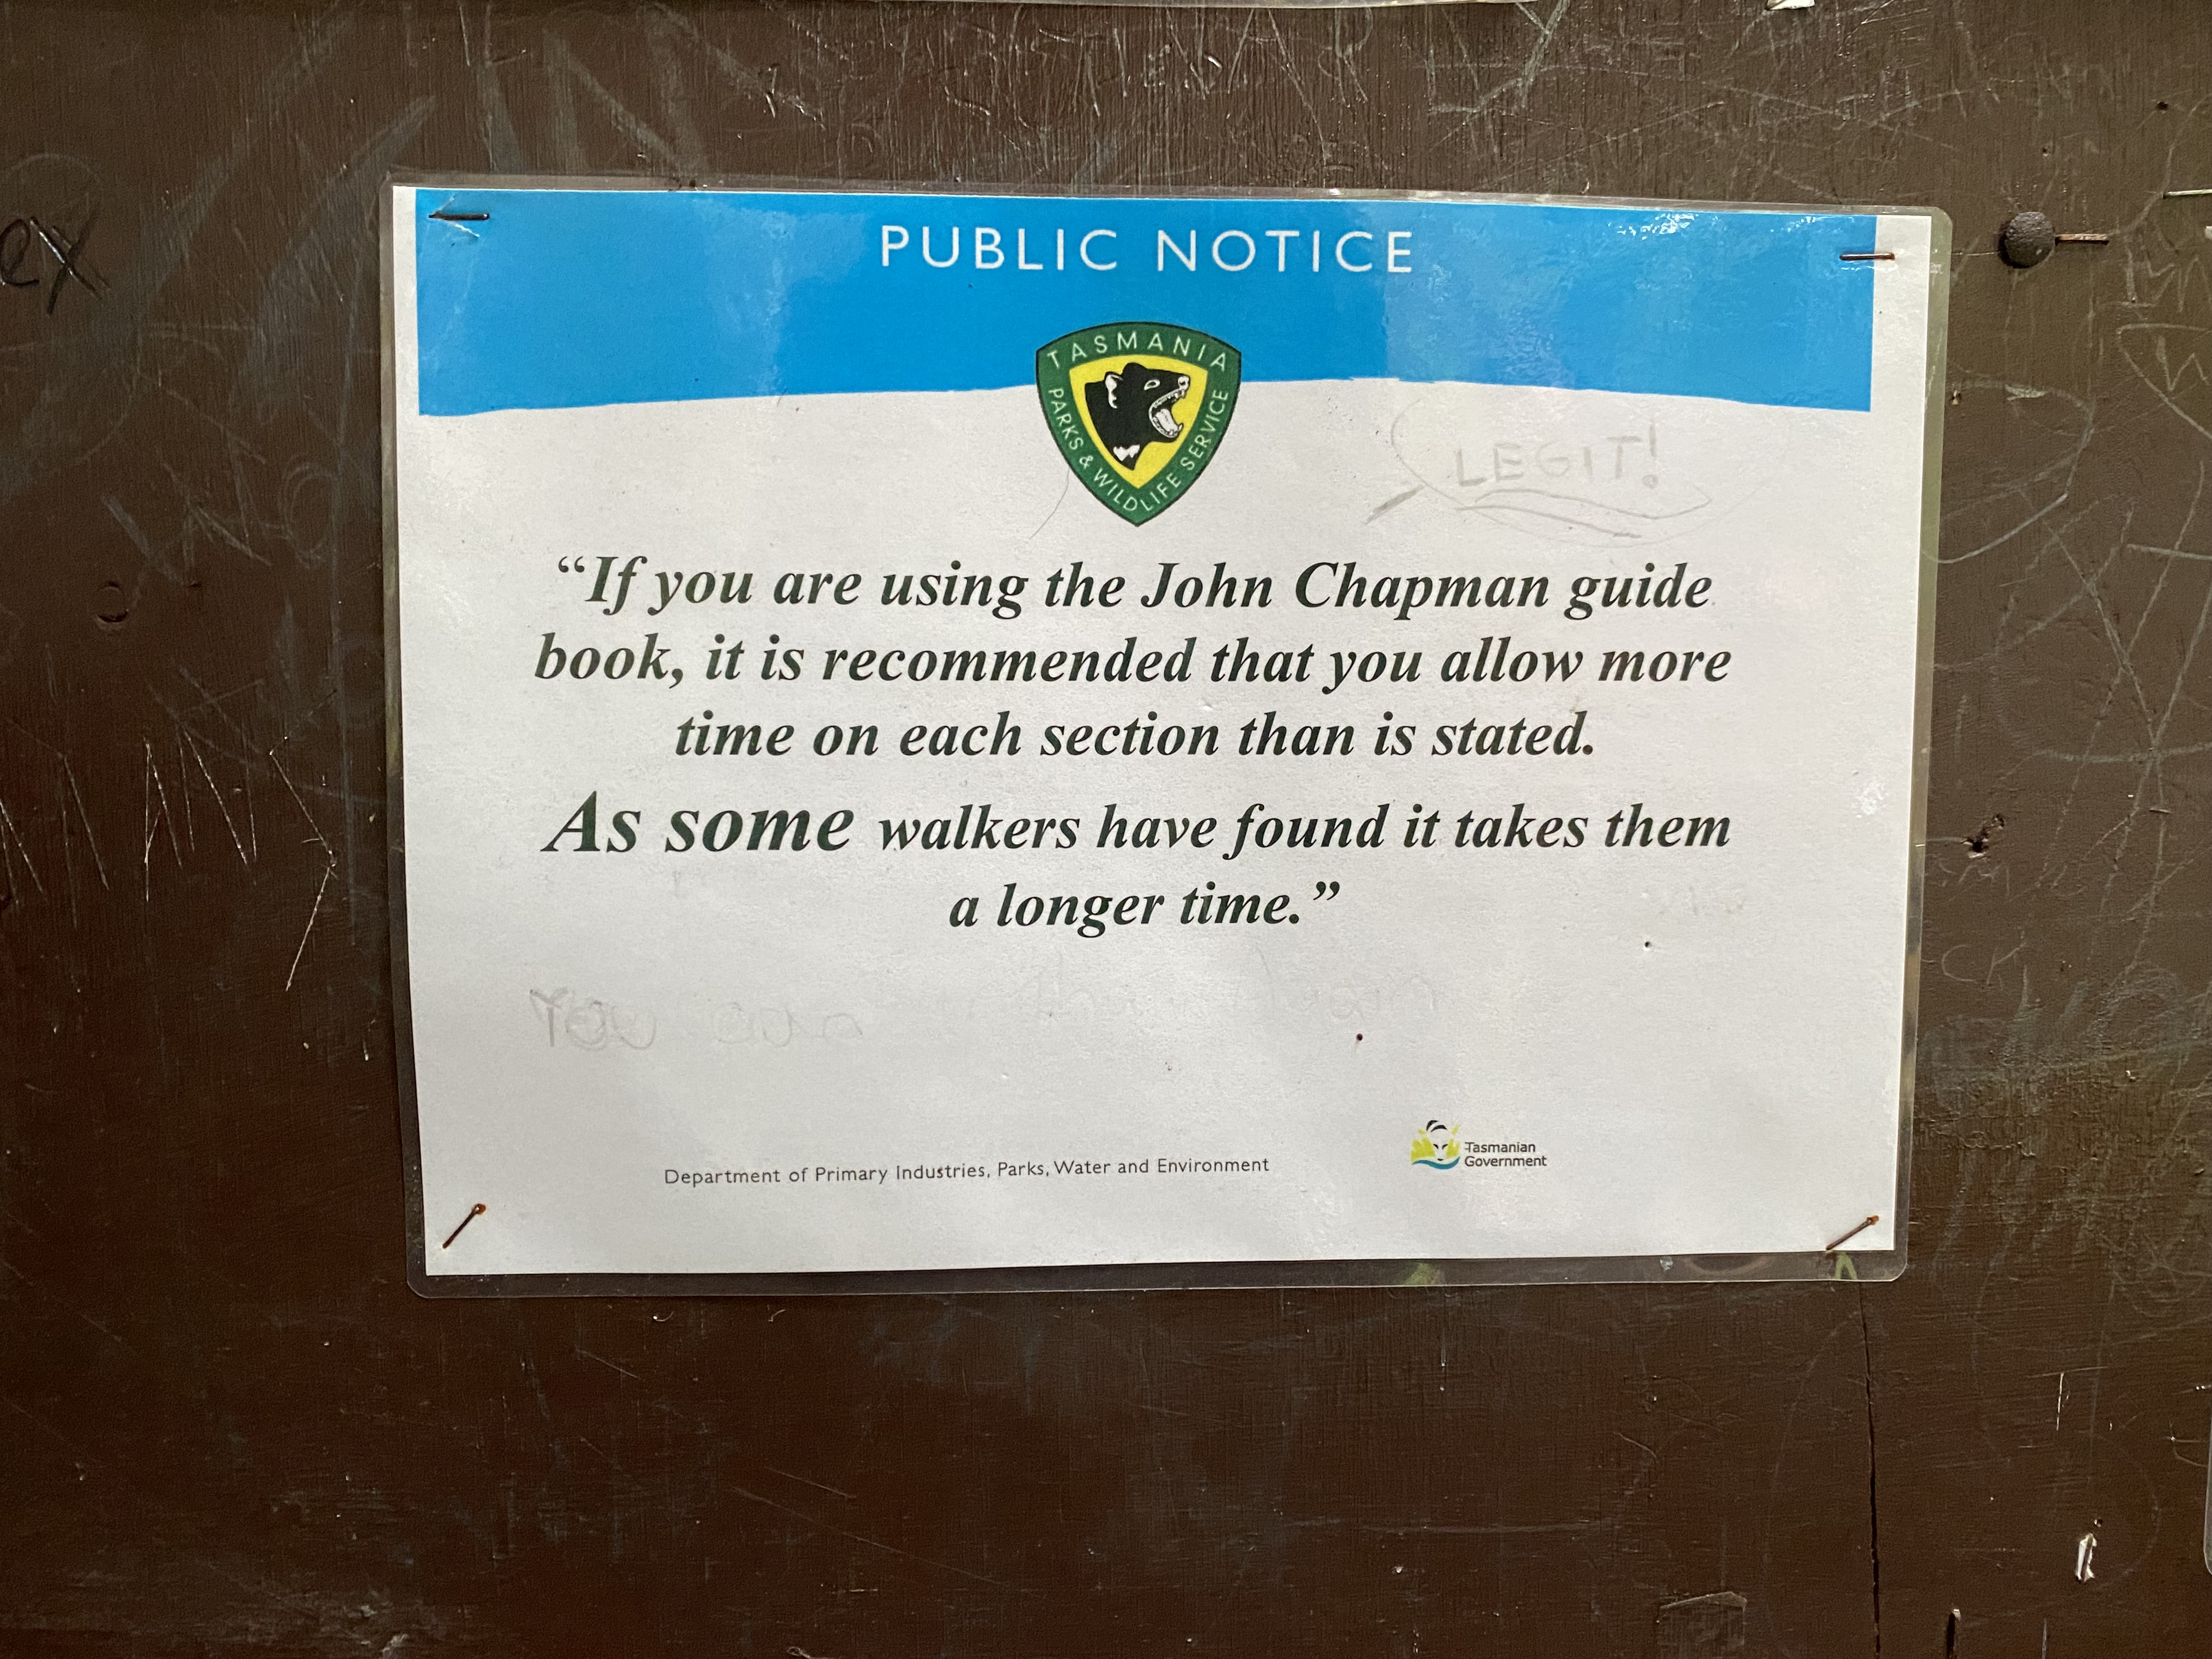
That is simply to say that people have very different experiences of walks due to differing weather, experience levels, fitness and how they like to approach their hiking.
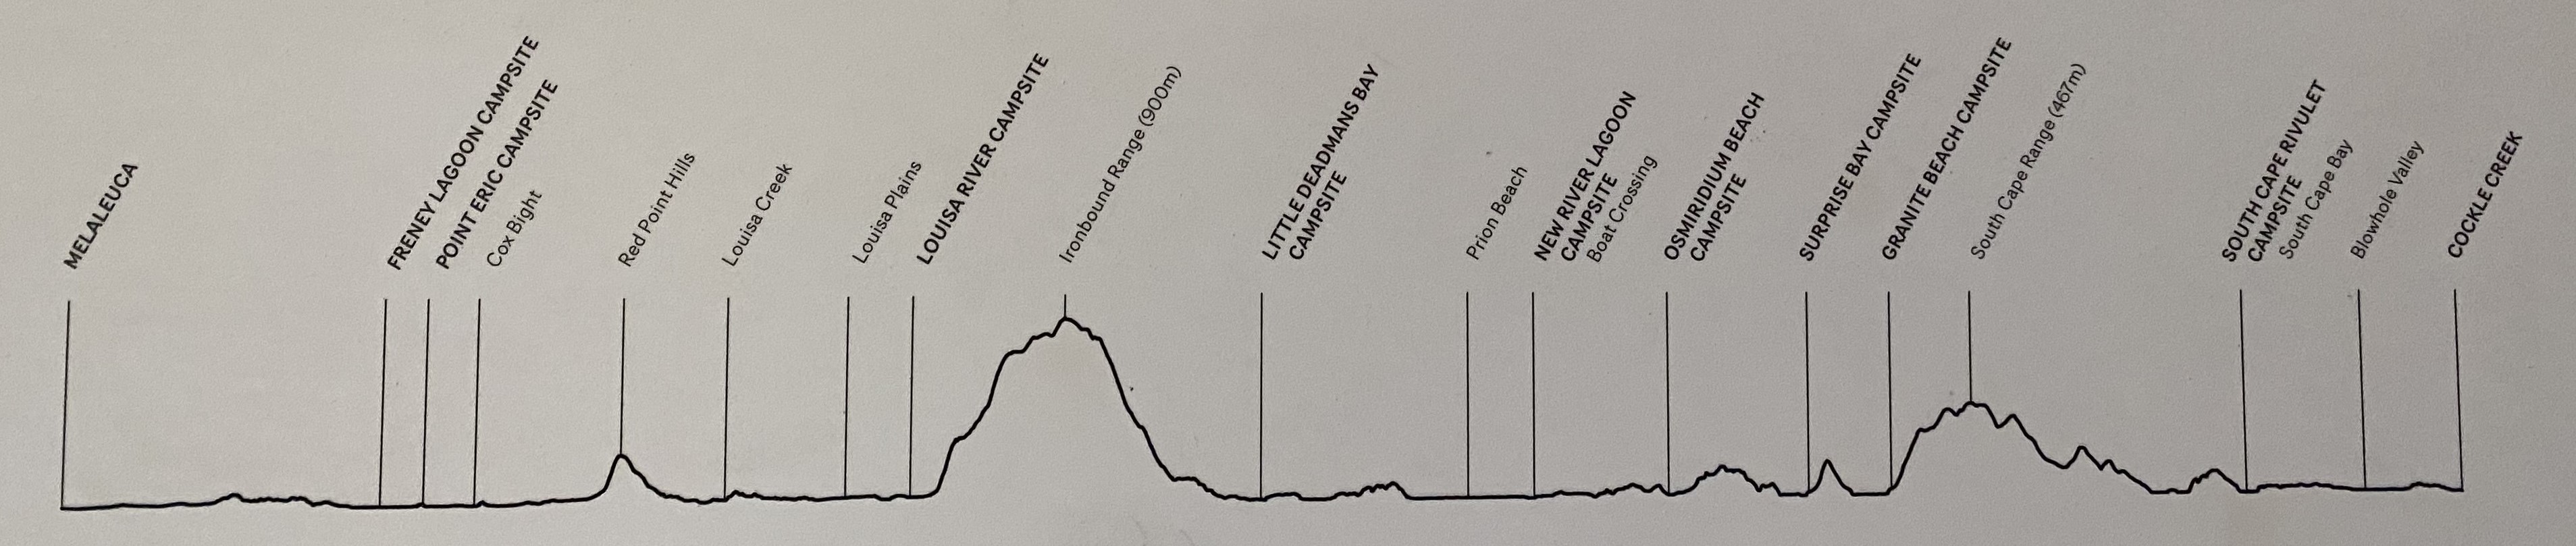
Here is a copy of our itinerary:
| Day | Route | Distance |
| Day 0 | Travel: Brisbane to Hobart | N/A |
| Day 1 | Travel: Hobart – Melaleuca (plane) Melaleuca to Point Eric | 13km |
| Day 2 | Point Eric to Louisa River | 17km |
| Day 3 | Louisa River to Little Deadmans Bay | 13km |
| Day 4 | Little Deadmans Bay to Prion Boat Crossing | 9km |
| Day 5 | Prion Boat Crossing to Surprise Bay | 9km |
| Day 6 | Surprise Bay to Granite Beach | 3km |
| Day 7 | Granite Beach to Lion Rock | 13km |
| Day 8 | Lion Rock to Cockle Creek Travel: Cockle Creek to Hobart (transfer) | 8km |
| Day 9 | Travel: Hobart to Brisbane |
Here are some blogs or other resources we found useful:
Navigation
The track is fairly easy to navigate, and there are whole sections where boardwalks lead the way. However, you’ll need a map and compass just in case. One of our group had a Garmin watch with the route downloaded which was really helpful, and it would alert us and point us in the right direction if we got off track.
There are only a few points where trails intersect, so taking the wrong path shouldn’t be too much of an issue. There are some yellow arrows, however these can be few and far between. On beach sections, buoys will indicate the trail access points.
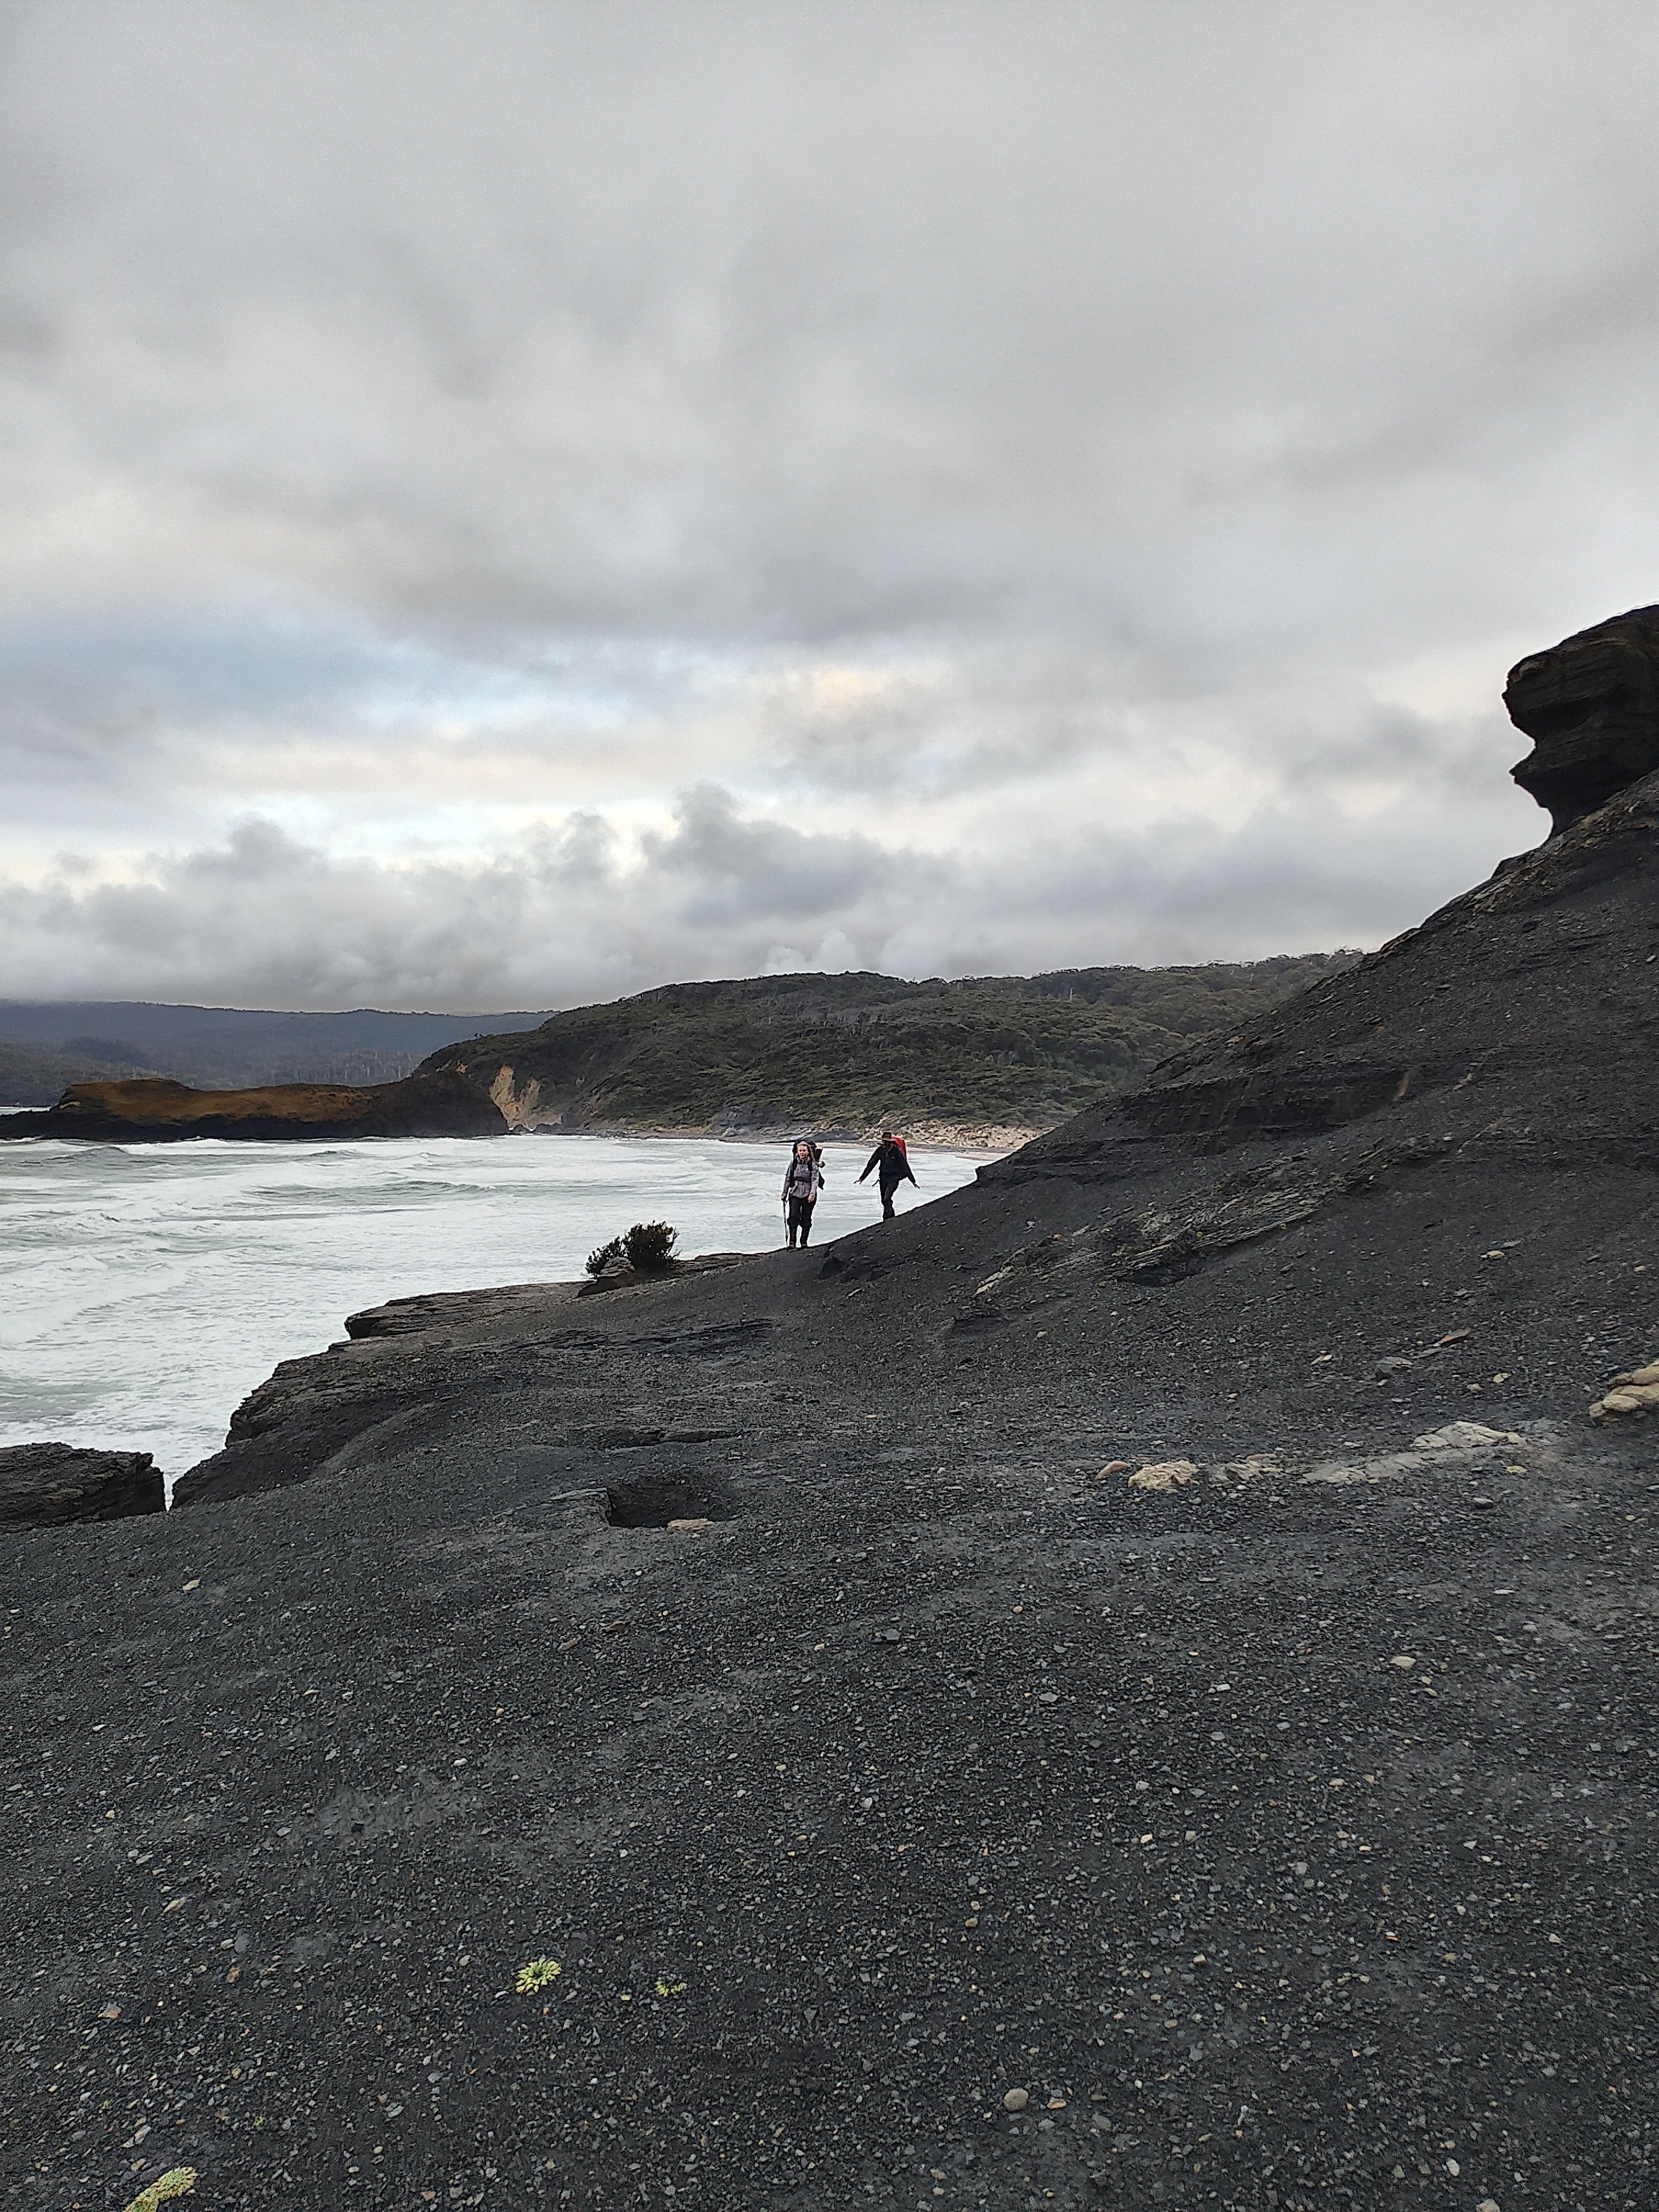
There were only a few moments we felt unsure of directions, including a couple of moments of bush-bashing. Of note, the final section before Granite Beach was very unclear and we bush-bashed our way to the beach. This would be particularly challenging for walkers heading the opposite direction. We also had a few unclear moments on the South Cape Range where there are lots of intersecting go-arounds, and with the scrub being at eye-level, it’s difficult to see if/when the go-around meets the path again (or if you’ve been split up from your walking party).

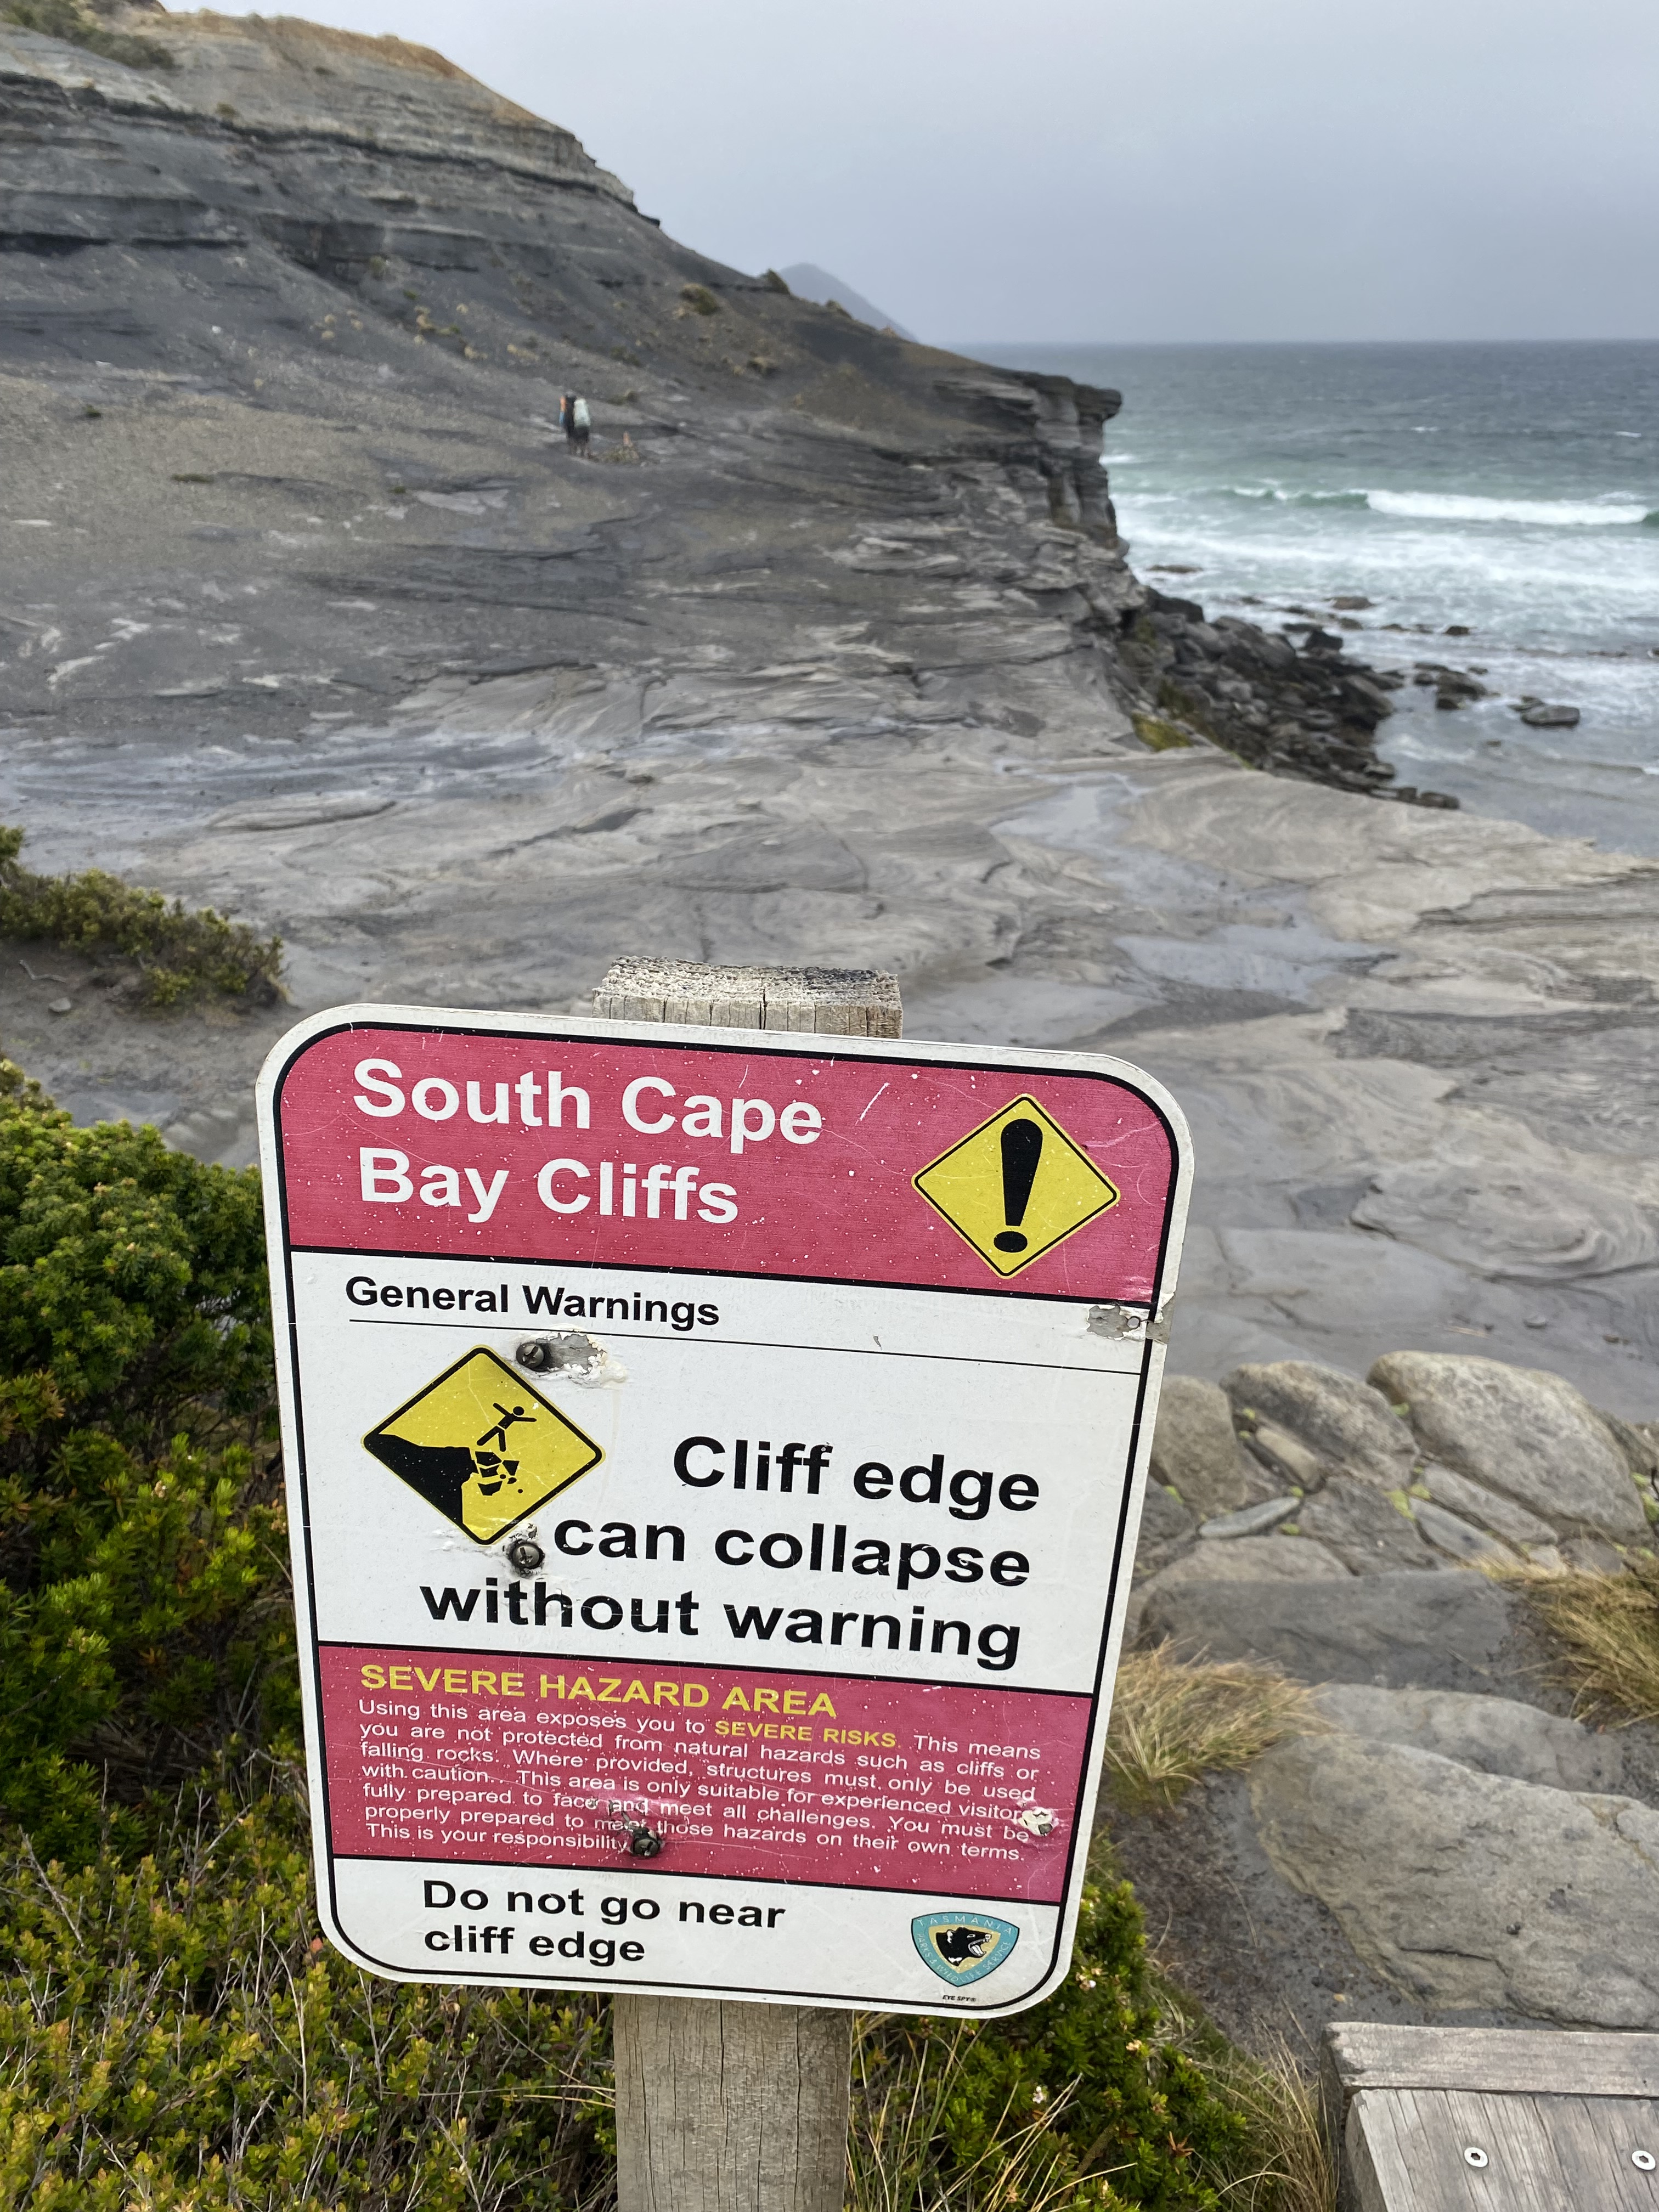
Conditions & Terrain
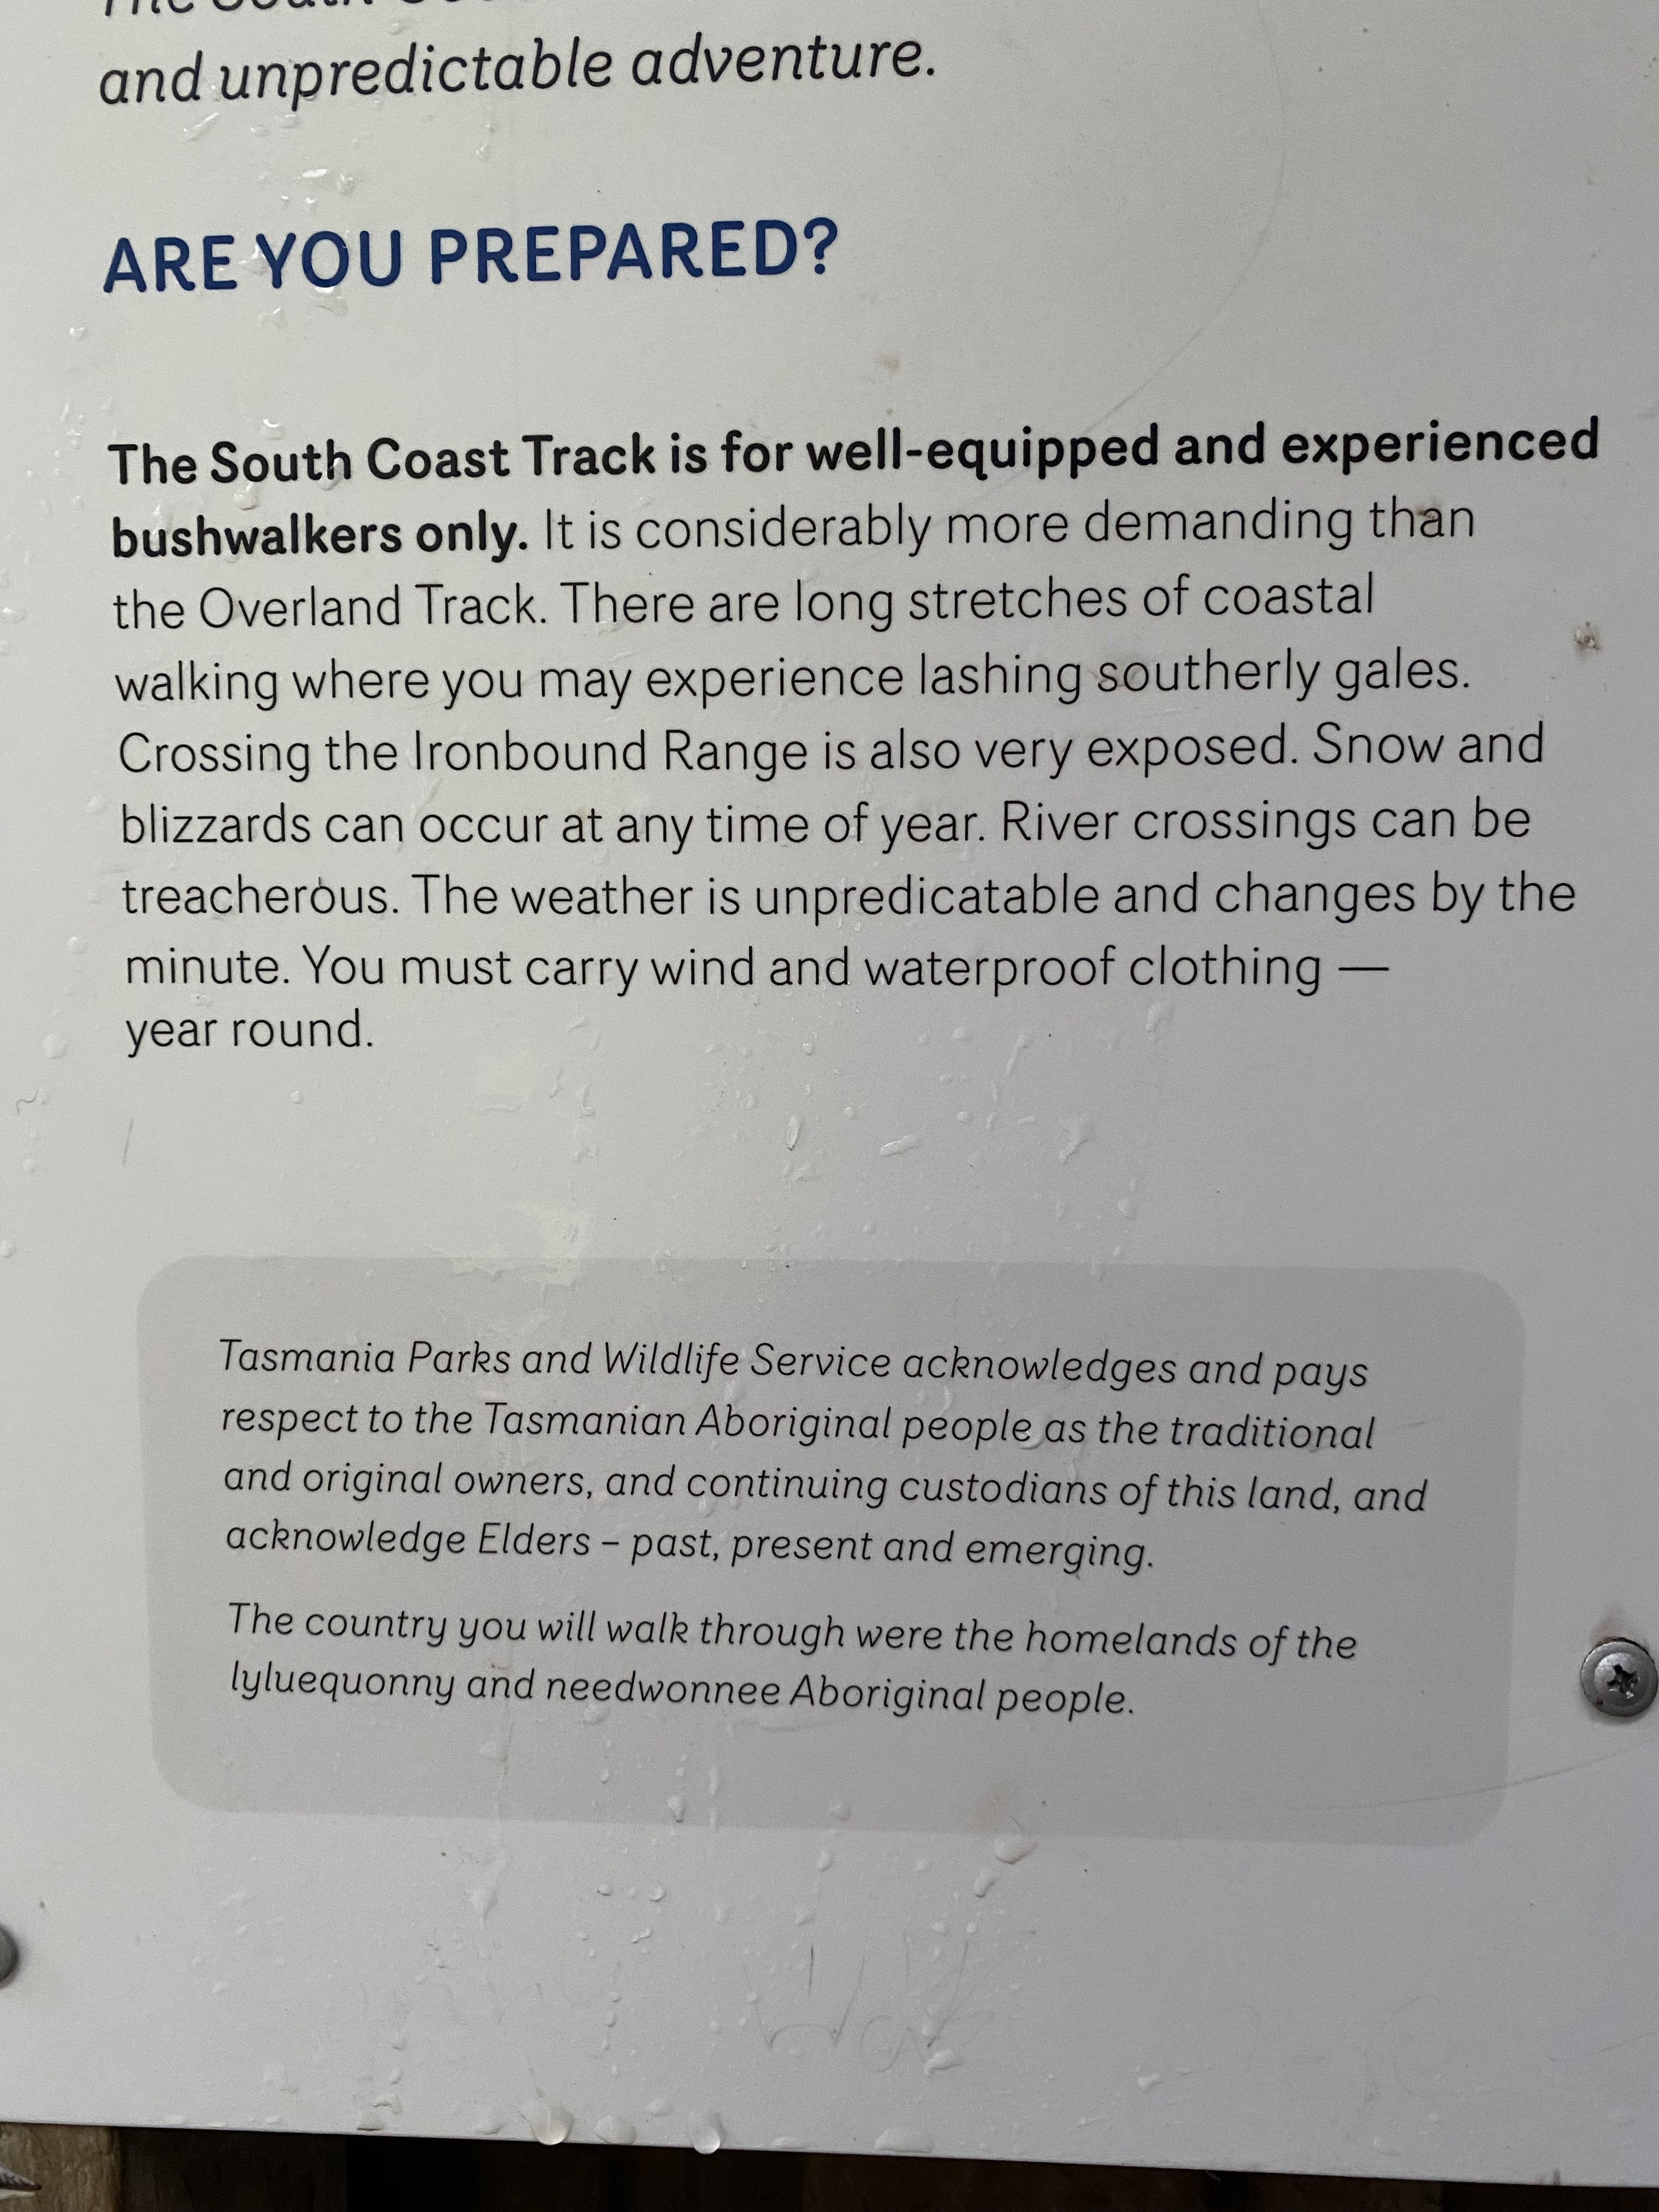
The South Coast Track is a Grade 4 walk, but with a whole host of complicating factors that render this walk a true challenge. Between the unpredictable weather, serious climbs, river crossings and deep mud, this is an adventure you won’t easily forget. For comparison, I would say South Coast Track was far more challenging that K’Gari Great Walk (Grade 4), Cooloola Great Walk (Grade 4) or Carnarvon Gorge Great Walk (Grade 4 and Grade 5 sections) due to the difficult conditions and mud.
Weather
From what I can tell, conditions vary a lot depending on time of year and weather, and the weather can change several times in one day. We experienced heavy rain for about 5 days of the walk, 8 bouts of hail, sleet, cold temperatures overnight (snow was on the mountains) and strong winds, particularly on the Ironbound Range.
Long sections of the trail are exposed with little shelter, so be prepared with appropriate equipment to be exposed in weather for many hours (our longest day was 12hours walking).
Trail
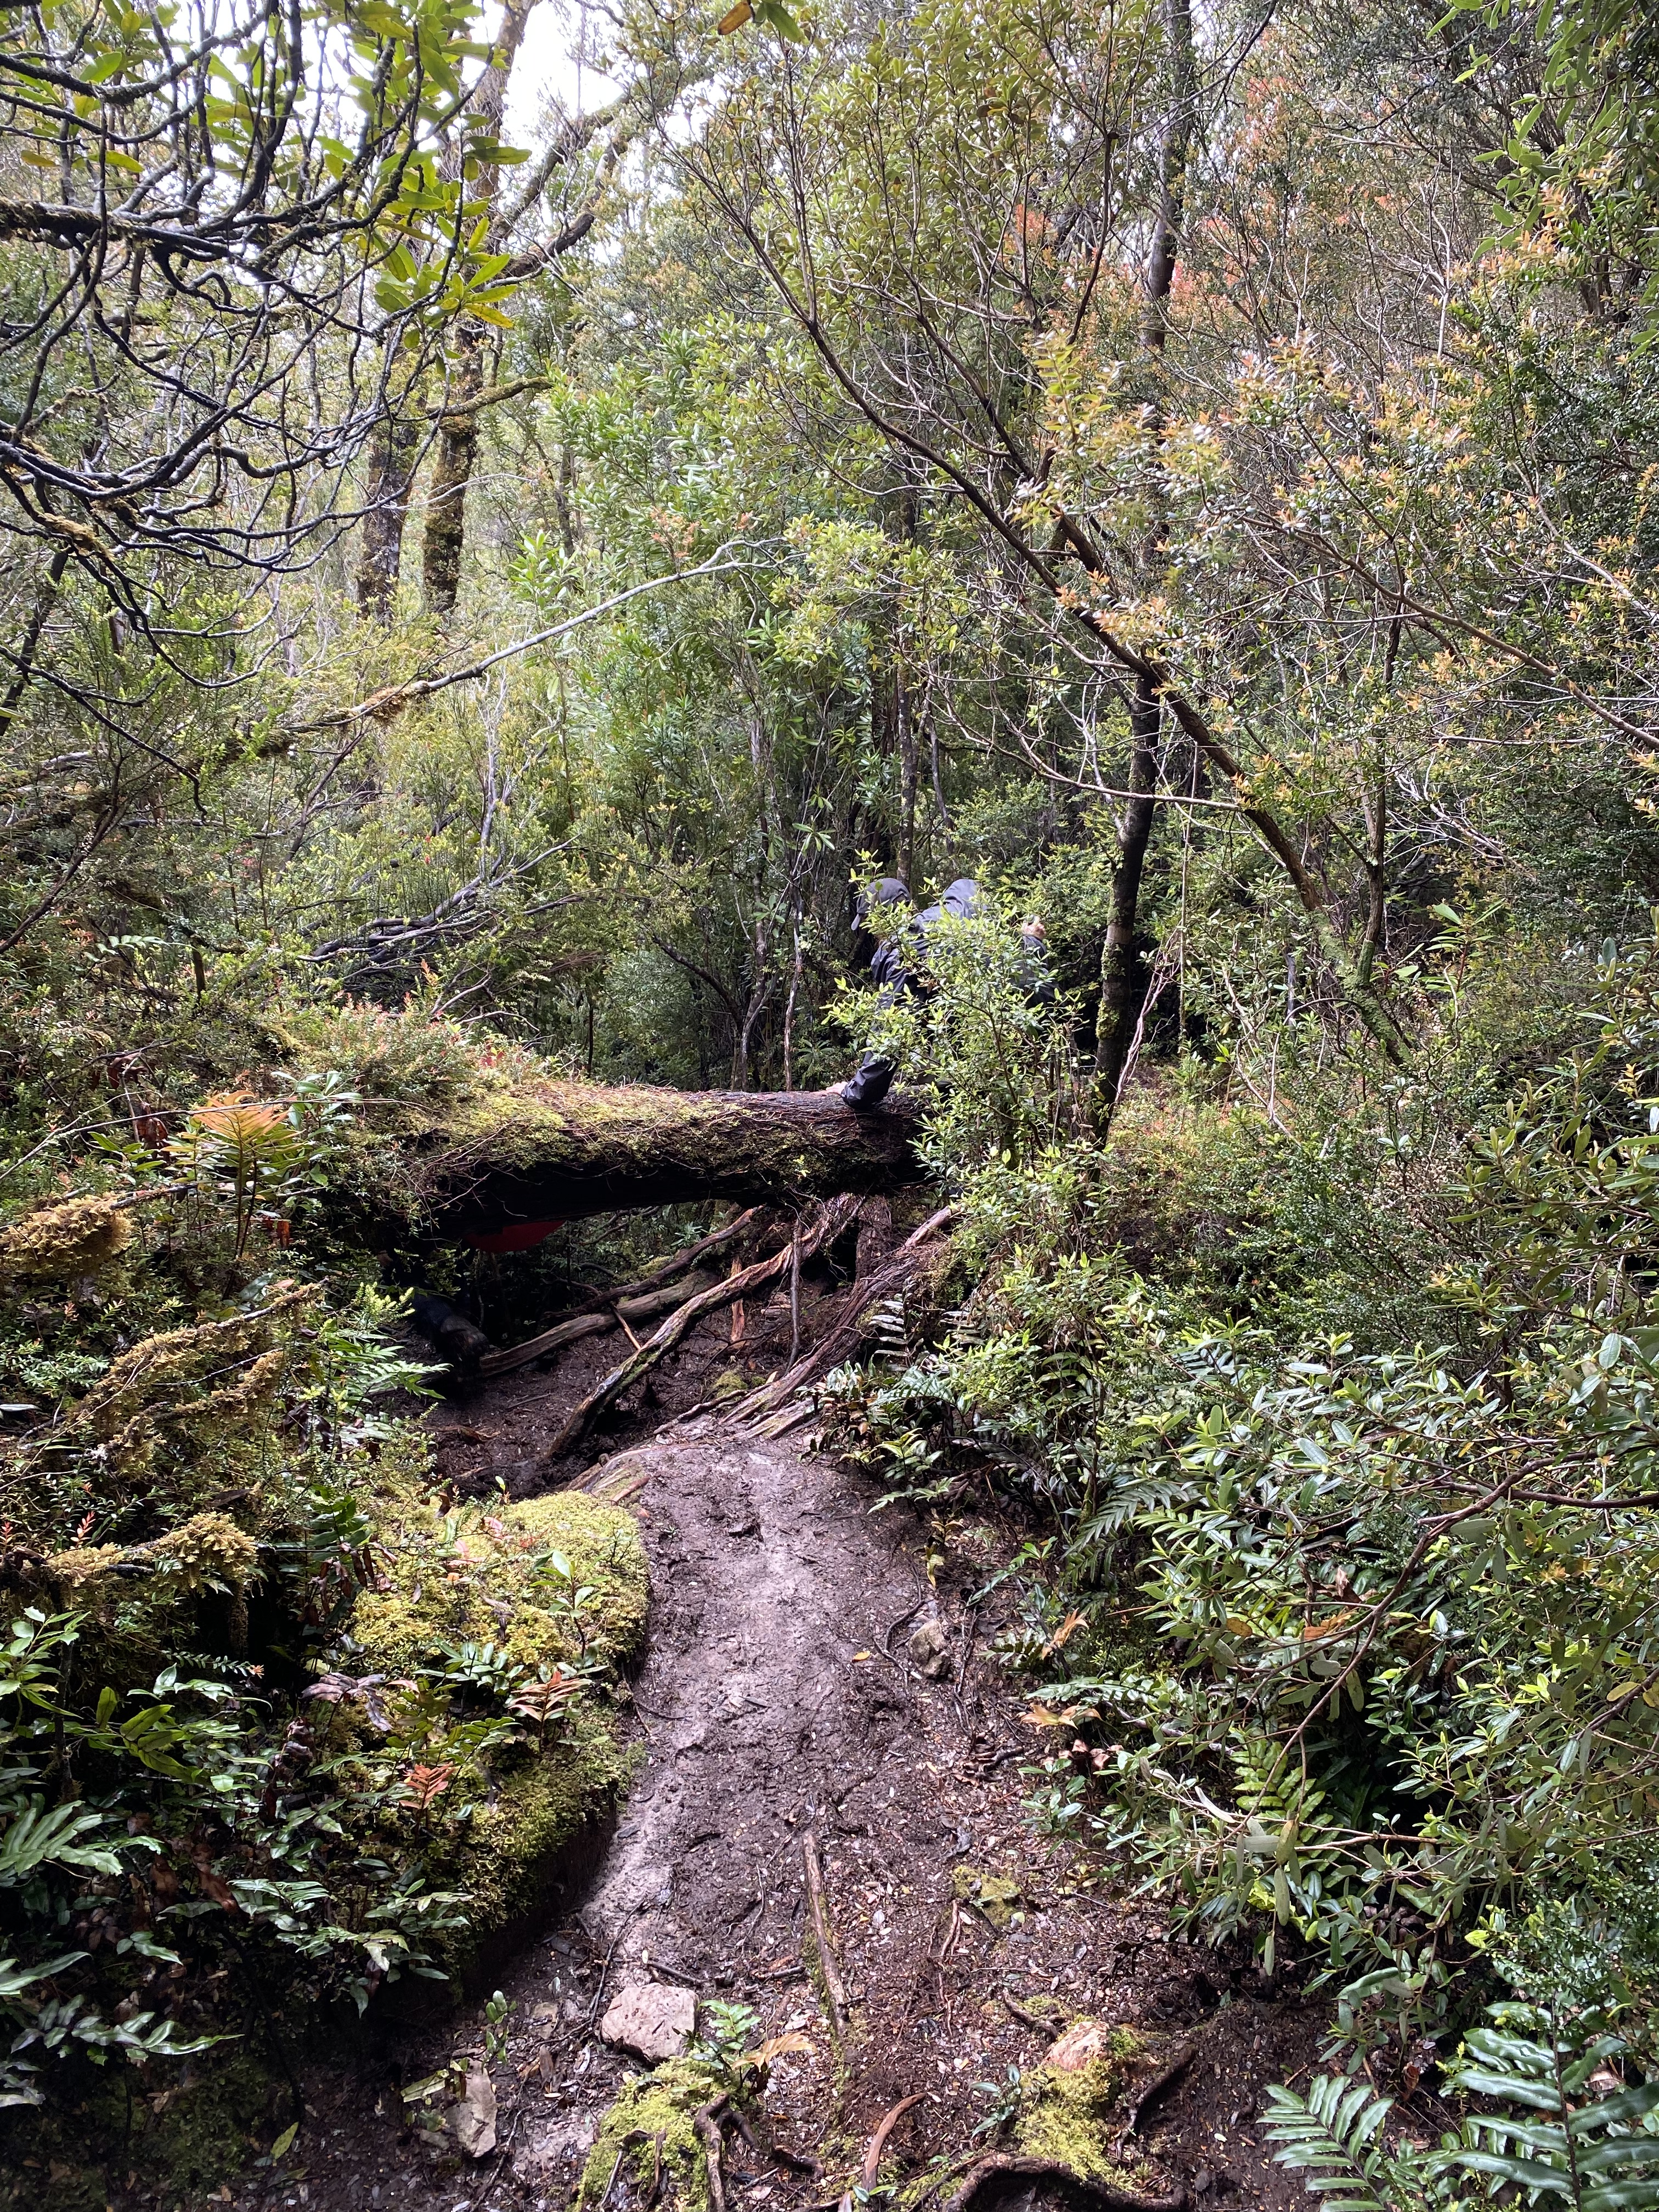
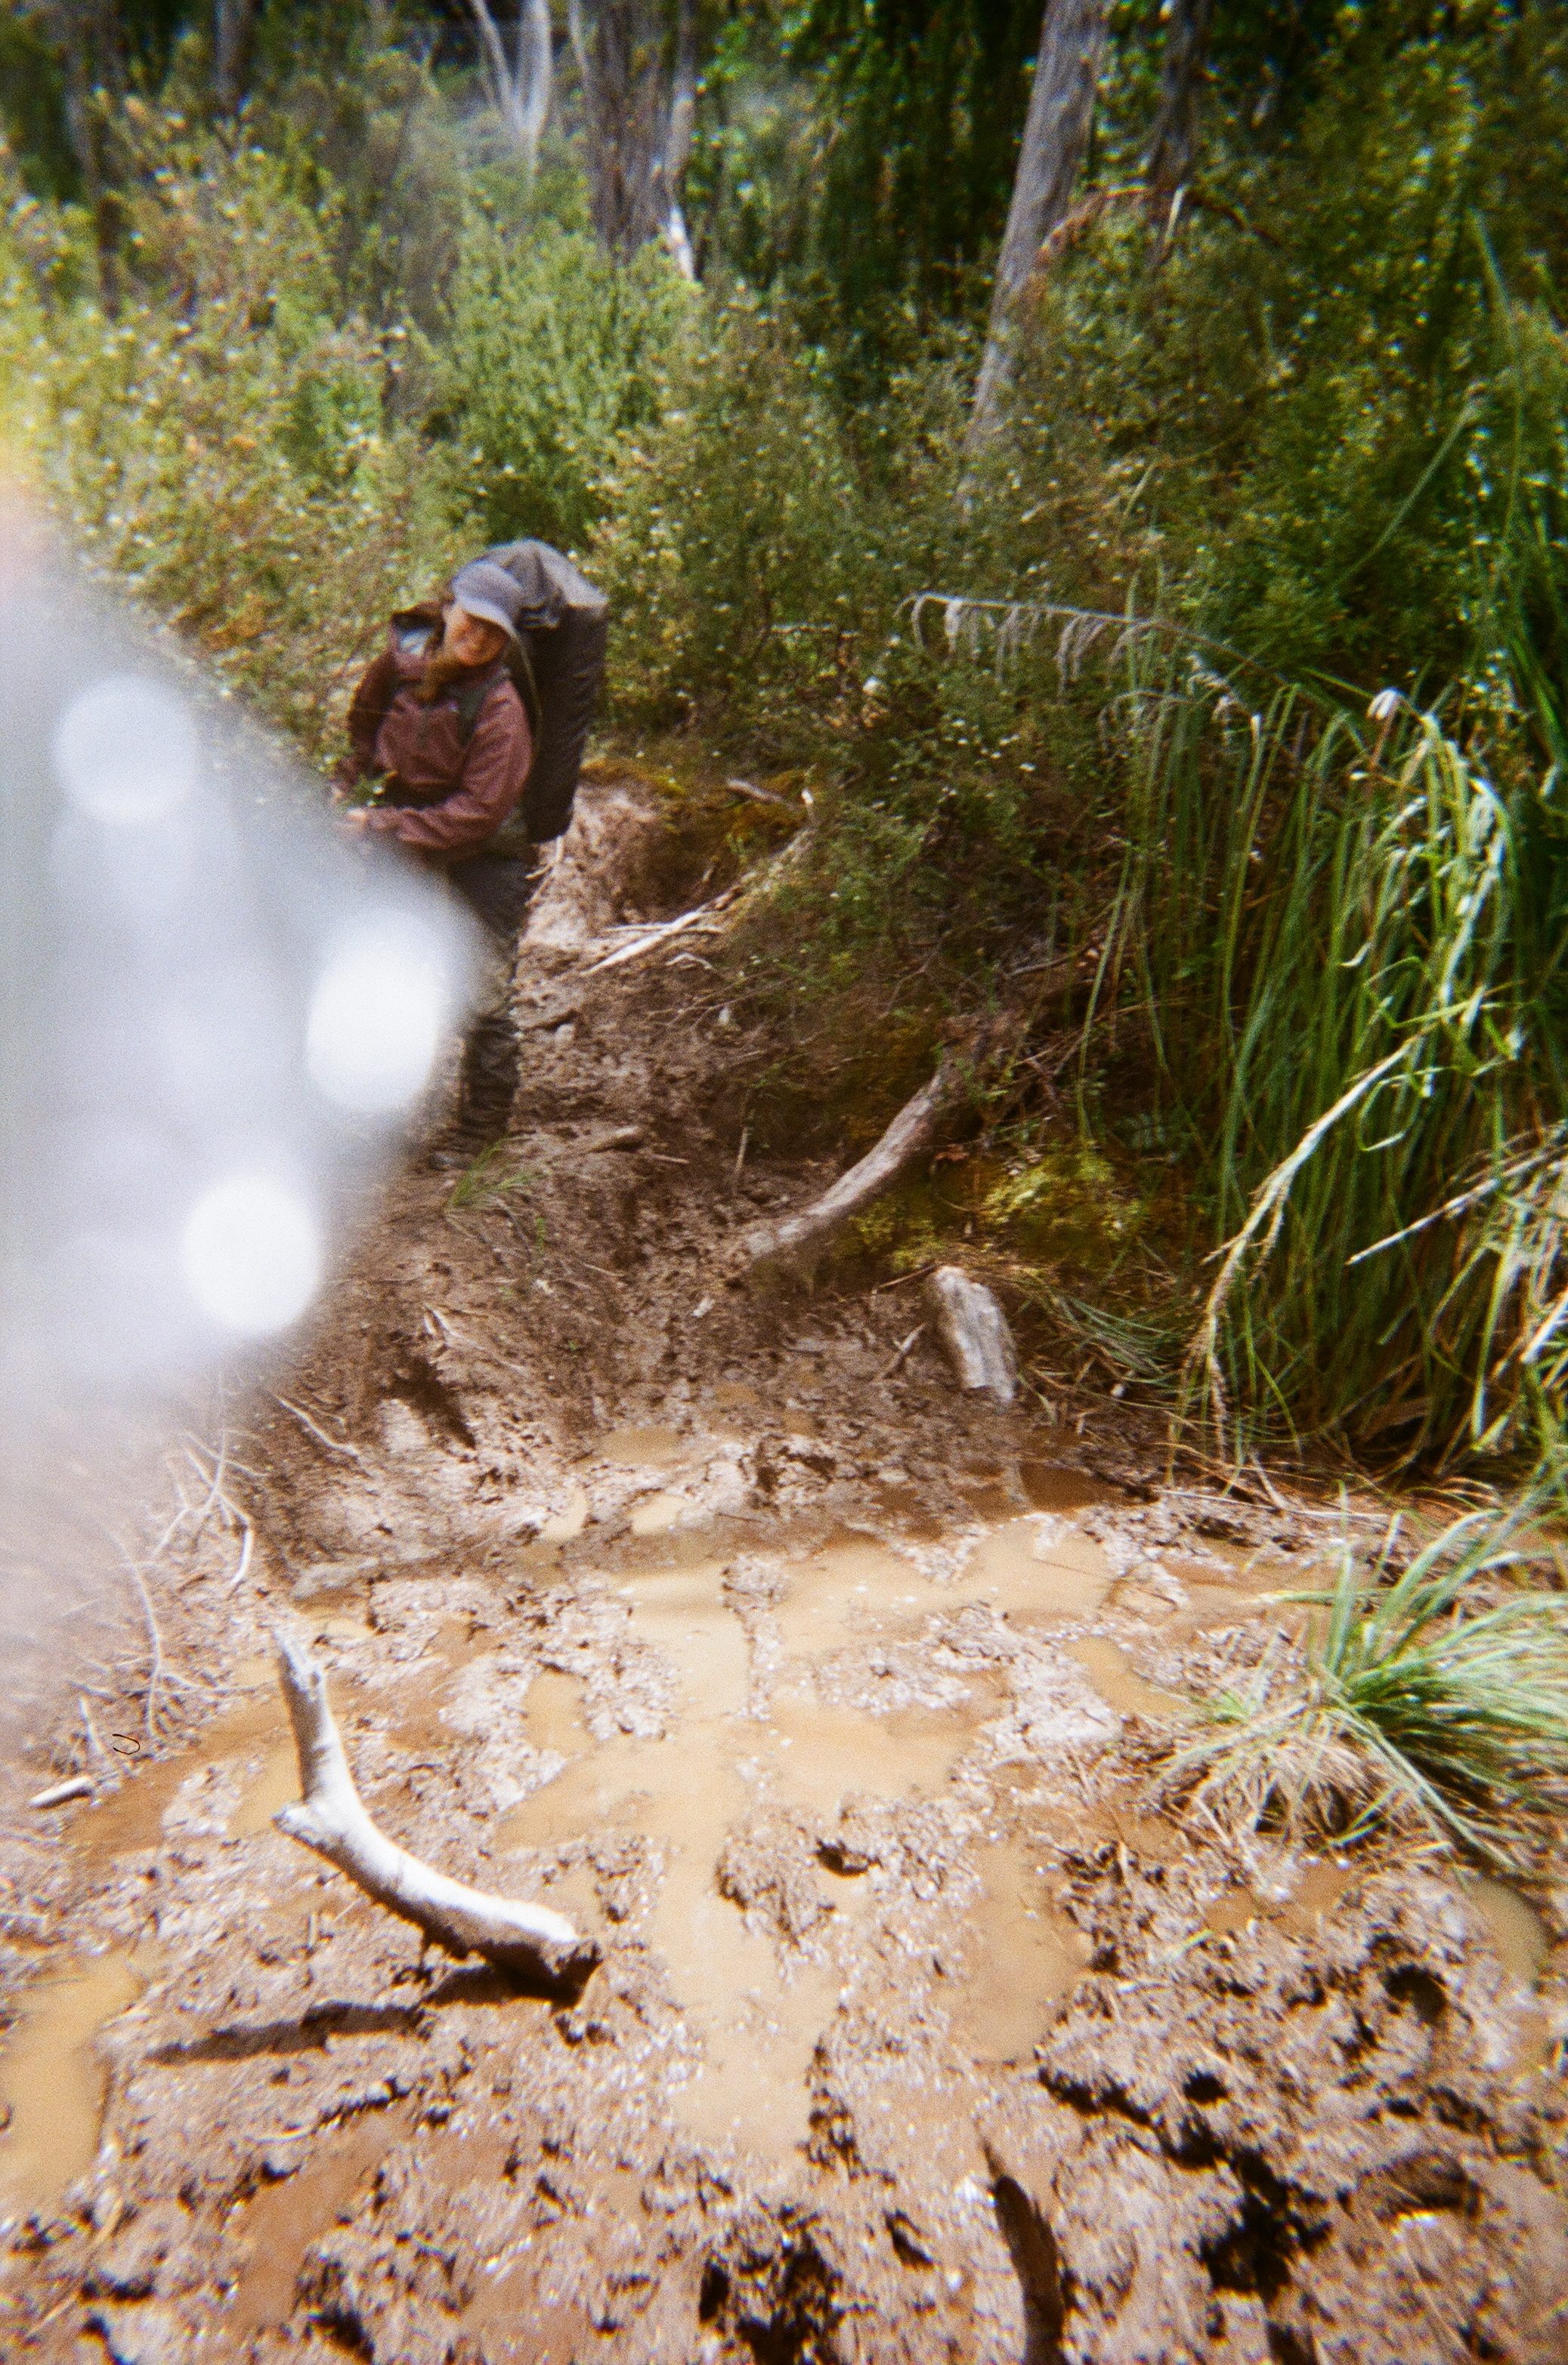
Overall, the trail was very muddy. At its deepest, the mud was chest deep (on the South Cape Range) which significantly impacted our walking pace. While the daily kilometers may look small, our average walking time for sections of the walk (up to whole days) was 1 hour per kilometer, and at our slowest, we were doing 500m an hour. On our second last day, we passed a group who said they were aiming to complete the walk in 3-4 days (in sandals no less!), which in my opinion, is not feasible and probably not safe for the average walker.
On the descent of the Ironbound Range we faced the most challenging terrain due to the combined steep descent, mud, slippery roots and obstacles. It felt like constant climbing up and over branches, or gently lowering yourself down from precarious positions.

Other than mud, you can expect to see quartzite trail, beach walking or boardwalks, all of which are fairly easy walking. Don’t be fooled by the coastal element of the walk, this is also a mountainous trail, traversing both the formidable Ironbound Range and (far less formidable but still challenging) South Cape Range. There are some solid climbs often with stairs (Red Point Hills, Ironbound Range) and at times, some scrambling on both descent and ascent (Ironbound Range day mainly).
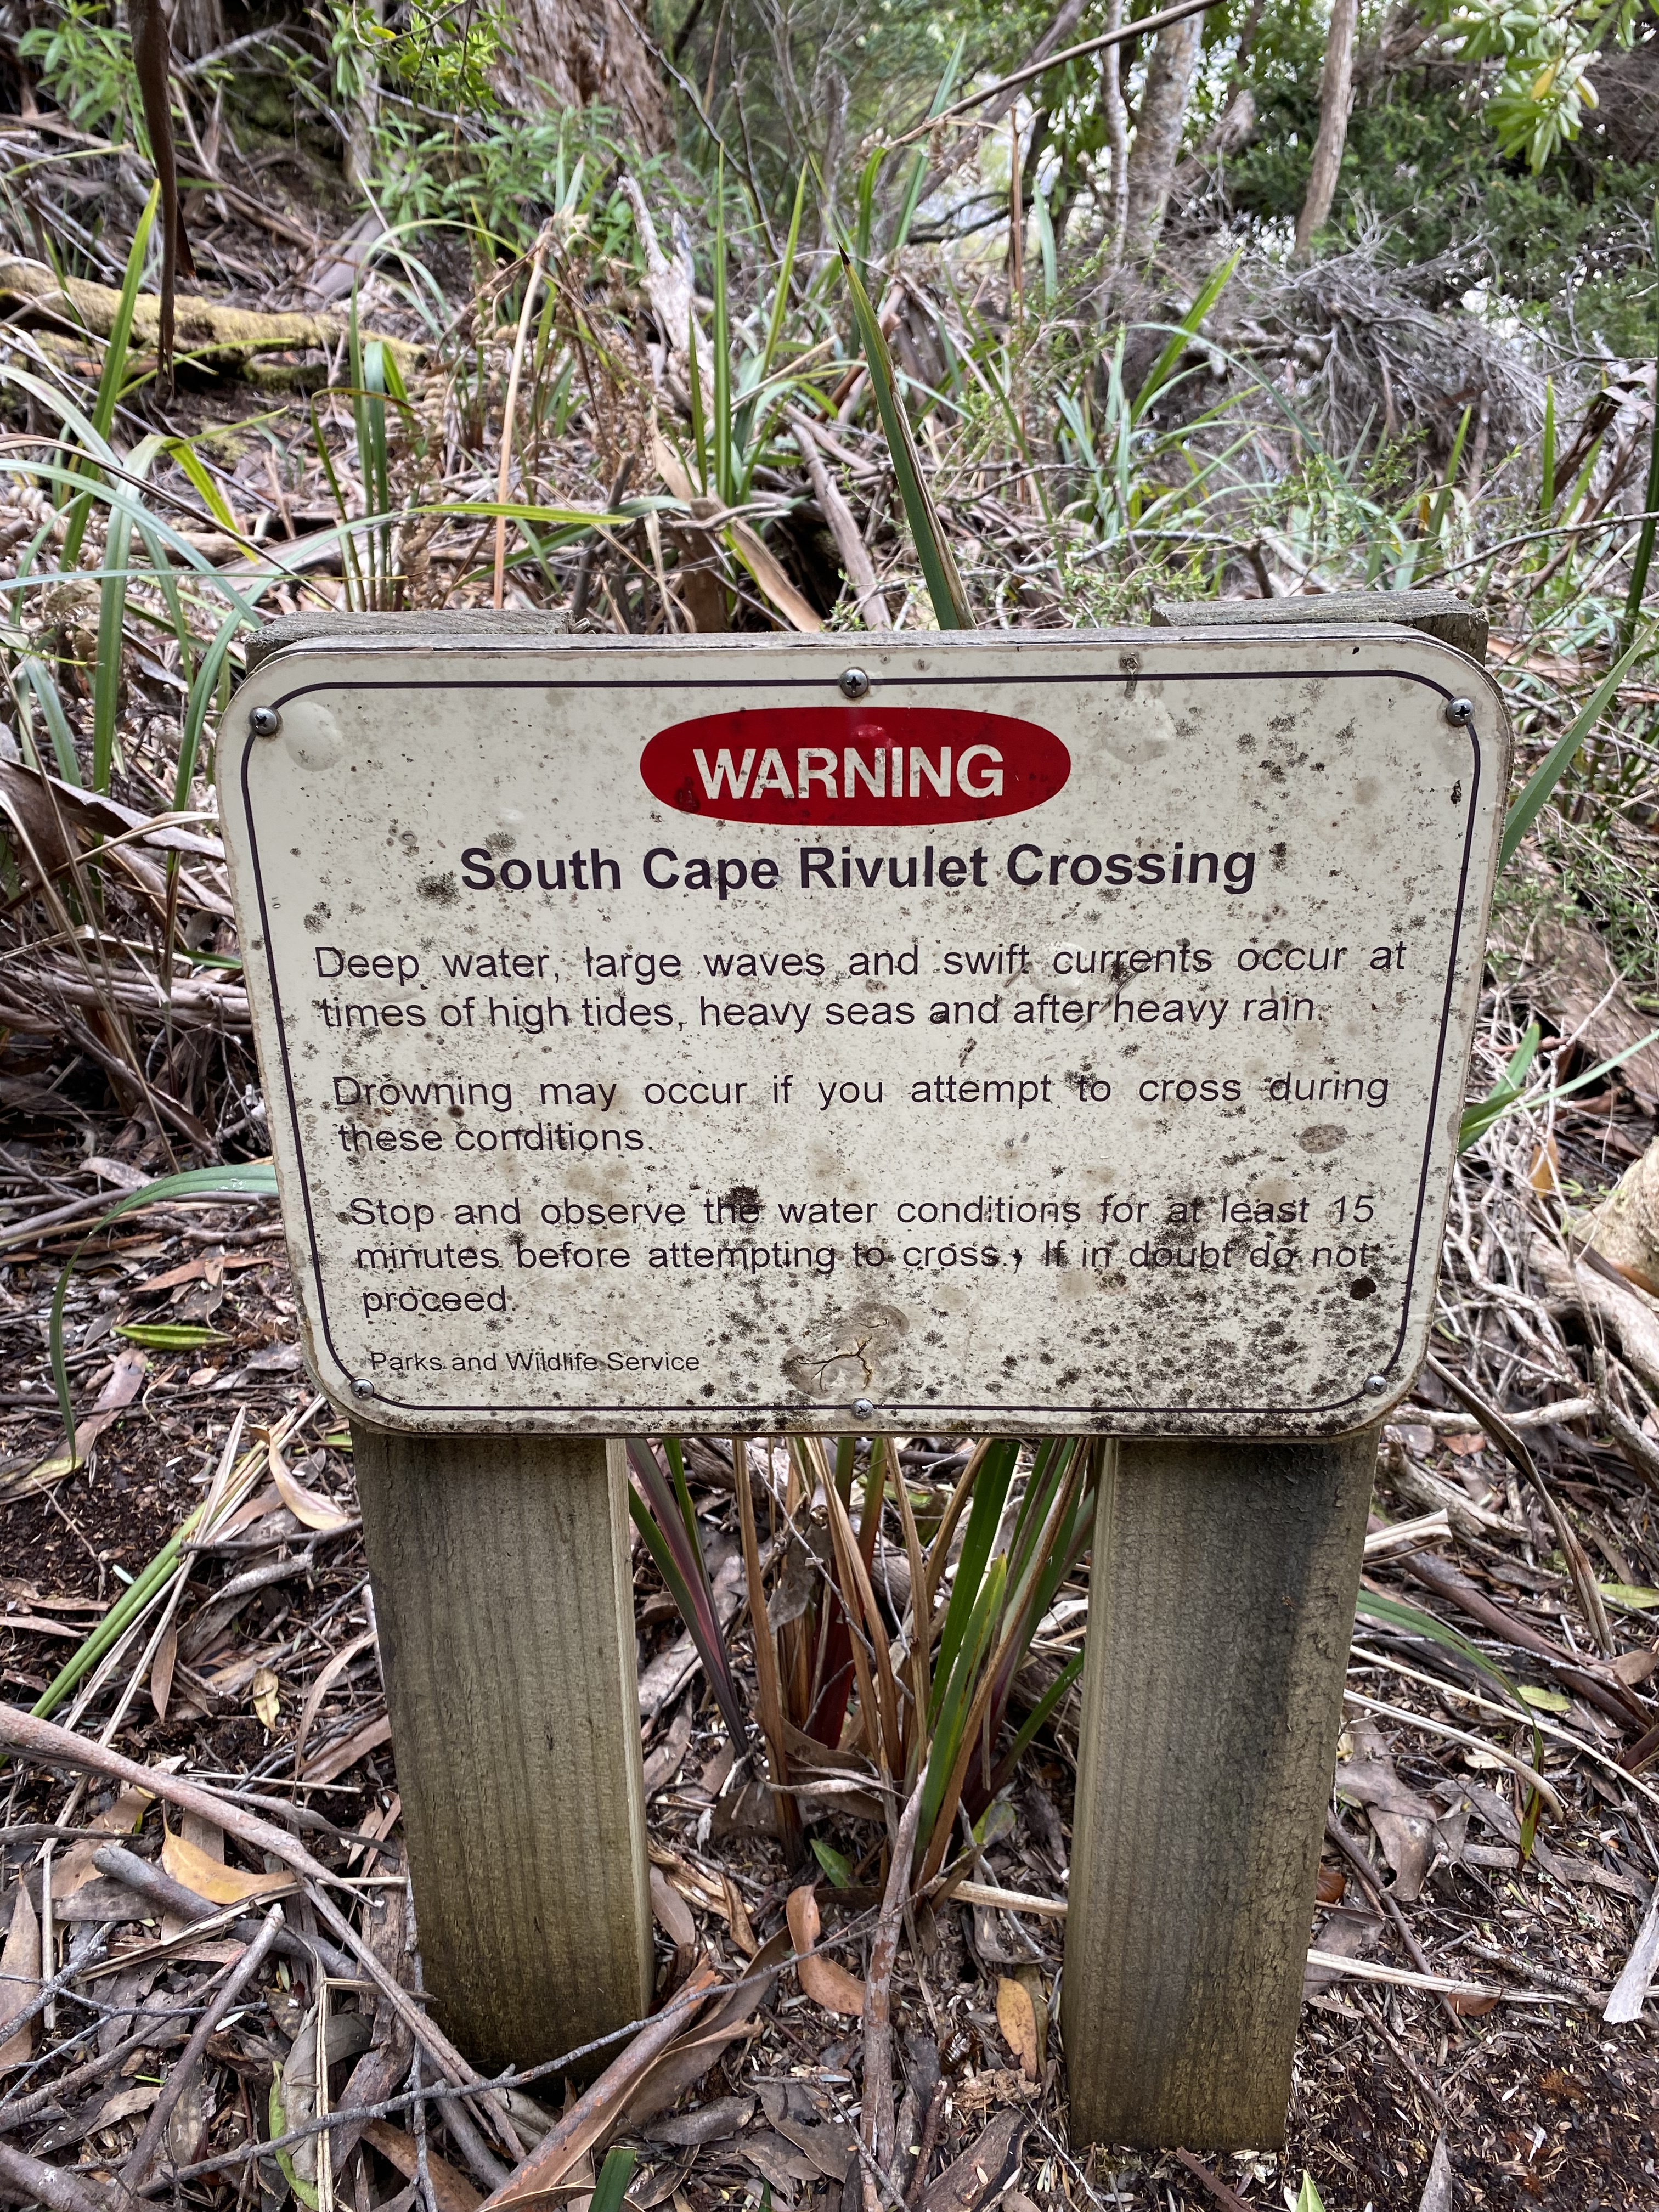
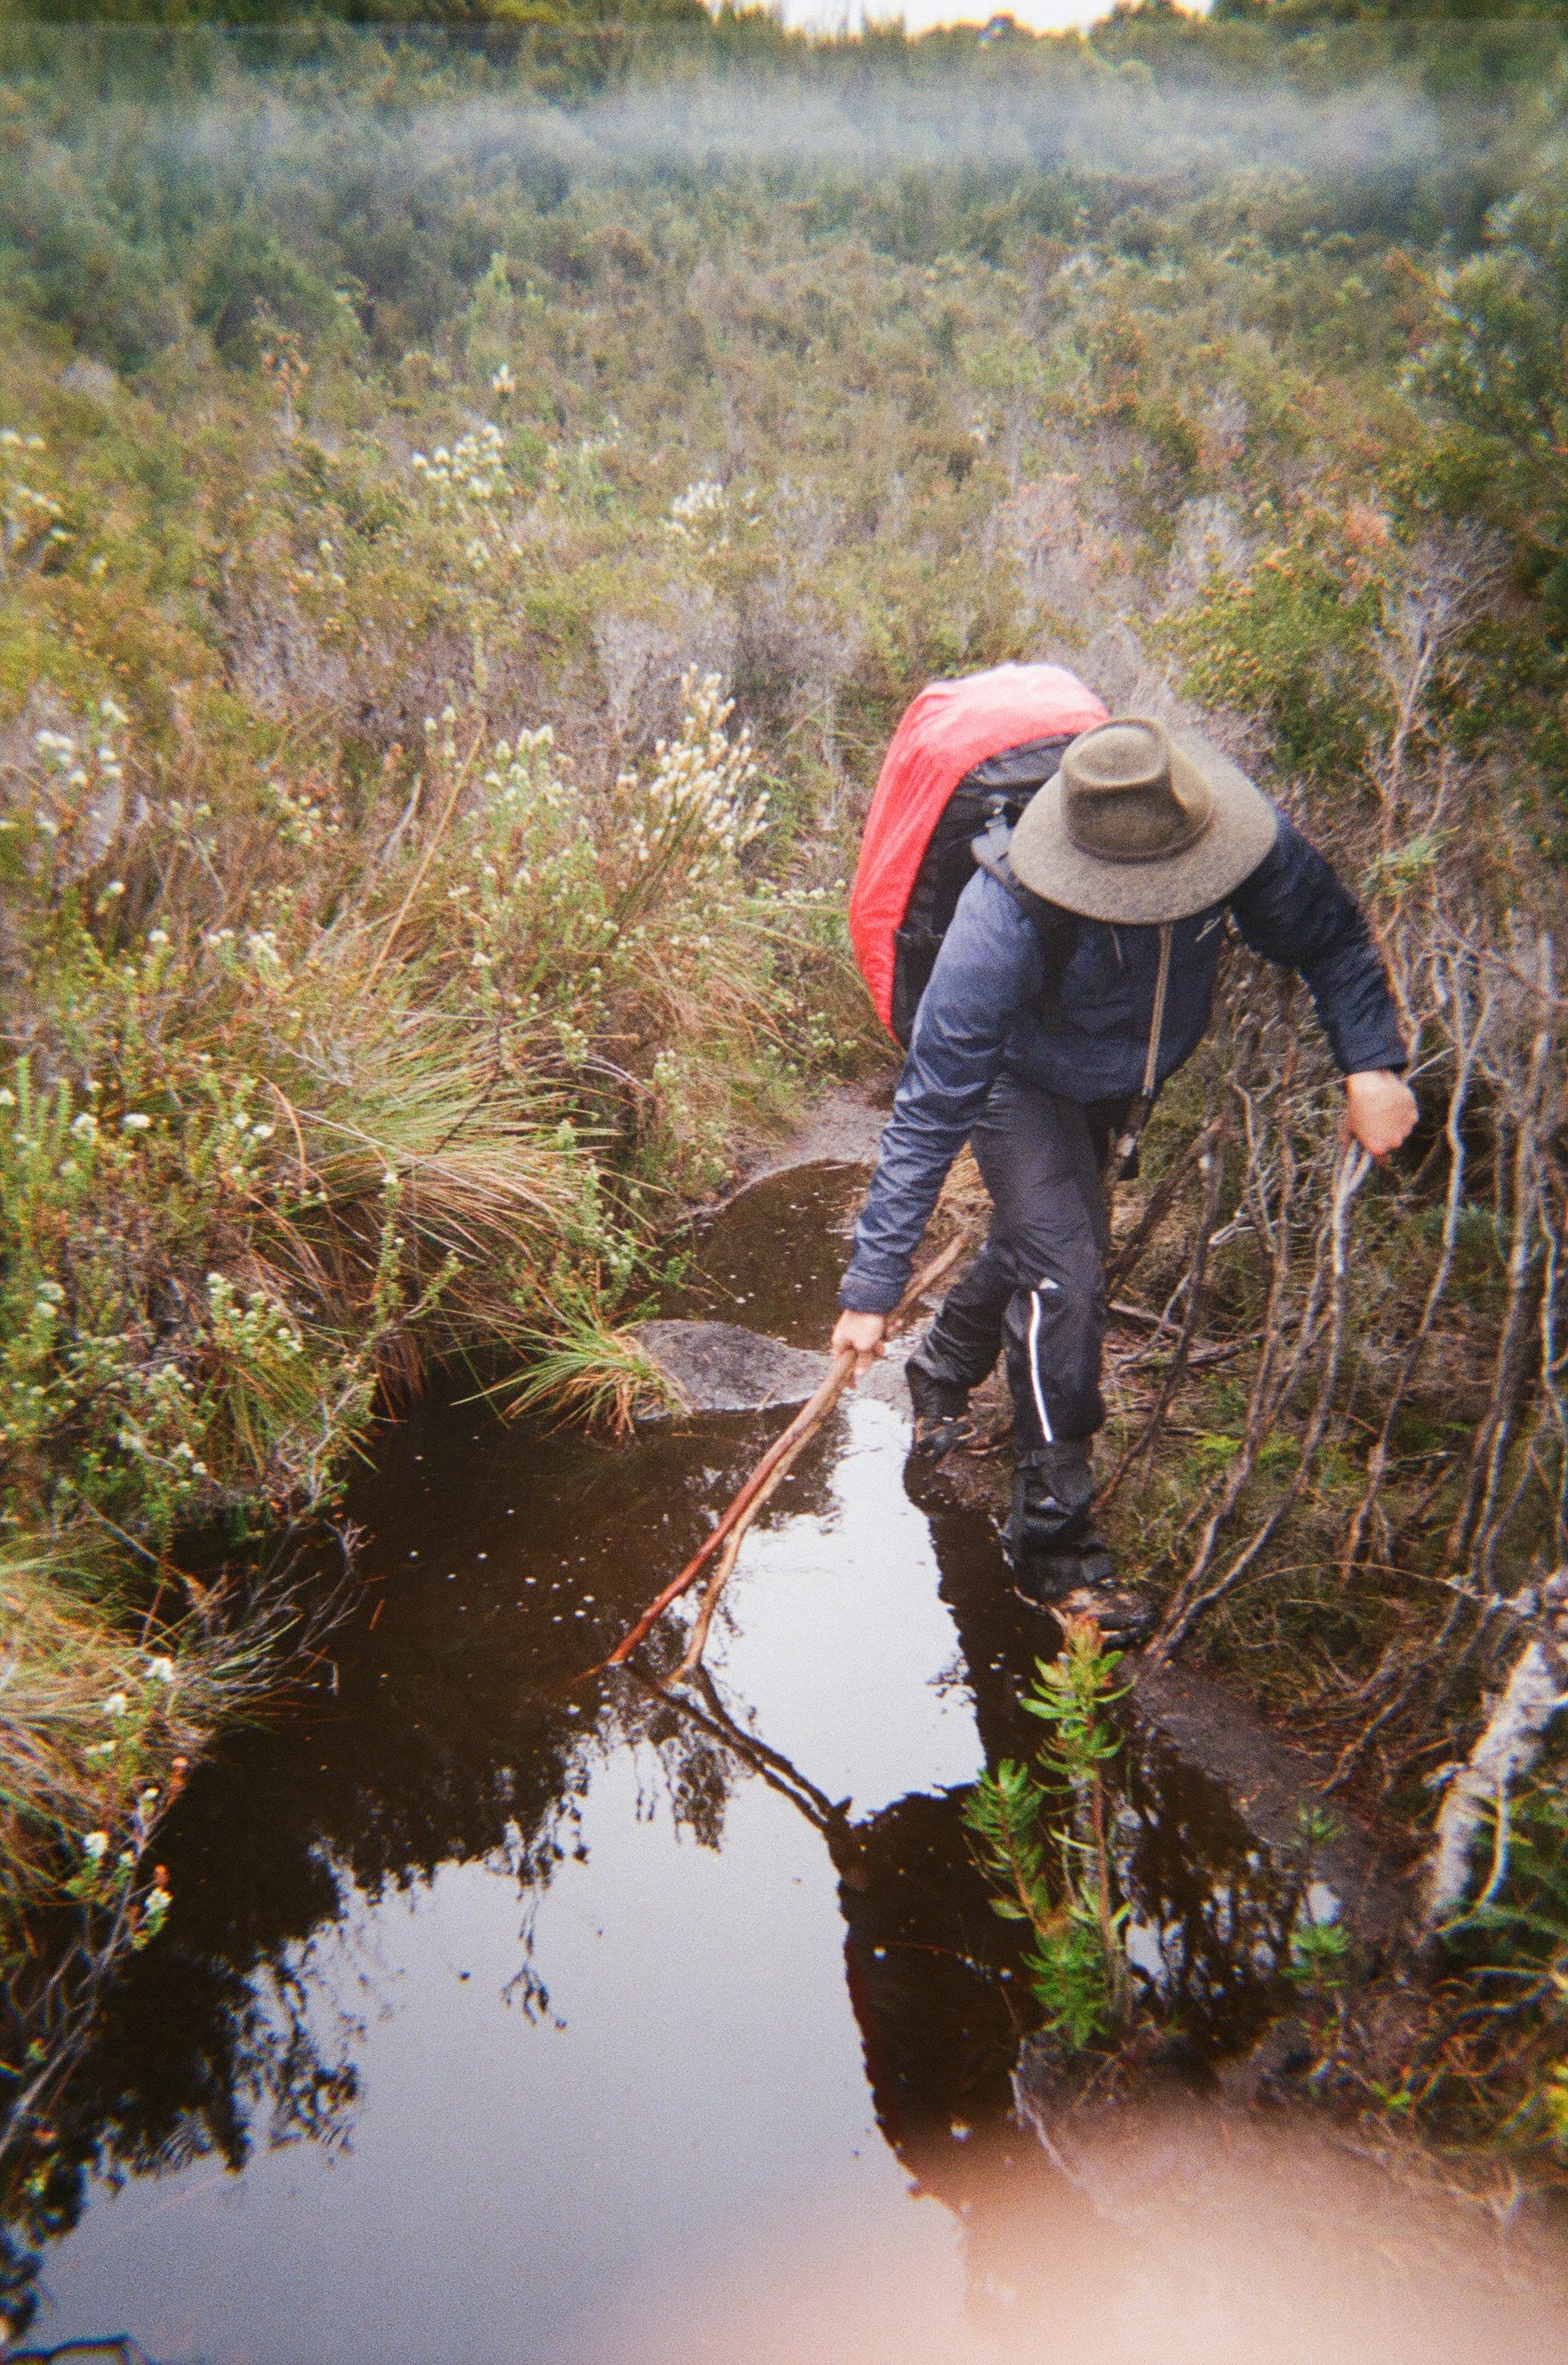
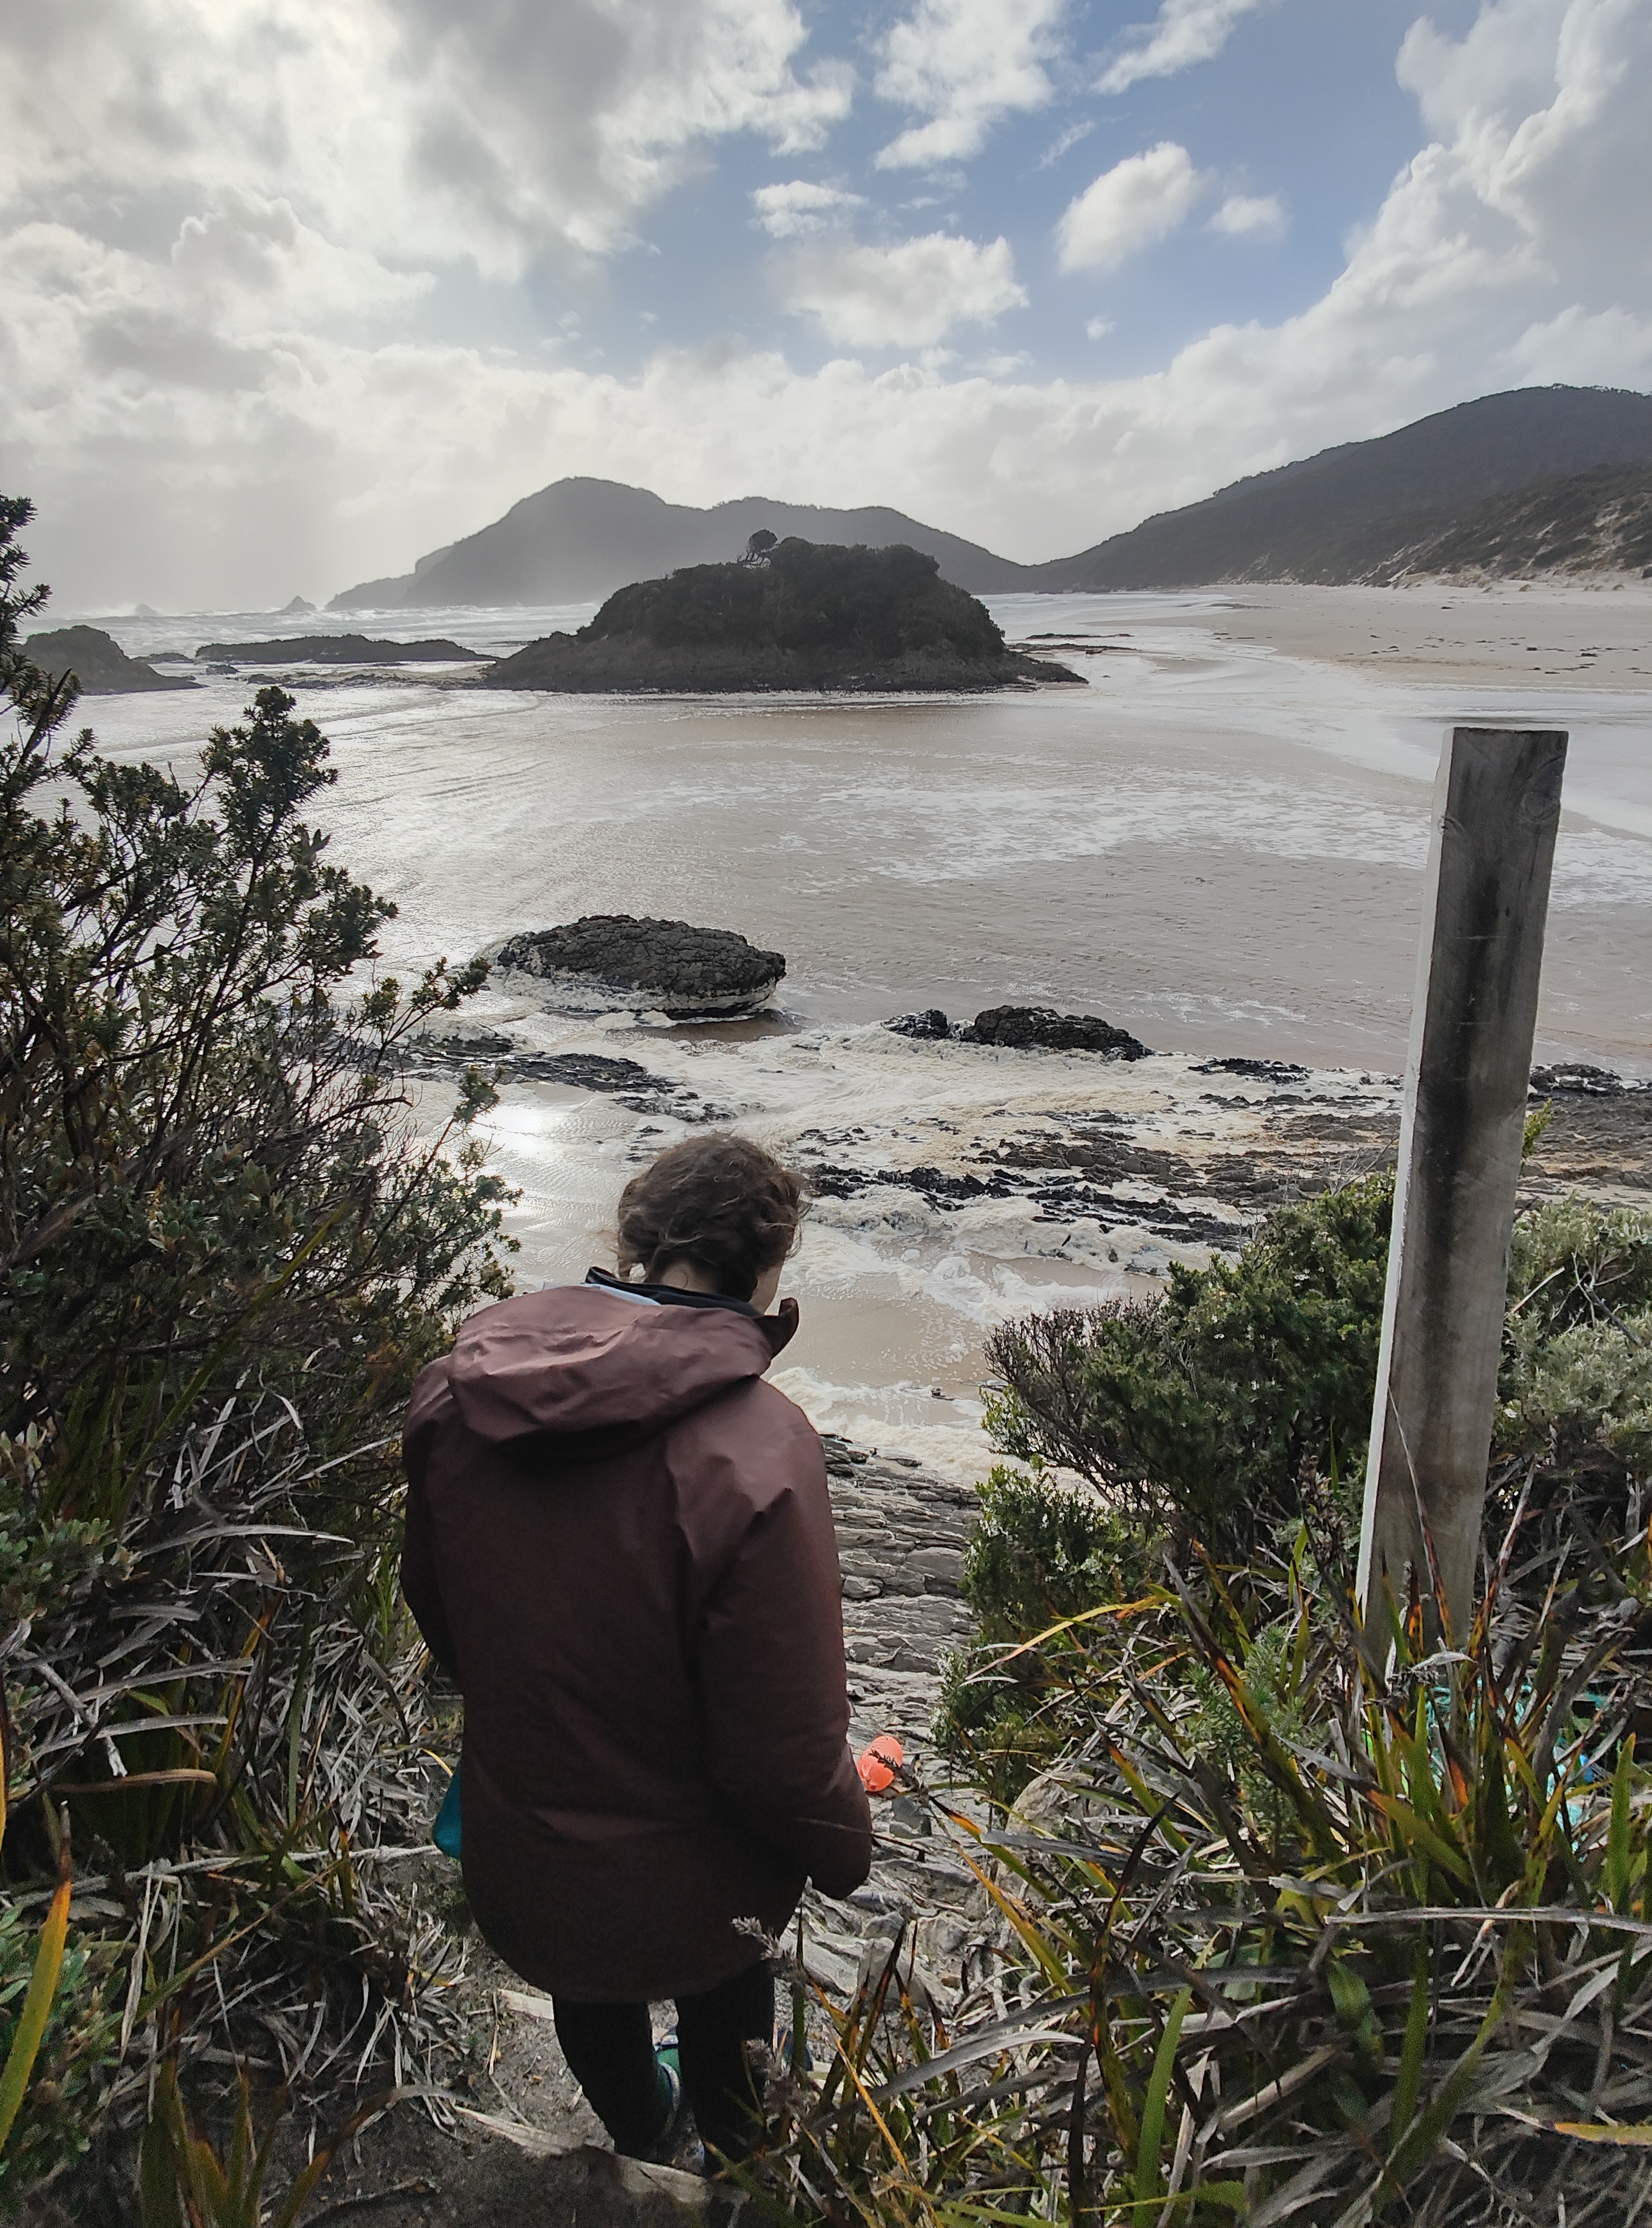
Water Crossings
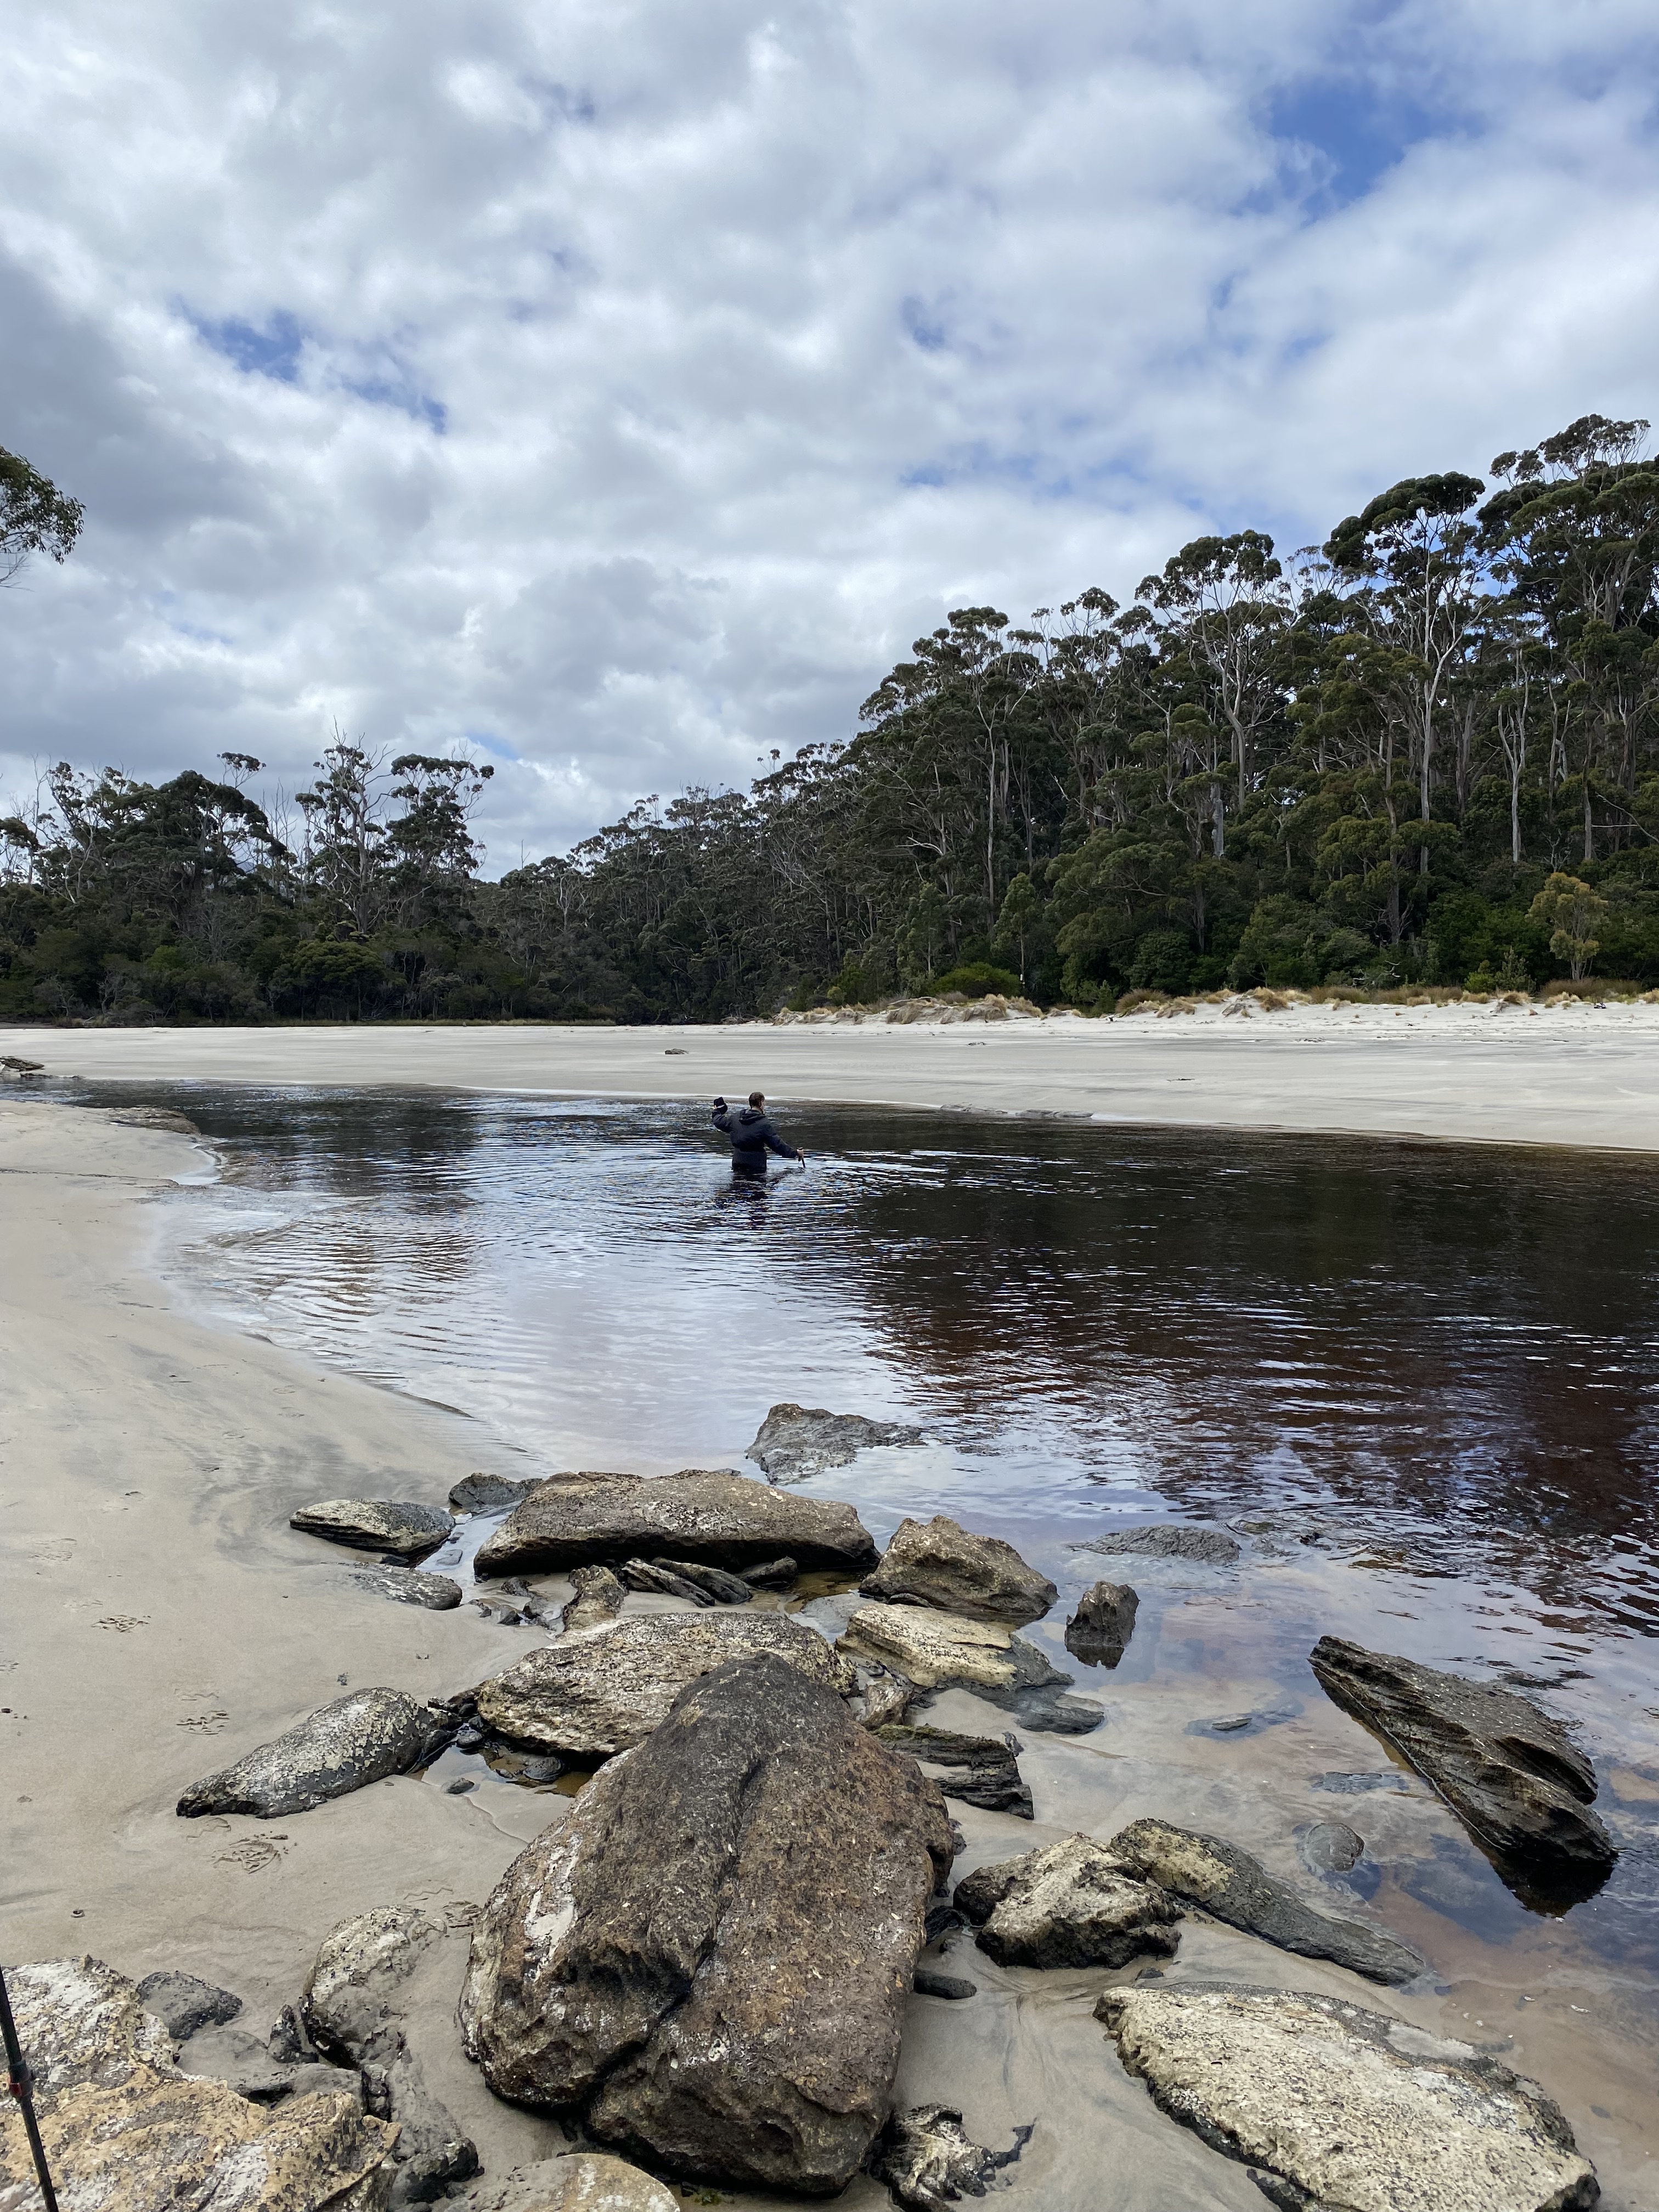
A new terrain-type for me on this trail was the water crossings. There are multiple river and creek crossings, rivulet crossings (where river meets the beach) and a boat crossing over New River Lagoon. The water crossing conditions are variable as a result of weather, tides and shifting sands. Rivulet or beach crossings were best done at low tide, particularly Surprise Bay and South Cape Rivulet. We found ourselves in some deep water on the trip so it’s worth having someone with experience in water crossings in your troupe if possible (more info under Safety section below).
Safety
I want to preface this section by stating that we had some bad weather on our walk, and you may enjoy the walk without any life-threatening situations in better weather. I have written the information around safety (and section about on Conditions & Terrain) based off our experience and finding ourselves in a few situations that felt unsafe. This might seem a bit dramatic, but it’s just towards the worst-case scenario end of the spectrum.
Remoteness
This is a remote walk with virtually no reception. Apparently this is actually the area where Alone Australia was filmed! There are lots of potential hazards on this walk from risk of hypothermia, water crossings, snakes, unpredictable weather and risk of falling from slippery roots. You will need an EPERB or PLB for this walk, and make sure that an emergency contact is aware of your planned route and expected exit date.
There is a logbook at Melaleuca and Cockle Creek to register your walk and expected exit date.
Exposure
Hypothermia is a real risk in Tassie, and particularly on long days of walking with wet, cold and windy conditions. By the end of day 3 we were concerned about risk of hypothermia after having been out in the rain and wind for 12hours, with a very tough day of walking.
Appropriate clothing and equipment is essential including a tent, warm sleeping bag (I took a -10 and was glad to have it), waterproof clothing, beanie, thermals, lots of high-nutrition meals and appropriate footwear.
It’s also worth reading up on the symptoms of hypothermia, and how to manage it if symptoms appear. Here is one resource that may be helpful.
First Aid
You will need a first aid kit with thermal blanket, snake bandage, pain relief, bandaids and bandages.
Water Crossings
Water crossings have the potential to be a major hazard on this walk. One of the challenges is that, as many are tidal, the conditions are ever-changing. Big storms, heavy rain or tide changes can effect the depth, current and pace of water, so note that past accounts may no longer be accurate.
We had some scary moments at the river crossings, with high volumes of water after rain and strong currents. On day 3 and day 4 we umm-ed and ahh-ed about whether to cross, and there was some genuine fear as we were crossing that someone would fall. In retrospect, this was definitely not safe to cross but sometimes its difficult to tell in the moment. I remember wishing I had done some research around river crossings before the trip. How do you know when it’s too unsafe to cross? How long does it take for the water to go down? Cross upstream or downstream of the rope? Walk in boots or barefoot?
I would strongly suggest that anyone doing this walk studies up on how to safely manage river and water crossings, and take a copy of tide times to help make decisions about walking times. It is recommended to watch the water for at least 15 minutes before crossing, and we unclipped our packs when crossing to be able to easily drop them if needed in an emergency. We also sent our tallest team member across first to test the depth and strength of the water.
Here are some resources I found after our walk, and having done this reading, it’s confirmed that it definitely wasn’t safe to cross the river when we did! (more details under day 3 and day 4).
- Bushwalking Manual
- If in doubt, stay out: Lessons from a river safety course
- Bushwalking leadership South Australia
Beach Safety
There are portions of beach walking, most of which were fine – but there is BIG swell on the south coast. There is a beach crossing at Surprise Bay and South Cape Rivulet which should ideally be done at lower tide. At Granite Beach, you walk along the beach before scaling a waterfall to make it to camp. Right before the waterfall, there is a section with cliff to your left and ocean to your right. We were there closer to low tide, but still the tide seemed very close and it felt like a precarious position with big waves so close. So would also recommend considering doing this section at lower tide, particularly if it is a big tide.
Snakes
Tasmania has three species of snake, all of which are capable of biting and injecting venom (Tasmanian Government, 2024). We saw two snakes sunning themselves on this walk, and they quickly moved off the trail. Nonetheless, it’s recommended to carry a snake bandage just in case.
Water Access
There are lots of opportunities to pick up water along the track, although they aren’t always close to camp. Lots of people choose not to treat the water is Tasmania, but we didn’t take the risk and instead used chlorine tablets.
While we experienced a lot of cold weather on our trip, there is the potential for this to also be a very hot trip given the level of exposure. Make sure you carry enough water, thinking ahead of when water may be available. At times, we picked up water around lunchtime which would have to last us the rest of the day walking, dinner and breakfast the next day before more water could be found.
Packing List
| GEAR Hiking pack (60-70L) Dry bags Water bladder/drink bottles (at least 3L) Waterproof pack cover Sleeping bag (at least rated to 0 degrees) Sleeping mat Sleeping bag liner Tent Headtorch + batteries Electrical tape Trowel Map Compass Gaiters Rope Tarp Walking poles | FIRST AID & SAFETY: Personal Locator Beacon (PLB) Bug repellant Snake bite bandage Water purification tablets Bandaids Blister kit Hand sanitiser Pain killers/analgesia Antihistamine Sports tape Tweezers Scissors Antiseptic cream Alcohol wipes |
| COOKING: Tea towel Washing up liquid and sponge Gas stove and cookwear Gas/butane canister Matches/lighter Cup/mug Spork Plate/bowl Sharp knife Chopping board Garbage bags/ziplock bags | CLOTHING: Hiking shirt Hiking pants/shorts Thermal top and bottom T shirt for camp (or use thermal) Pants for camp Fleece Puffer jackets Waterproof jacket Waterproof pants 2x sports bra 3x underwear 2x hiking socks 1x camp socks Hiking boots Camp shoes (crocs/sandals) Hat Sunnies Beanie |
| TOILETRIES: Toothbrush Toothpaste Hairbrush Sunscreen Hand sanitiser Toilet paper Vasoline (as lip balm and to help with chaffing) | OPTIONAL: Book Camera Binoculars Pillow Power bank Face wash and moisturiser Towel |
Protecting Food from Animals
We took smell proof bags to help with managing animals getting into food as we were aware from our research that there had been some incidents. All was calm, except for at Deadmans Bay when one team member left some peanuts in their waterproof jacket pocket, and woke to find a big hole gnawed through the jacket.
Not all food was kept in smell proof bags, but we prioritised any unsealed foods or particularly smelly items. We also took ziplock bags for rubbish to help minimise the smell and had no other issues. We slept with food inside smell proof or zip lock bag, inside dry bag in the tent.
Campsites
You do not need to book campsites, and they are first come best served. Most campsites have a pit toilet, and many are close to water crossings so water access was generally not an issue.
There are a few spots where the campsite is split across both sides of the river (Louisa River, Little Deadmans). A toilet is only available on one side of the crossing, and you’ll need to decide whether to cross the water the night before or cross in the morning and start with wet feet. The other benefit of crossing before setting up camp is that if there is rain overnight and the river swells, you will have already passed the crossing.
| Campsite | Toilets | Water Source |
| Point Eric | Pit toilet available at camp. | Water is available throughout trail on Day 1. No water at camp. Water is available from a small creek about a 5min walk eastwards along the beach from Point Eric camp. |
| Louisa River: Campsites available on both sides of the river. | There is a pit toilet on the eastern side of the river. | Fresh water available at creek crossings throughout the day and at Louisa River campsite. |
| Little Deadmans Bay: Campsites available on both sides of Little Deadmans Bay, separated by a small creek crossing on the beach. | There is a pit toilet at the camp on the western side of the creek crossing. | Several creek options for water in the latter half of the day. Recommend filling up at the creek crossing after descending the Ironbound Range. There are small creeks running onto the beach at Little Deadmans Bay, but may be brackish. A stream is available not far out from camp heading towards New River (less than a km). |
| Prion Boat Crossing | Pit toilet only a short walk away. | The lagoon water is brackish. We didn’t fill up here and used leftover water from the day prior. |
| Surprise Bay | Pit toilet available. | Fresh water available near camp. Climb back down to the rocky headland from camp and walk around to the right towards the river. Test water as some will be brackish. |
| Granite Beach | There is a pit toilet with a great view out to the ocean. | Fresh water available at camp at top of Granite Beach waterfall. |
| Lion Rock | There is a toilet at camp, although it was a makeshift set-up on our trip while a new toilet was being built. | Brackish water available near camp – Need to fill up at any freshwater prior to camp. Lots of water available on the walk out to Cockle Creek. |
Campsites are typically fairly large, although not much room for bigger groups at some campsites (such as Point Eric, Lion Rock).
The Chapman guidebook made reference to a couple of campsites which do not appear to be official campsites (or perhaps are no longer campsites?). I would say don’t rely on any campsites that aren’t on the TasMaps, as I think these campsites are no longer used or are for emergencies only i.e. the high camp on Ironbound Range mentioned in the guidebook.
Day 0: Hobart
After arriving in Hobart, we checked into our accommodation, picked up final supplies from Woolies and hit a local hiking shop for some local knowledge. We were nervous about the weather forecast and some information we’d read that said it wasn’t safe to cross the Ironbound Range in bad weather. We asked the hiking shop man about this, and in what I now realise was some incredible foreshadowing, he said that the Ironbound Range was the least of his safety worries on the walk.
We had received an email from Par Avion the day prior indicating that our flight might be cancelled due to bad weather. We followed-up around mid-afternoon and confirmed that the flight was definitely going ahead. We had a burger and beer on the bus at Preachers while pouring over the maps and guidebook, excitedly chatting about the adventure ahead.
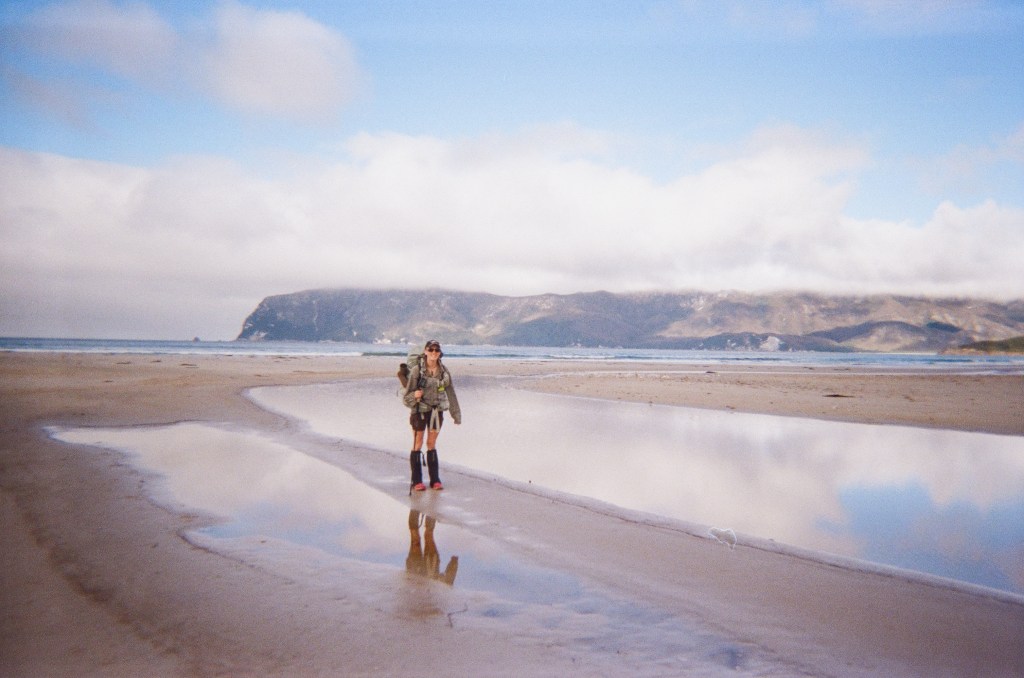
Day 1: Hobart to Melaleuca to Point Eric
Distance: 13km
Duration: 4hrs, 20mins (including breaks)
Highlights: Plane ride, wildflowers, Freney Lagoon, Cox Bight
Brimming with excitement, we packed up at our hostel and did a makeshift pack of bags for the Par Avion flight. In our second round of foreshadowing for the trip, as we were leaving the hostel I got chatting to an older woman who was asking about our hiking packs. She wished us the best of luck before reminding us of the ‘reason for the season’ and hinting at the upcoming rapture. With our future demise predicted, we spent the morning enjoying Hobart and a last supper (lunch) before the wilderness.
We headed to Par Avion airport where they weighed our bags, and we purchased National Parks passes and gas canisters. There is a nice waiting area with tea and coffee available. As we walked out to our plane the nerves started to set-in. This is the smallest plan I’ve been on before but it was a very cool experience. We felt lots of little bumps while up in the air.
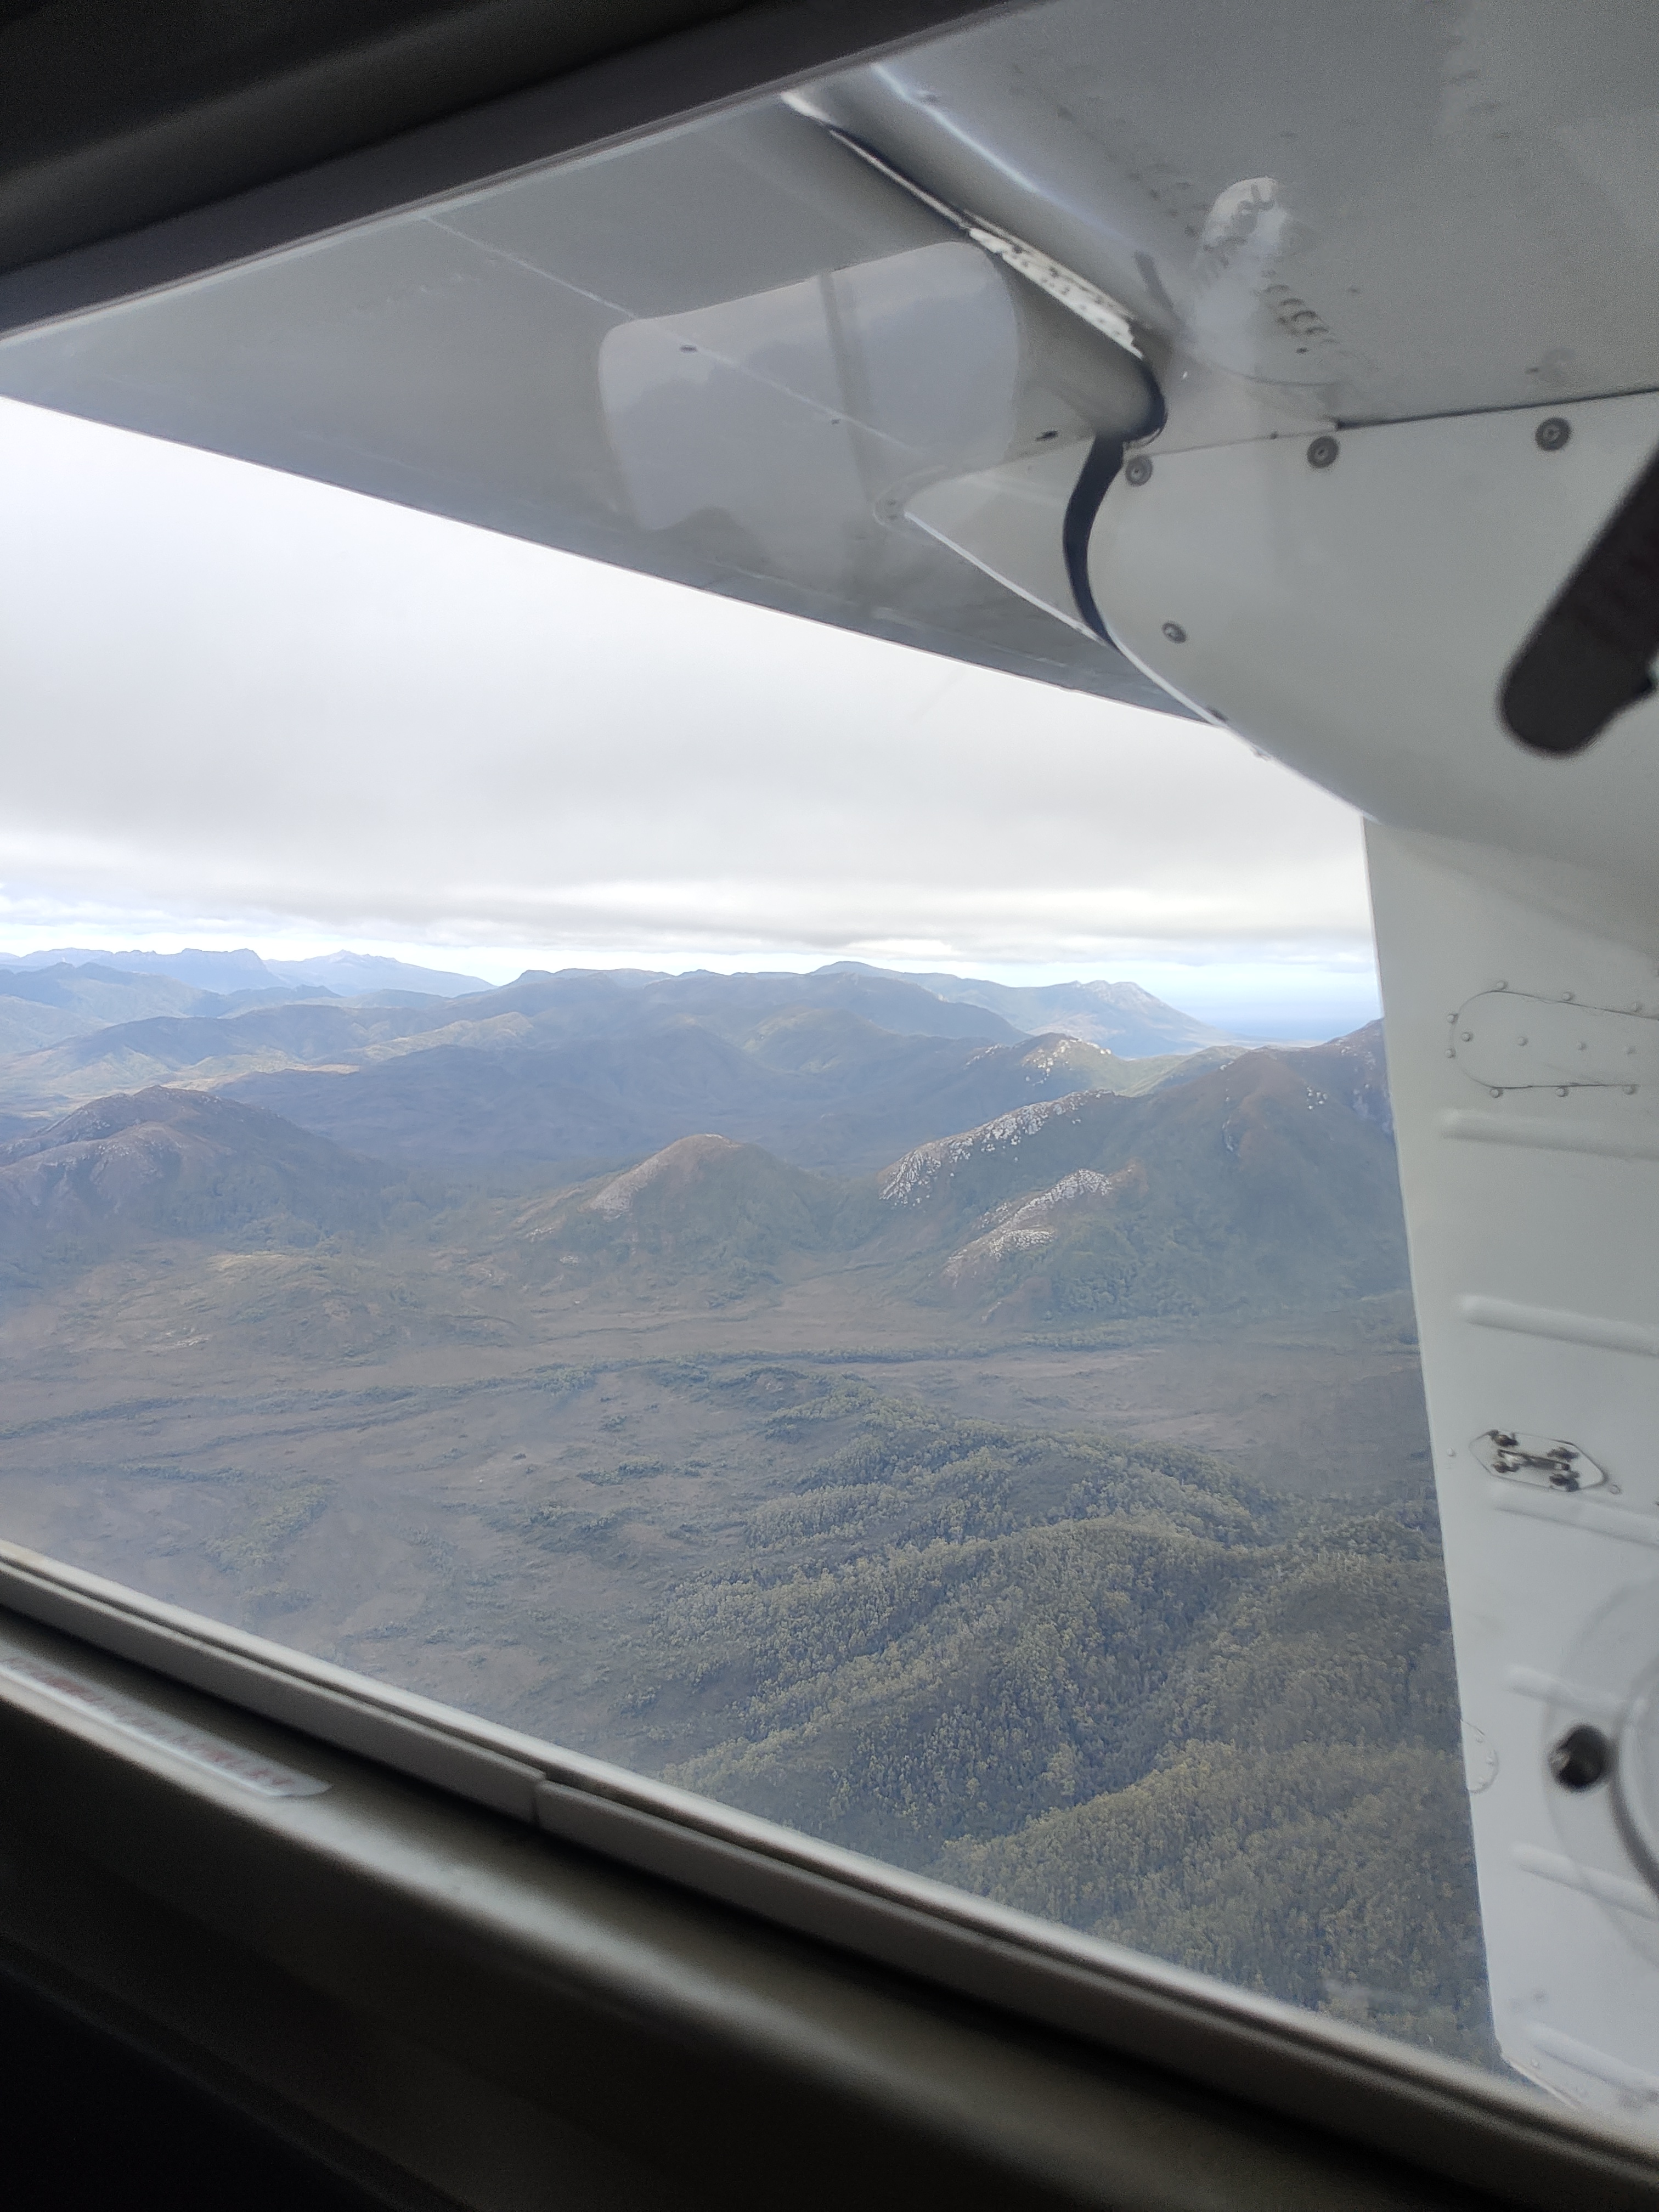
Our handsome silver-fox pilot took us over the inland route which had beautiful views of the mountains below including Federation Peak and Mount Picton. We also saw tarns on the mountains up-close, which was amazing!
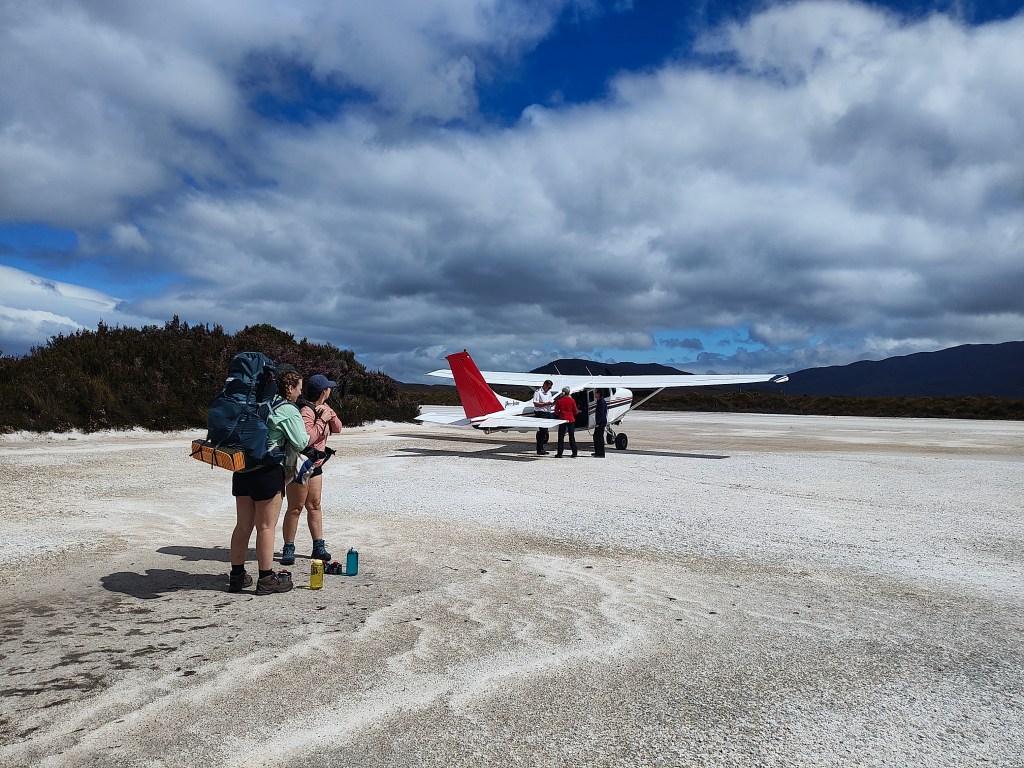
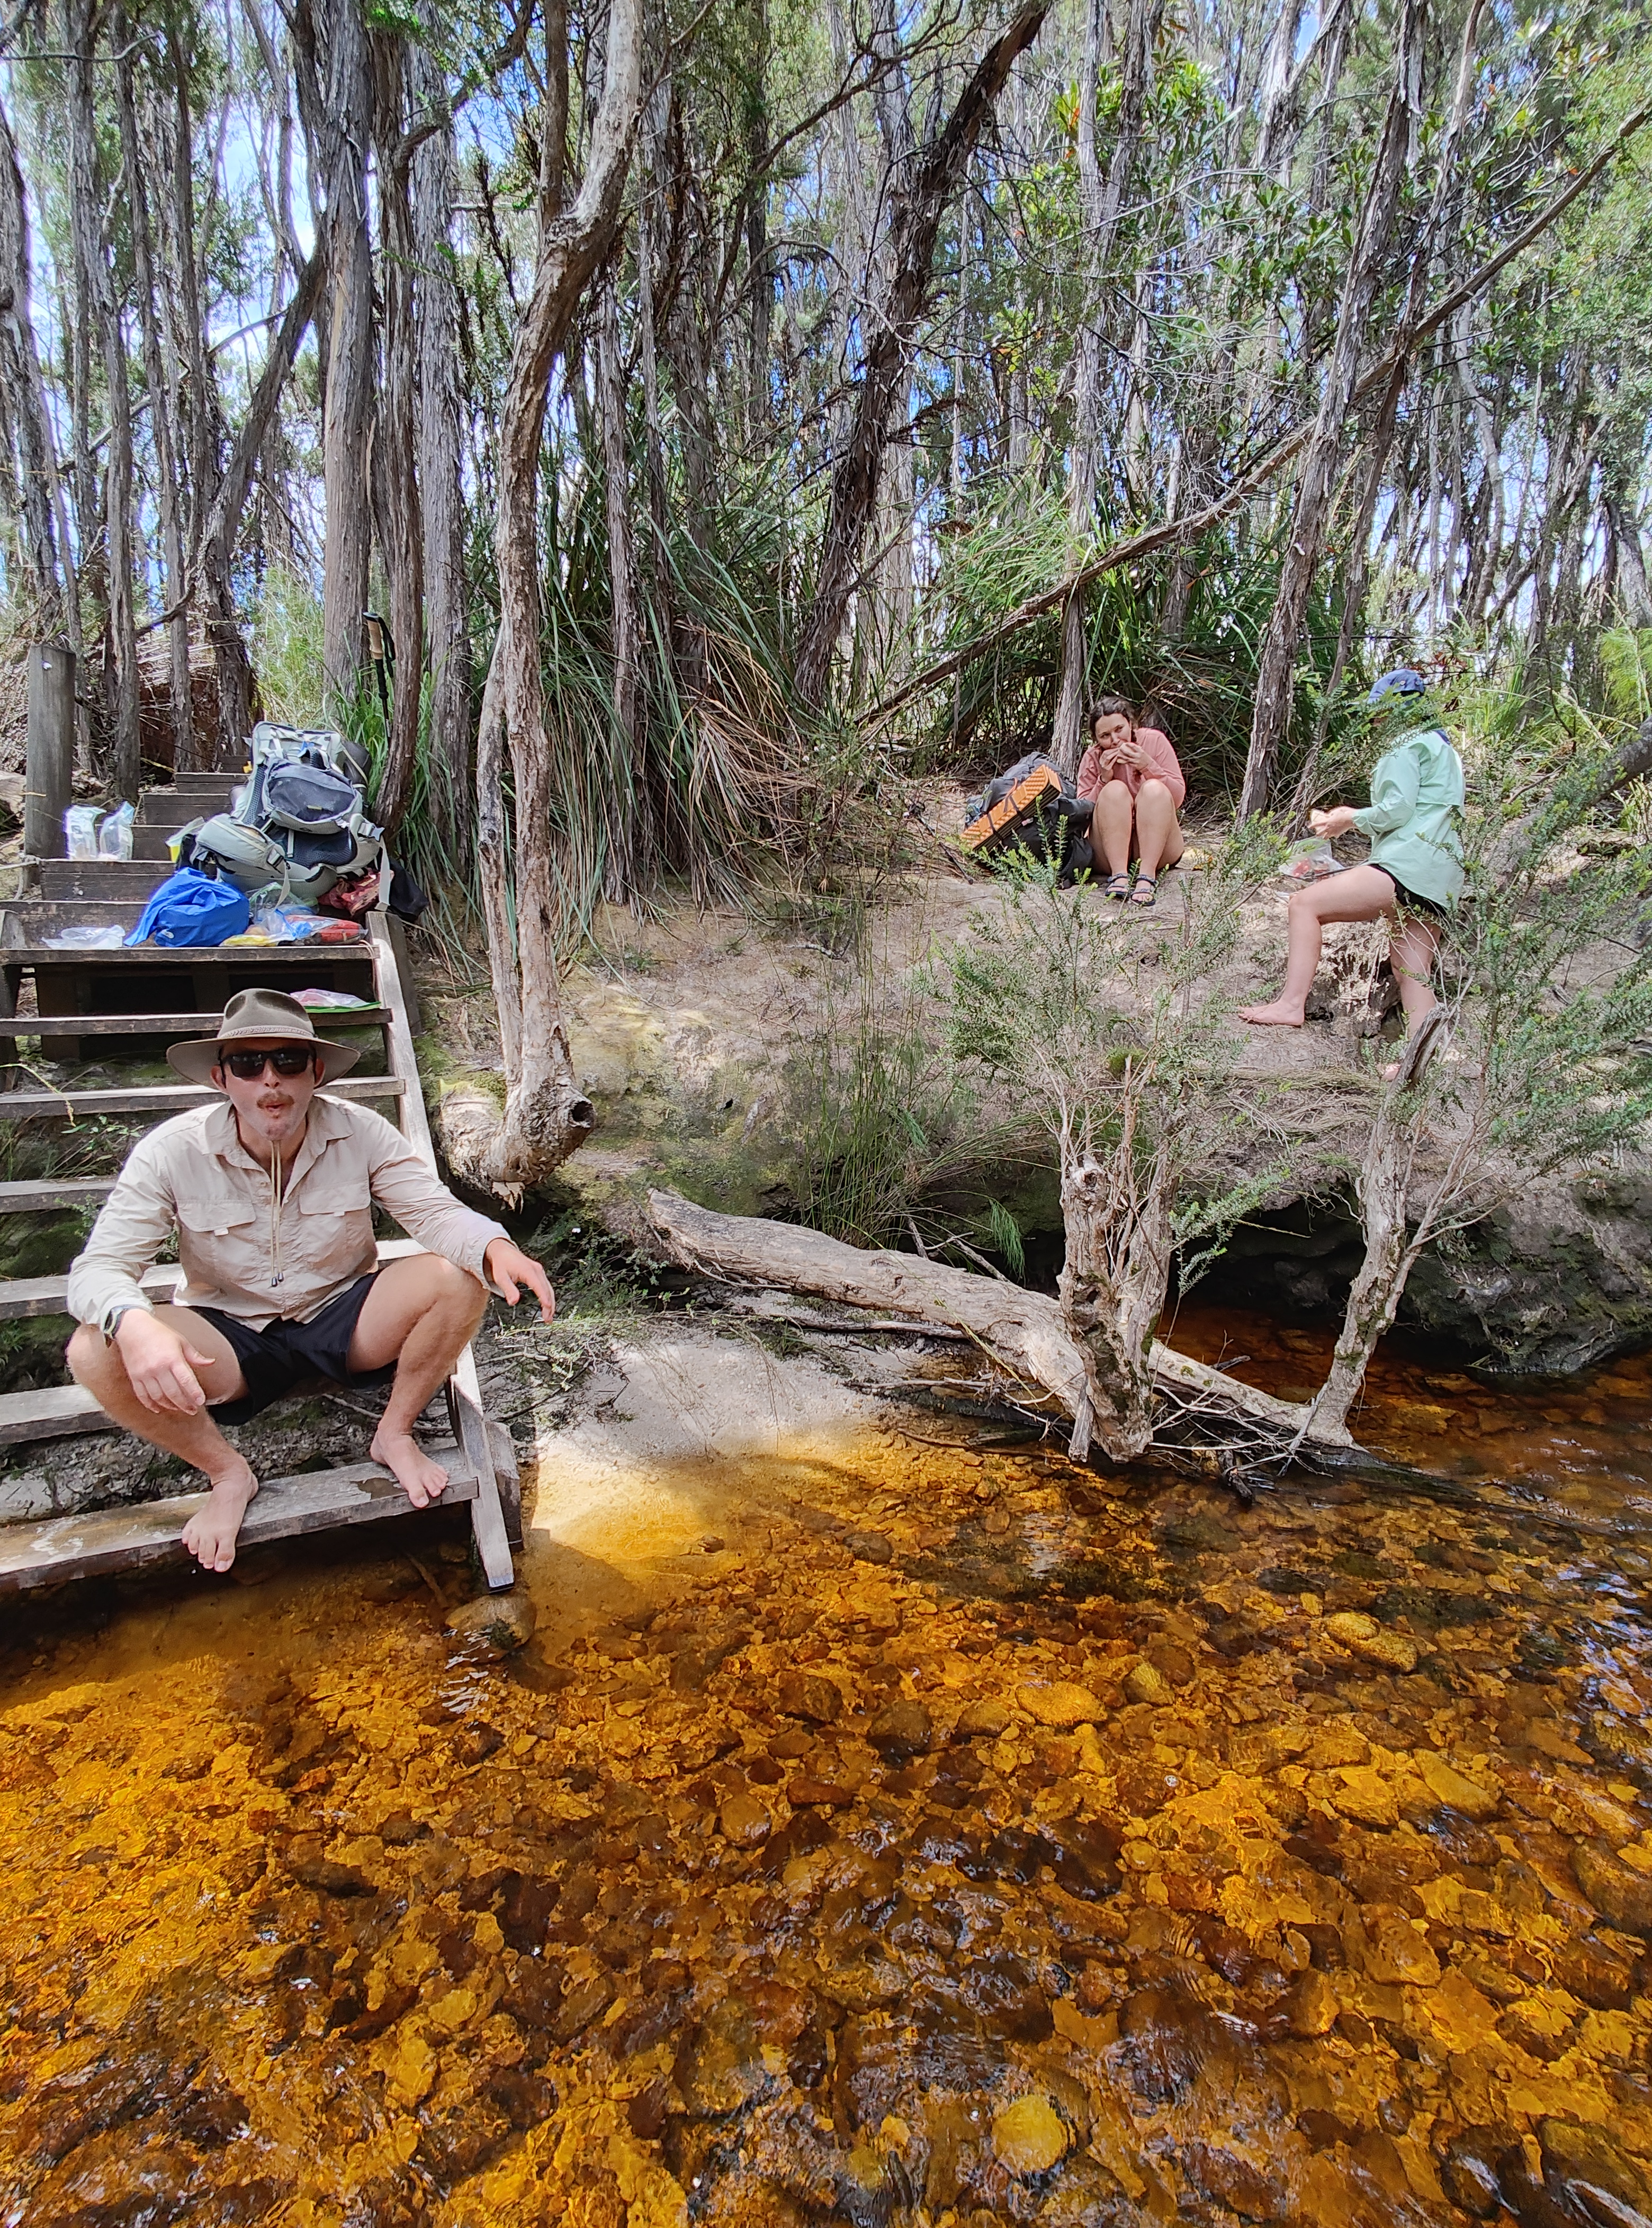
After landing, our pilot gave us our gas canisters and we were welcomed by the National Parks volunteers. From the airport, you can head left towards the cabins, or right to the start of the trail. We first went to the cabins for a final toilet stop before heading down to the information hut at the start of the trail. Here we filled our water, repacked the bags and filled out the walker’s logbook before starting on the trail.
A fellow pair who we came to affectionately refer to as Father and Son (a father and his teenage son) similarly hit the trail while most others from our flight appeared to stay at the cabins overnight. They wished us luck and ominously said “hope you’ve got some good weather gear, there’s going to be a lot of rain” before speeding off down the trail (we would later find out they did an extra ~30km walking in the time we did our walk, so they truly put us to shame).
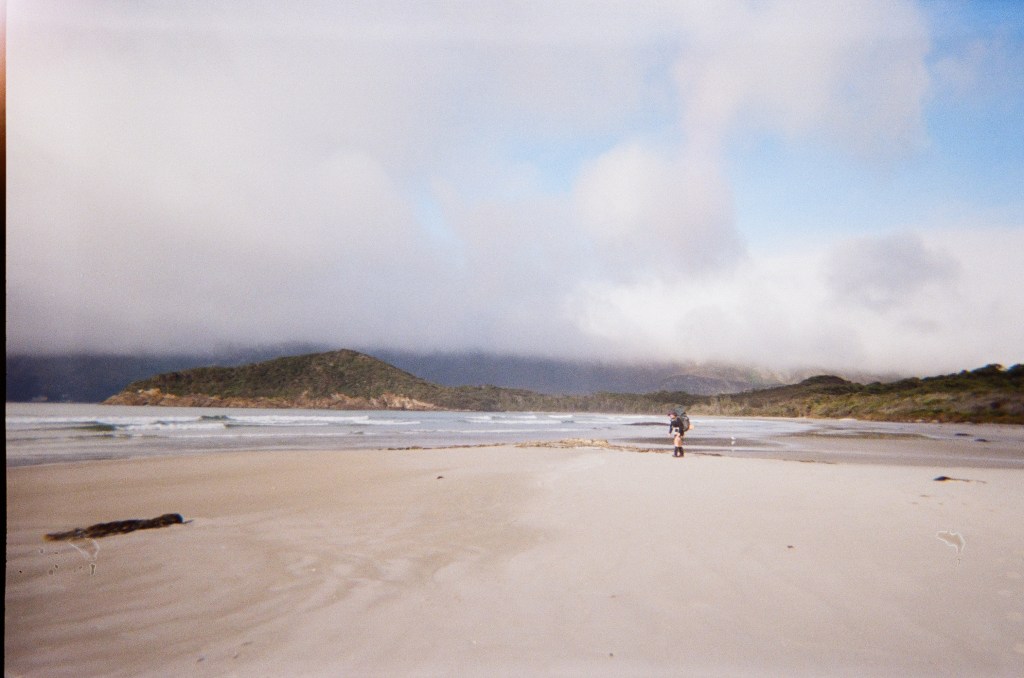
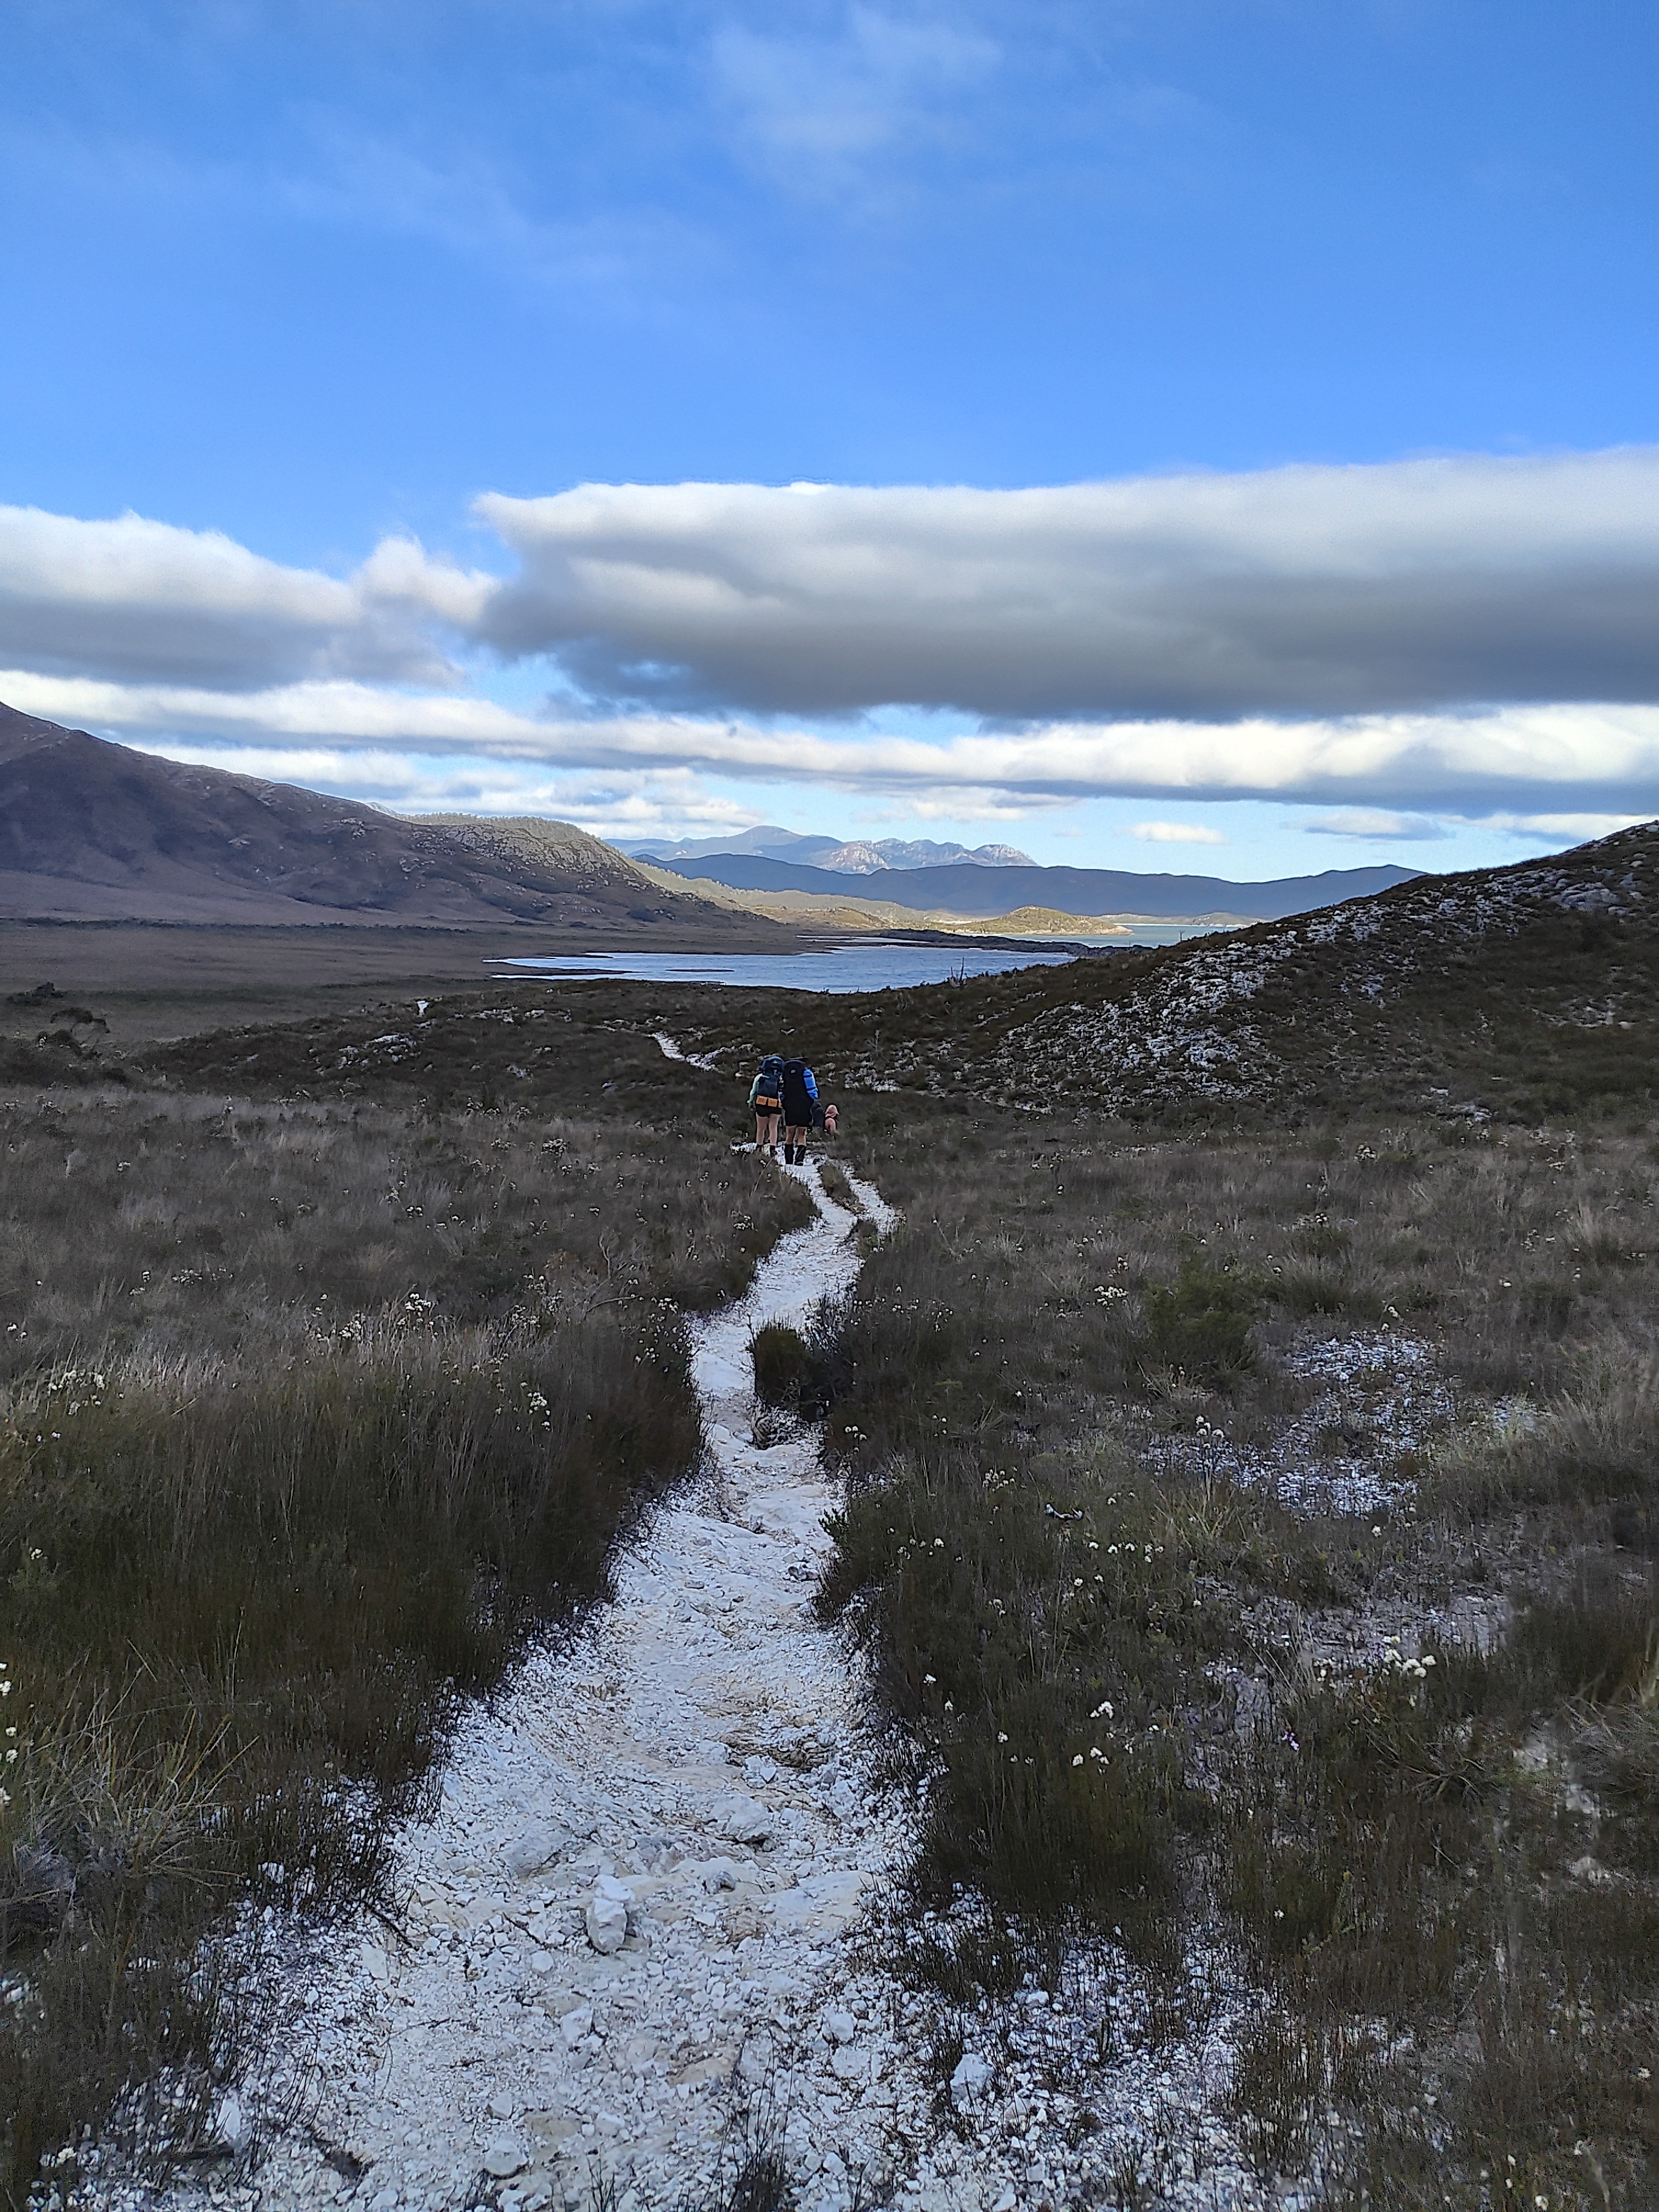
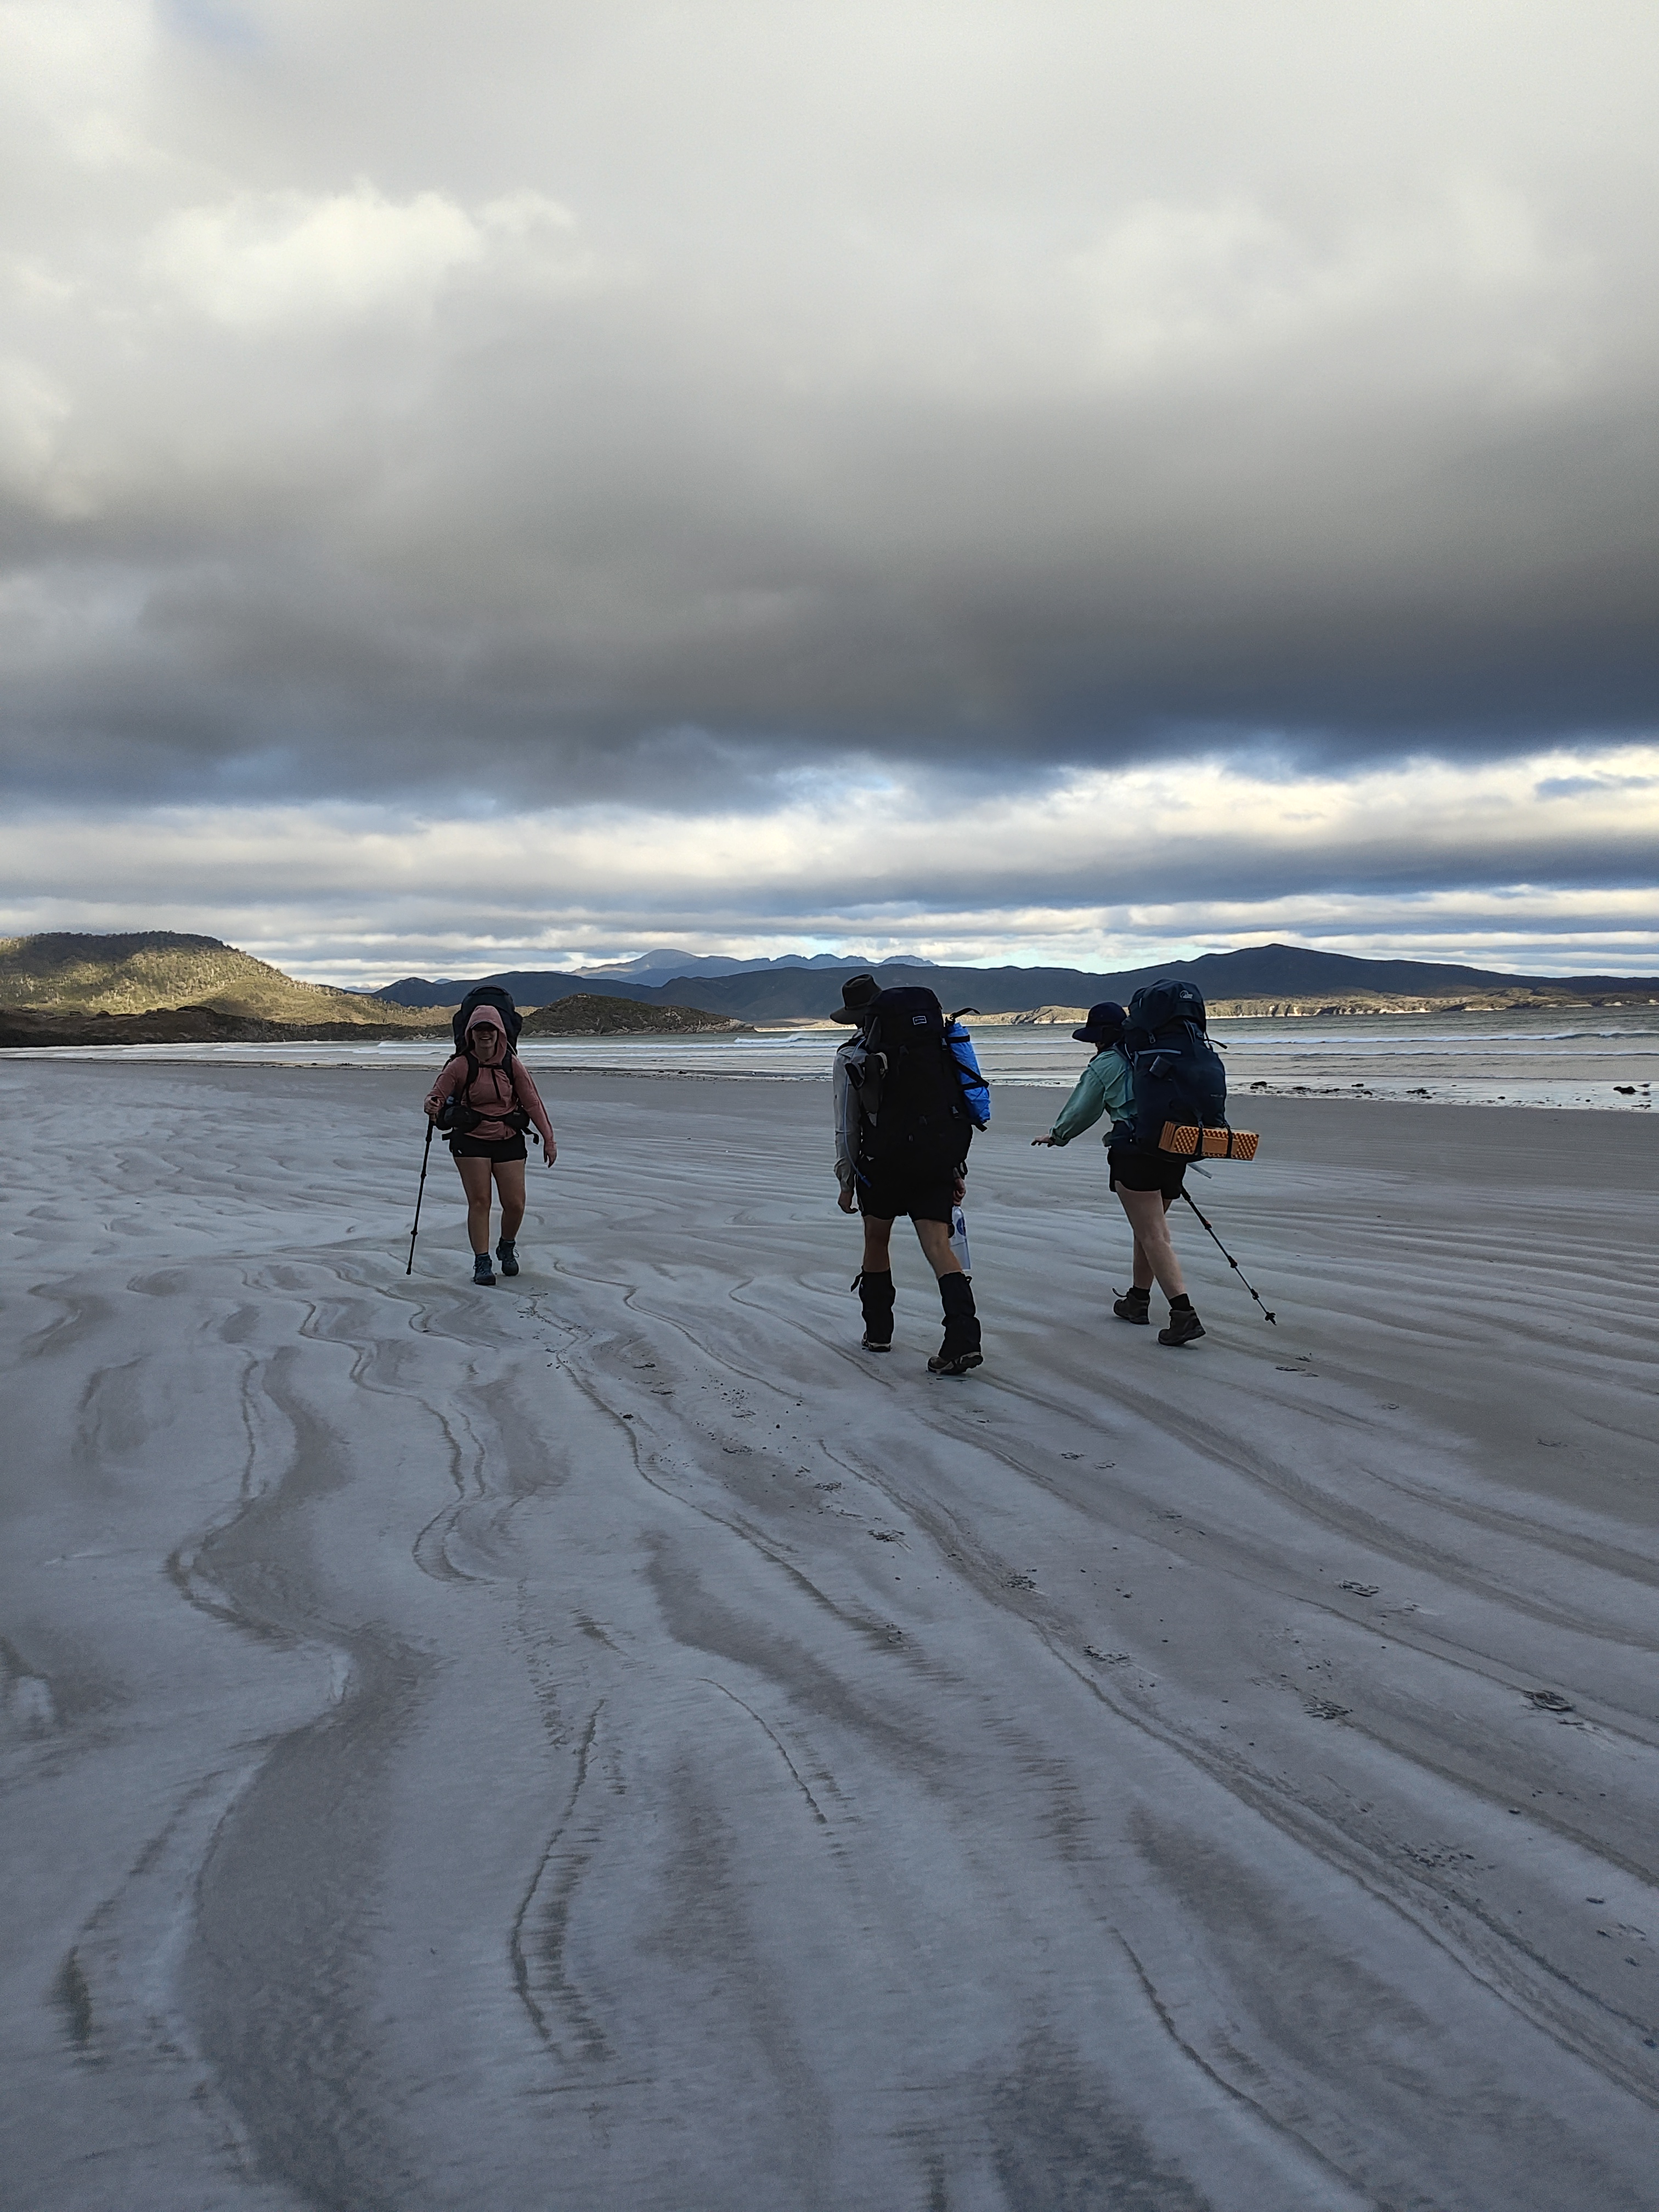
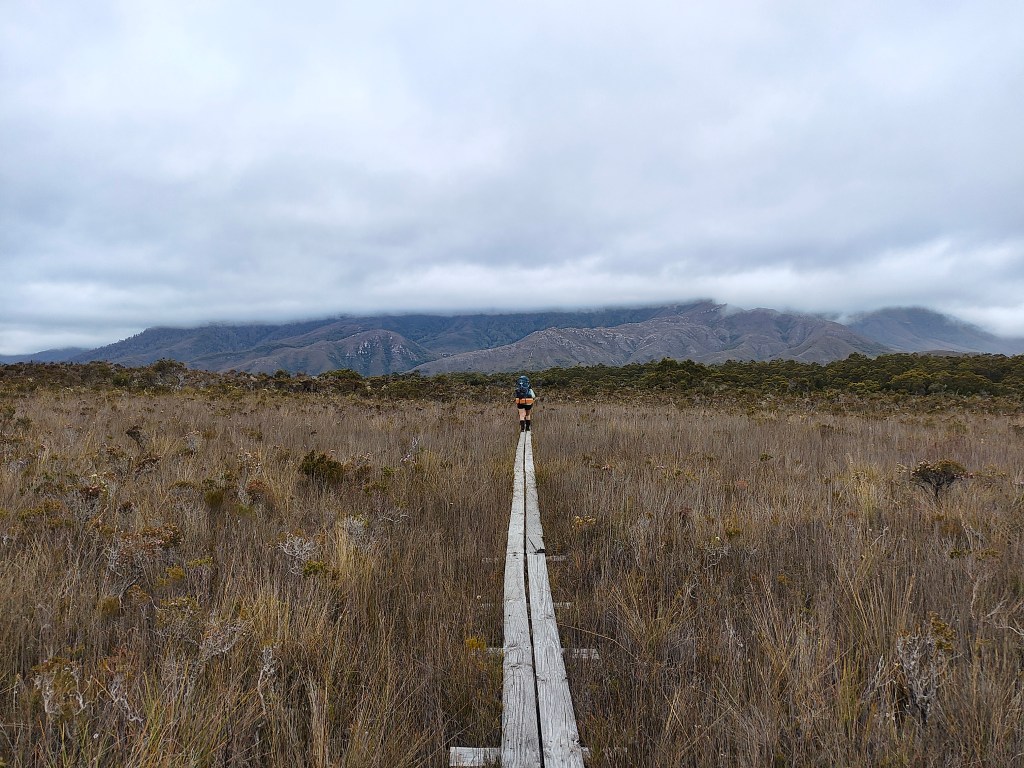
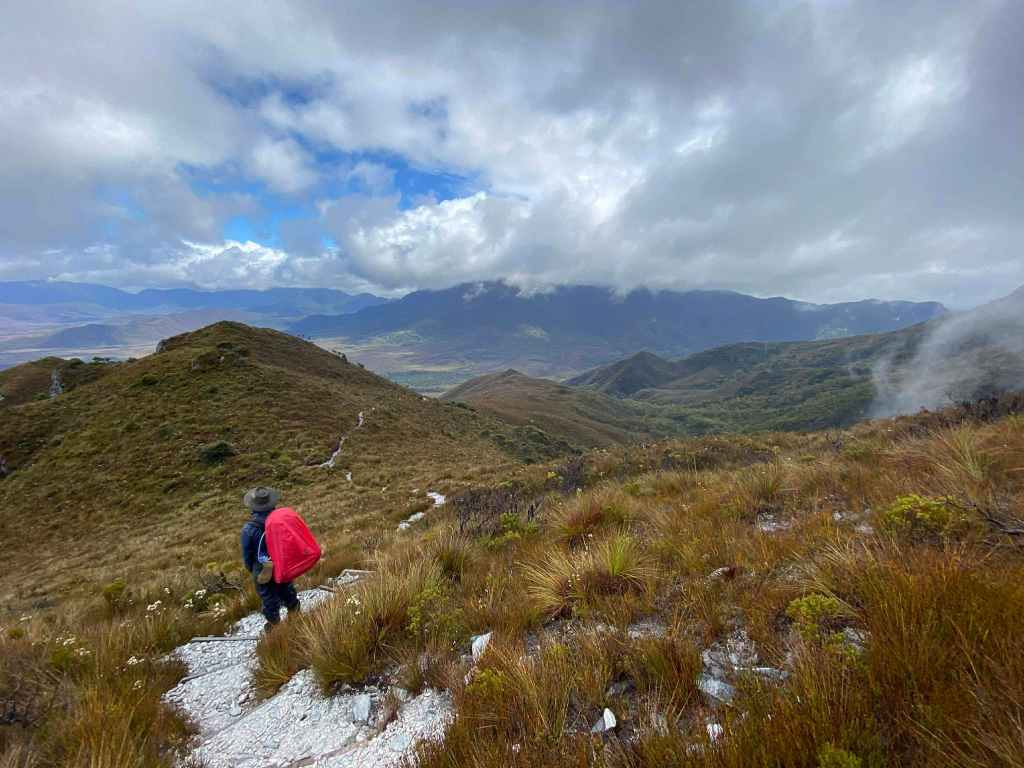
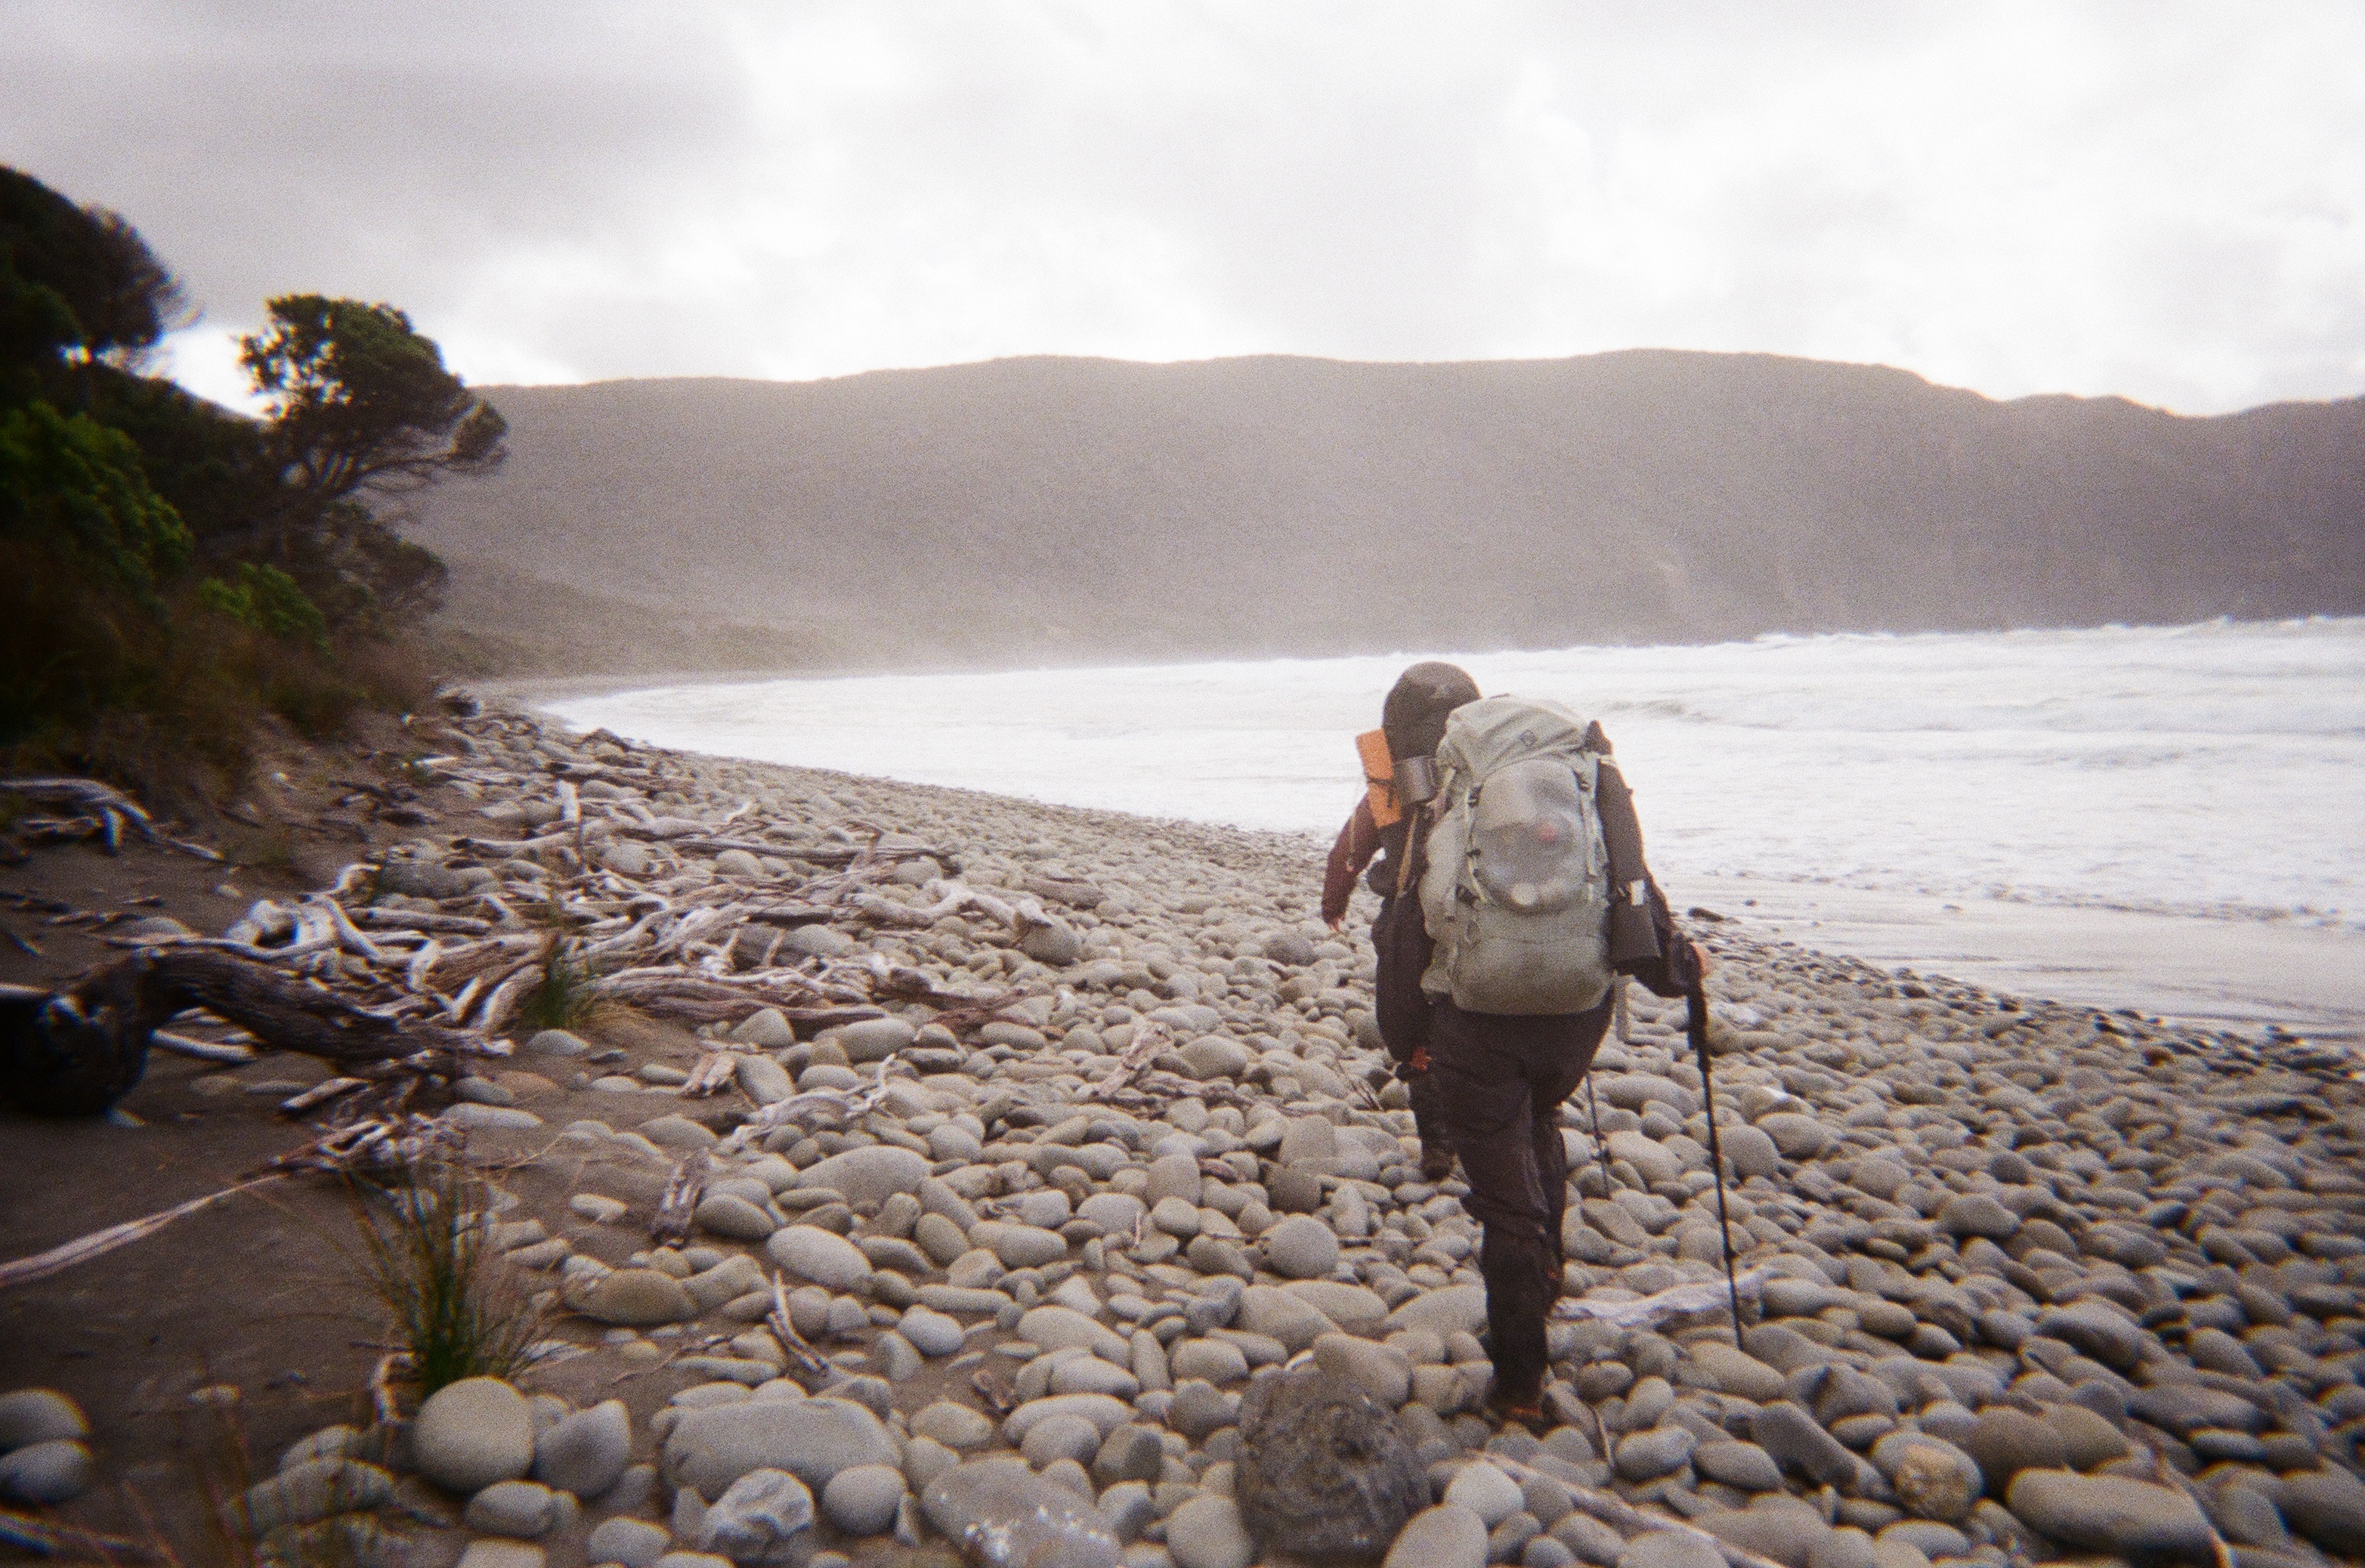
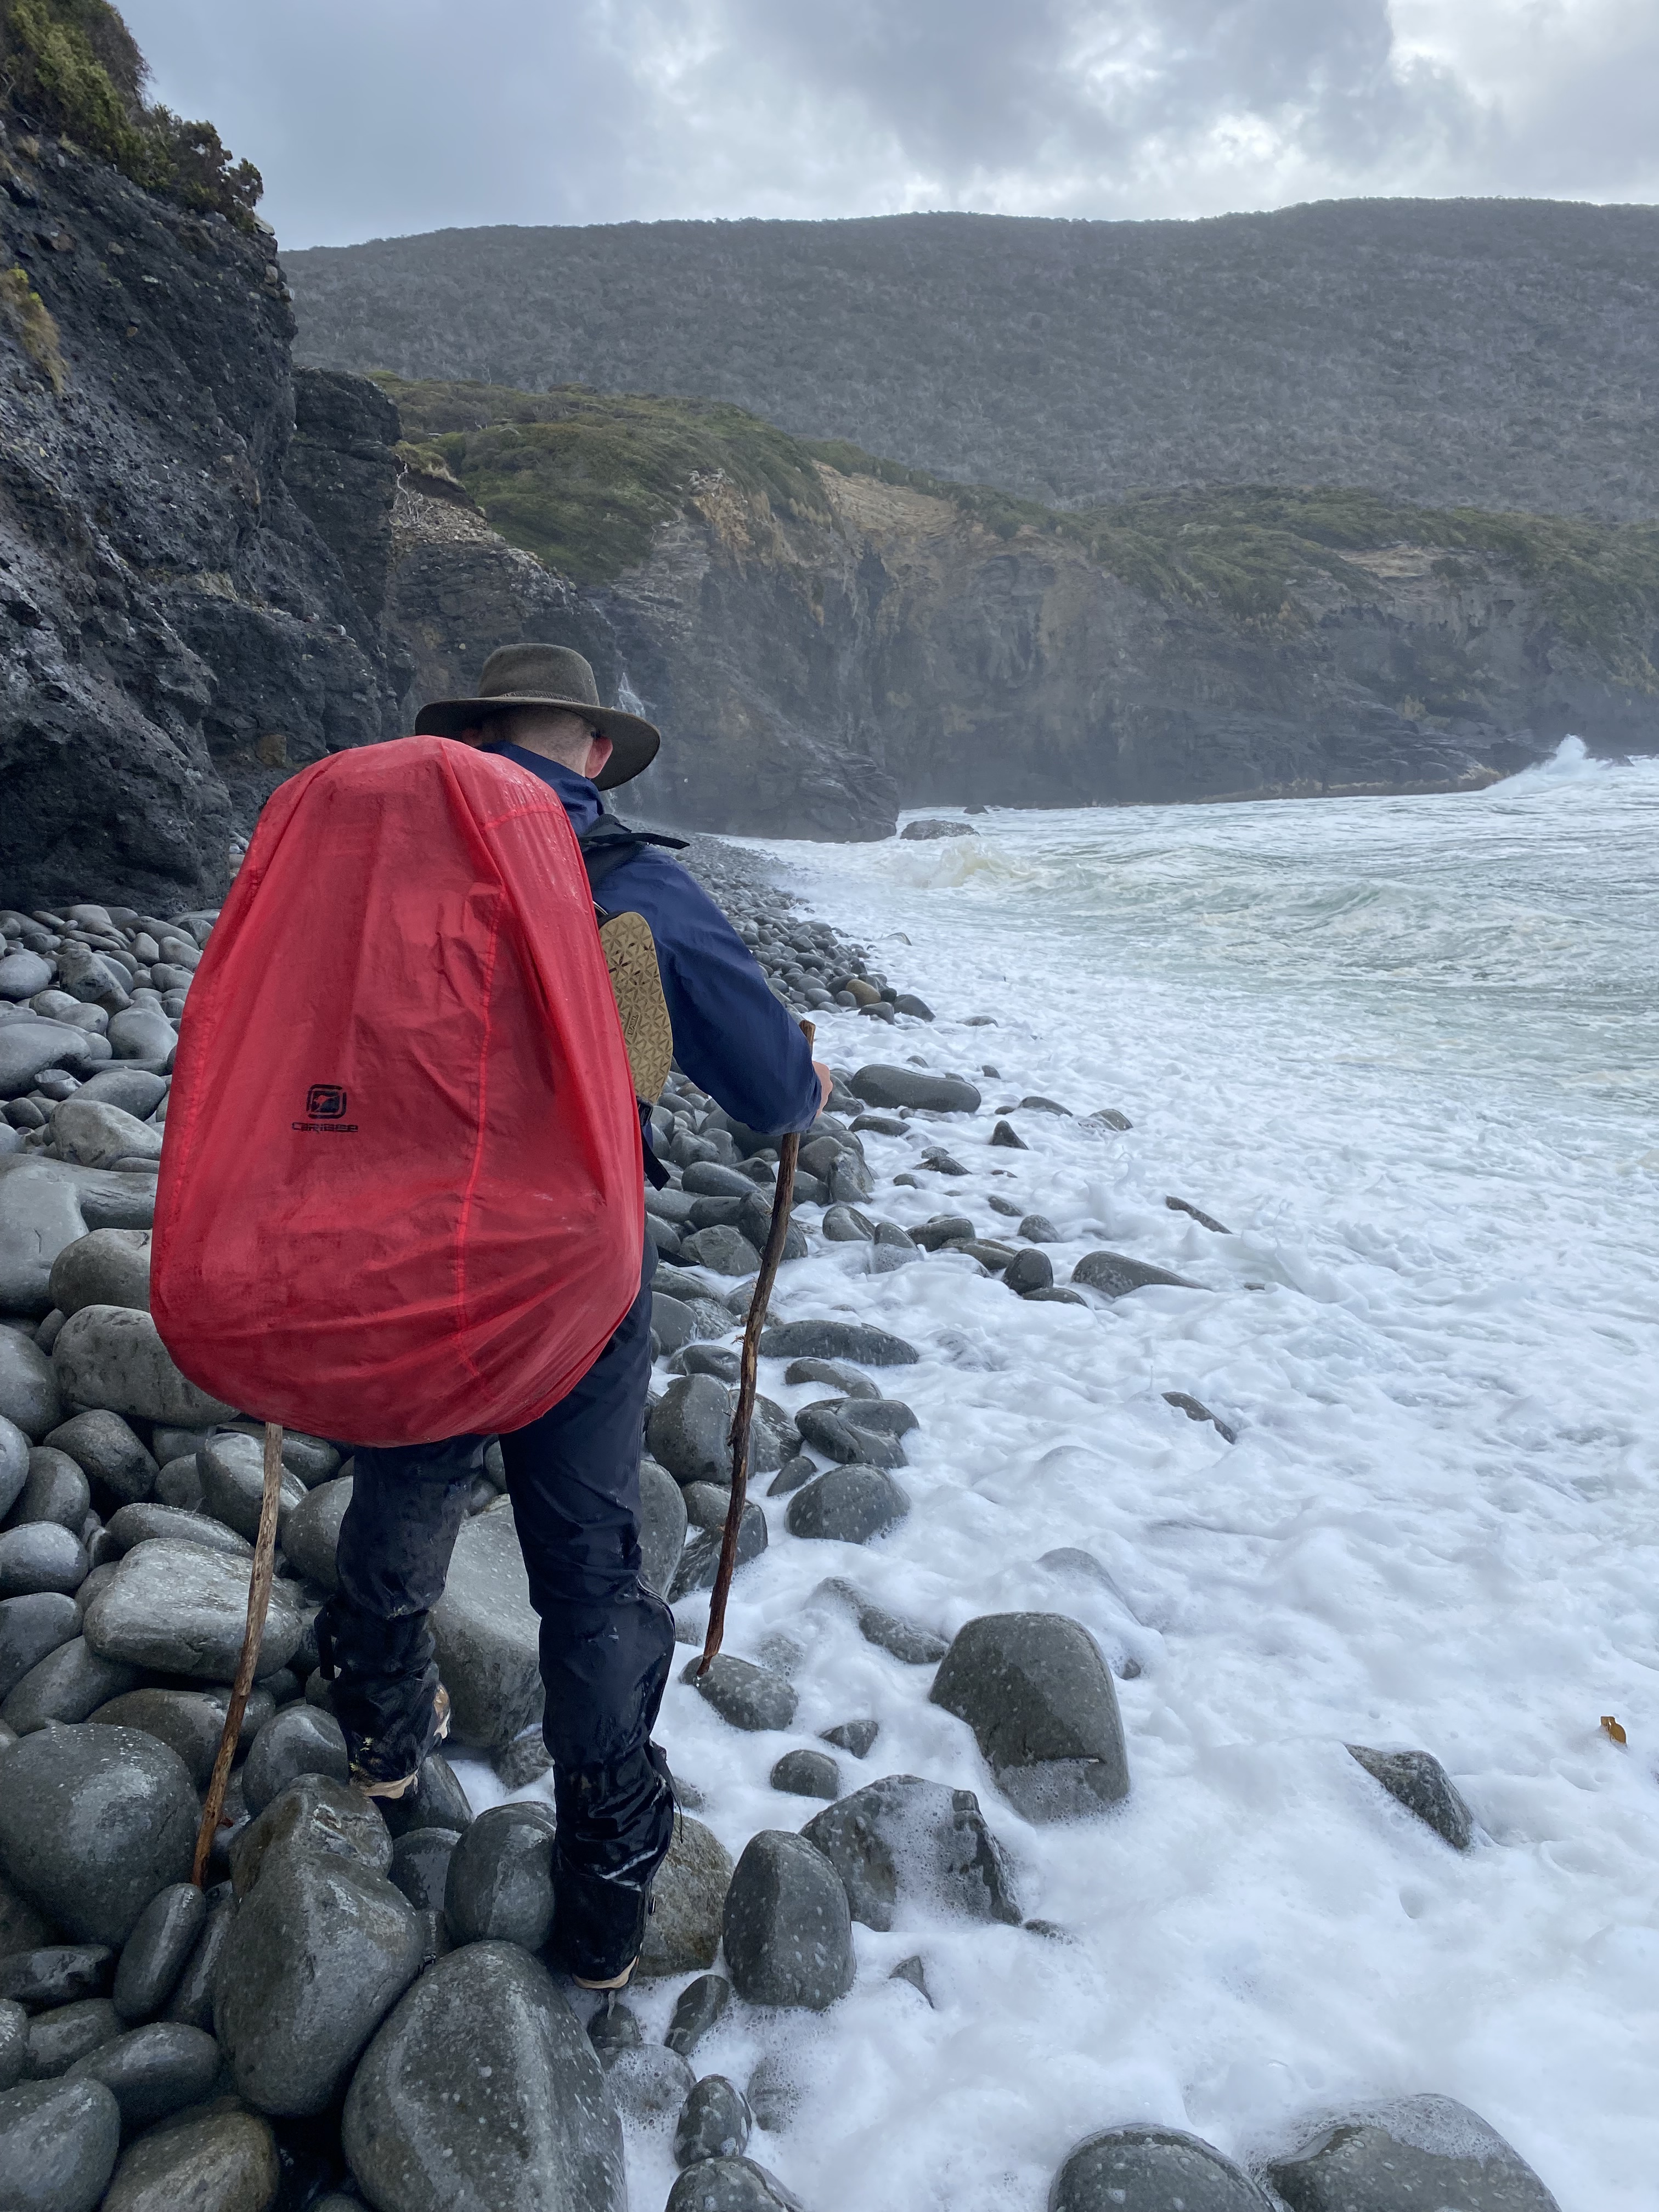
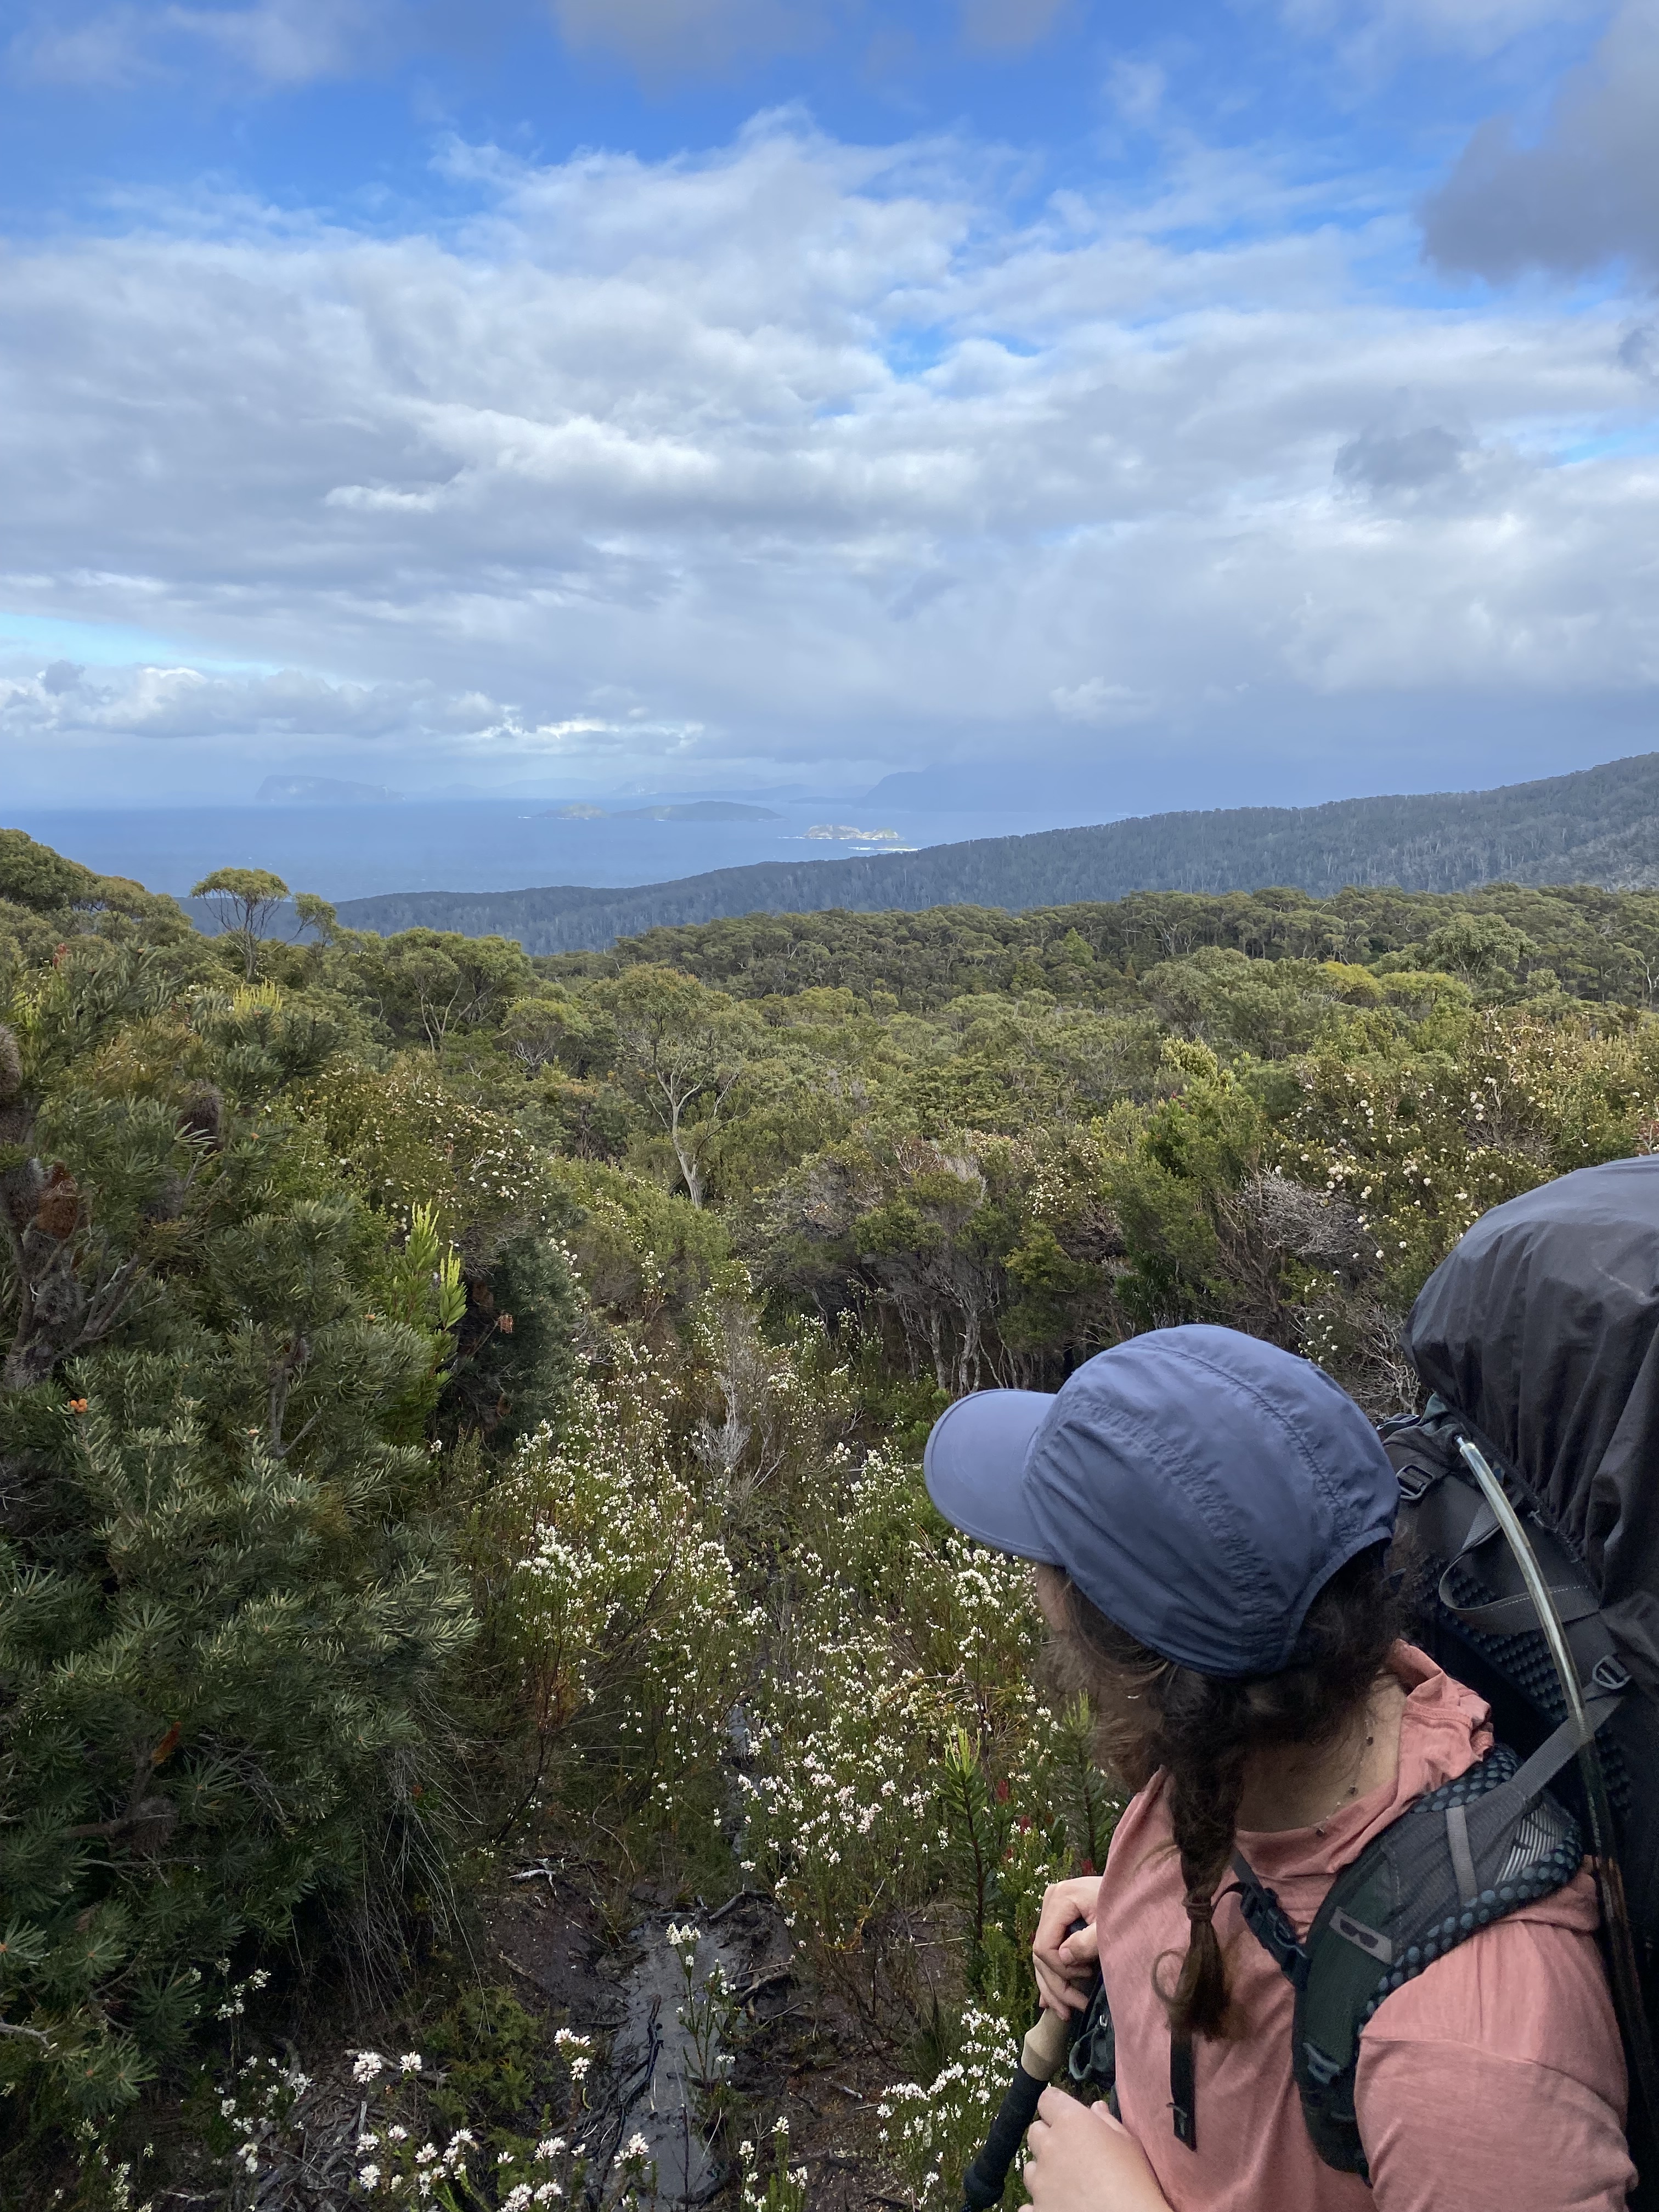
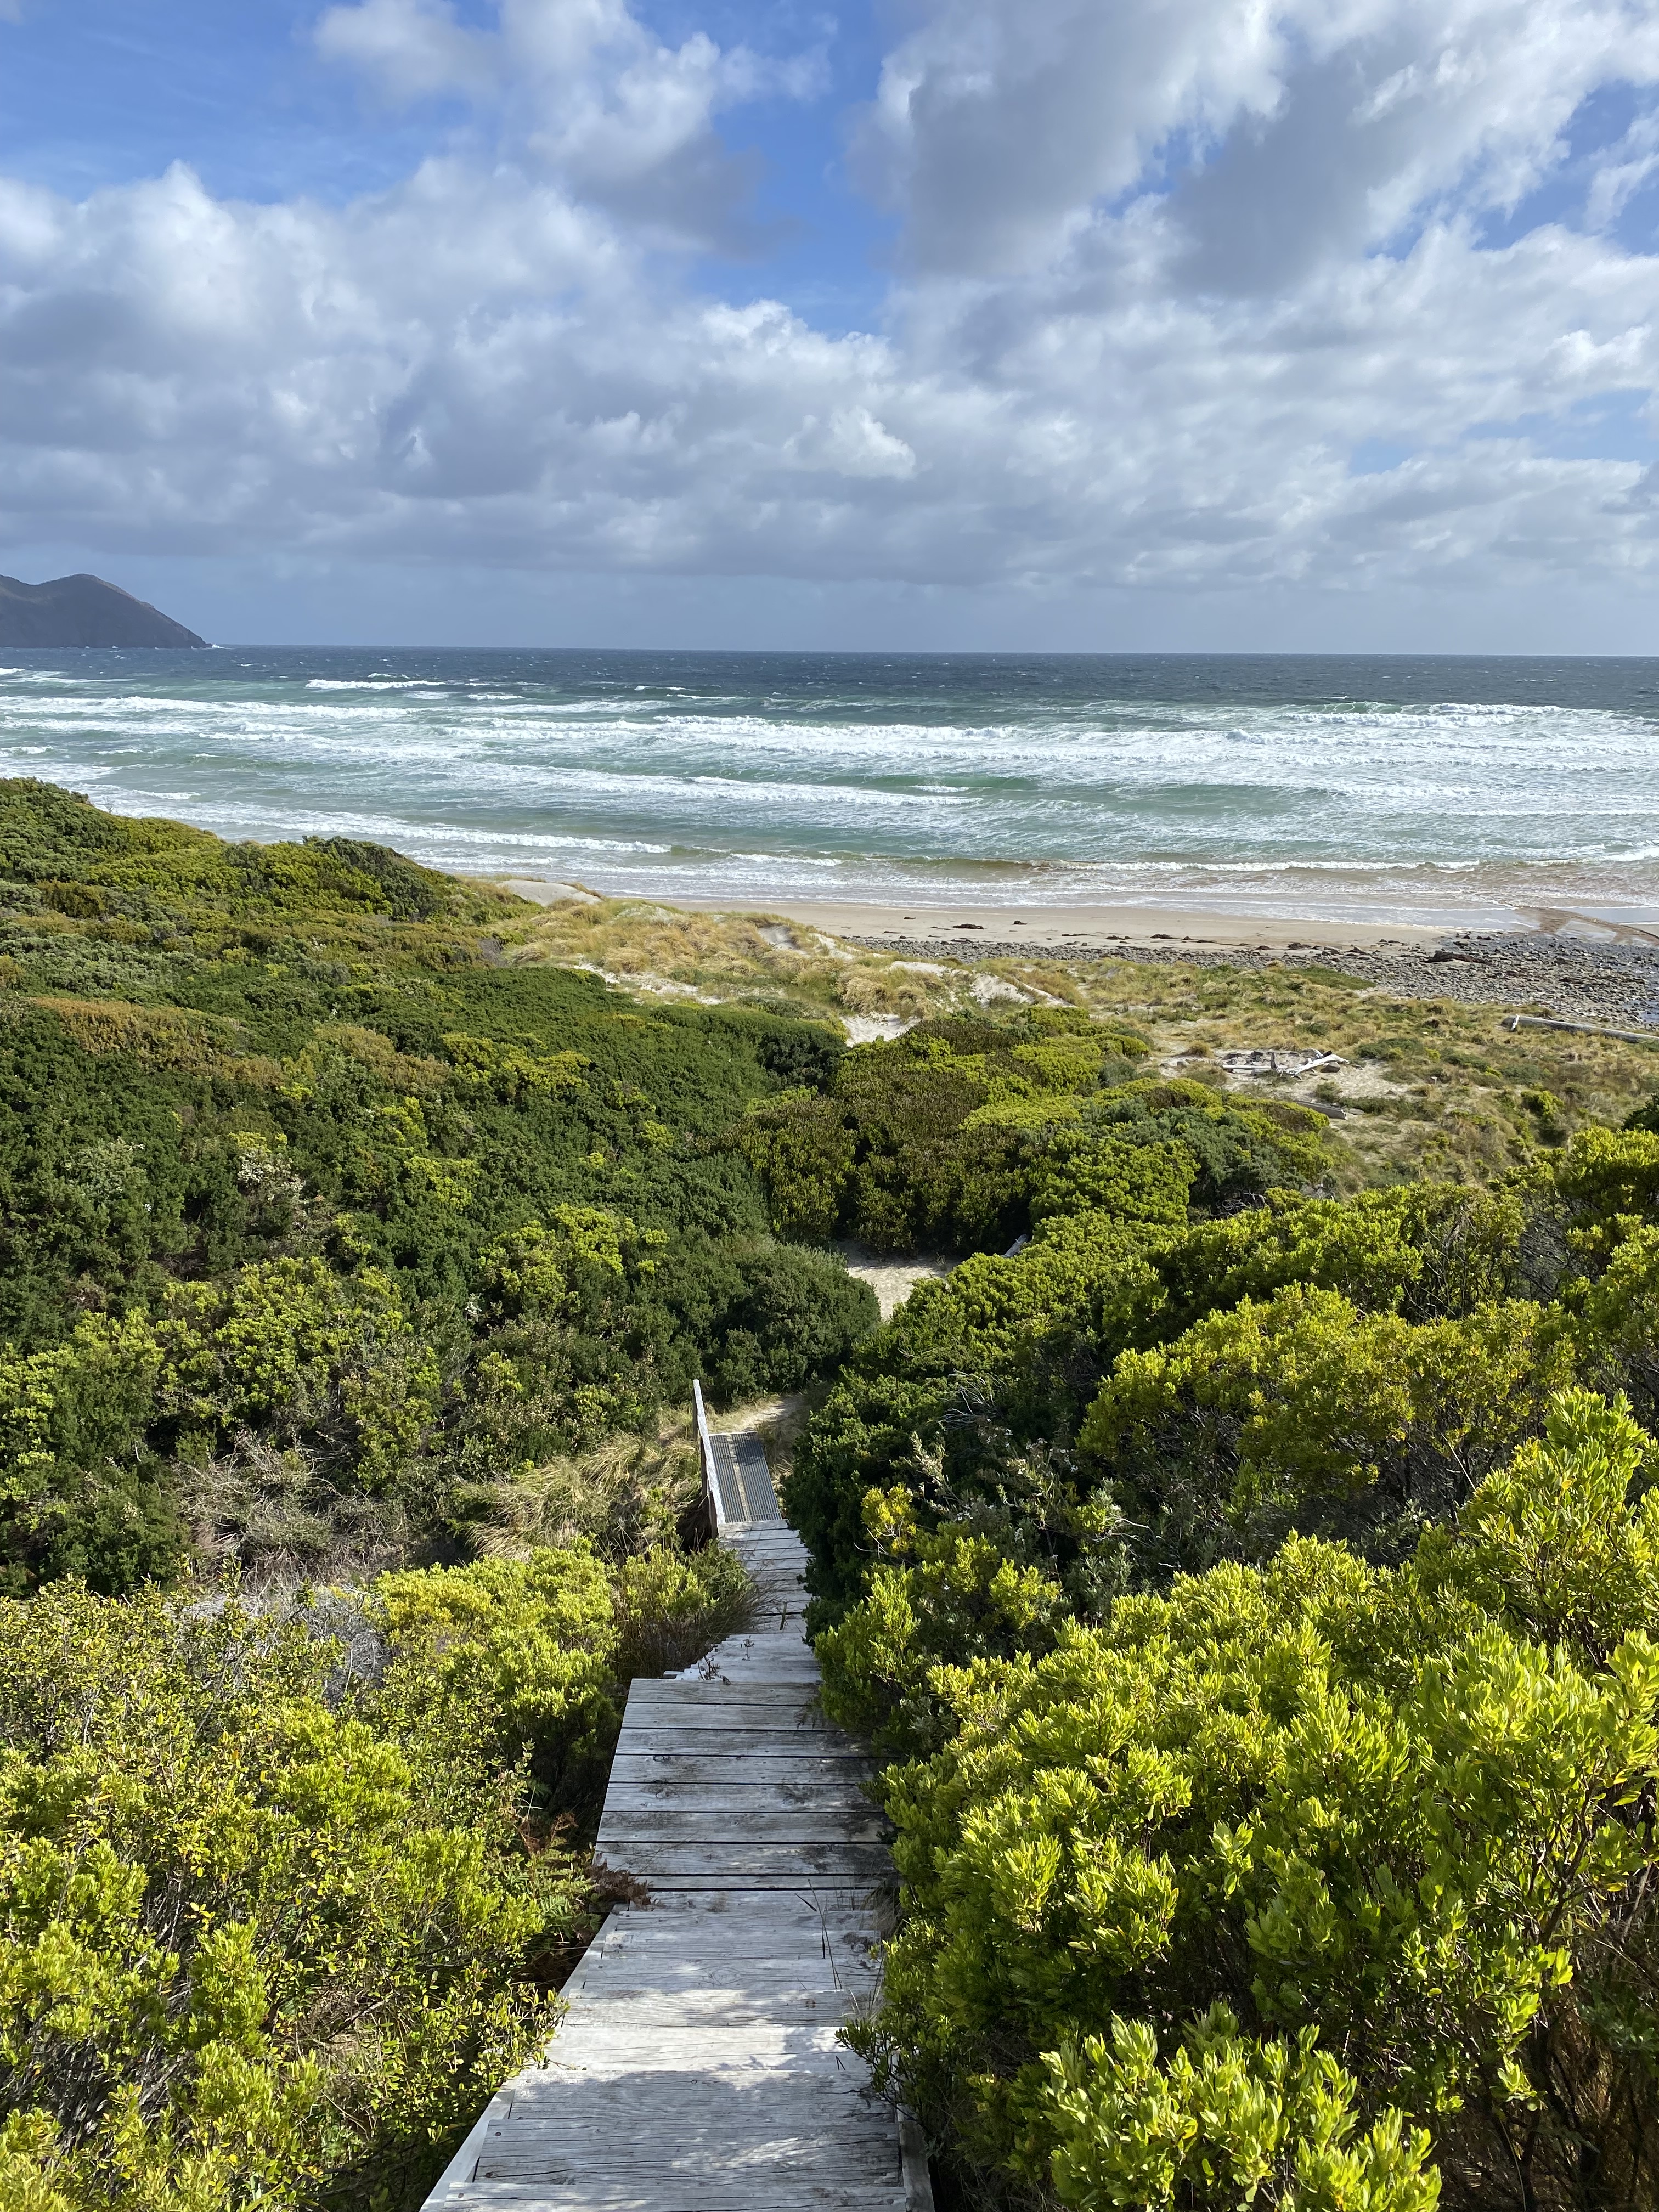
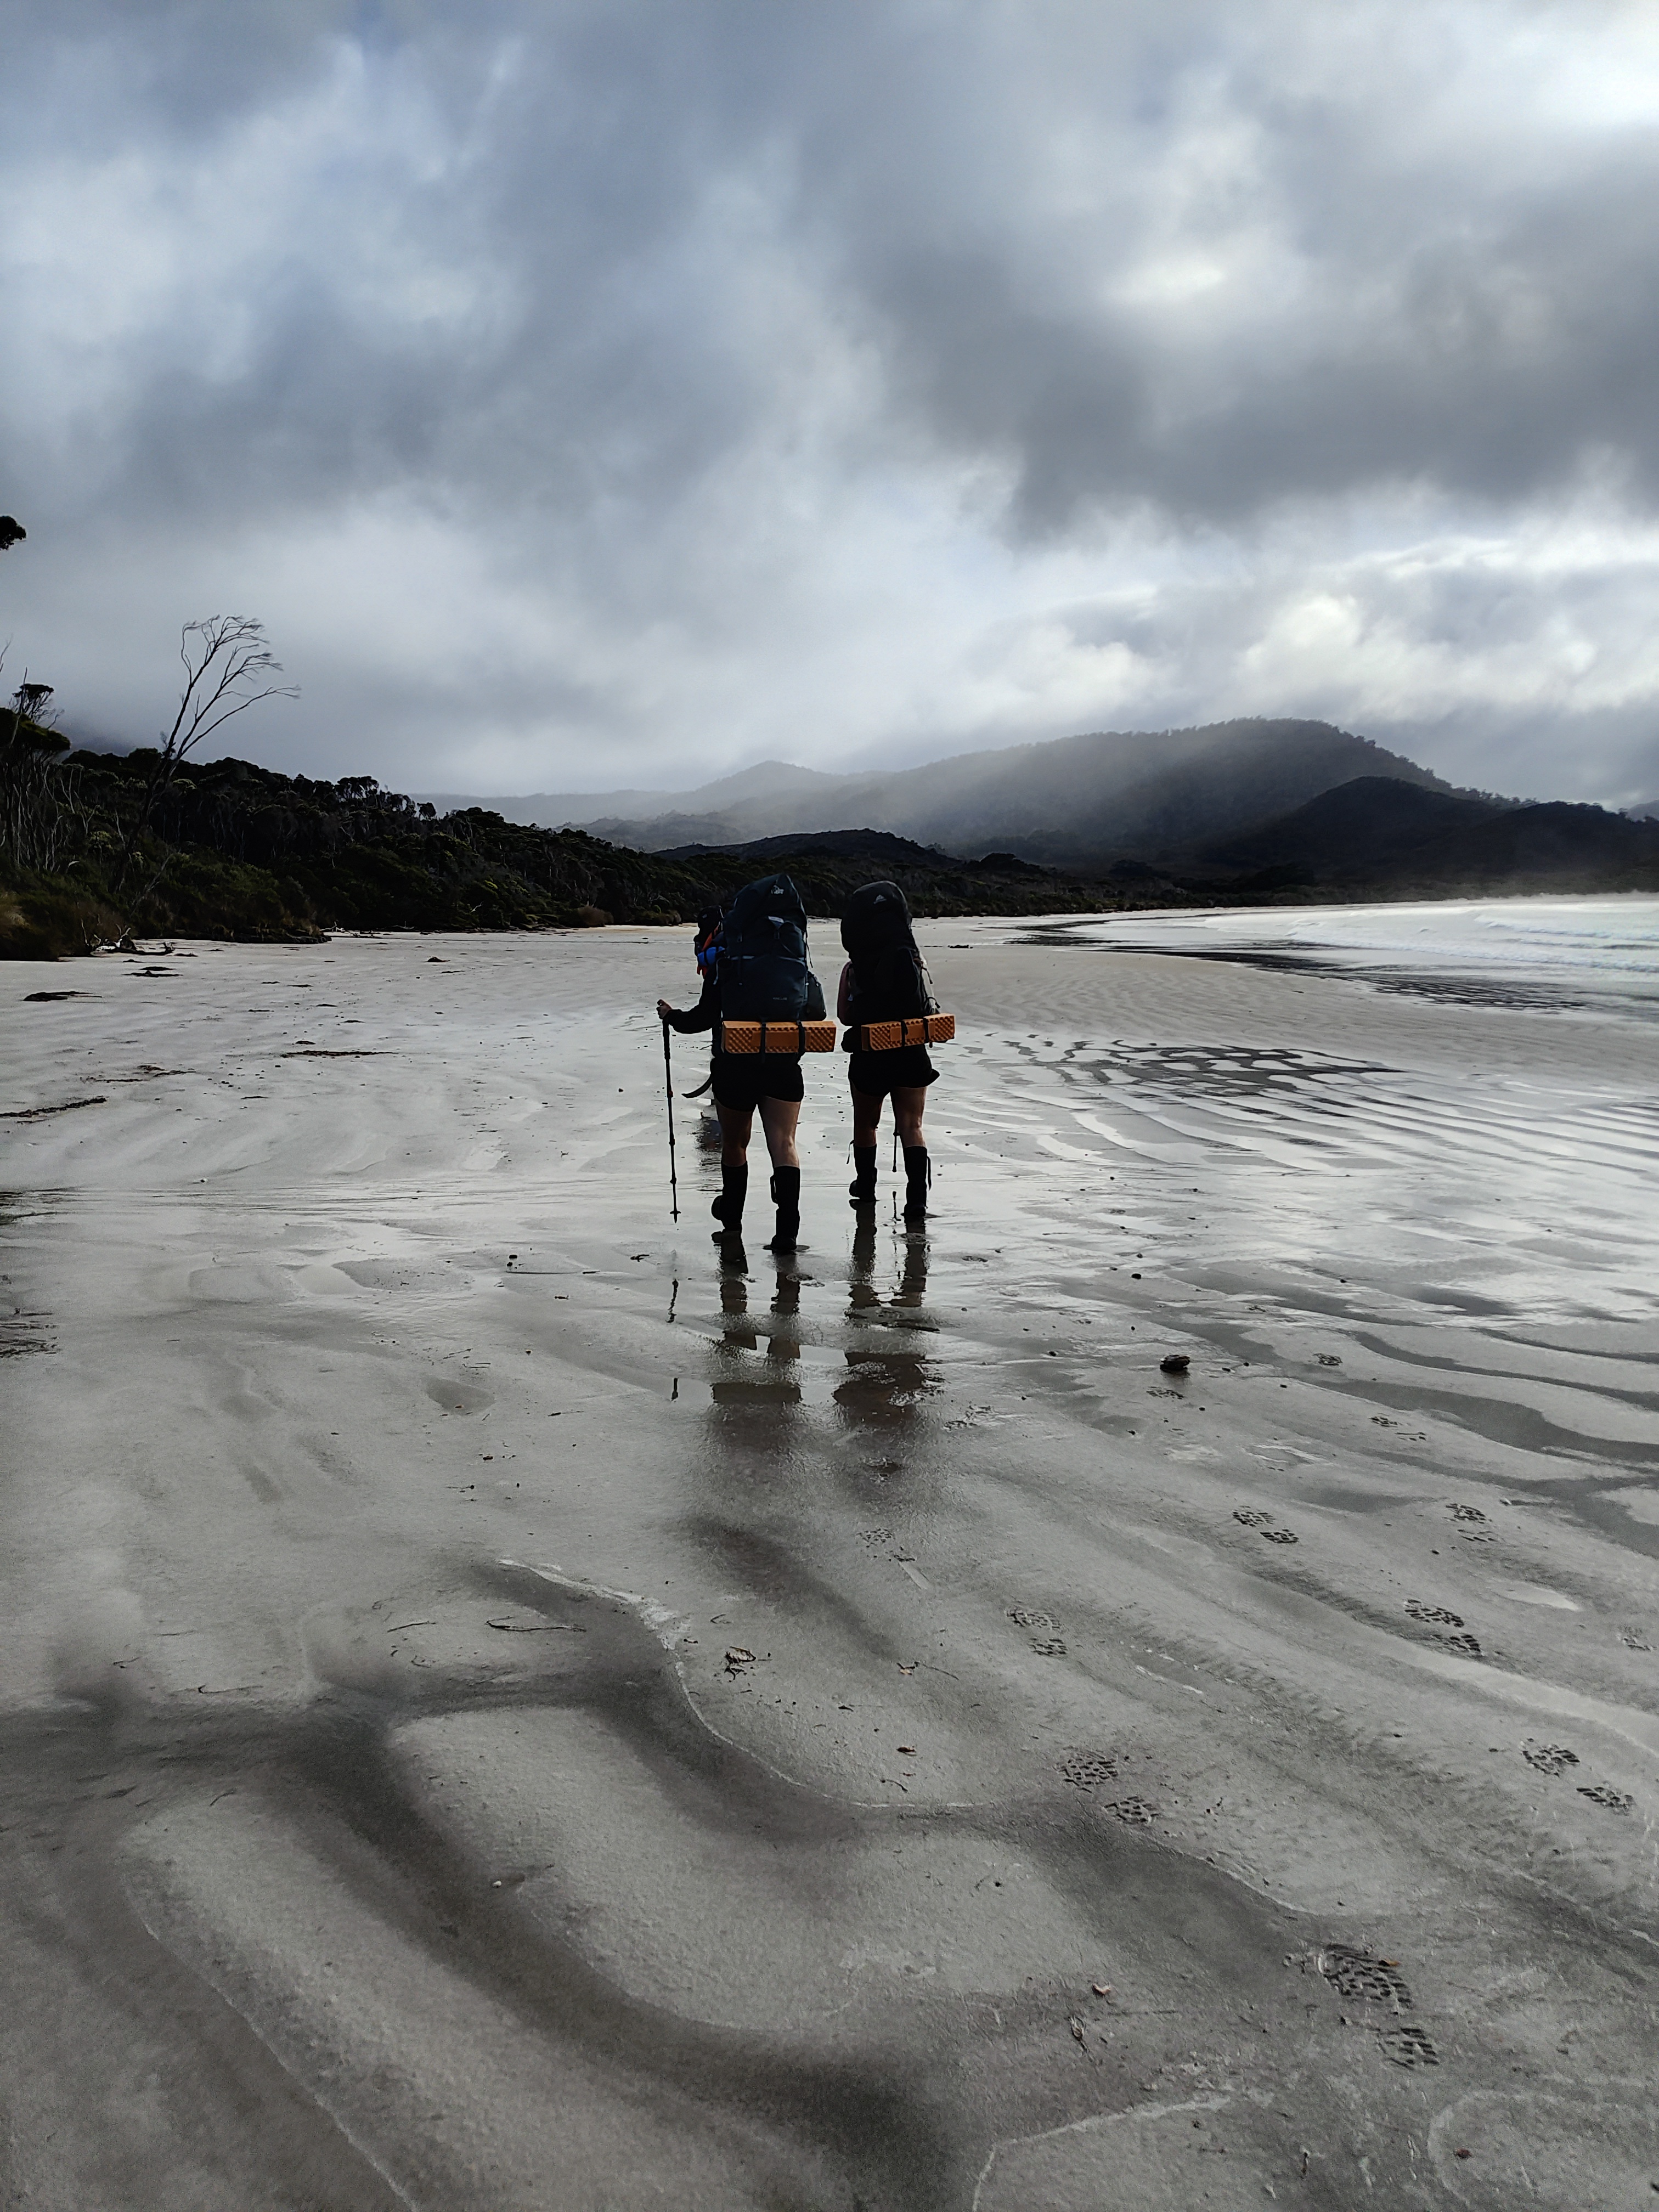
We landed about 3:30pm and were walking by 4pm. We were immediately aware of how exposed the trail was, with lots of low shrub which didn’t offer much protection from the wind. Day 1 is fairly flat walking with some undulating hills, mostly on boardwalk and quartzite gravel.
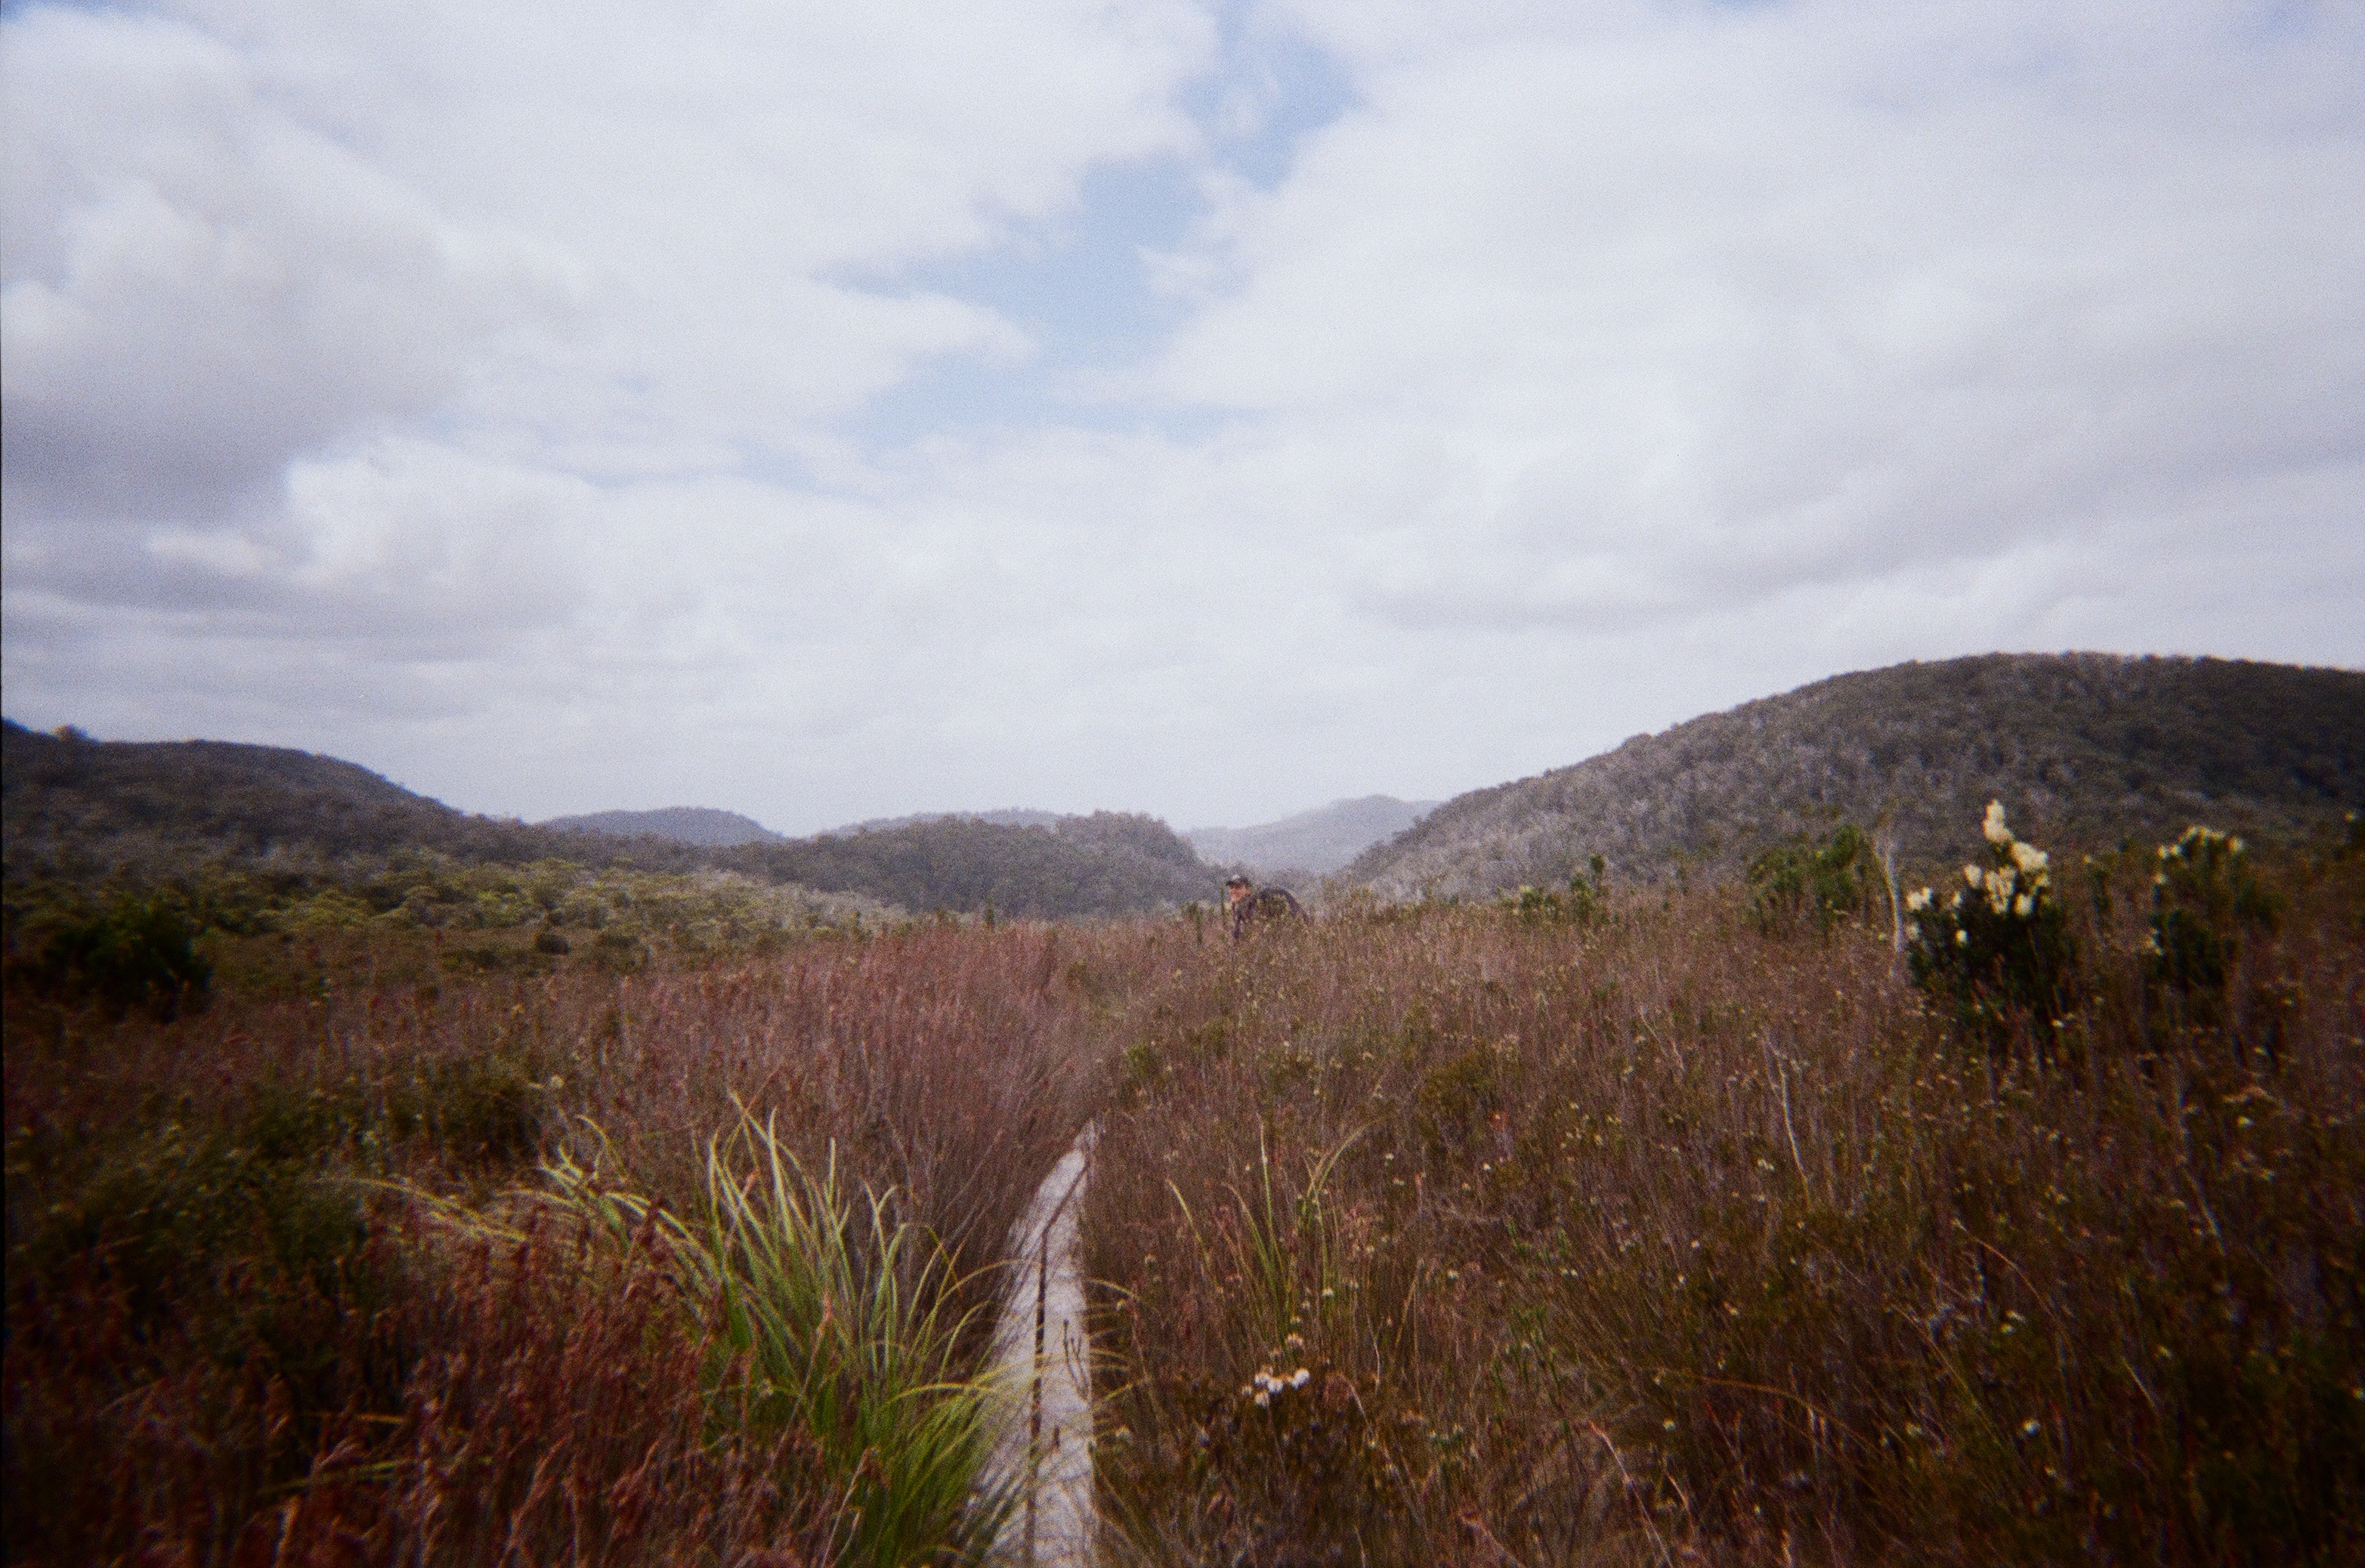
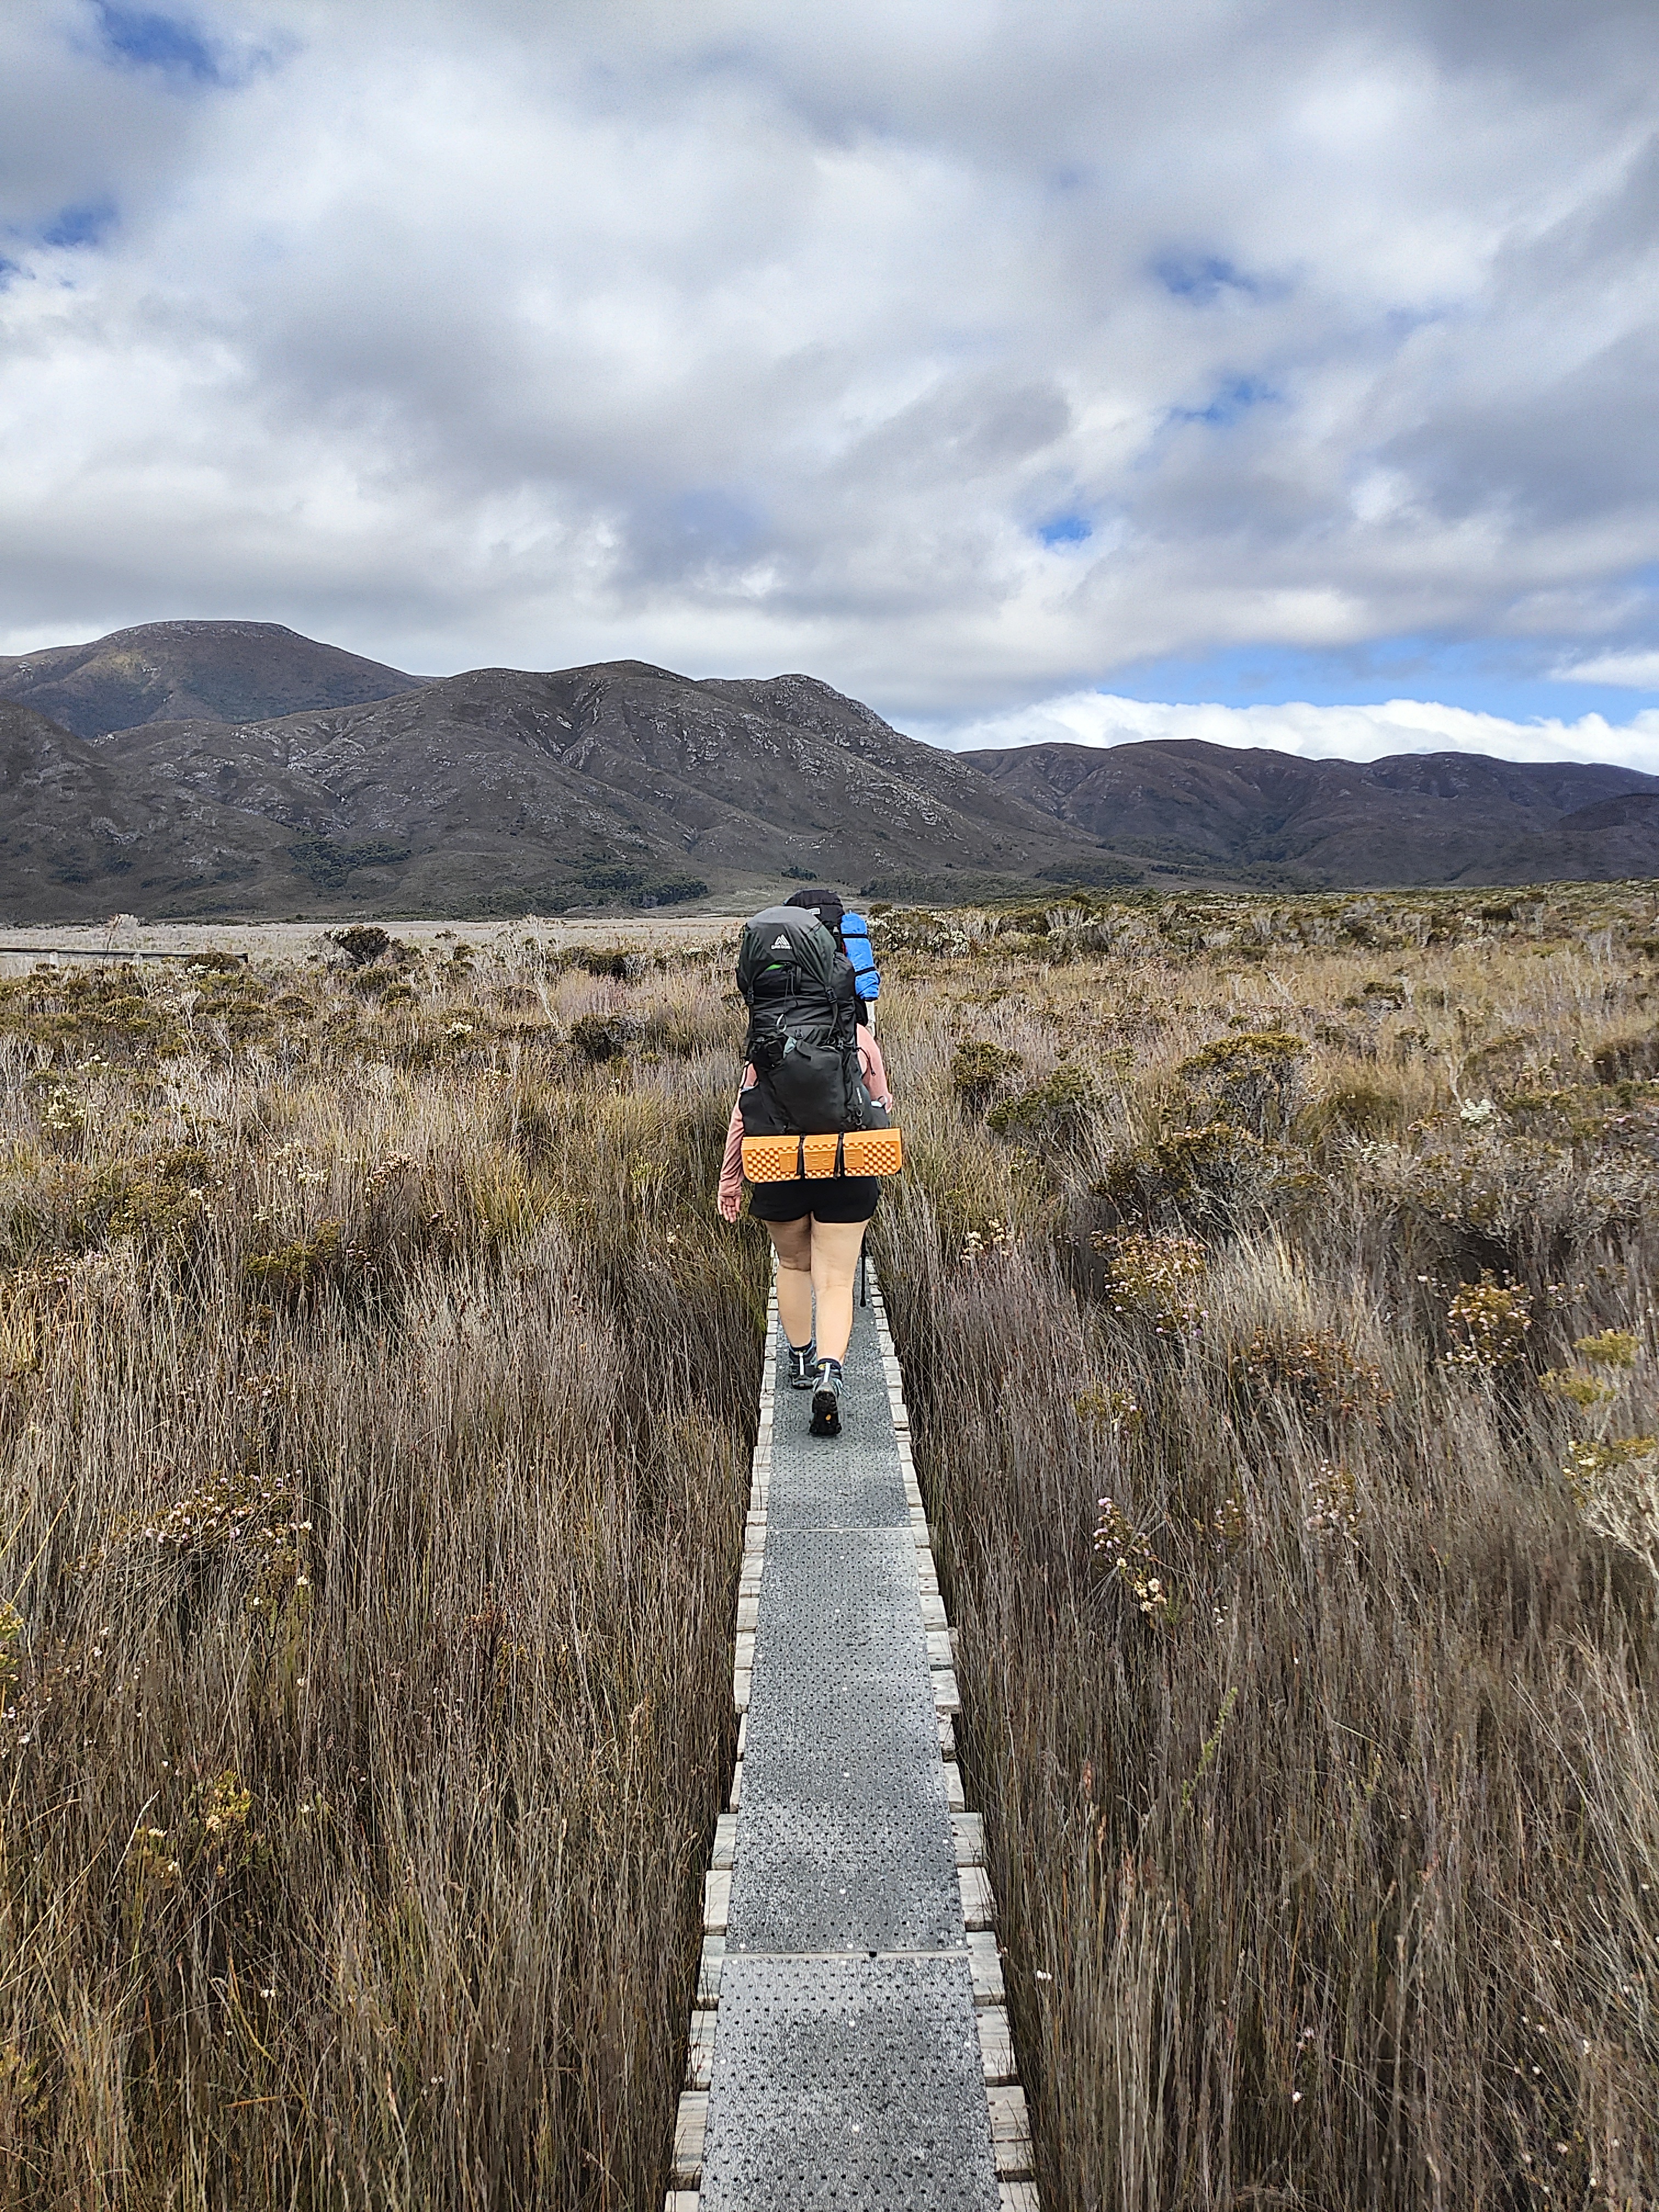
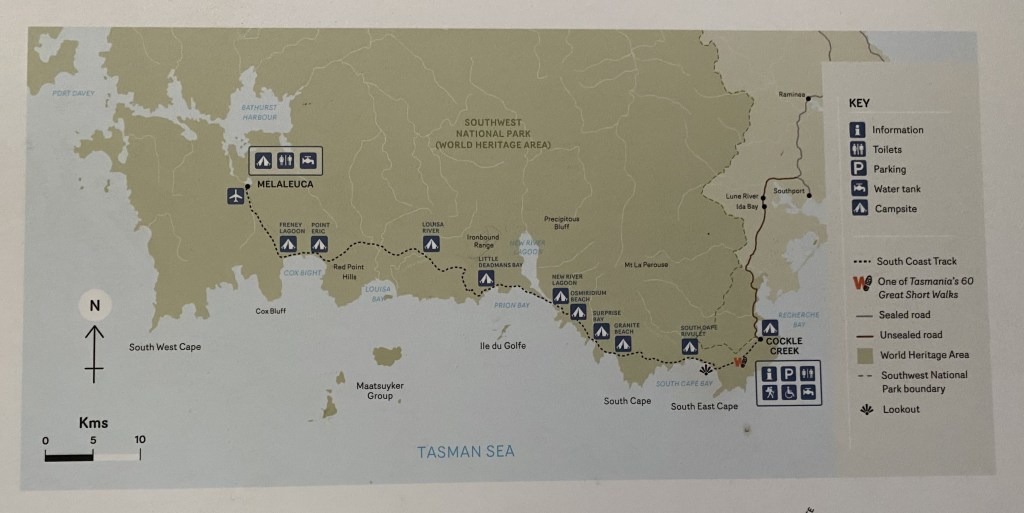
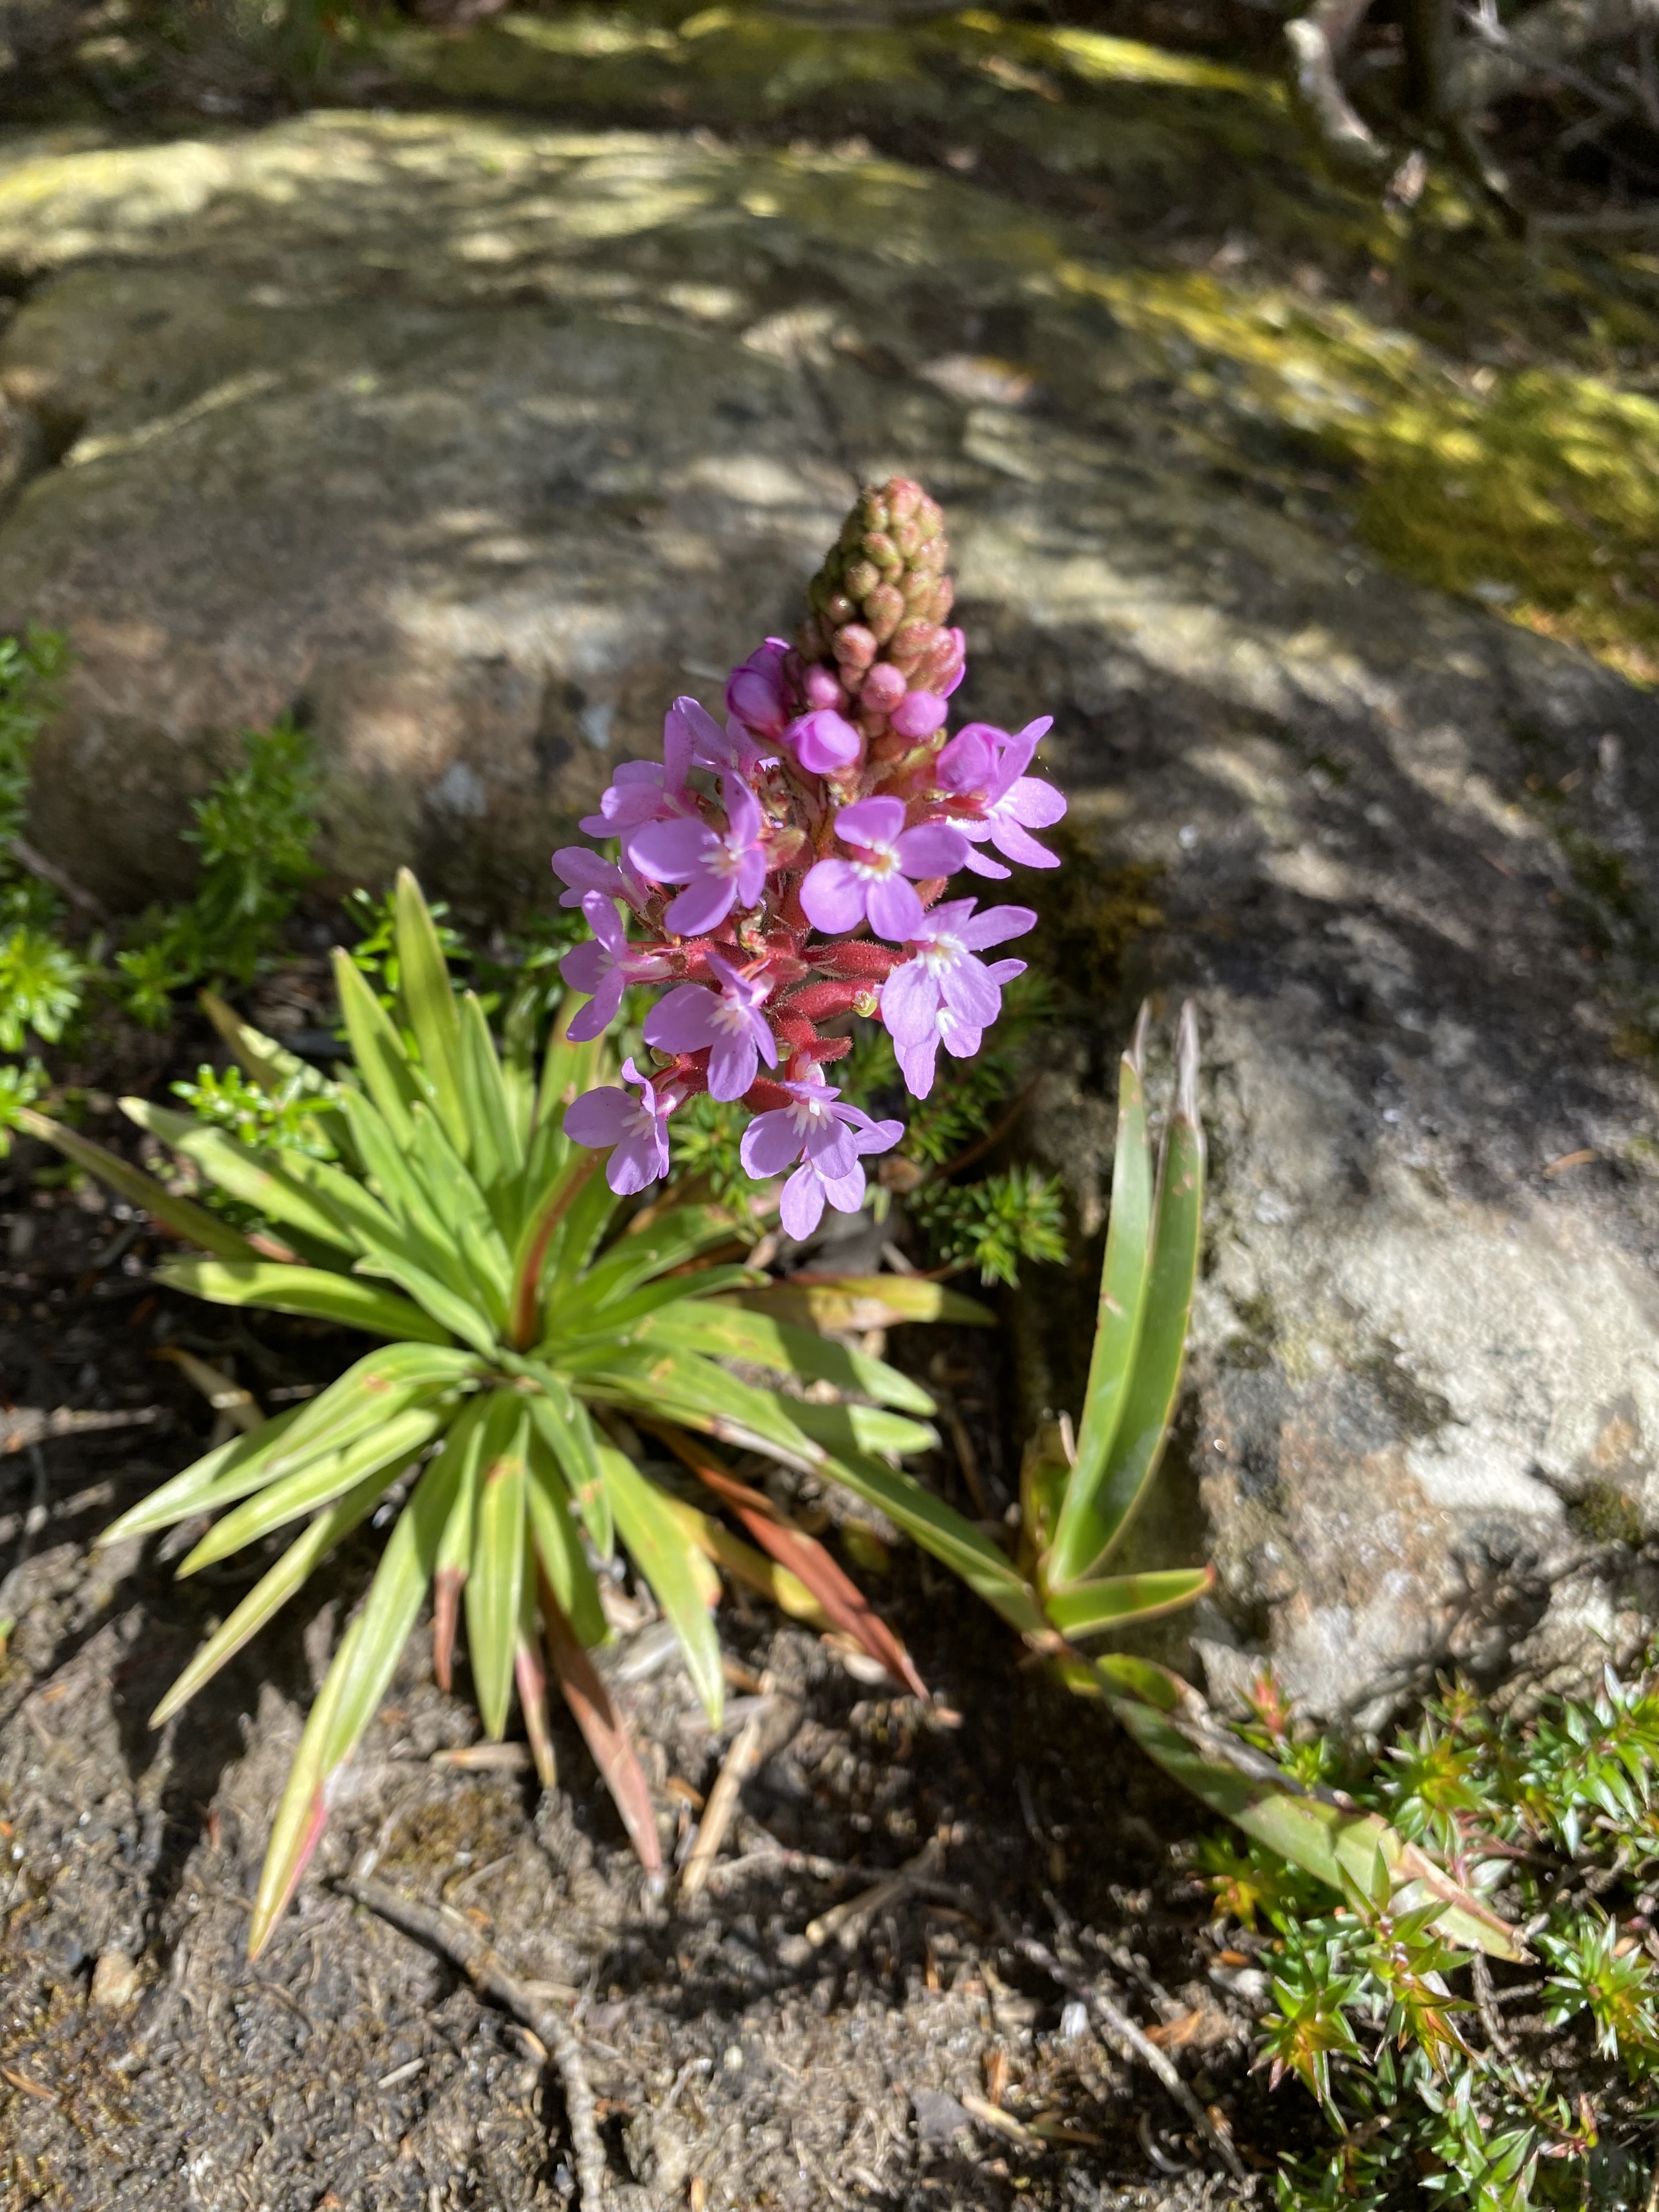
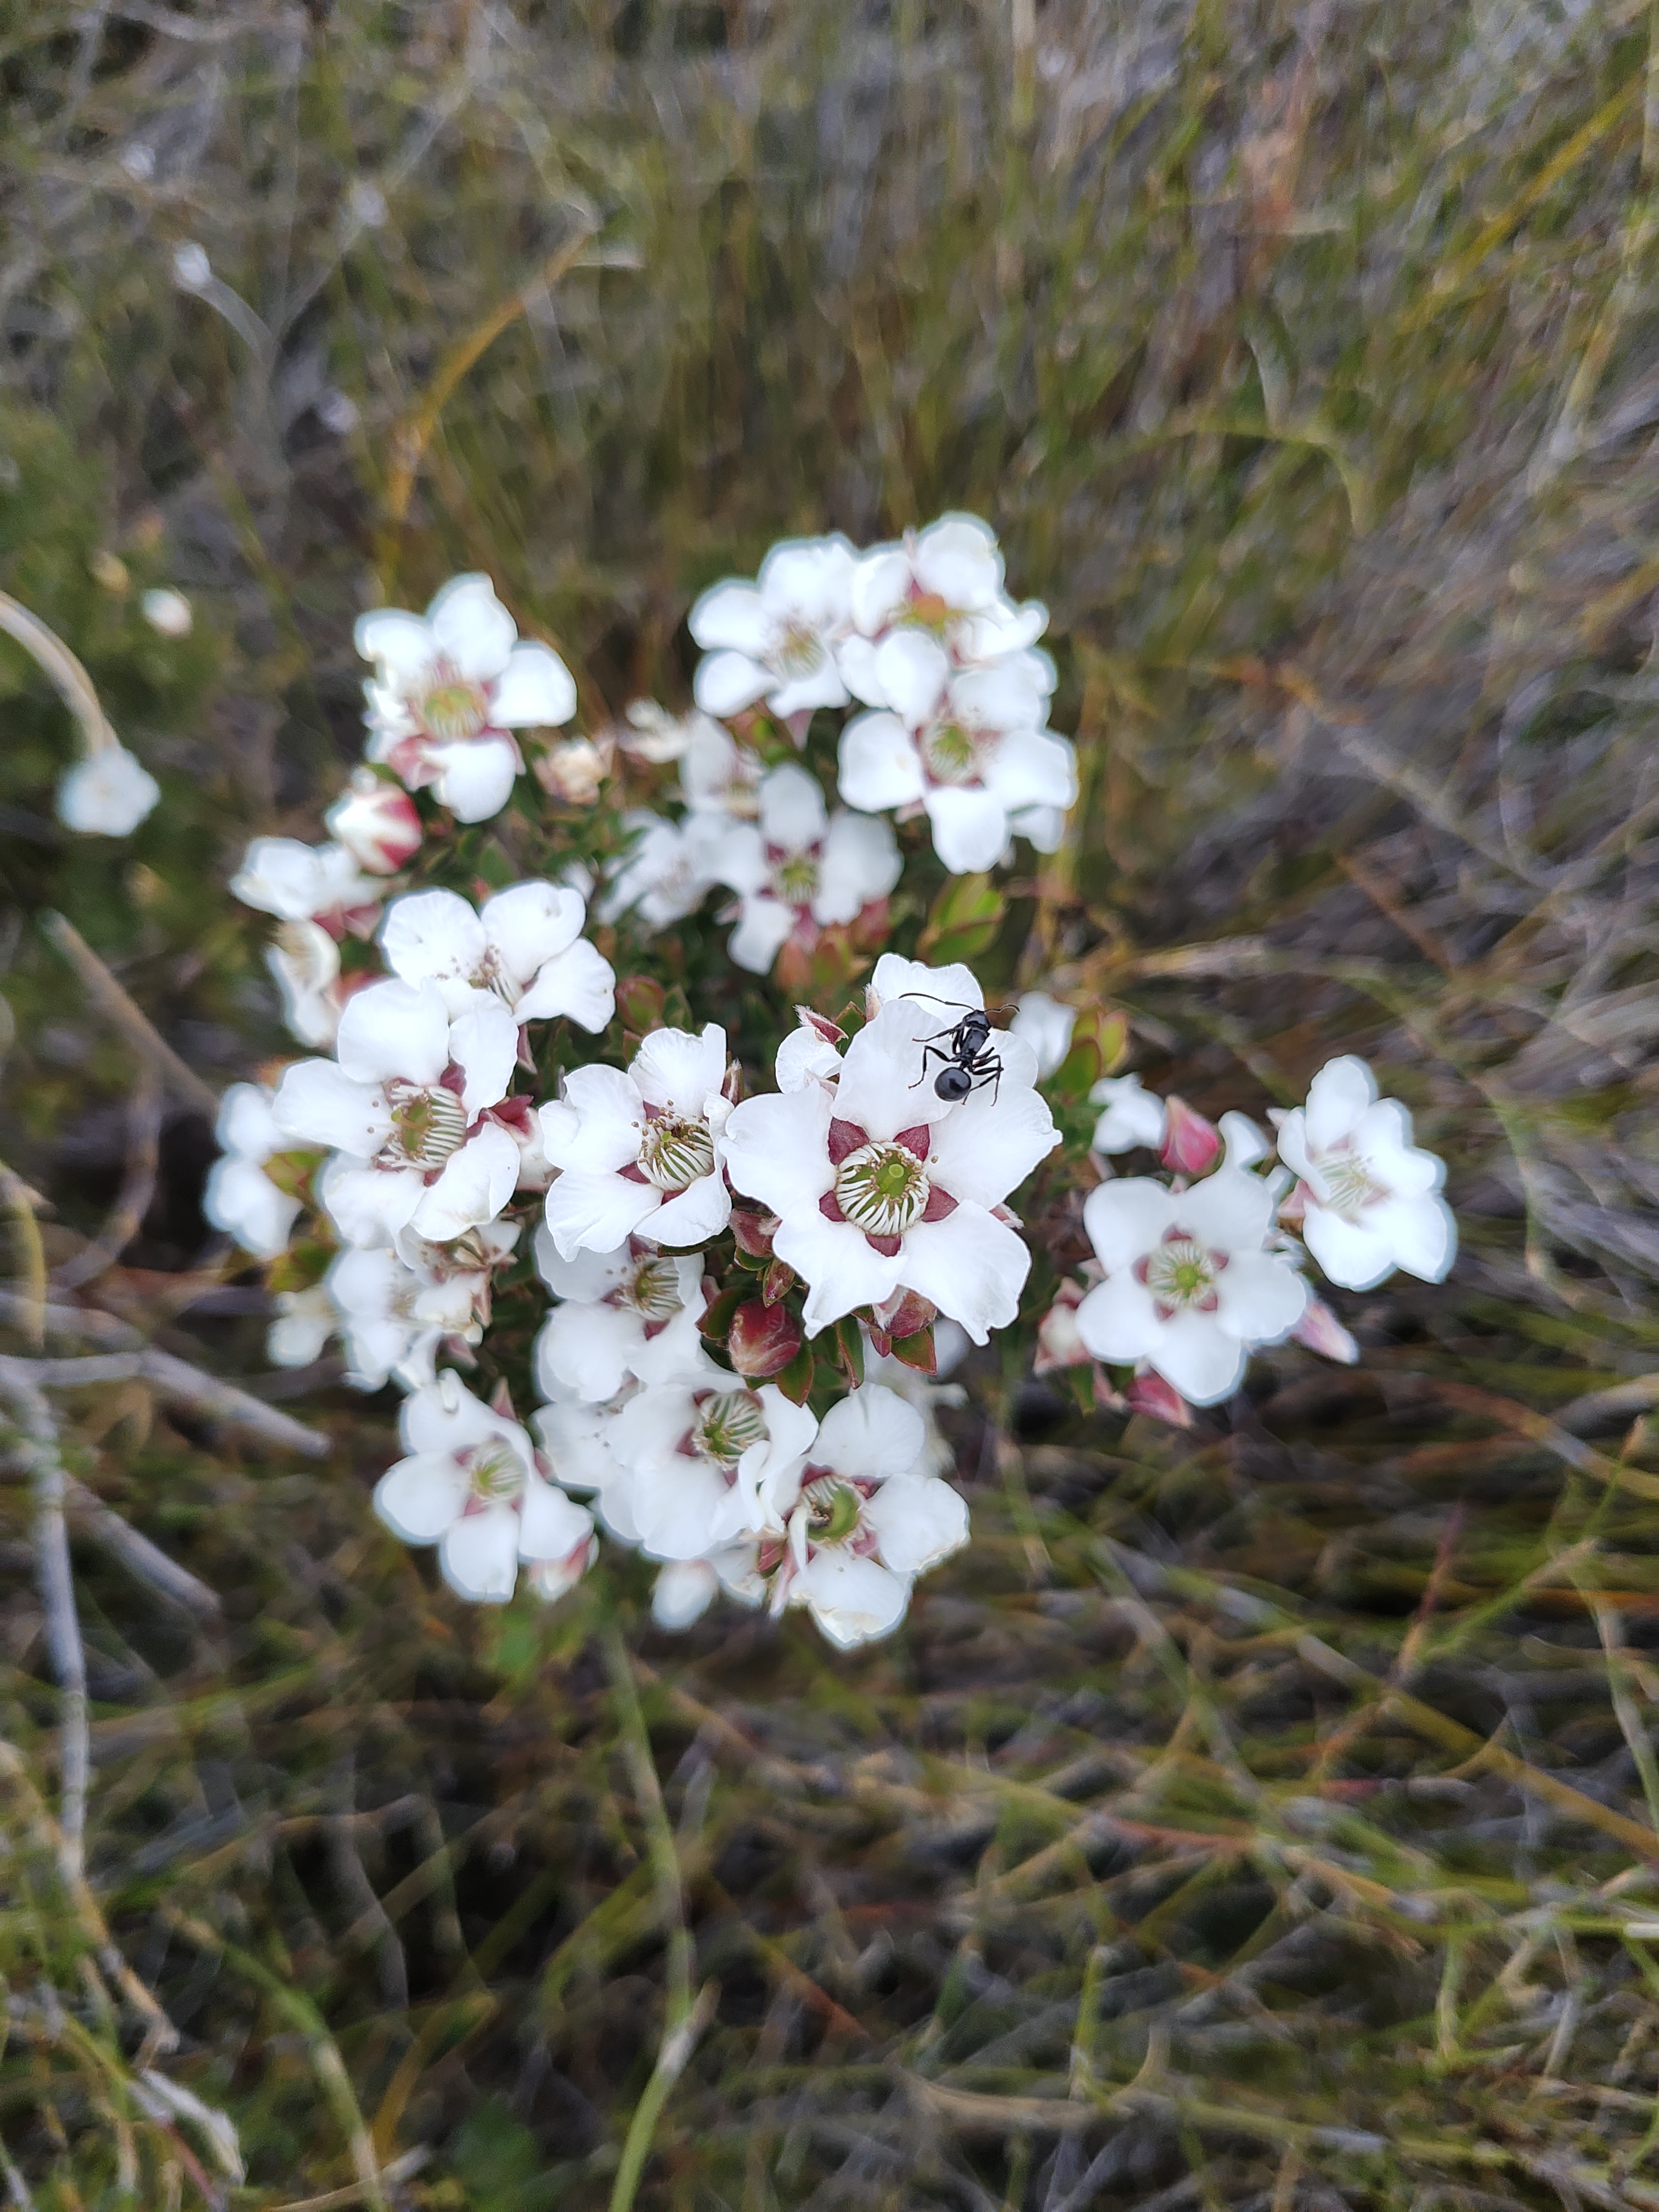
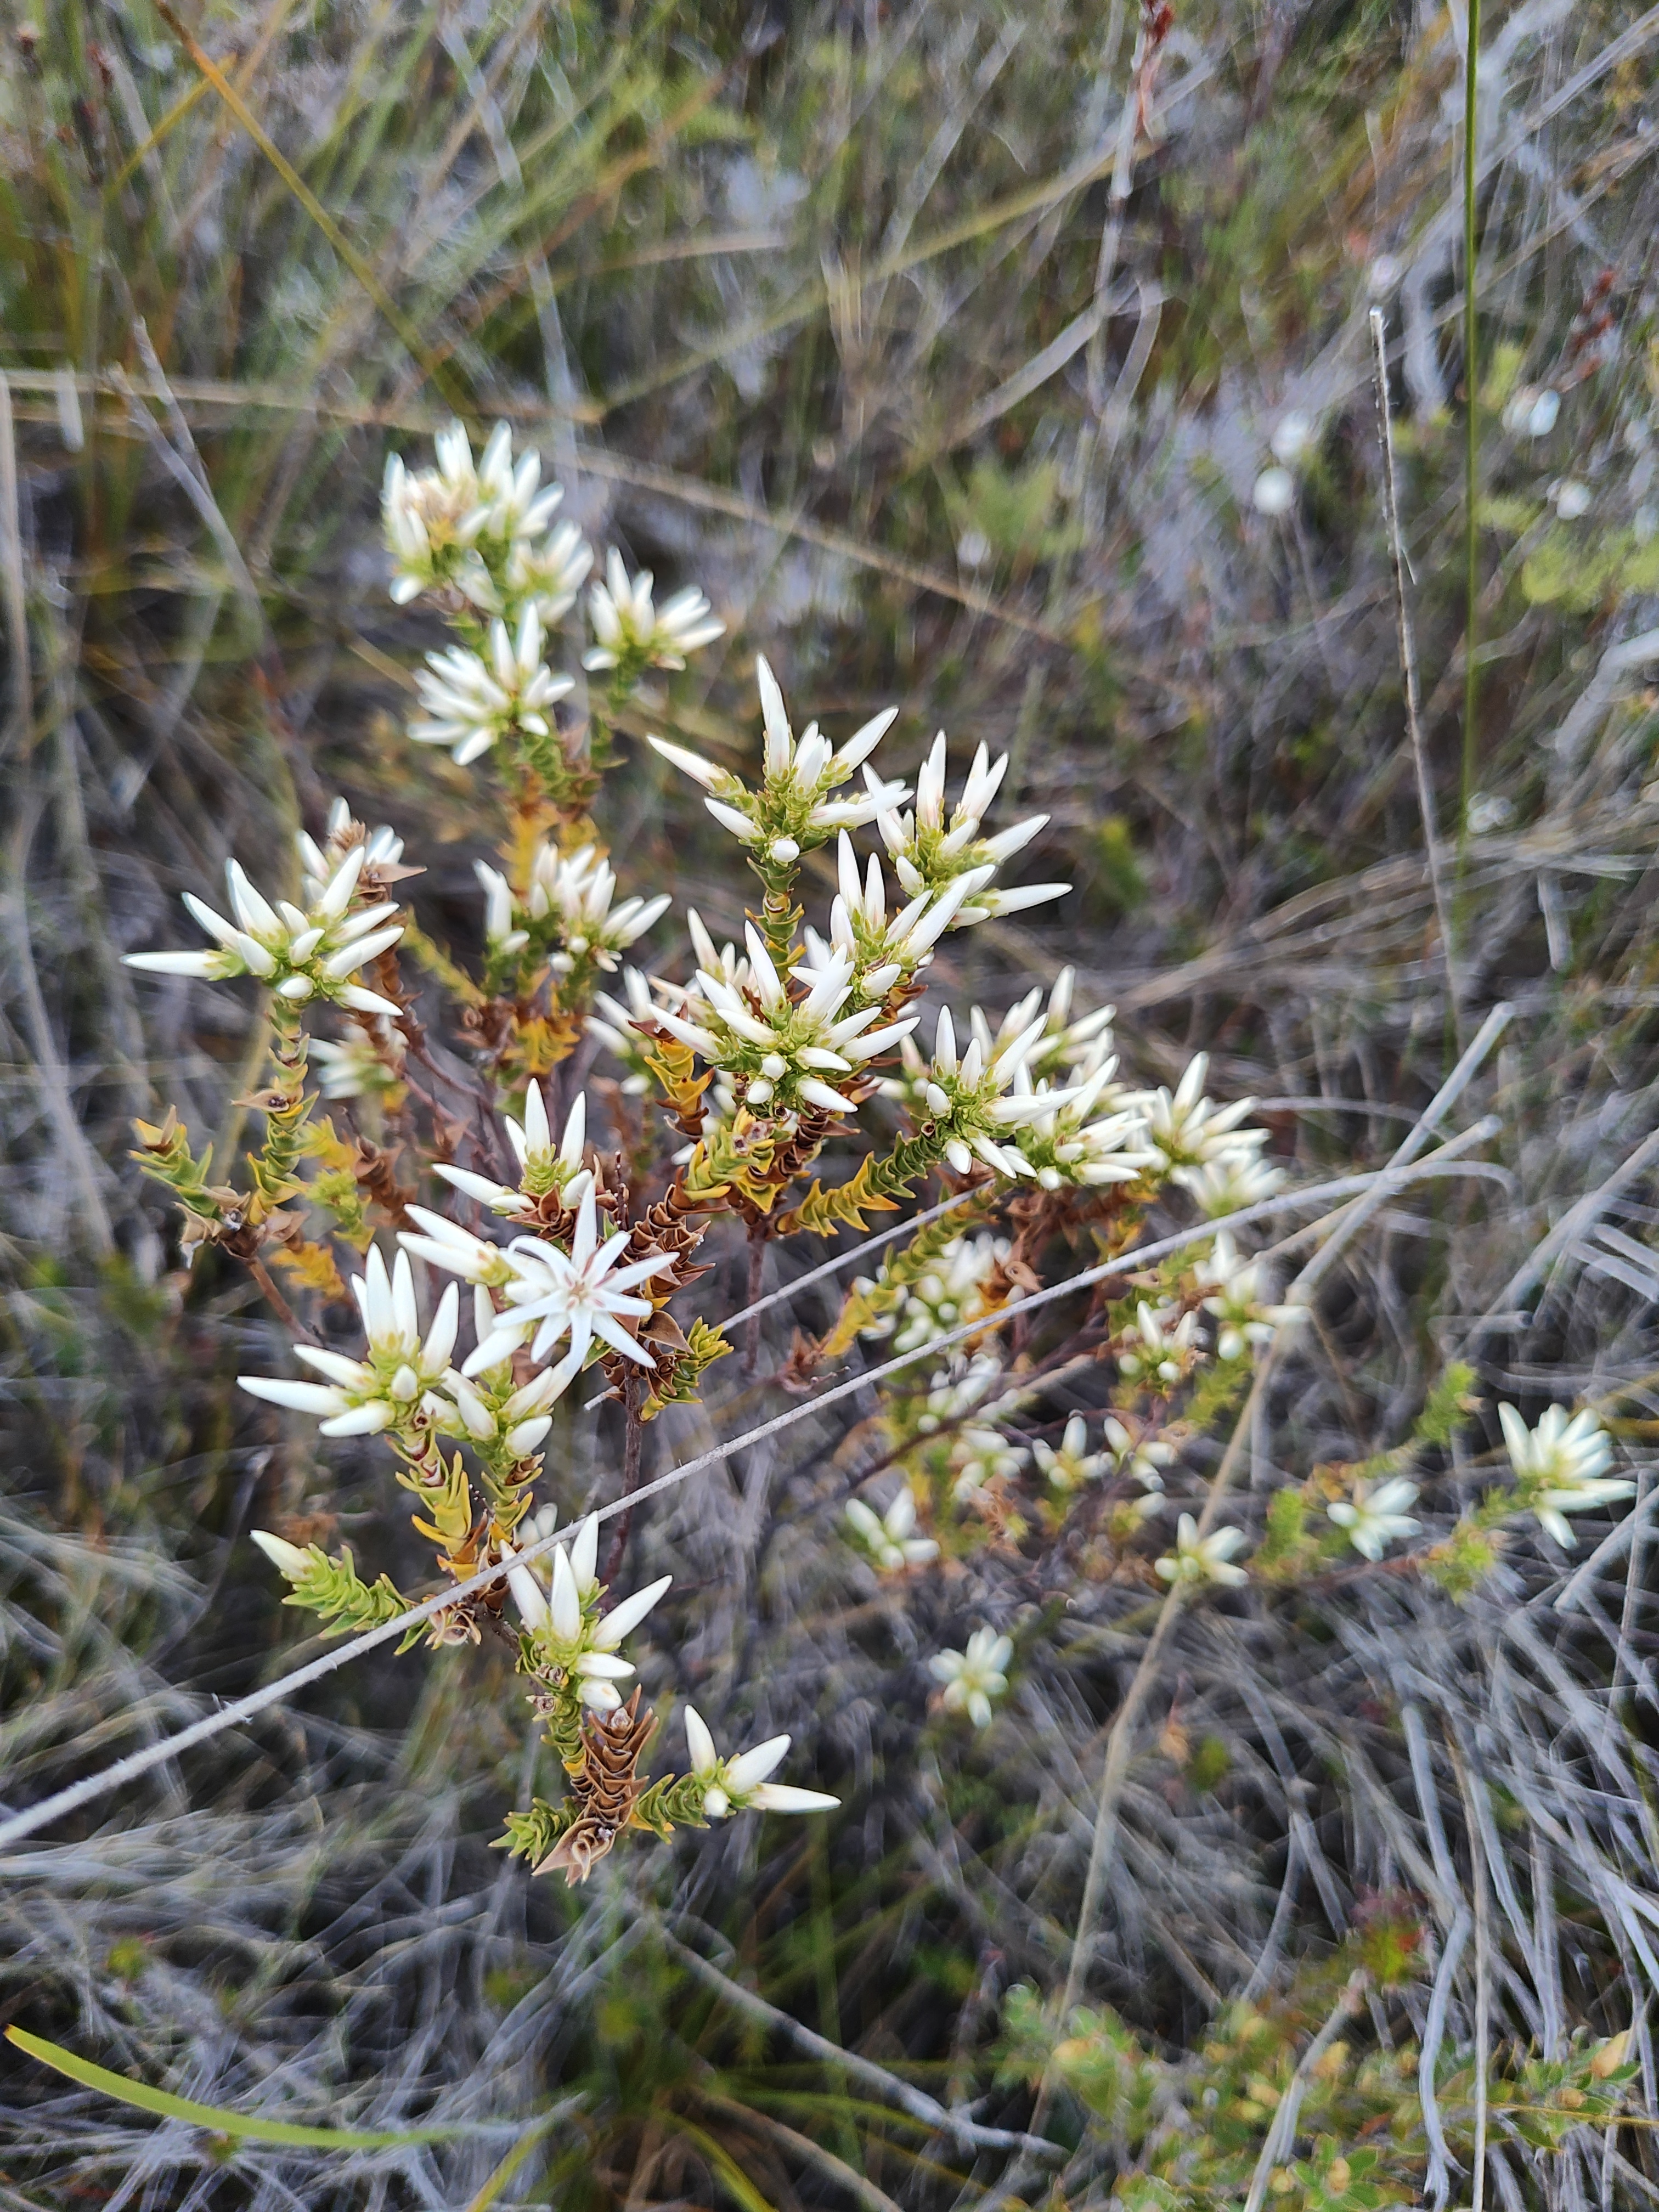
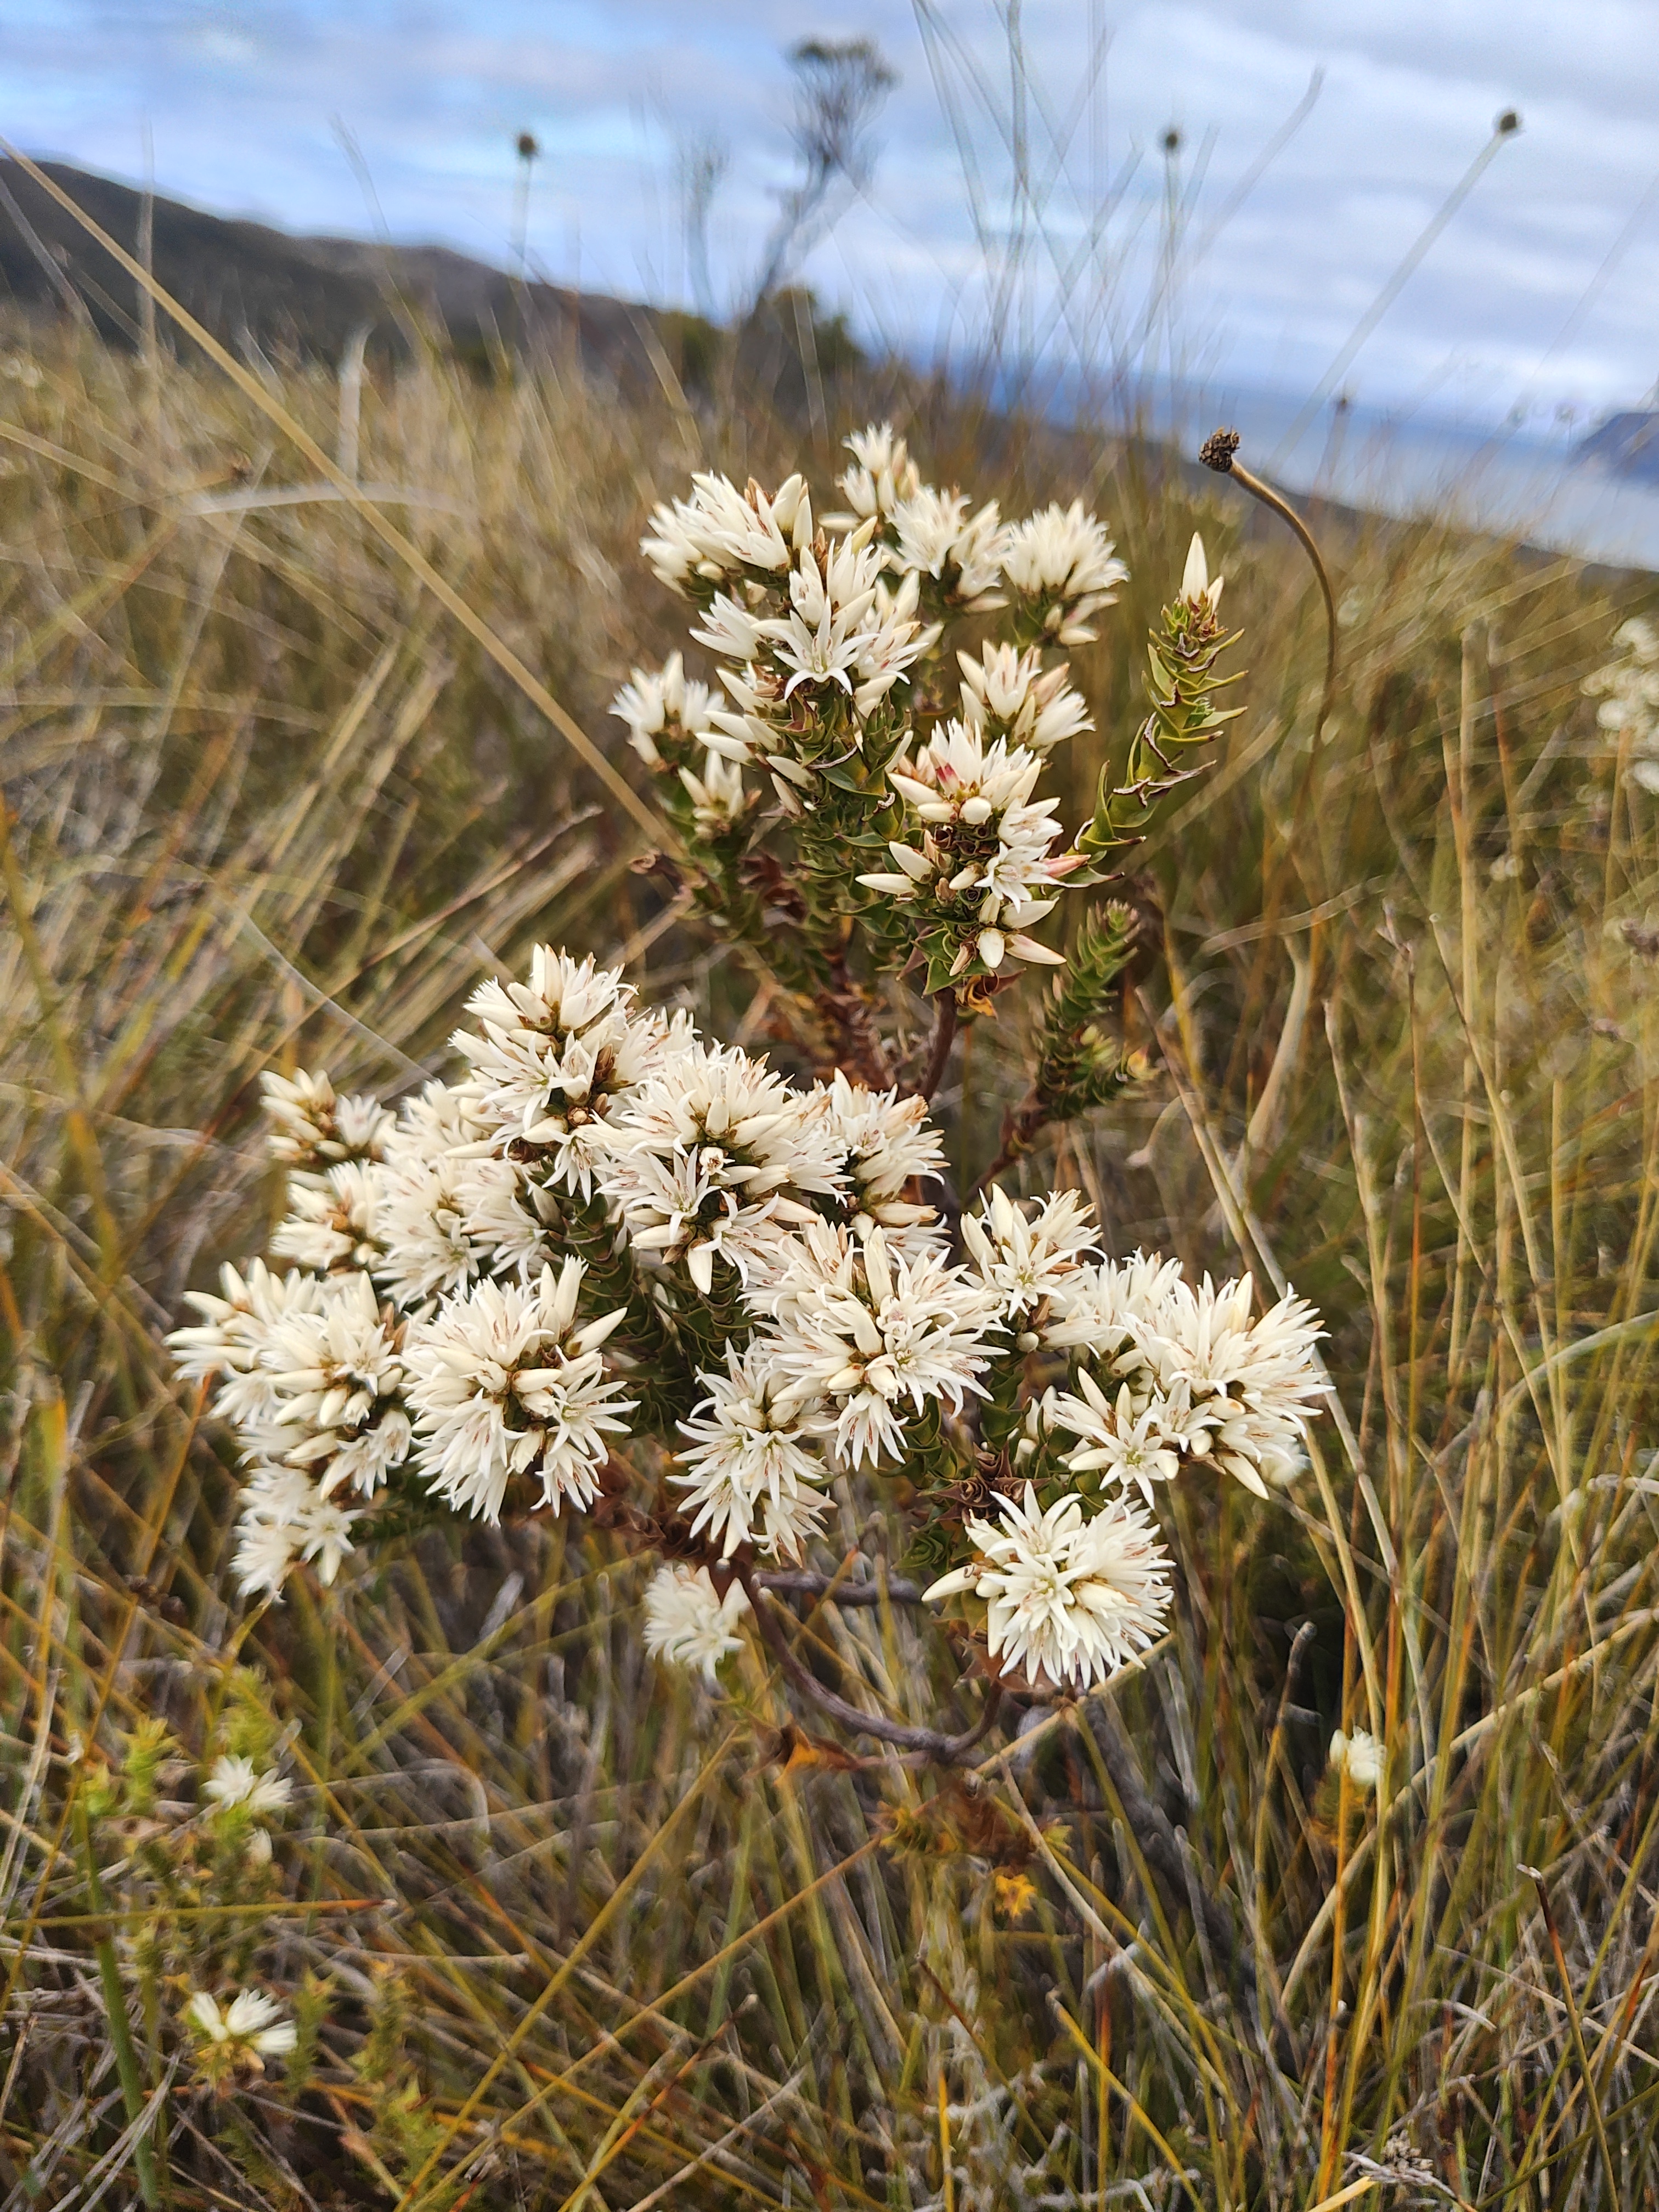
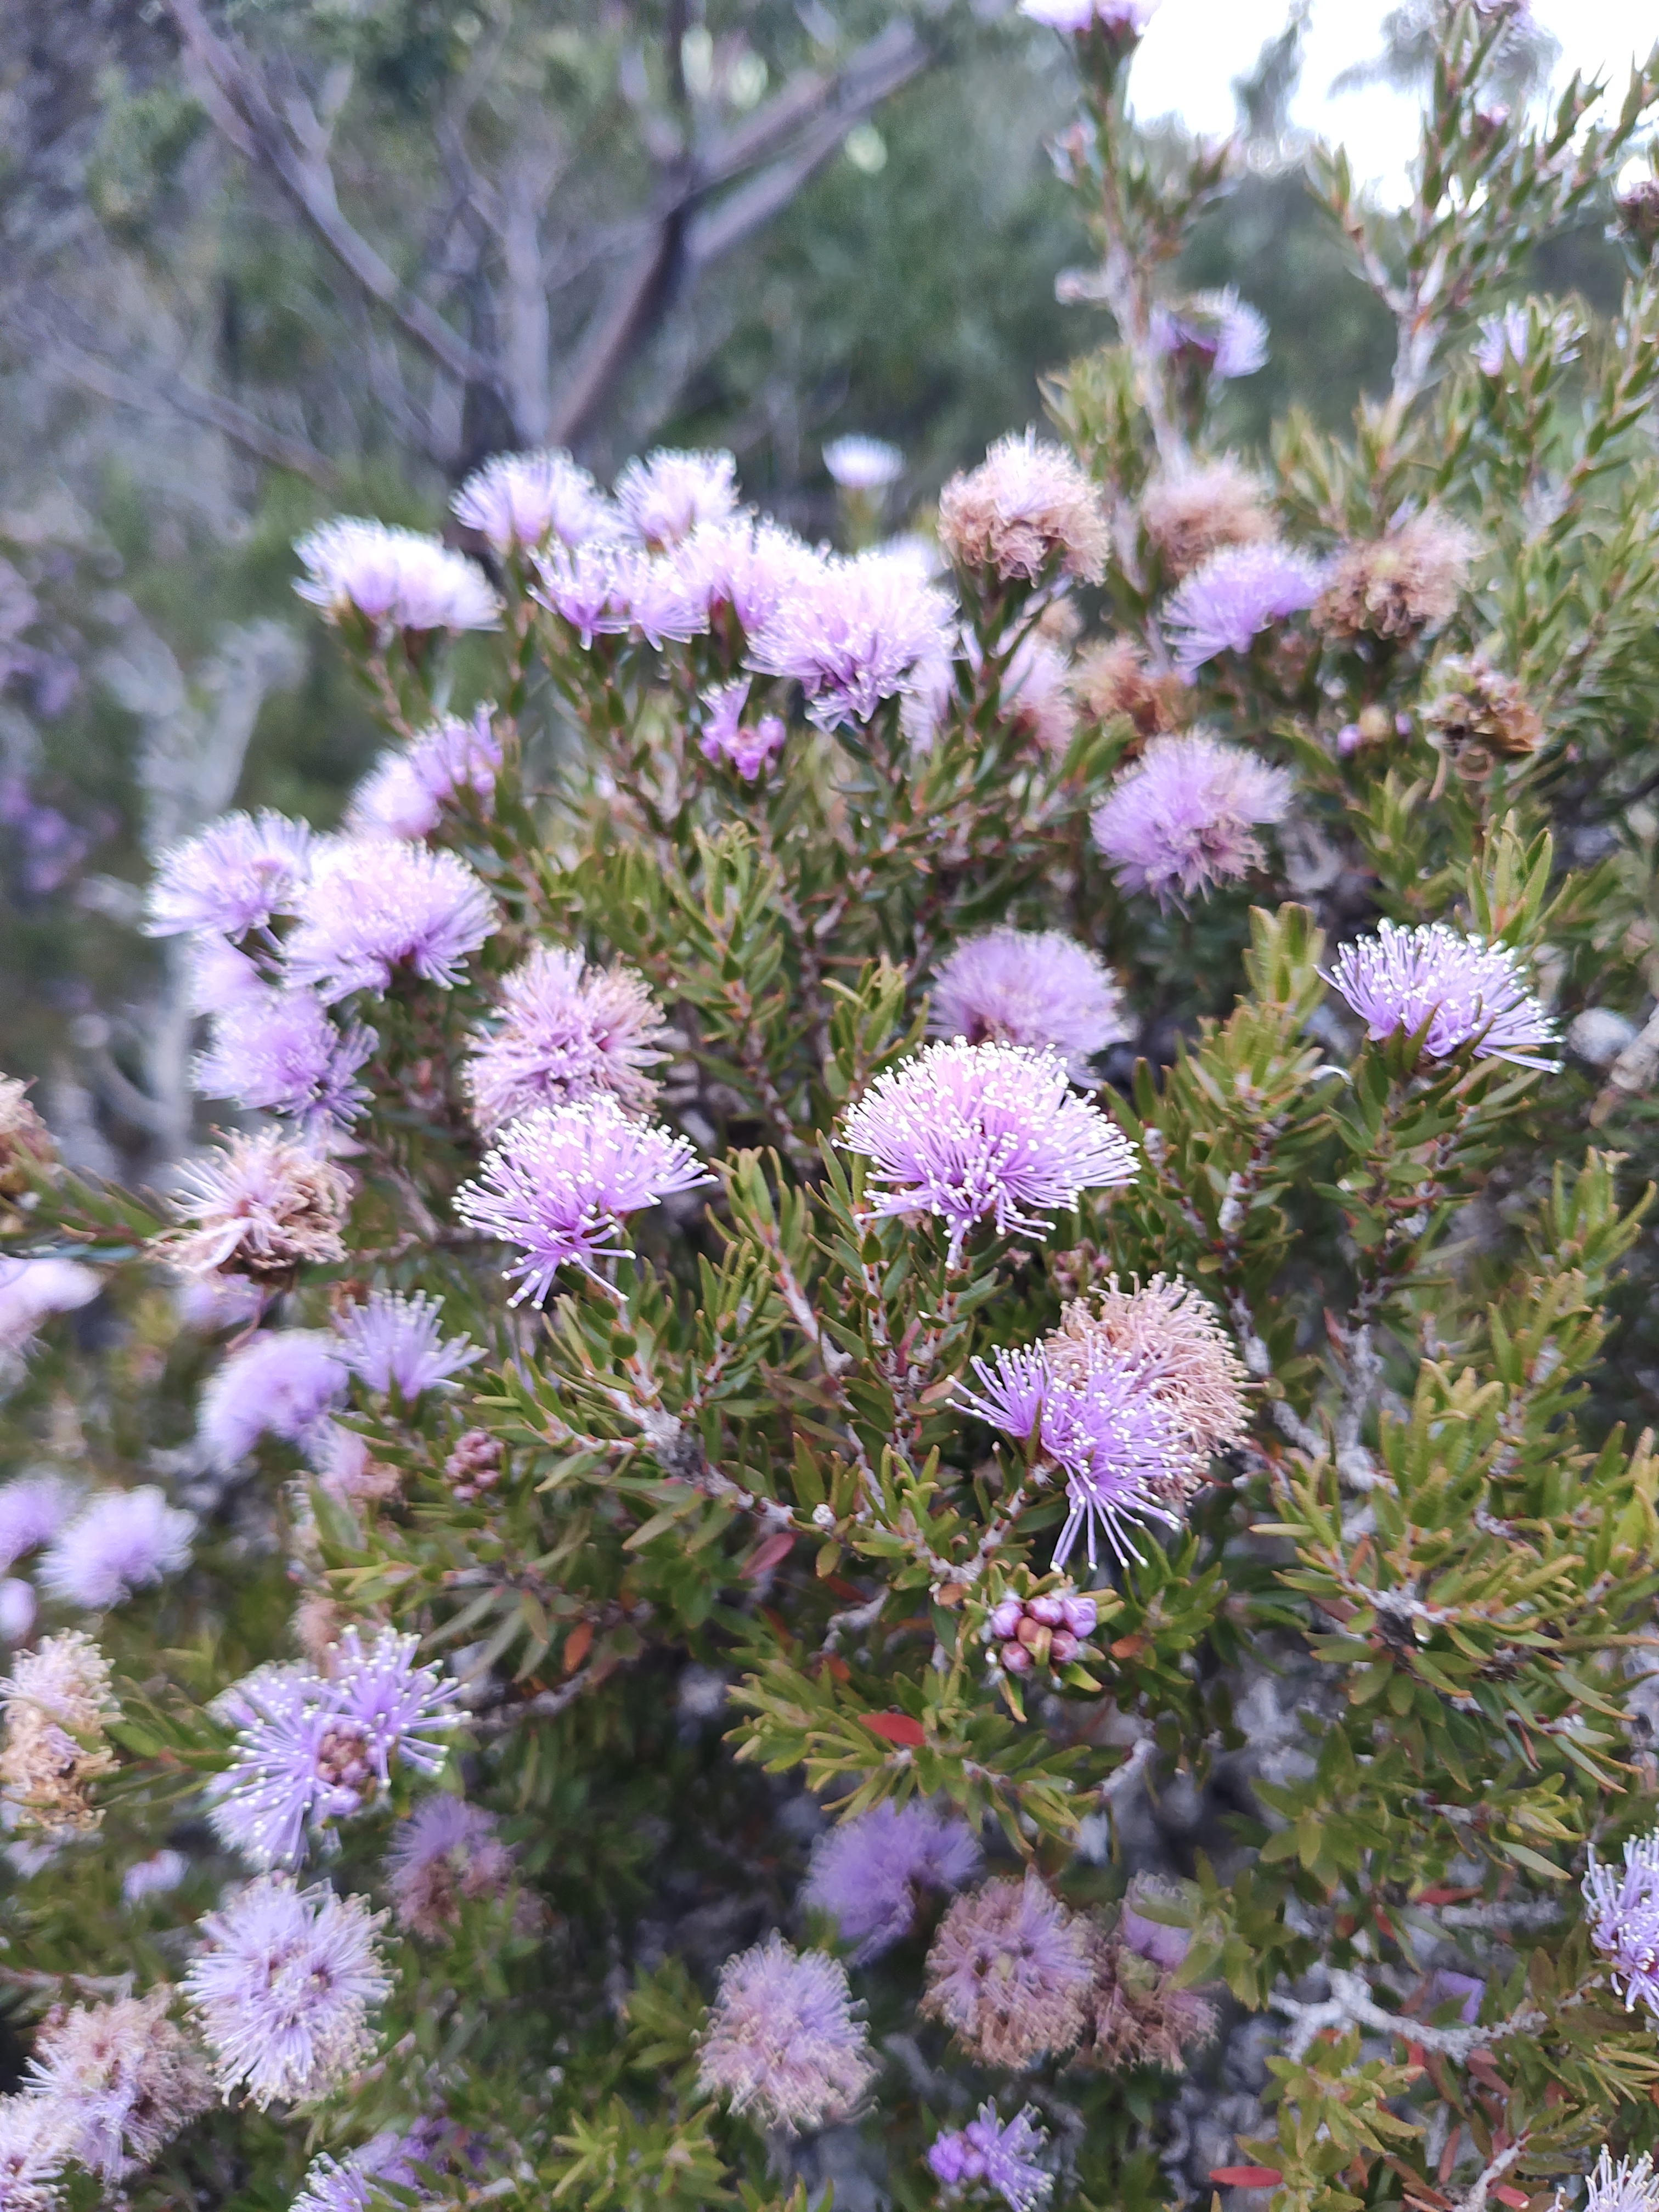
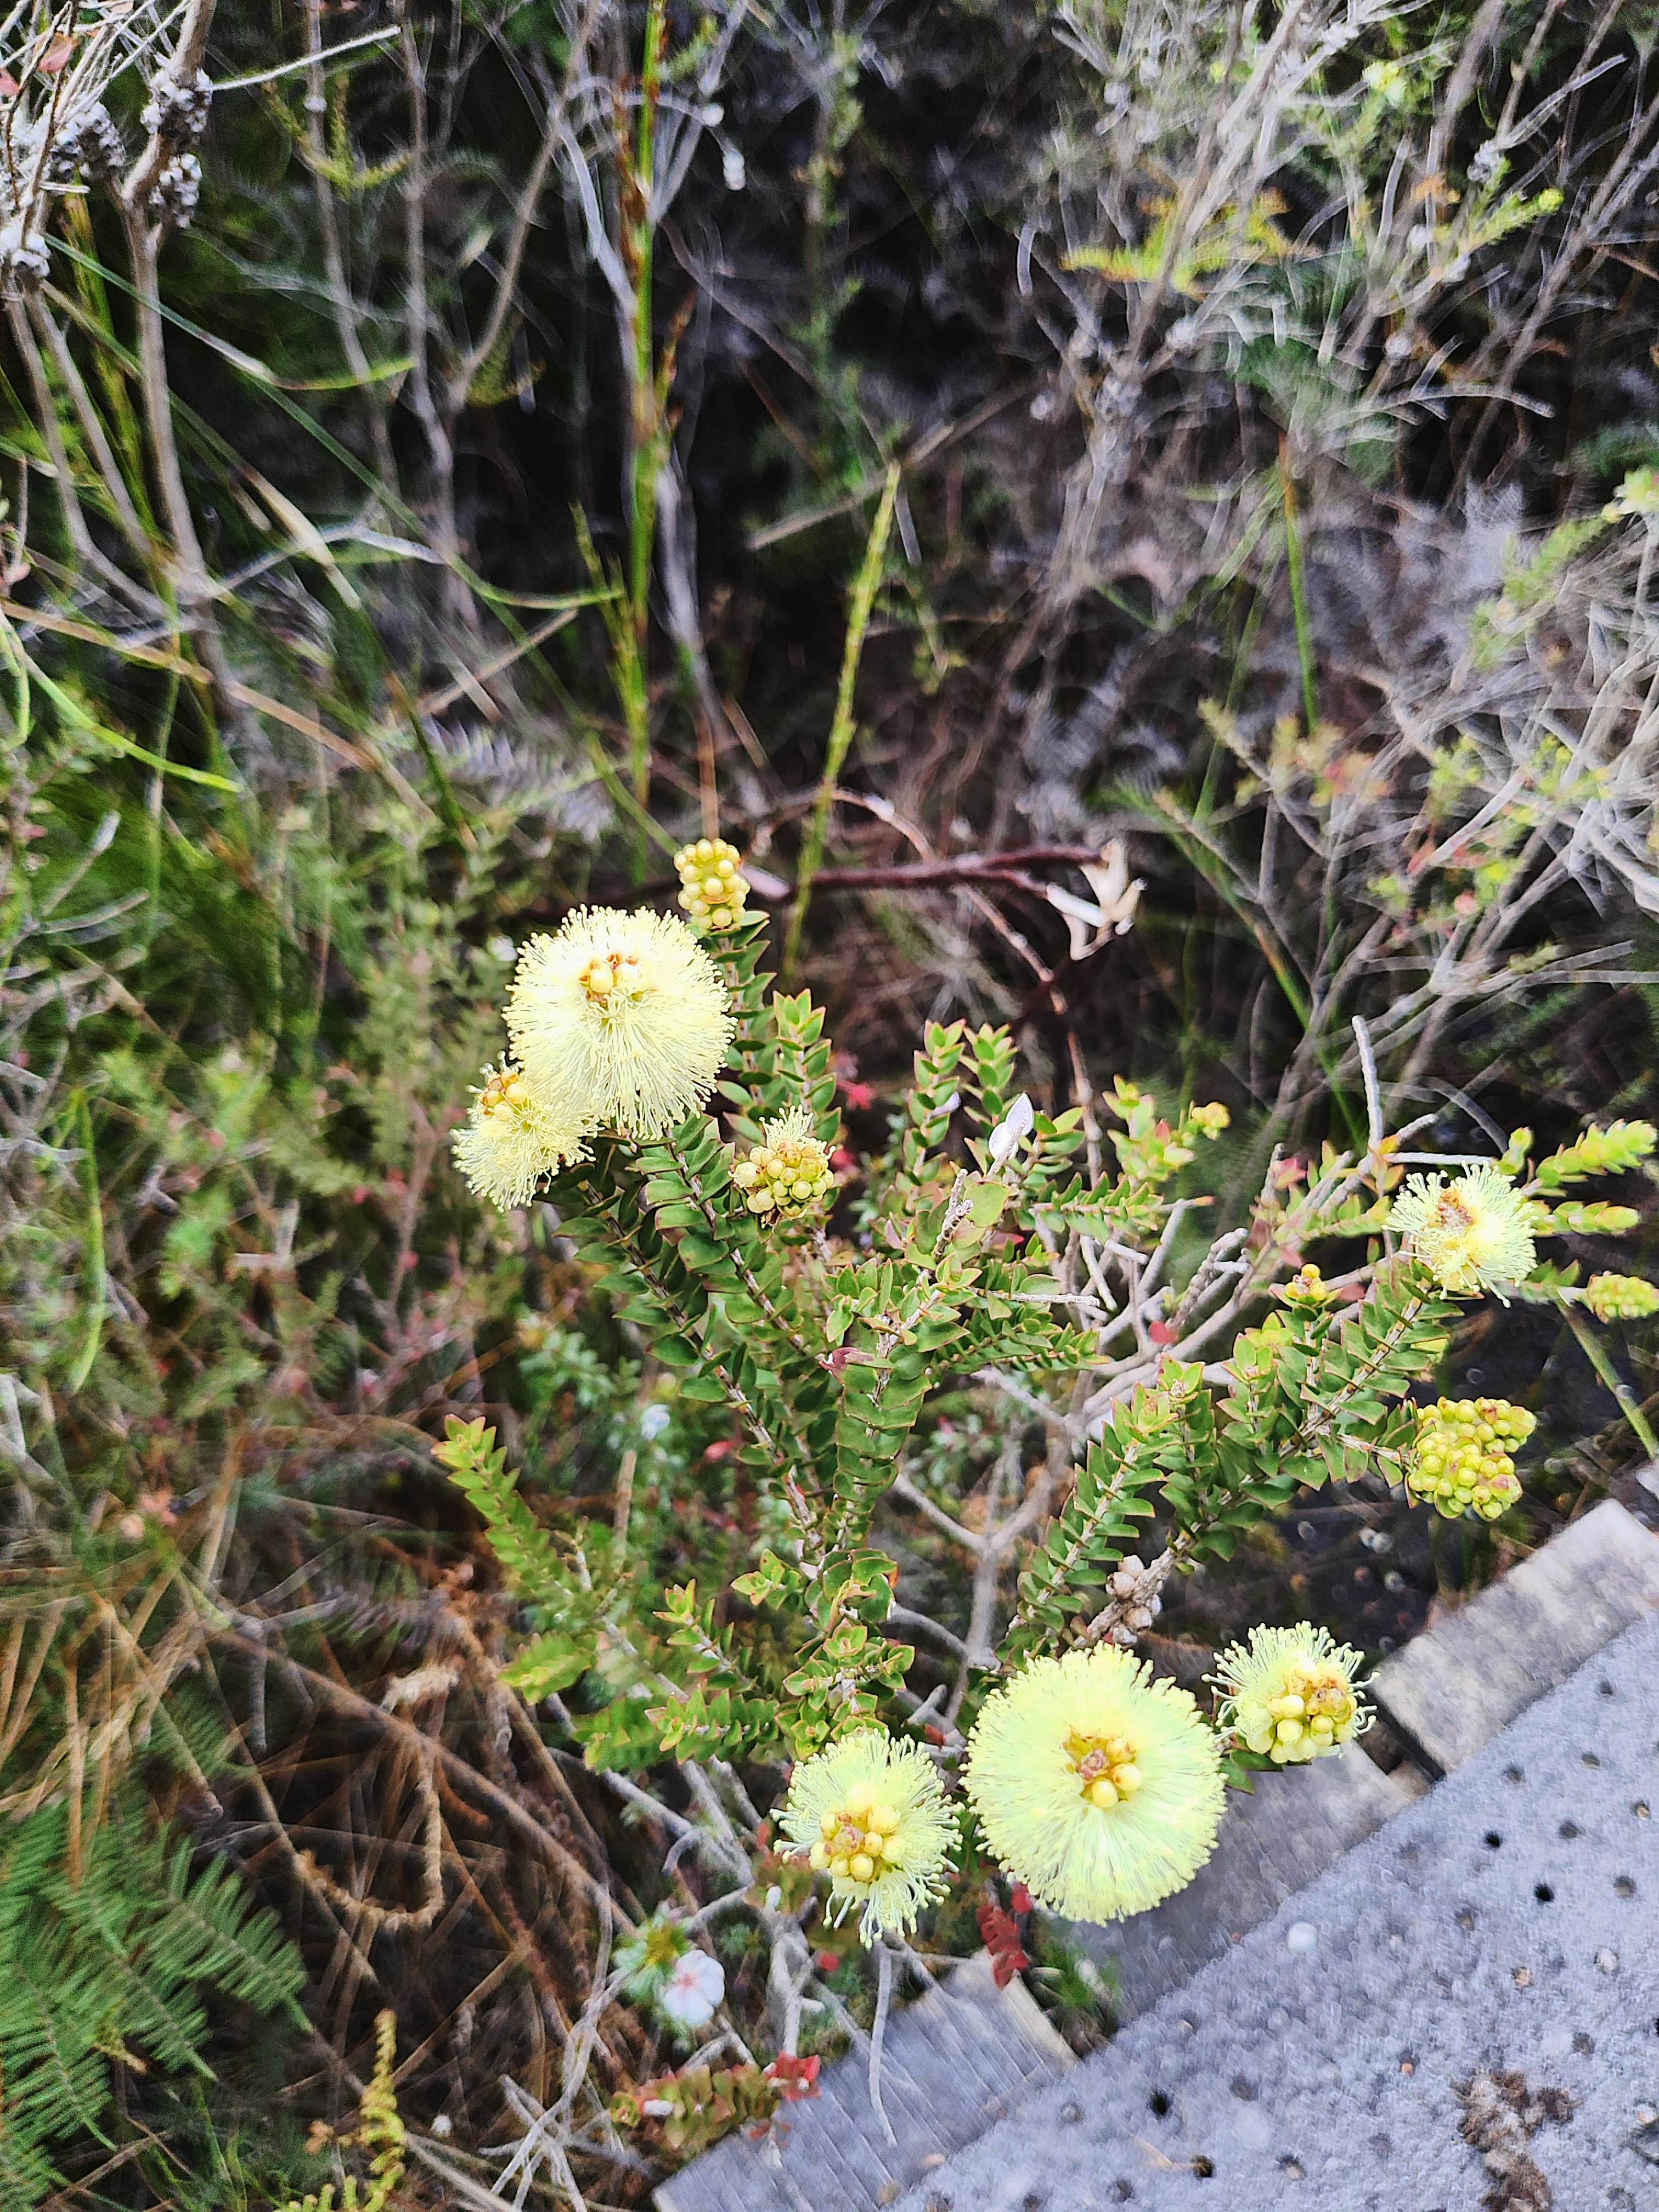
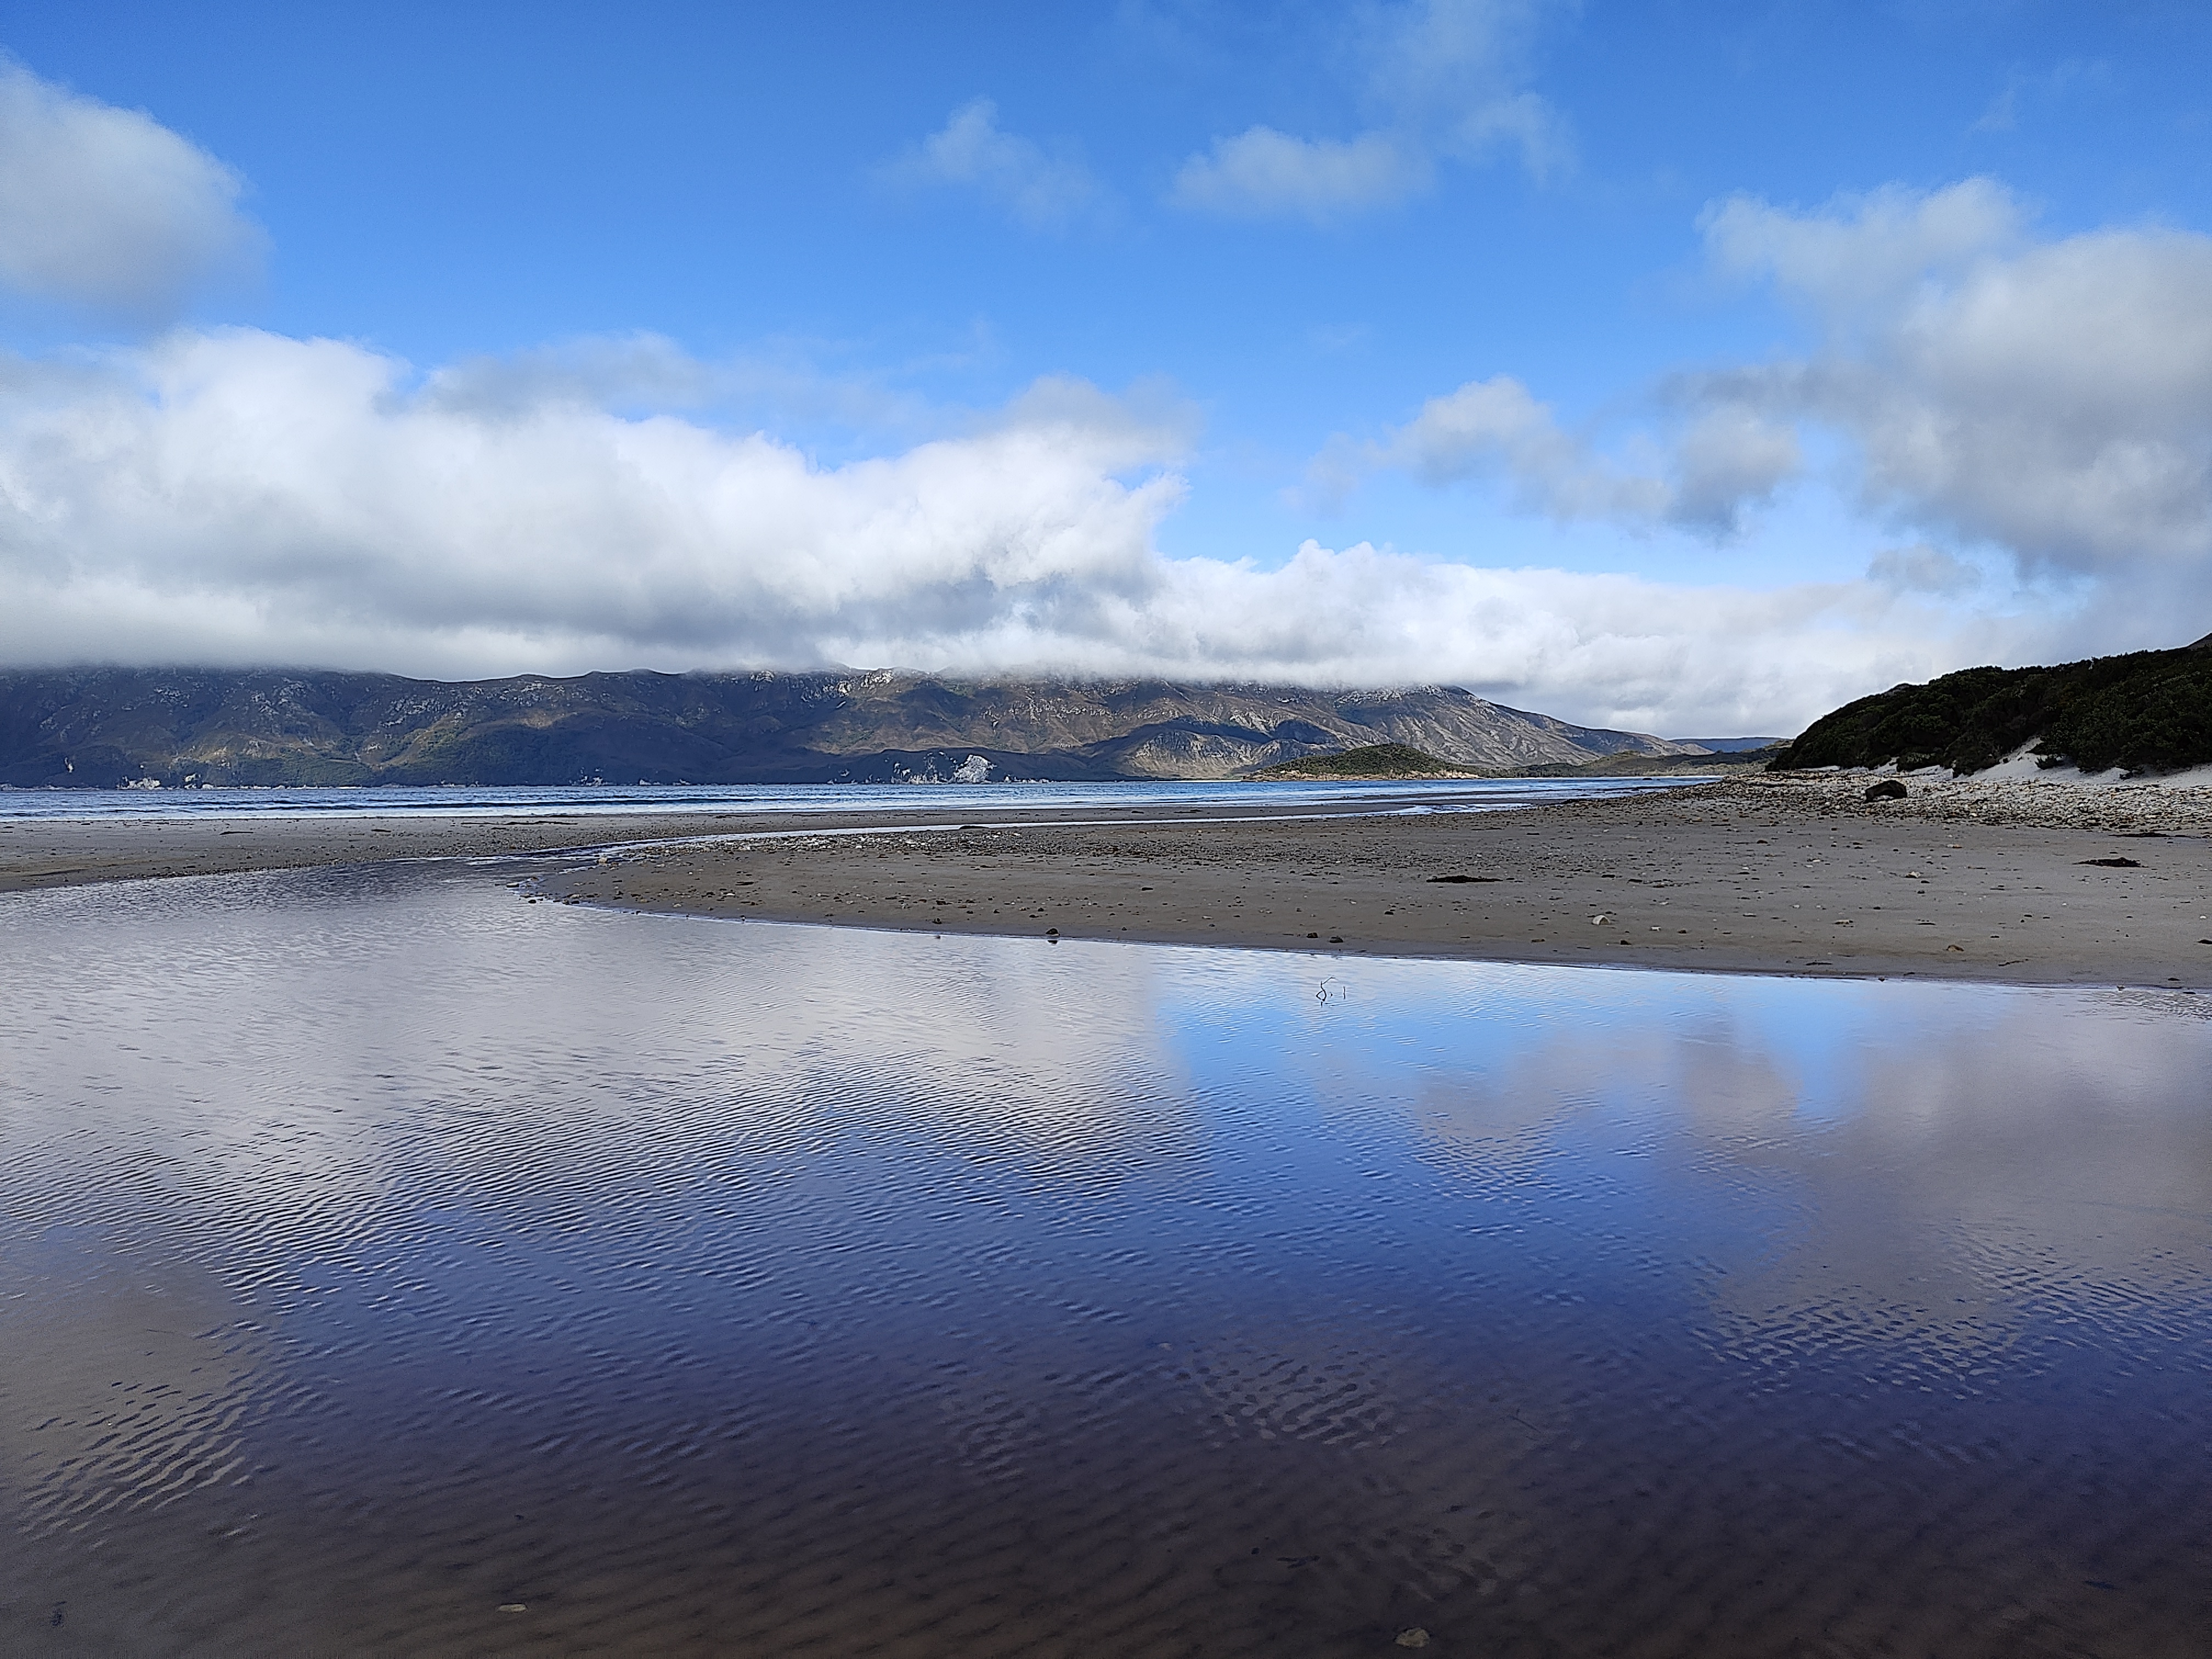
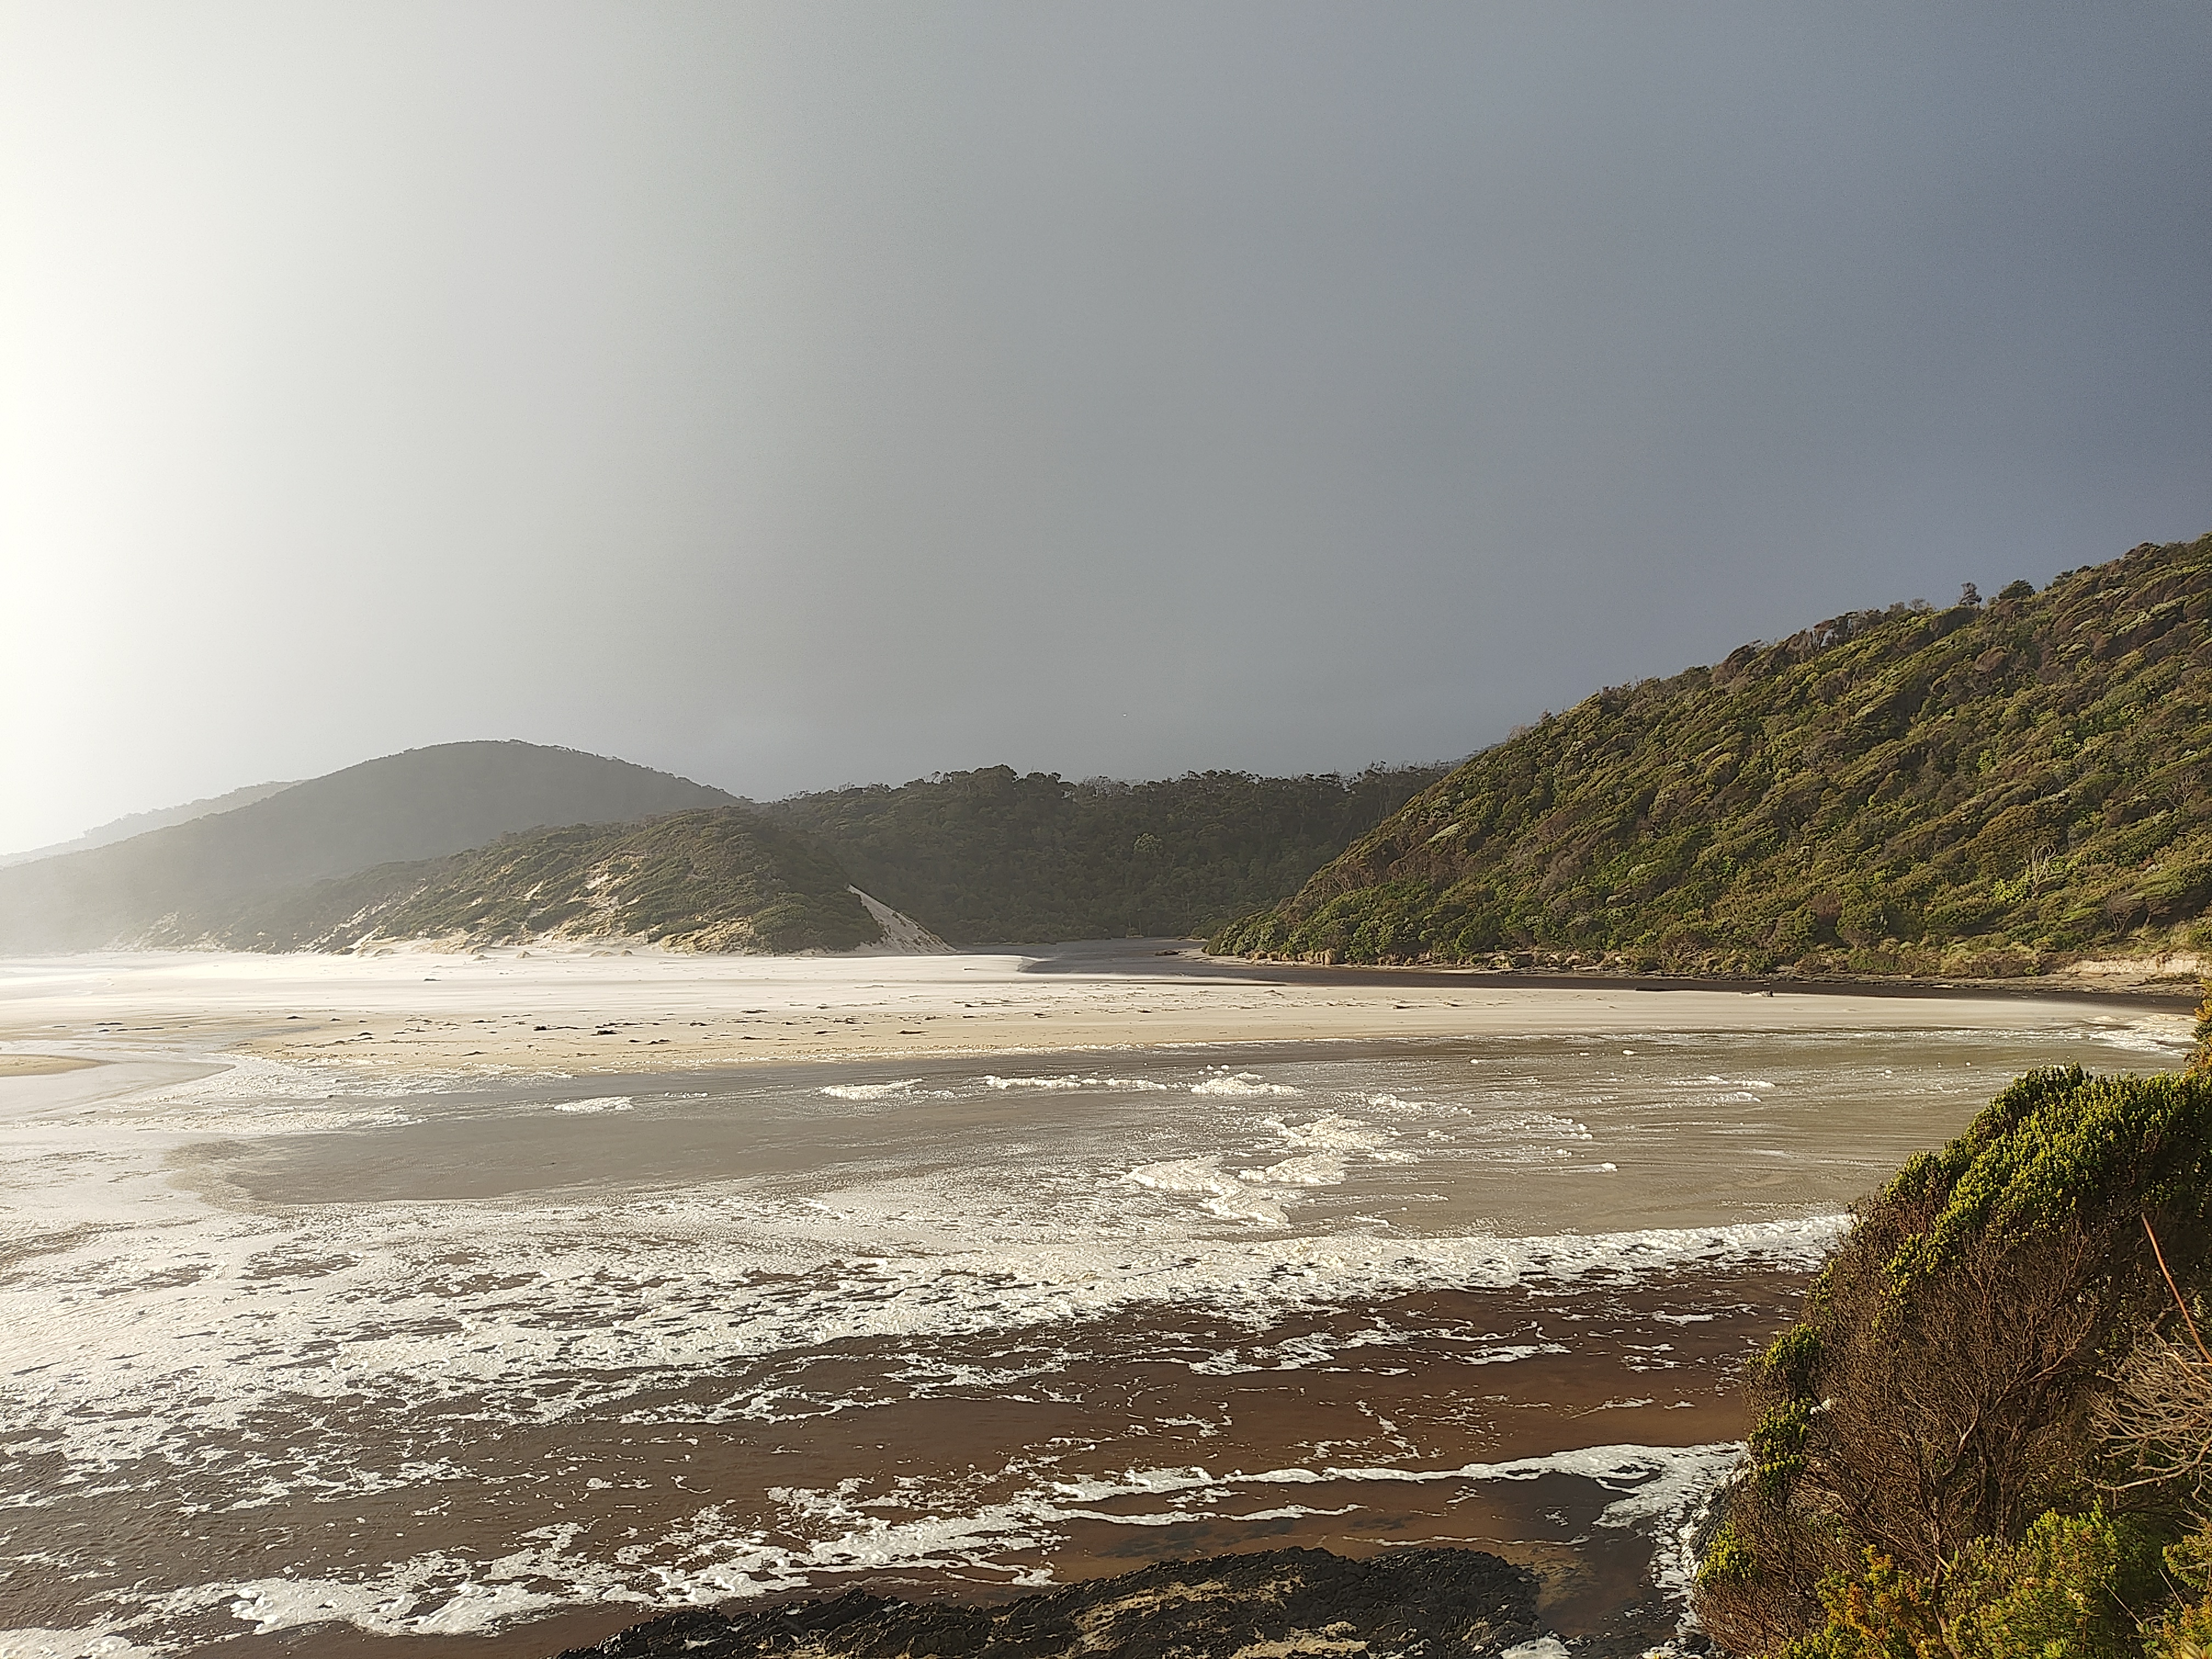
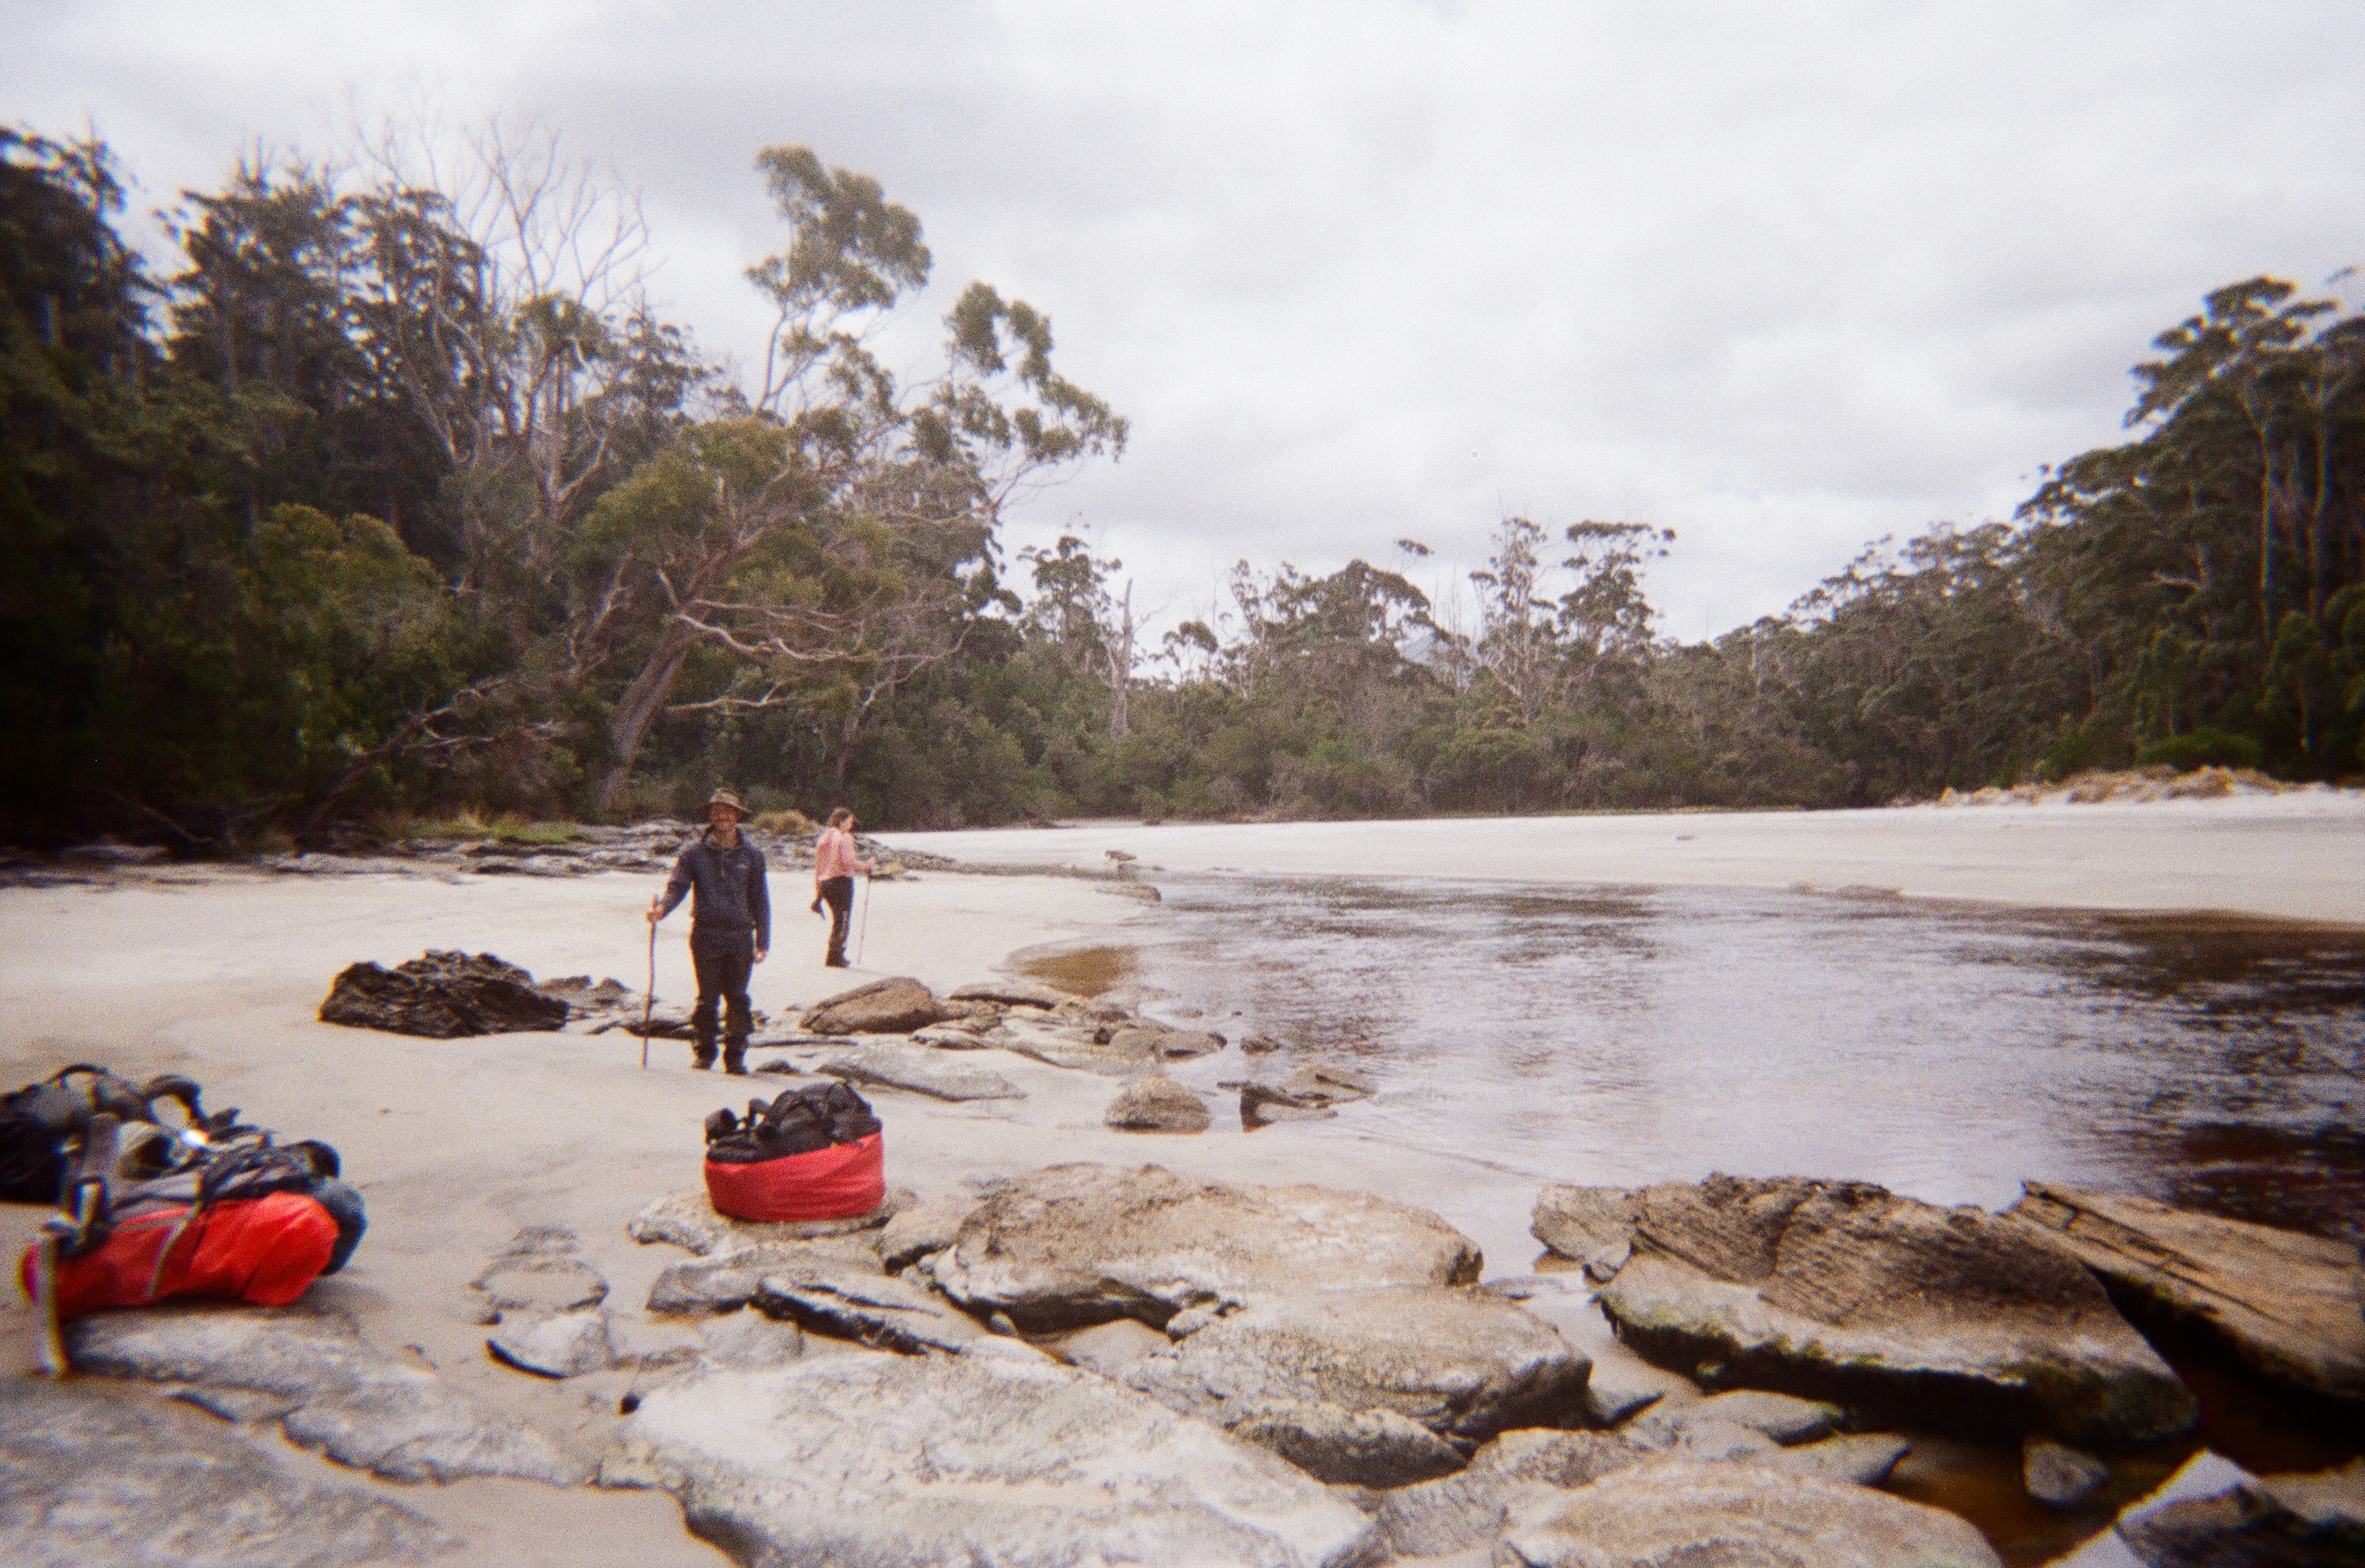
The stunning wildflowers were a highlight of the day, and we were lucky enough to spot an orange-bellied parrot which was magical. The trail starts along buttongrass plains, transitioning into ocean views as you approach the Southern ocean. The trail eventually turns onto the beach where we walked for approximately 1km on sand before coming to the first creek crossing on the beach. Trying to preserve our dry shoes for as long as possible, we took off our shoes and walked through the icy beach creek. We walked along the beach for a further 1.3km before turning away onto a forested track marked by buoys on the beach. There was a short forested walk before arriving at Point Eric campsite.
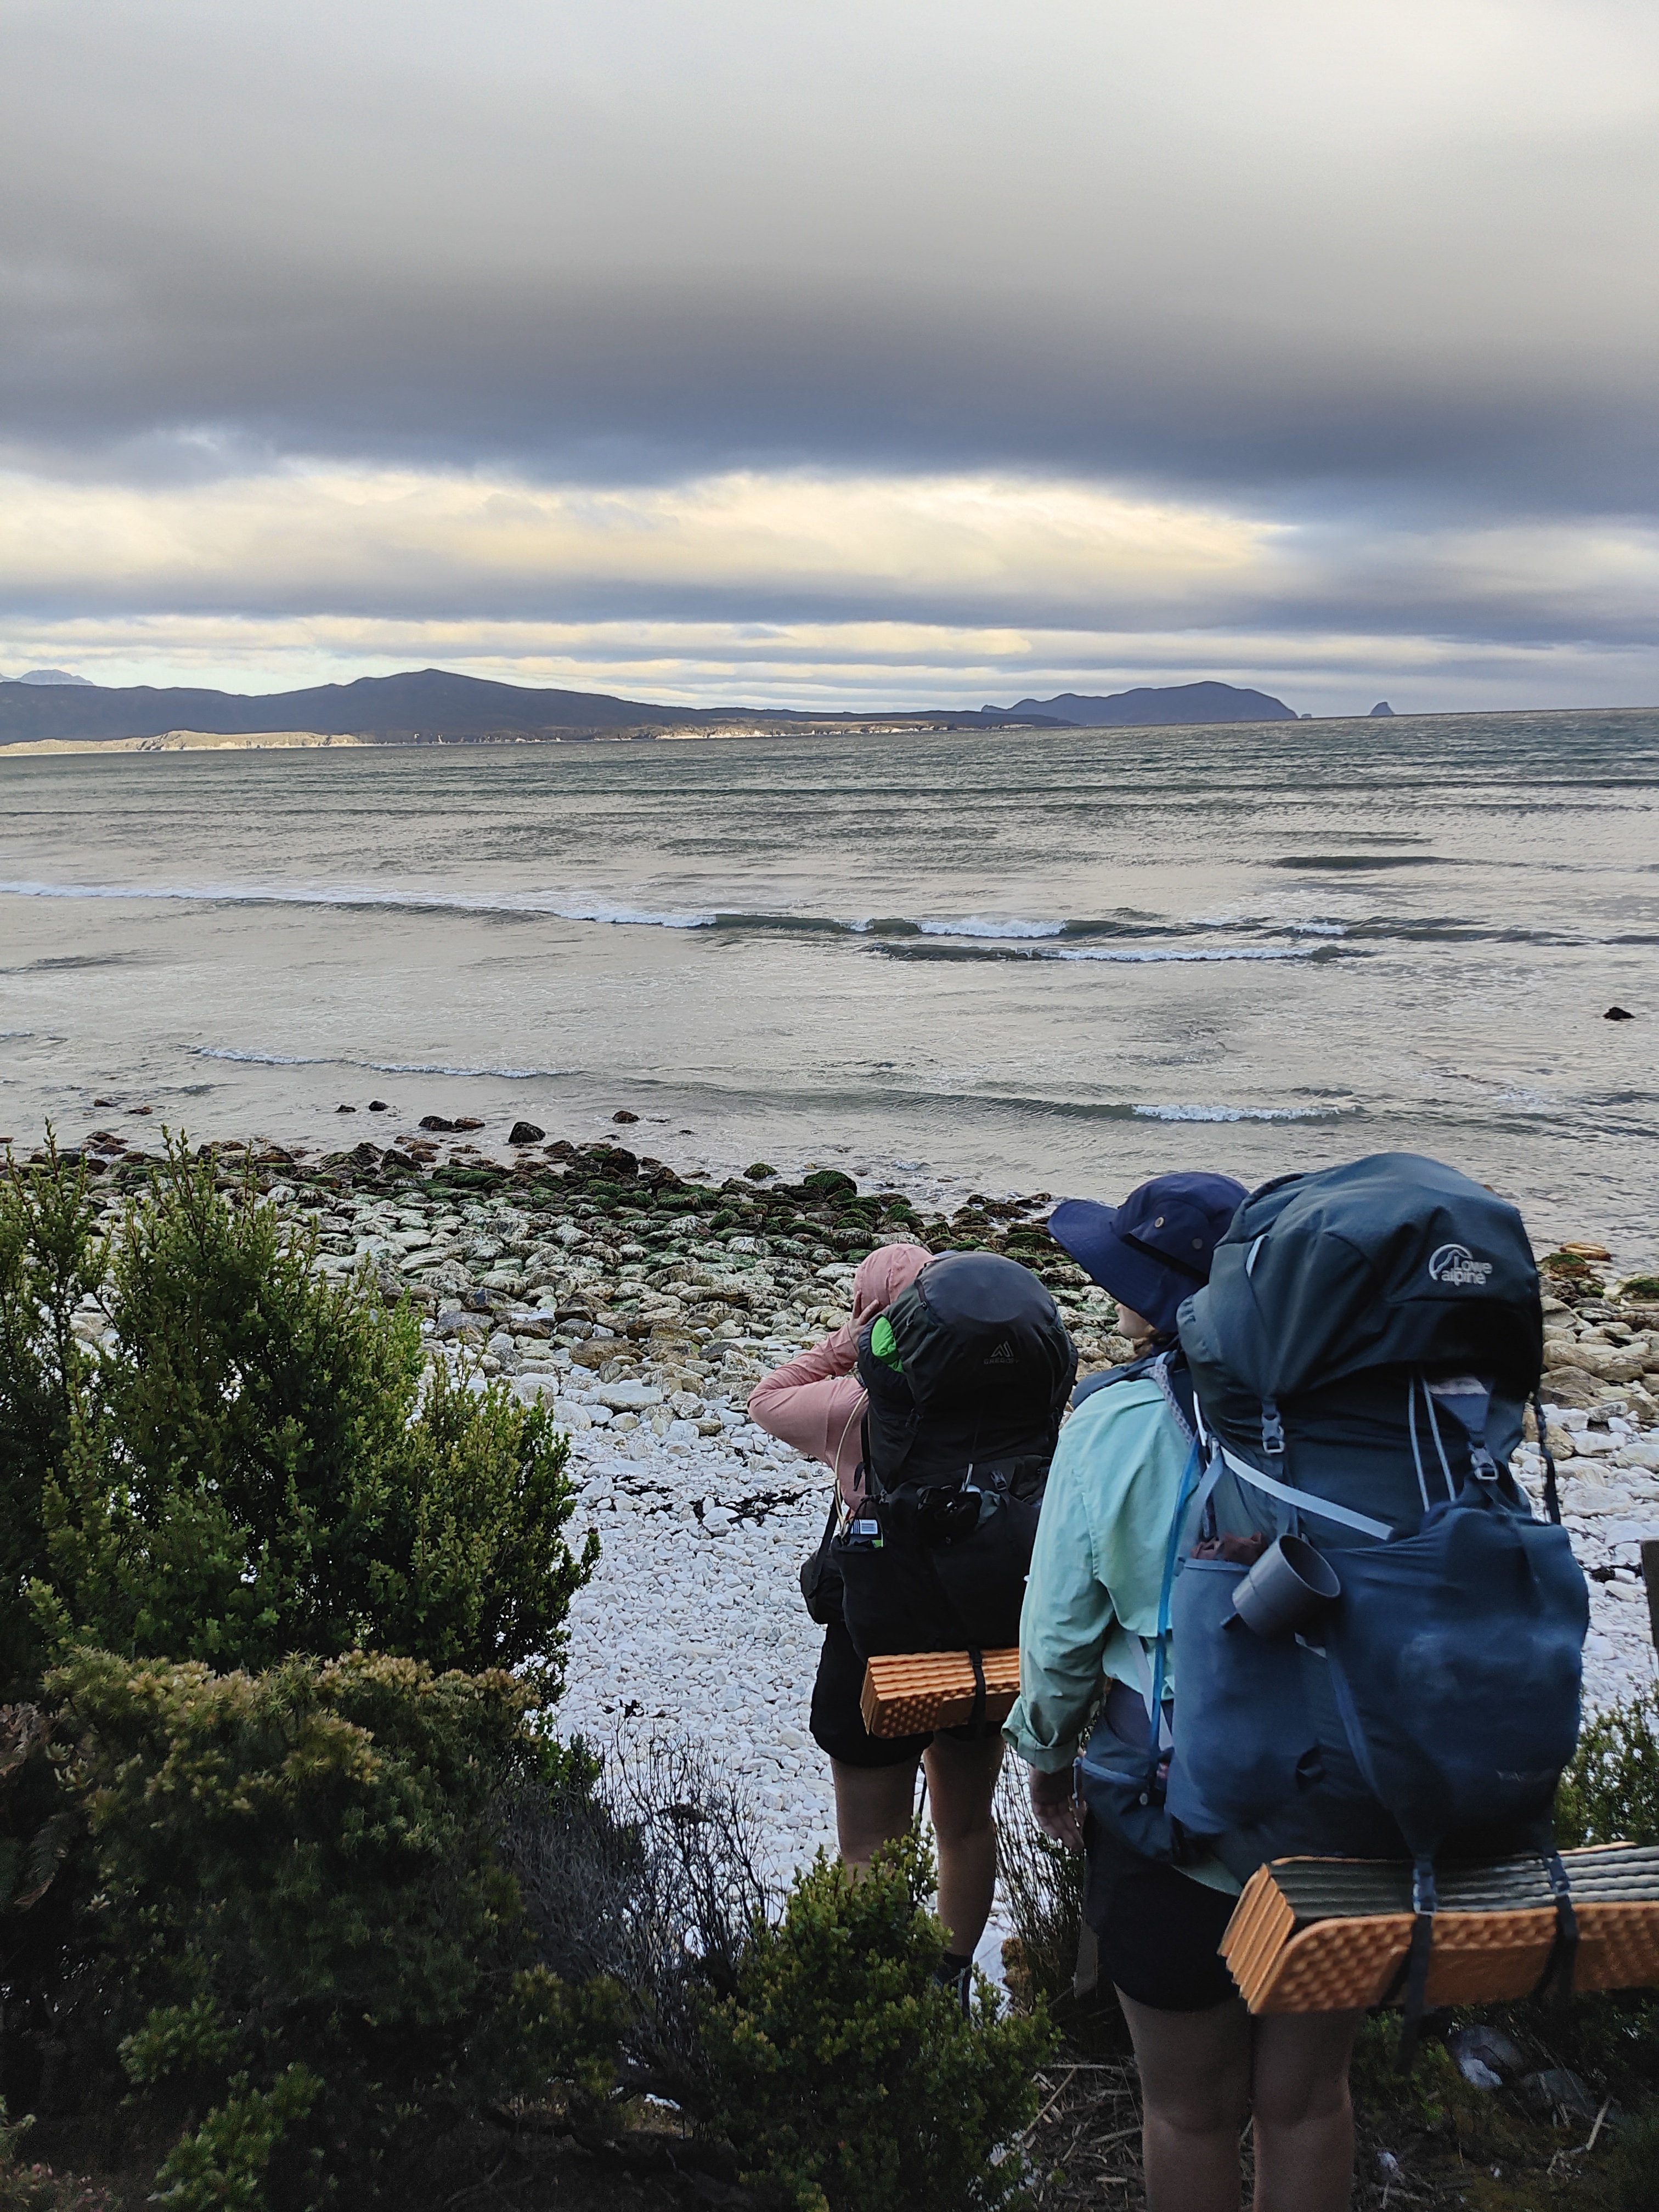
We had some confusion about Point Eric and Cox Bight, as some resources seem to refer to them differently. From what we can tell these are different names for features at this spot, but it is one and the same campsite. We arrived at camp around 8:25pm and quickly set-up camp and made a quick dhaal dinner before heading to bed. We saw bioluminescent fungi once the sun had set, and we fell asleep to sounds of the waves meeting the beach.
Peaks & Pits:
Peak: Plane ride
Pit: Day 1 conditioning to pack weight and the weather
Day 2: Point Eric to Louisa River
Distance: 17kms
Duration: 9hr 10mins (including breaks)
Highlights: Red Point Hills, Faraway Creek, Louisa Creek, Louisa River
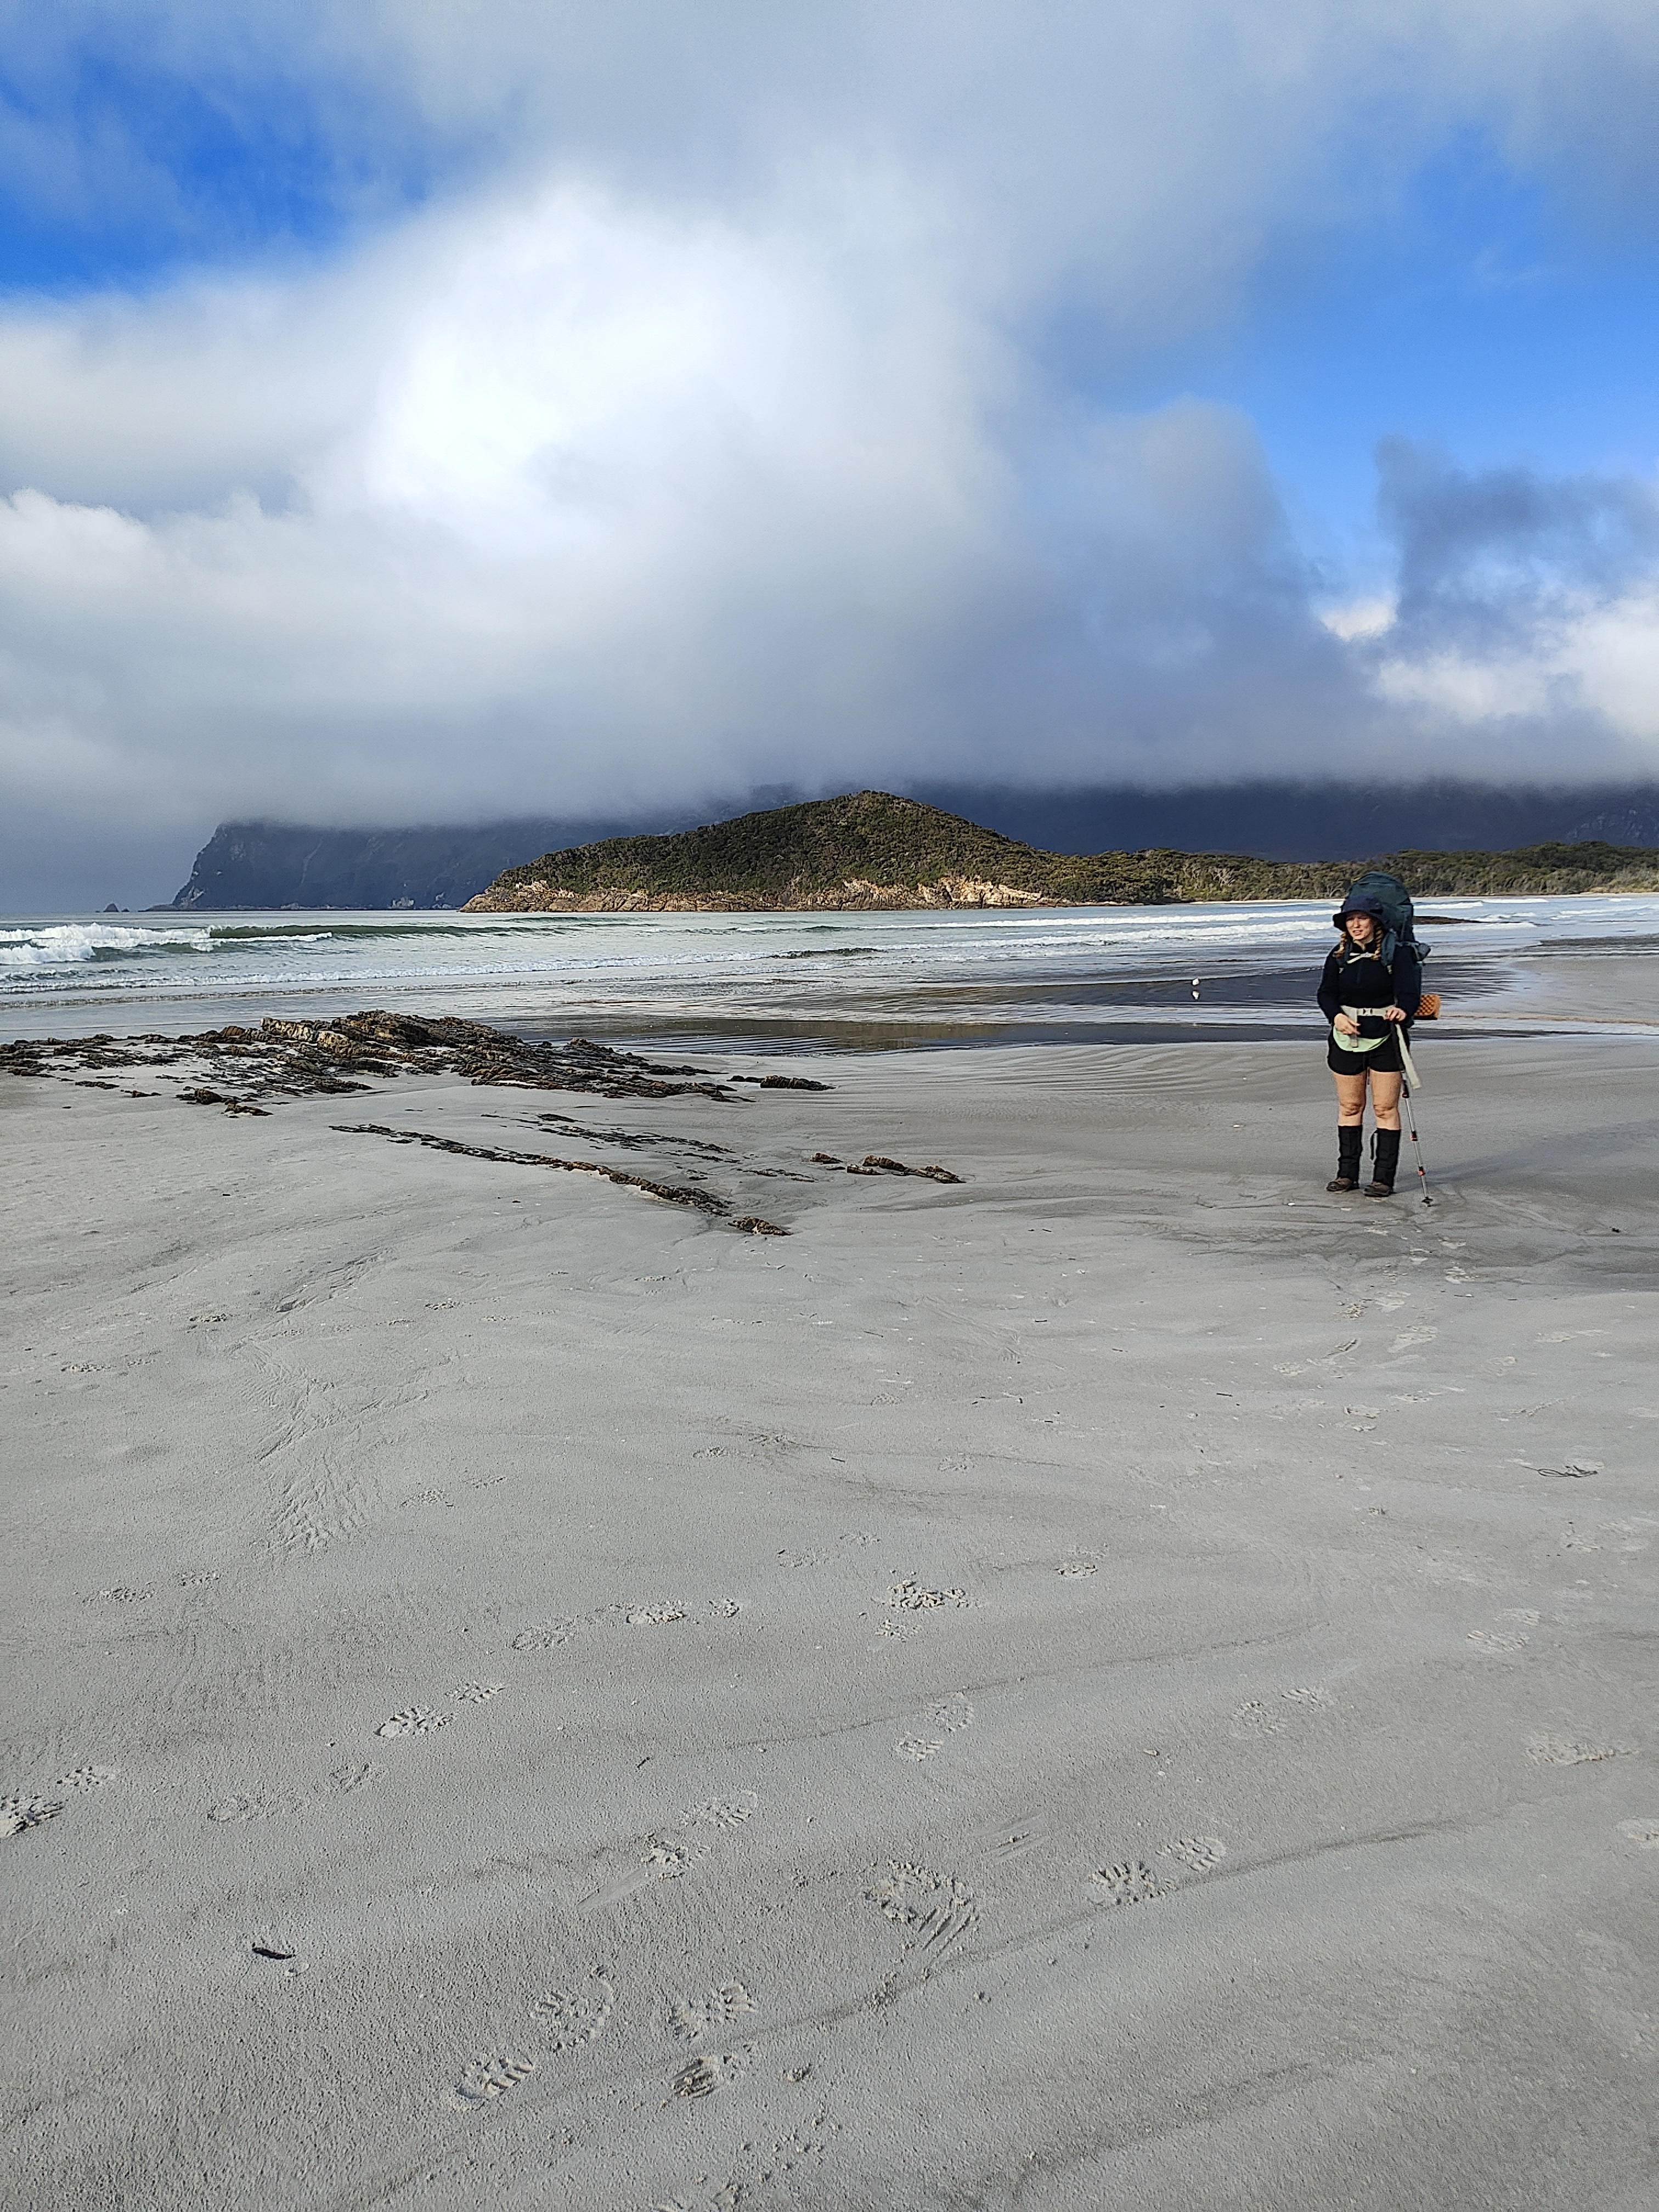
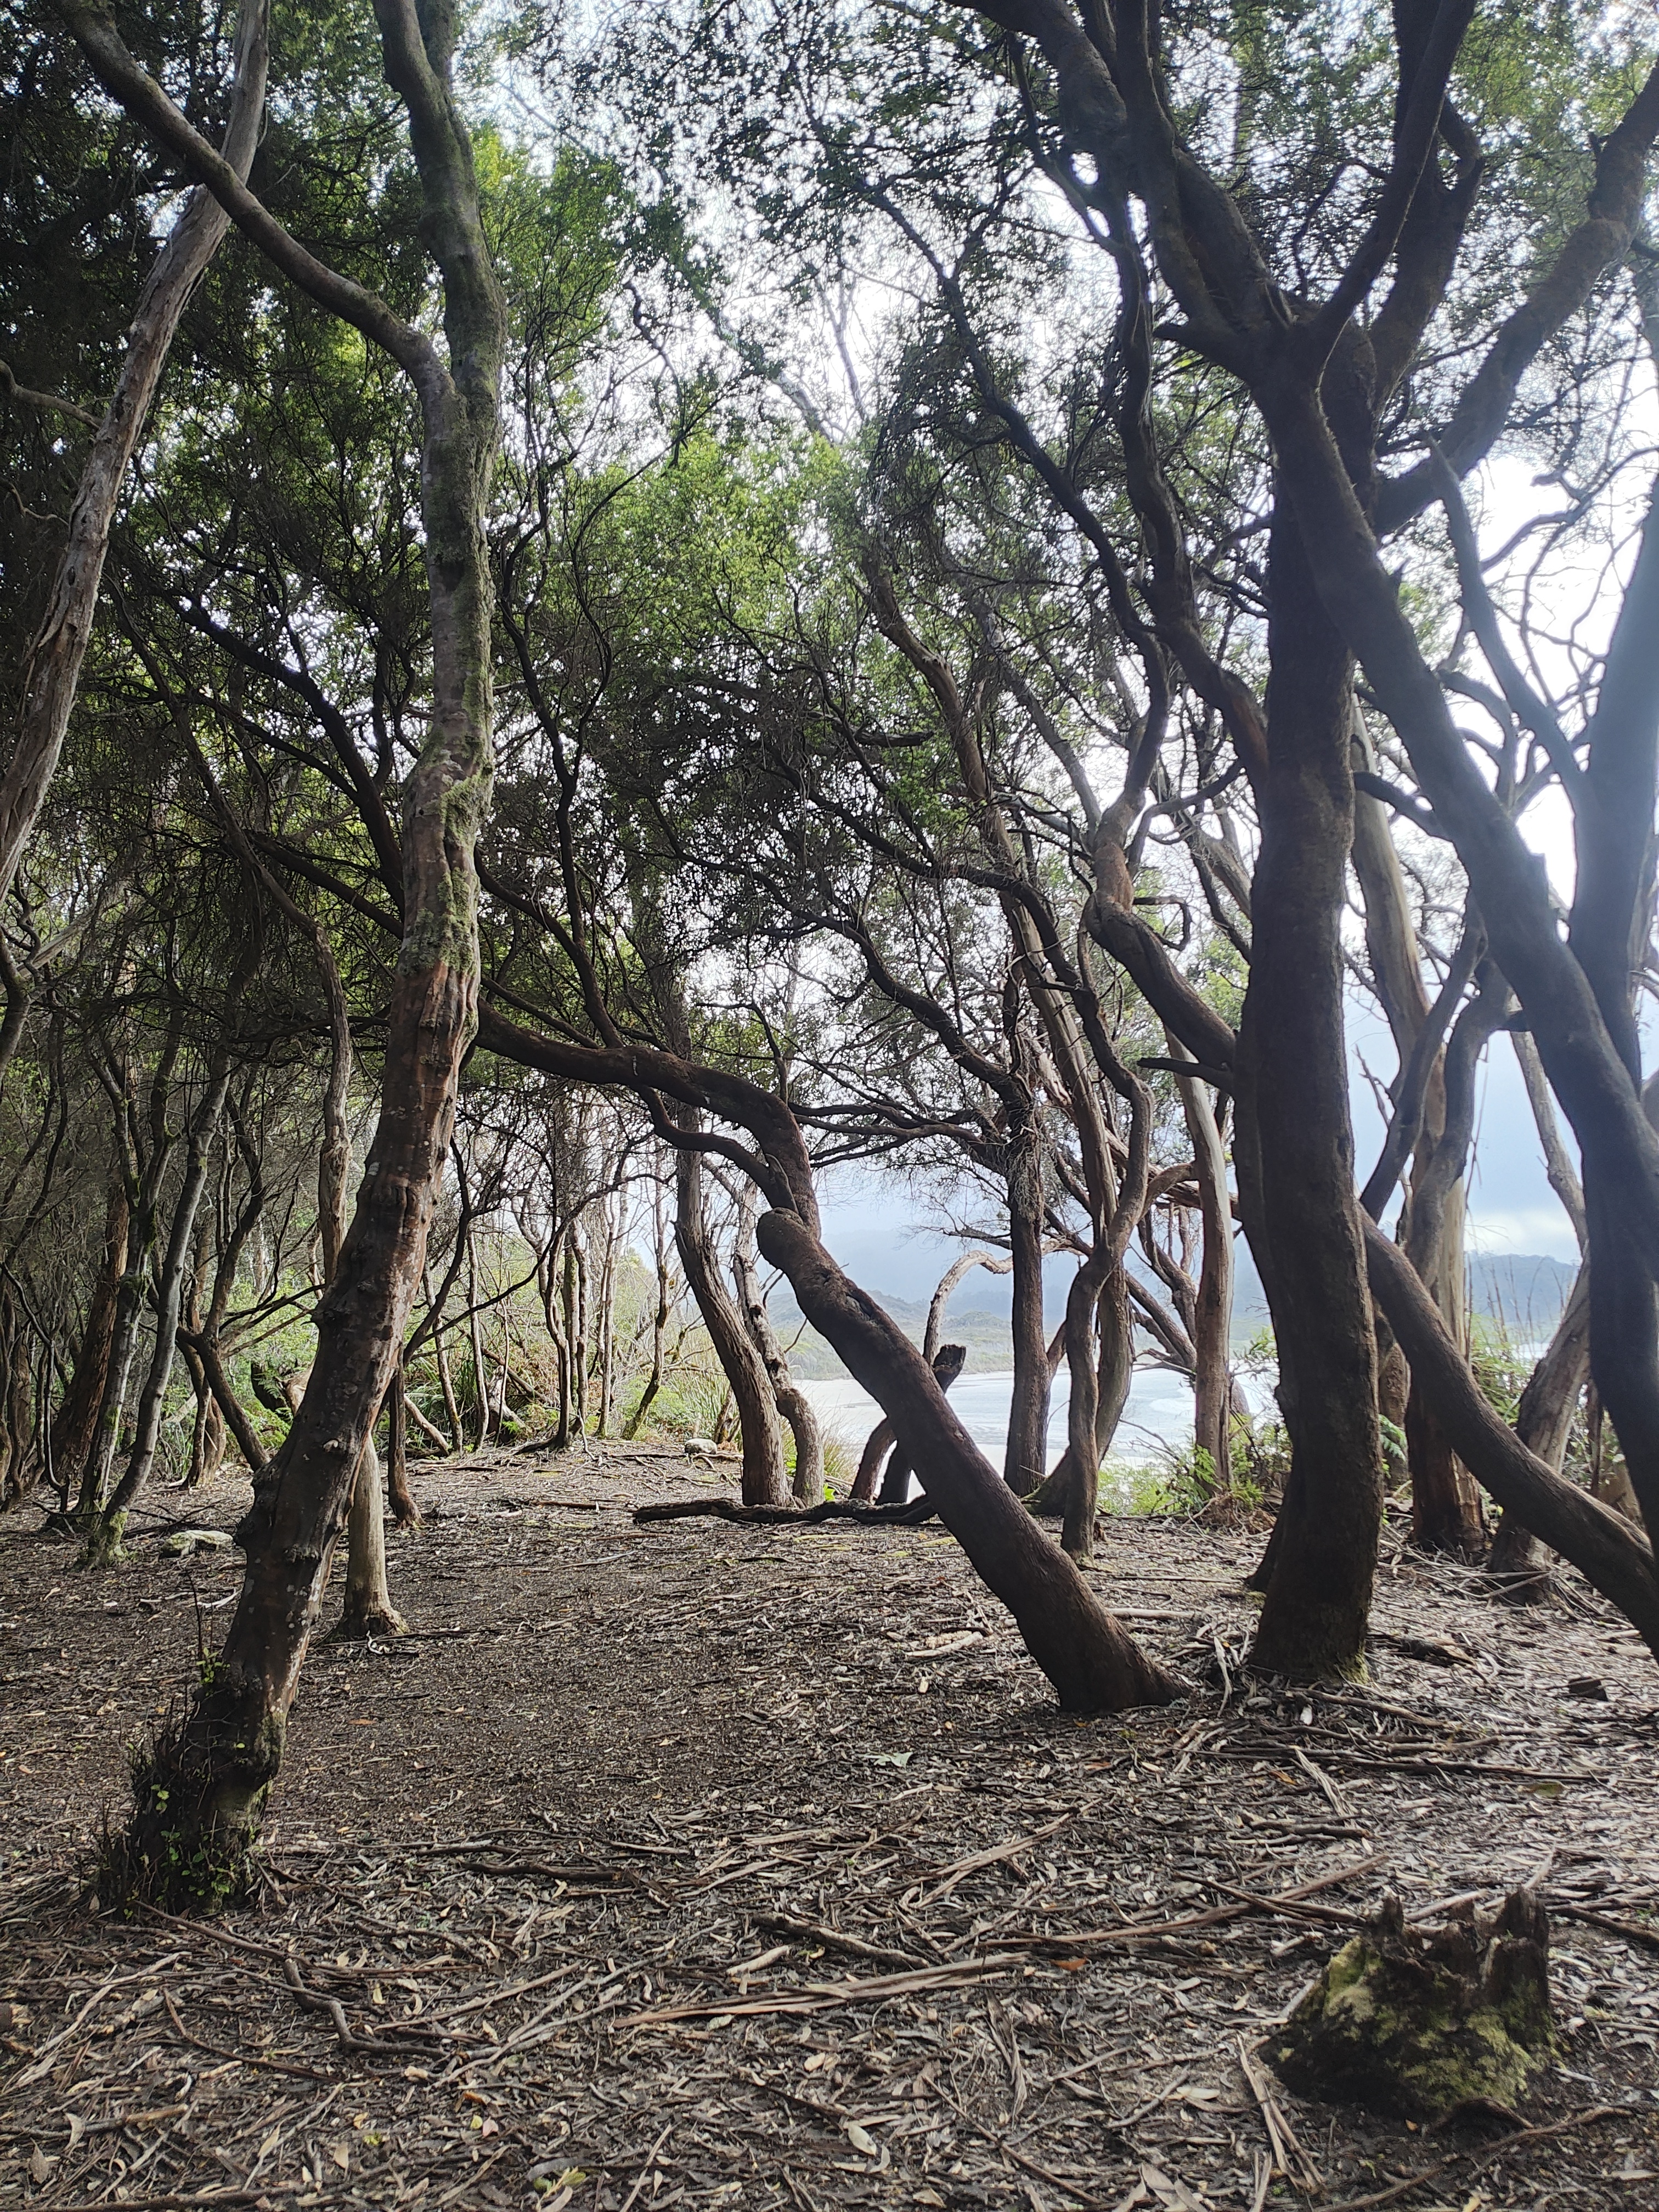
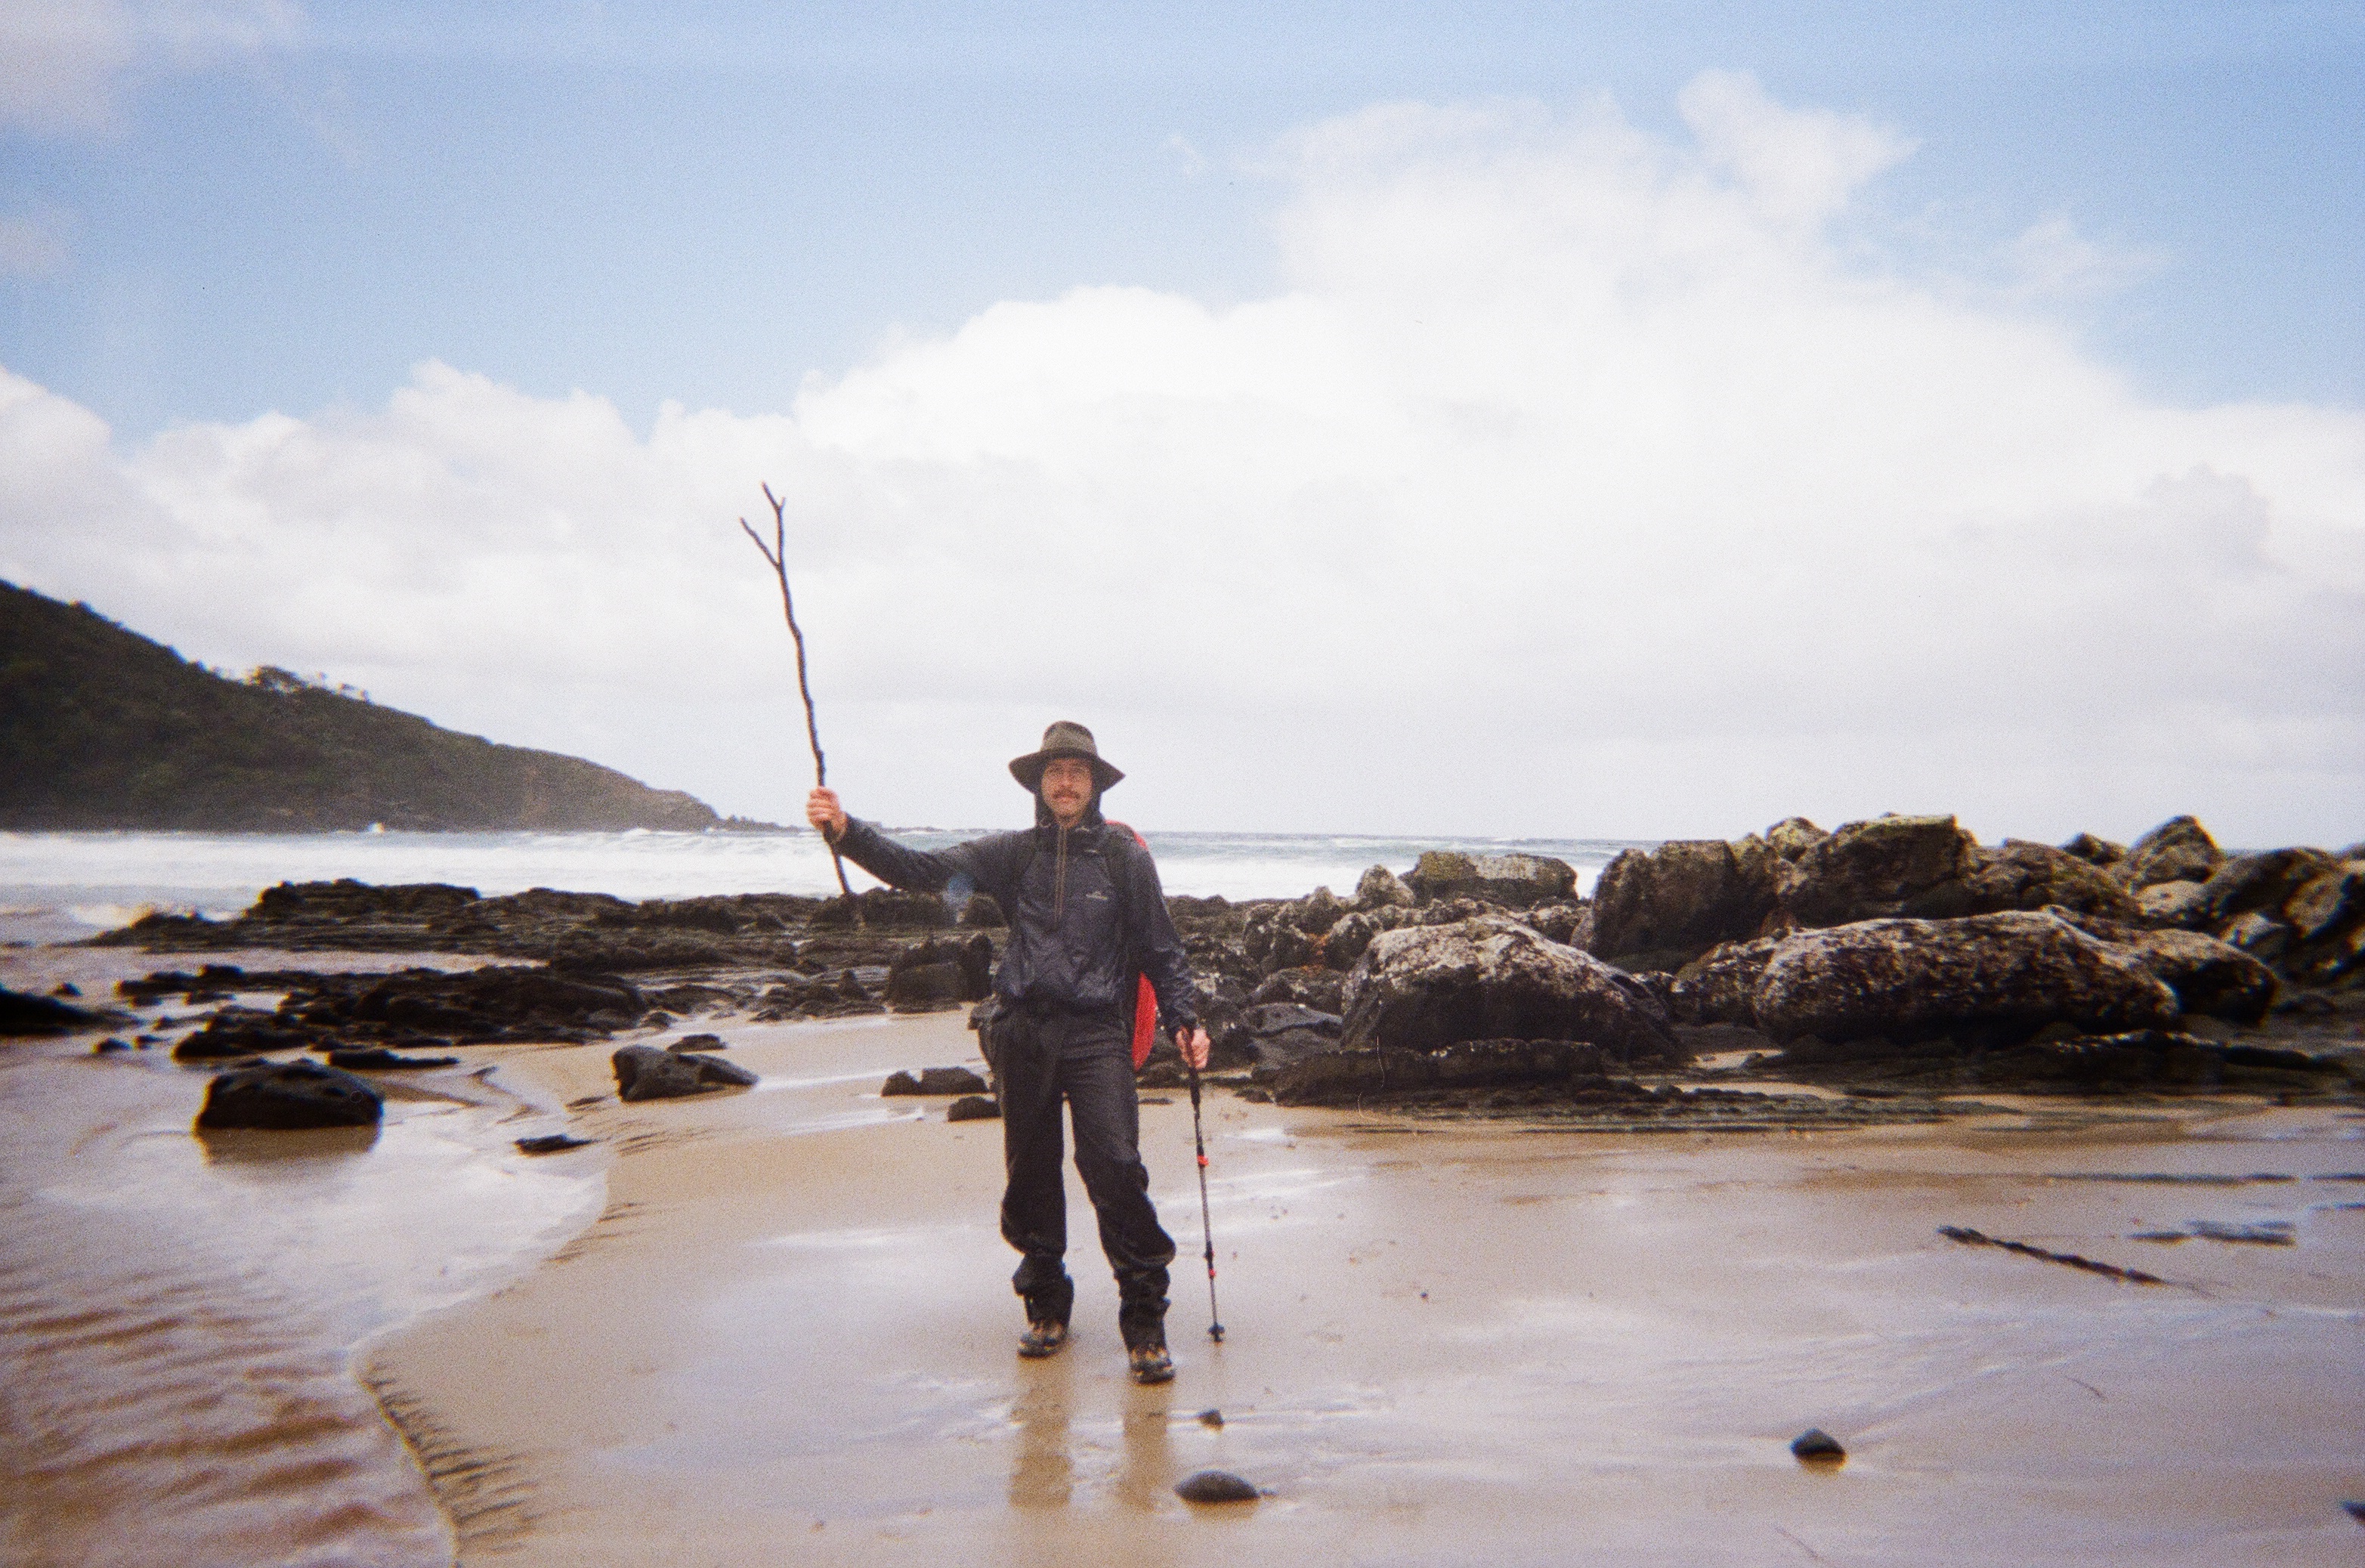
Day 2 started at about 7:30am with breakfast and pack-up before heading off walking along the beach. One brave team member had a quick swim and from reports it wasn’t too cold! Not far into the beach walk we came across another beach crossing about ankle-deep but had a surprisingly strong current. The track took us over a headland where the trail was thick tall scrub, which became known as ‘spike city’ for the extremely spikey and closely packed bushes. This was the beginning of some bush-bashing, and anything packed externally on the packs got a thrashing. Eventually we emerged from spike city and did another approx 900m of beach walking before crossing Buoy Creek and heading inland. We passed a small campsite here, not sure what it was called, but it was a nice spot and would be a good option if you wanted to extend Day 1 a little longer.
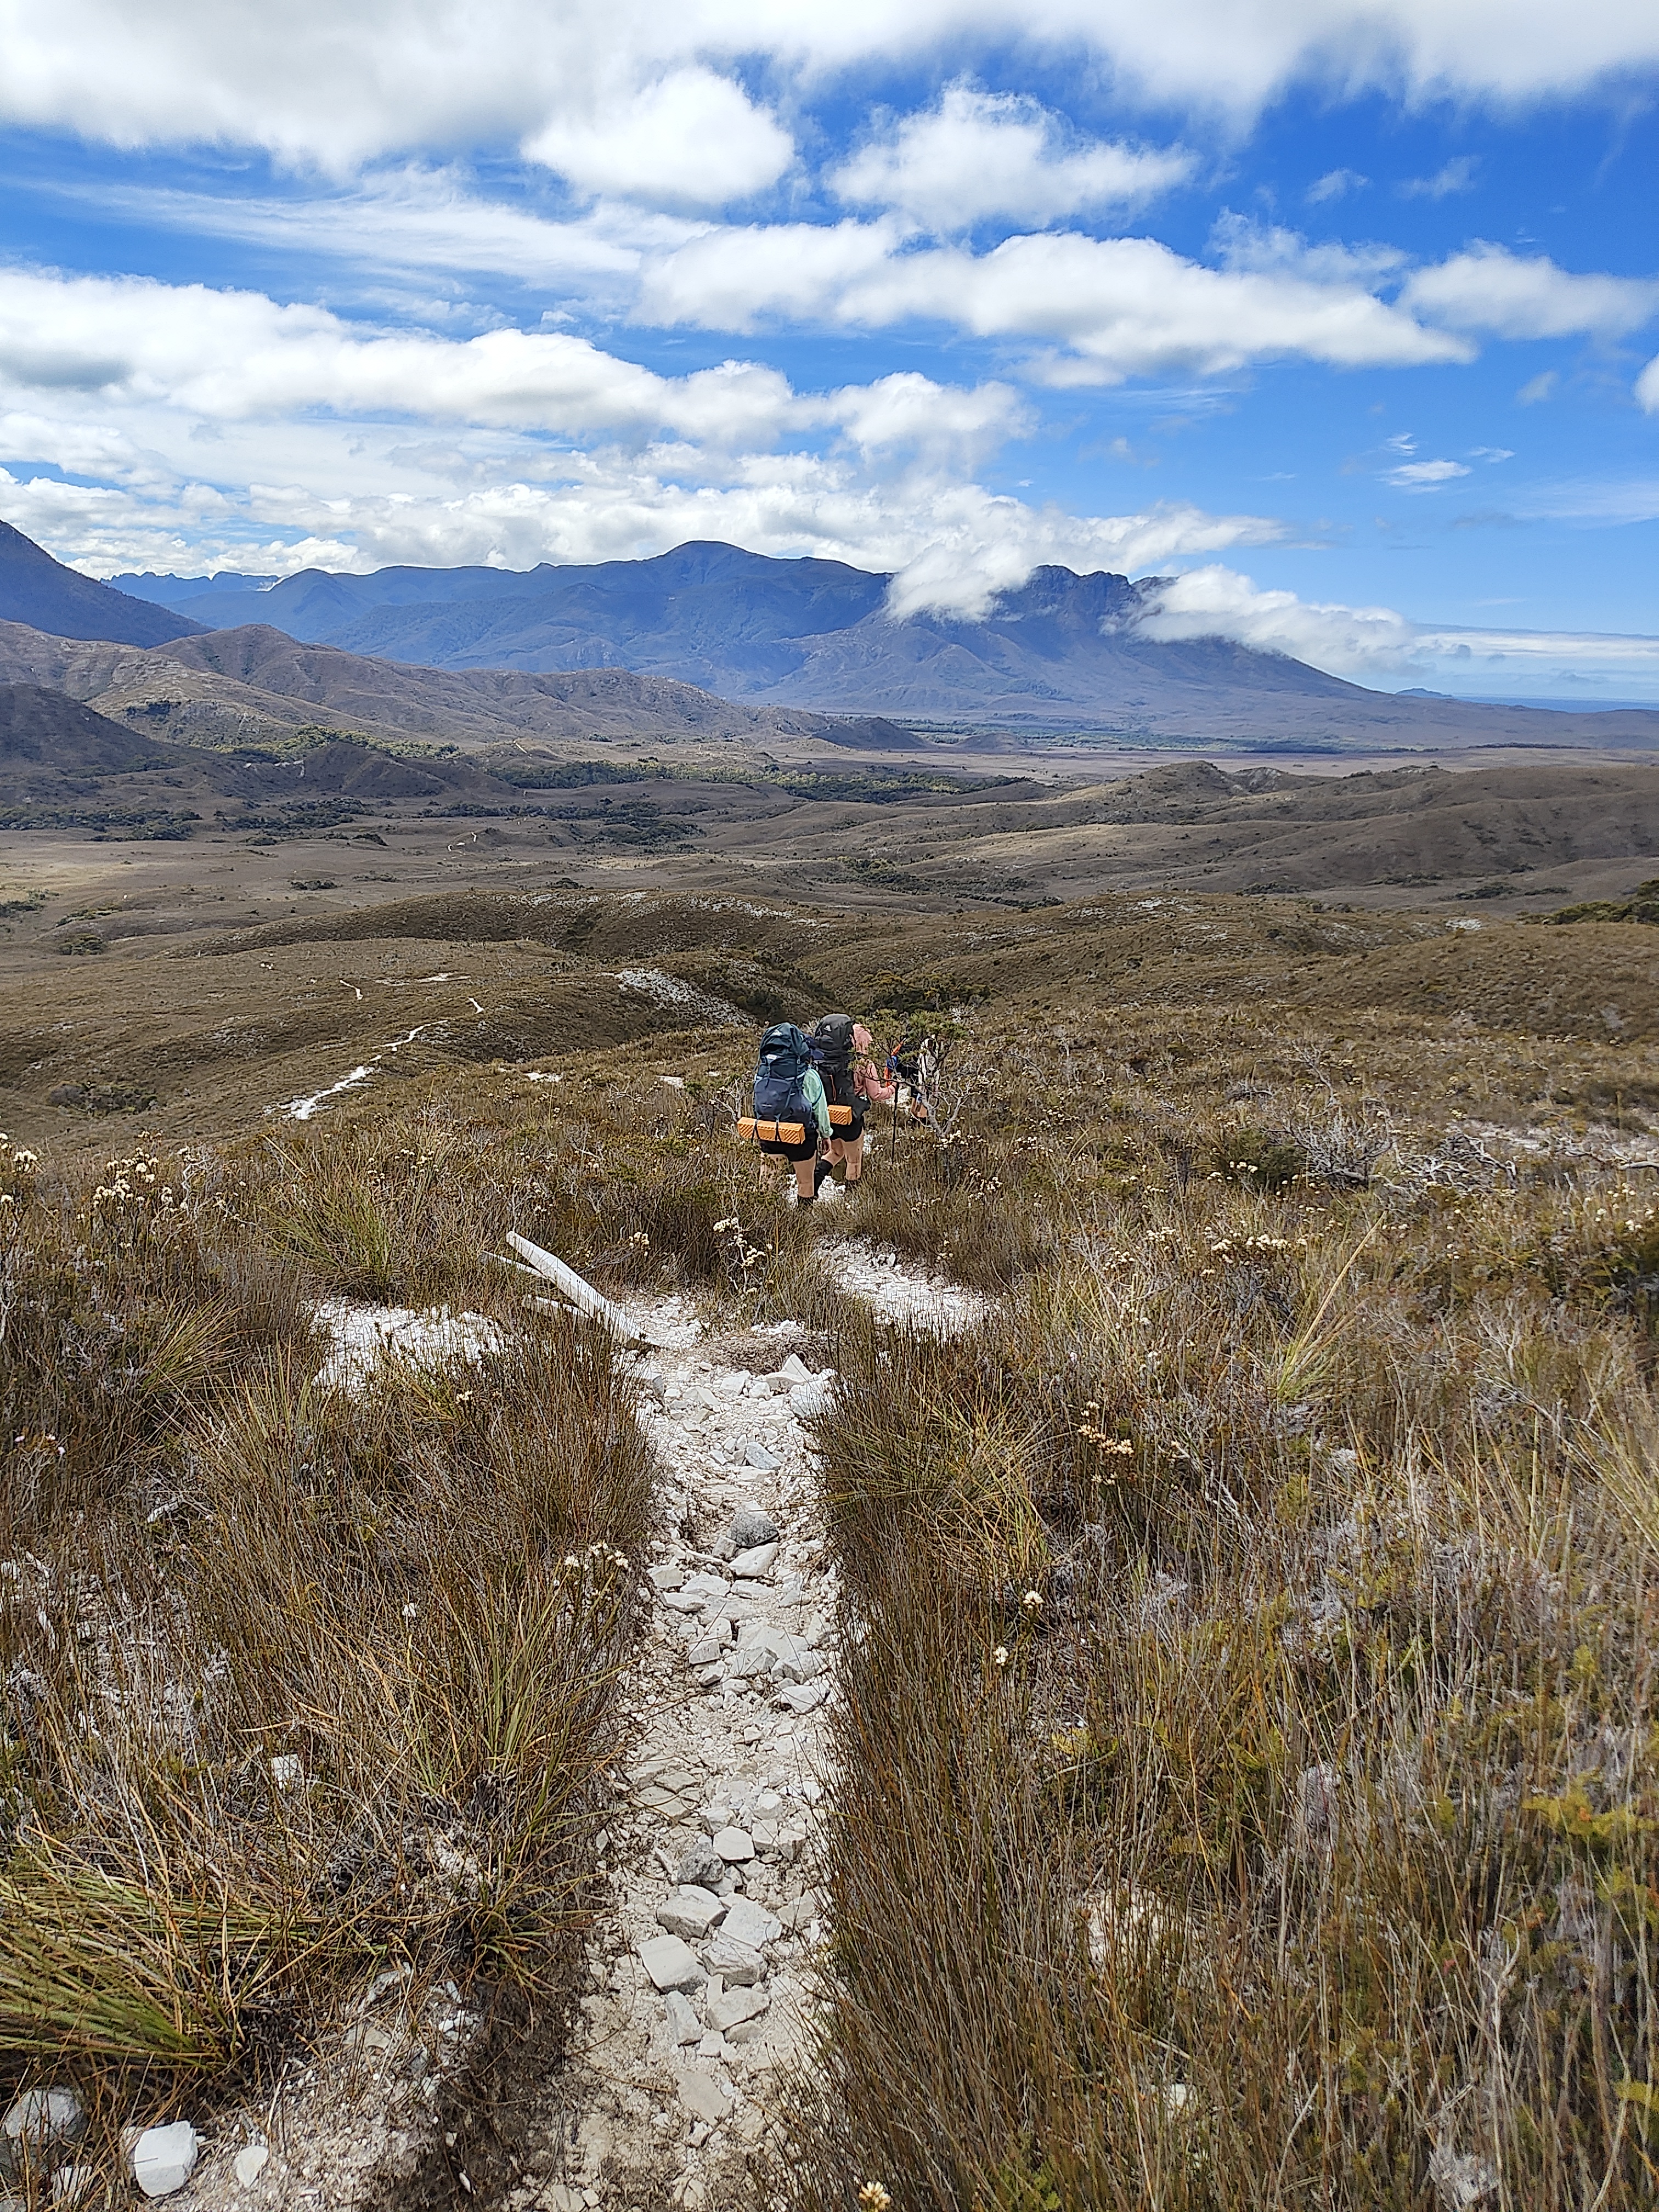
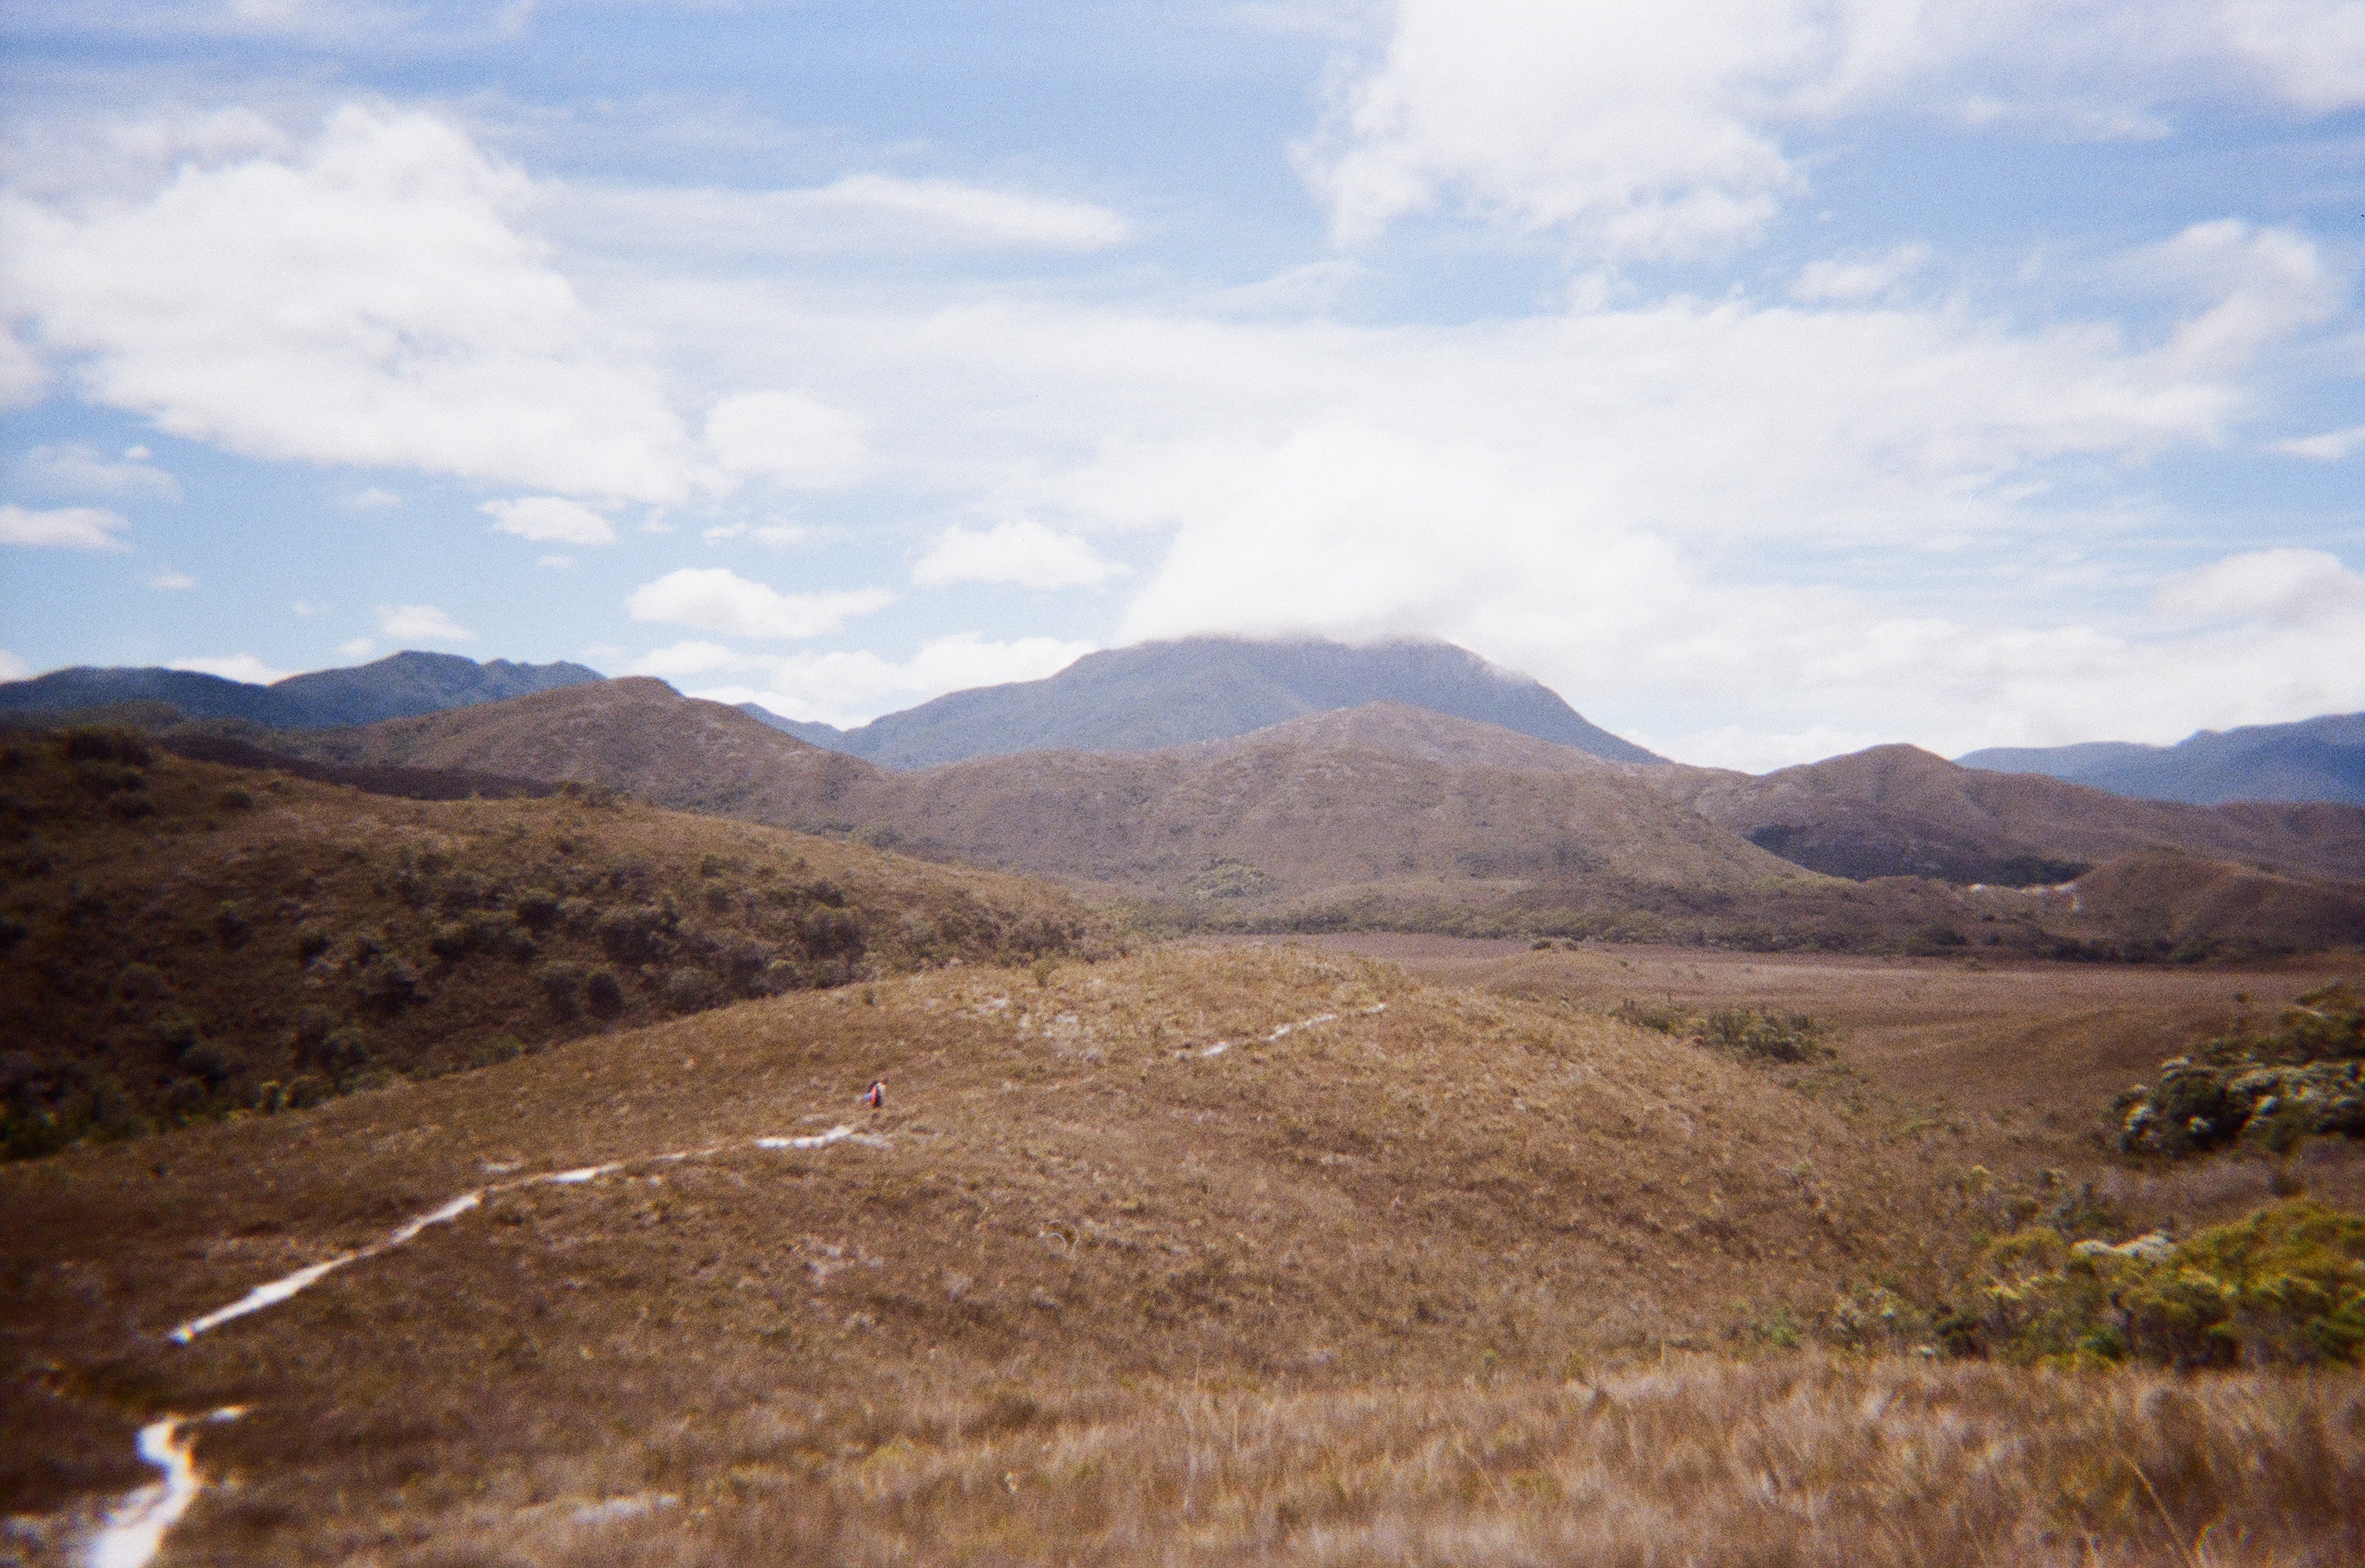
The trail takes a turn through a wooded section before opening onto buttongrass plain. Sections were boardwalk, with other portions muddy track or water lying on the trail (although in the scale of muddiness on this walk, this would be 2/10). There was lots of water available along this section of the trail, and we could see the path ahead of us climb over the Red Point Hills.
The Red Point Hills was a steady climb. The trail is quite steep up uneven steps and is exposed. This was one of the few moments we had real unadulterated sunshine on the trip (and we must be ever-thankful for the good weather, which sadly didn’t last), which made for beautiful views but the Tassie sun is hot. It’s a solid climb which got the heart racing, but provided stunning and far-wide views to the beach and views of the Ironbound Range which was the following day’s challenge.
The descent is steady before turning into a long section of undulating track. This portion of the walk is very exposed so you will be at the mercy of the elements, which was sun in our case. This section felt like a bit of a slog and it was pure relief when we eventually came to a lush section with trees, a refuge from the hot sun. Not only was there the relief of the shade, but here we found Faraway Creek.
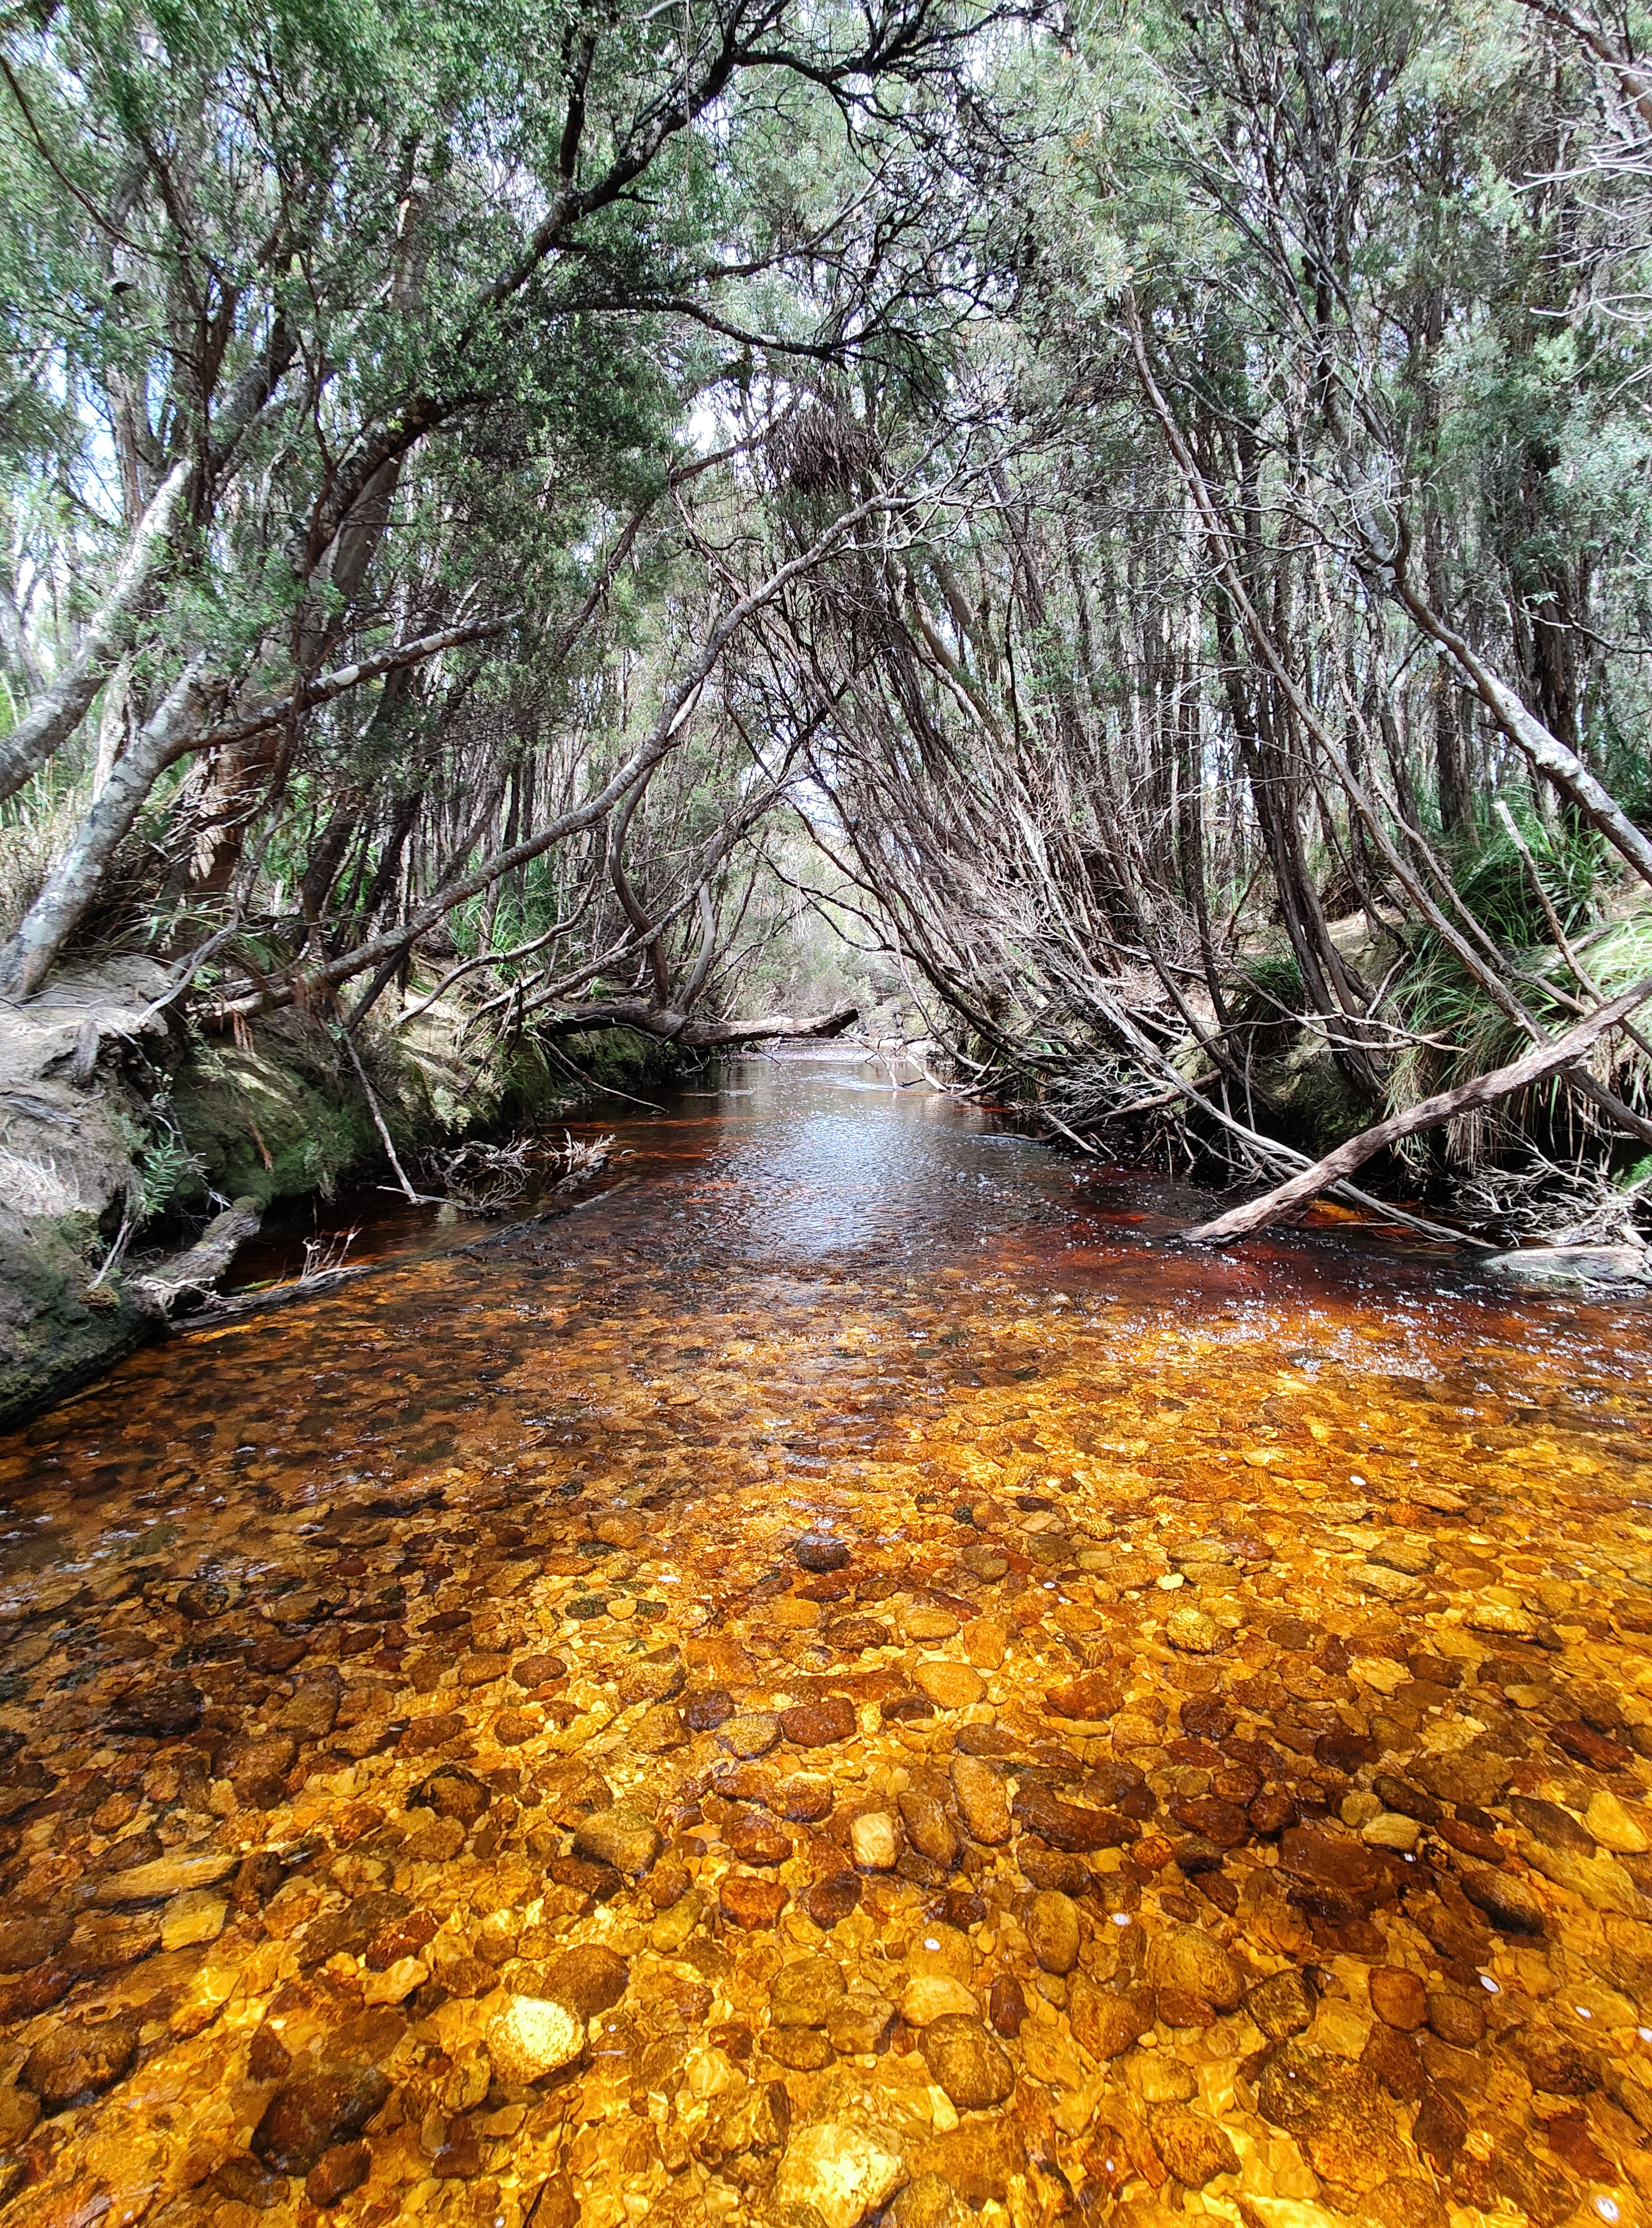
We took our shoes off for this crossing, which was about calf-deep and had a rope to assist (if you could reach it). There was a decent amount of water flowing, and I can imagine this could be strong current after lots of rain. This was a nice lunch spot listening to the gentle running of the creek. The water was perfectly clear and created a magical visual effect of smooth stones under tannin-stained water.

After lunch, it was only about another 700m before we came to Louisa Creek. Louisa Creek was similarly about calf-depth and was an easy crossing in our conditions. The track then headed up stairs before continuing along the plain along boardwalks and our first really muddy/wet sections of the trail. We could see tomorrow’s trail leading up the Ironbound Range and had a full view of the impending climb.
After what felt like a long walk, the trail started to descend into forest. By this point we knew the pattern; if there’s trees, there’s likely a creek. We arrived at Louisa River just as it was starting to rain. There is a campsite on either side of Louisa River, but we opted to do the crossing as there was a toilet on the opposite side, and it would mean not having to face the water crossing first thing in the morning. The river was shallow when we crossed, but this is probably the widest of the river crossings on the whole walk and does involve navigating some slippery stones. There is a rope available, but here we witnessed one team member dramatically slip on rocks and fall into the water, making for our first sodden items.
Of note, we did the river crossings without shoes for as long as our shoes remained dry (because we hadn’t had any wet weather yet). I’m not sure if this is recommended, but it was quite painful underfoot without shoes due to both the cold temperature and the rocks.
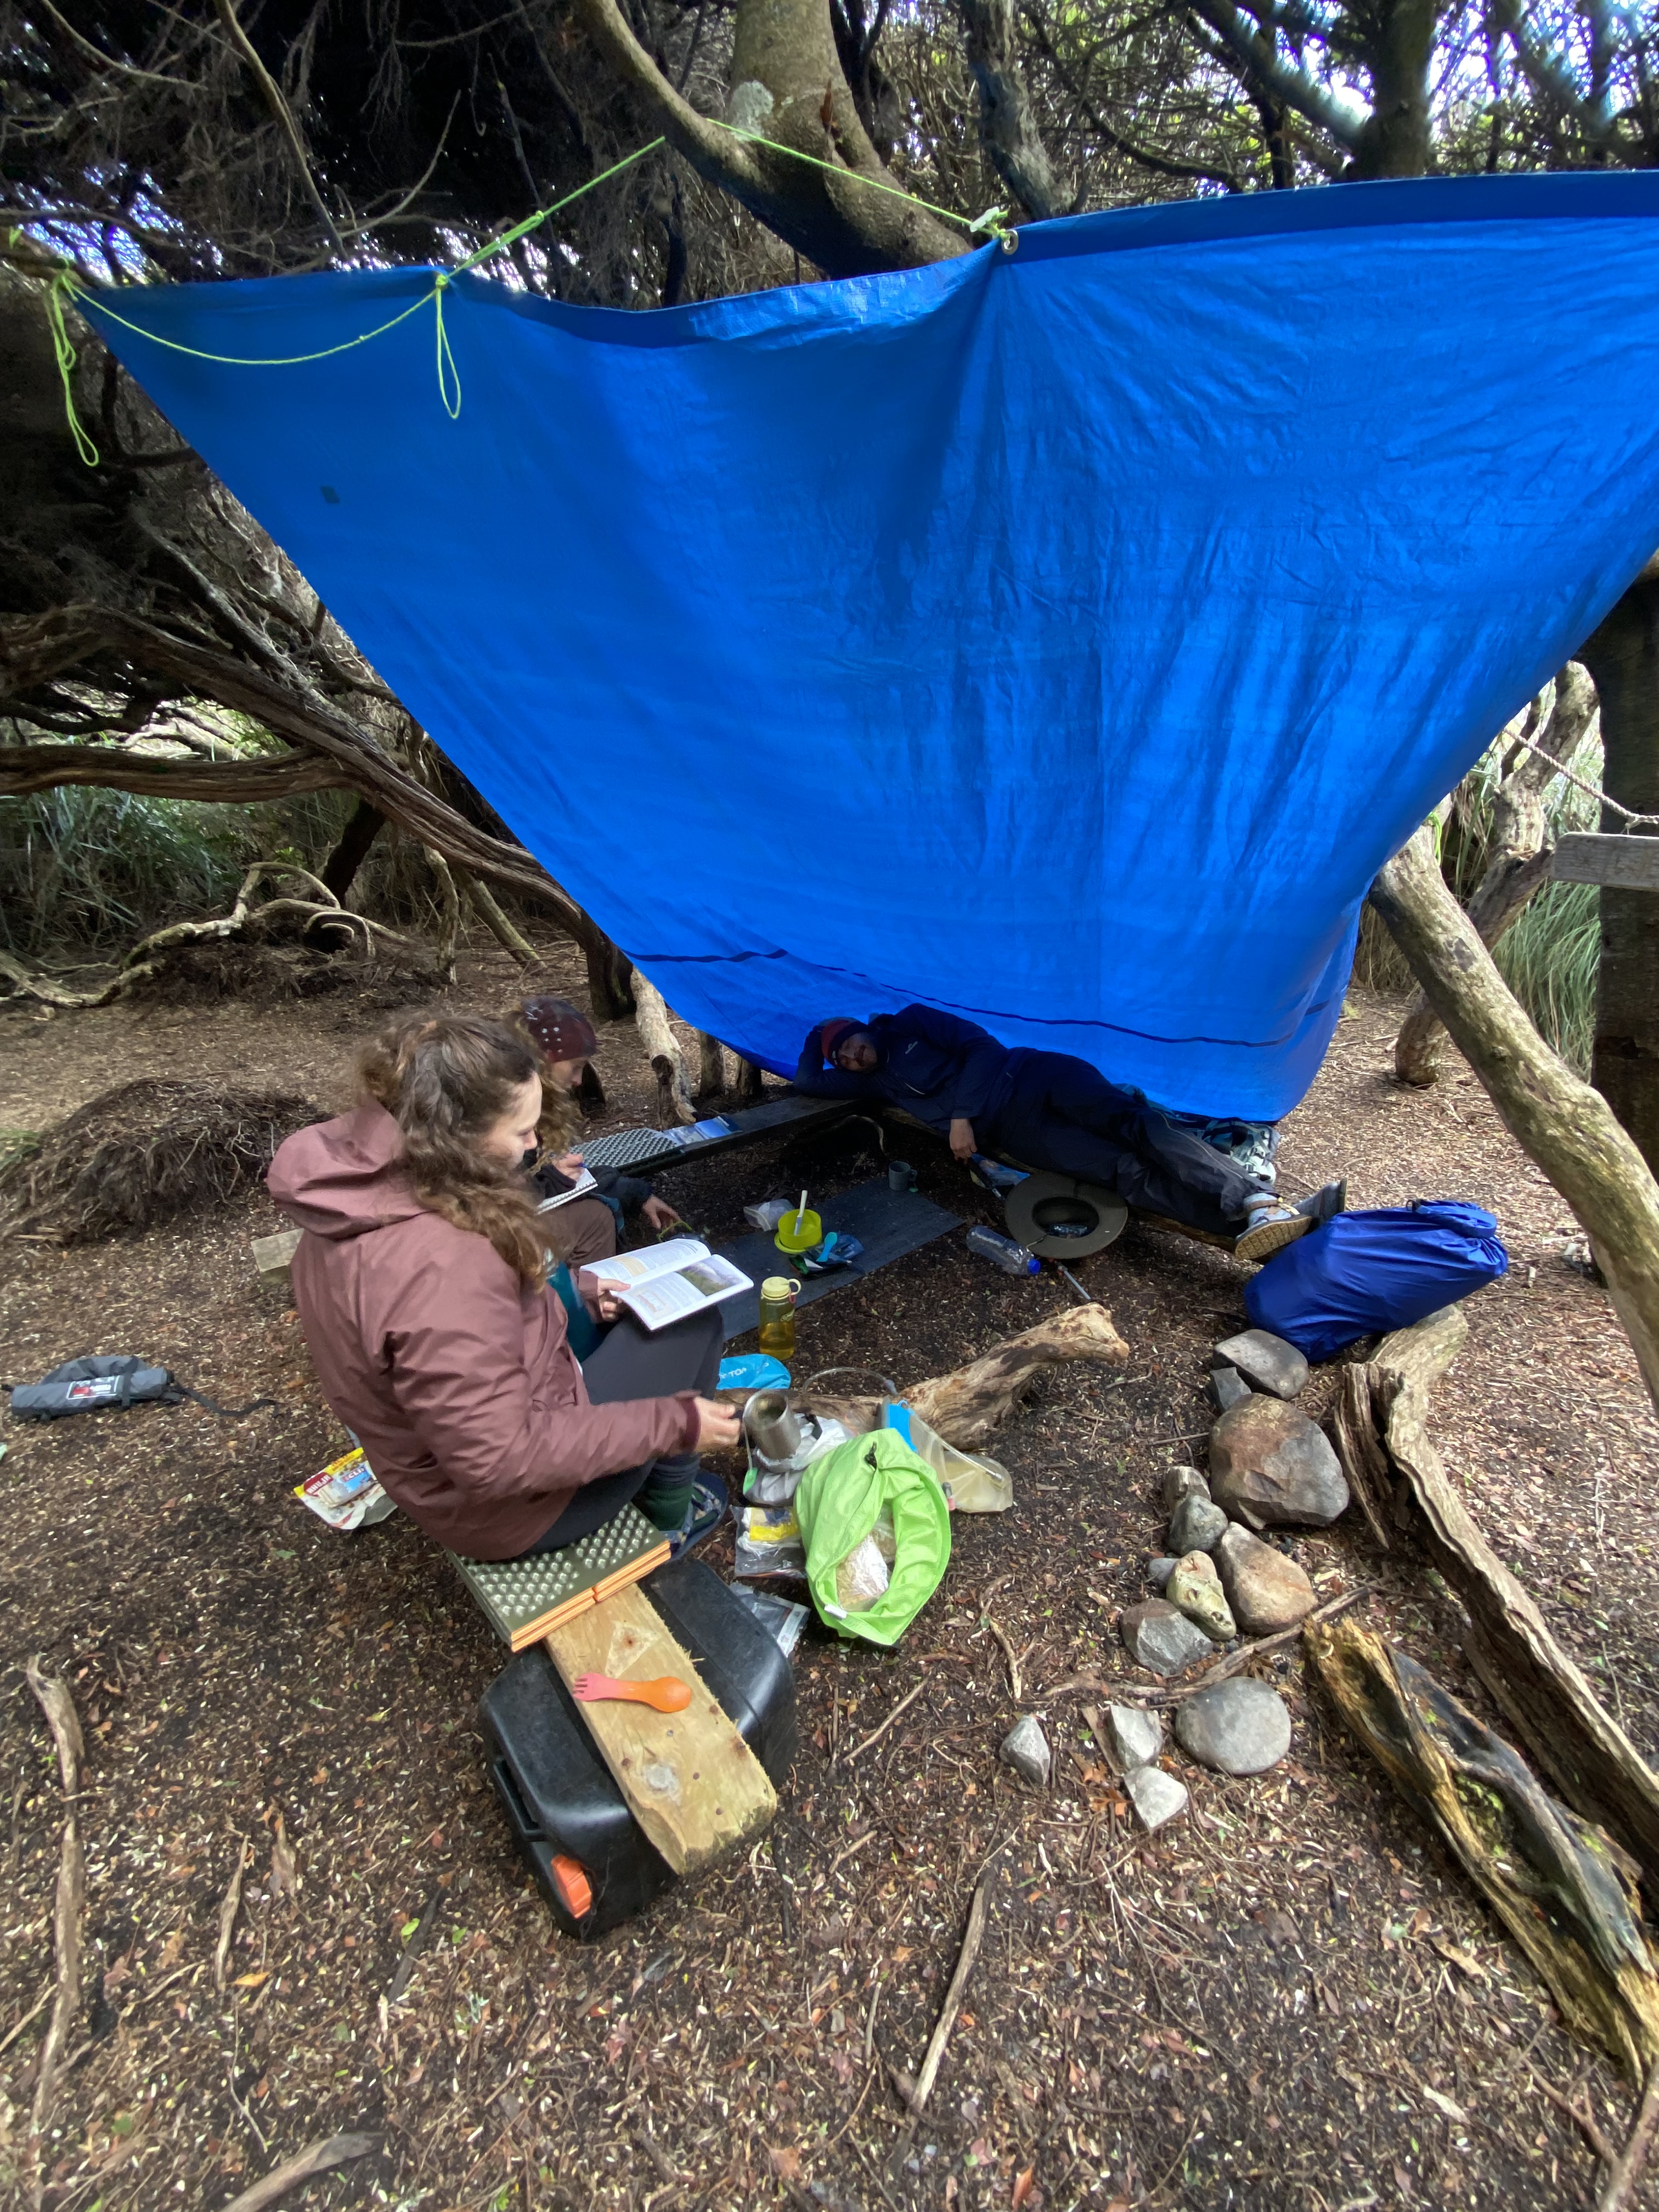
Once we arrived at camp around 4:30pm the rain really set-in and we were thankful to have a tarp to cook under. There were lots and lots of leeches here!
We ate Japanese curry for dinner (a crowd favourite) before getting into bed. There was some anxiety and lots of discussion about the day ahead and whether the Ironbound would be safe to cross. It was a restless sleep under heavy rain and thinking of the day ahead.
Peaks & Pits:
Peak: Beach walking, Faraway Creek crossing and lunch spot
Pit: Spike city and a looong day of walking
Day 3: Louisa River to Little Deadmans Bay
Distance: 13km
Duration: 12hr (including breaks)
Highlights: Ironbound Range
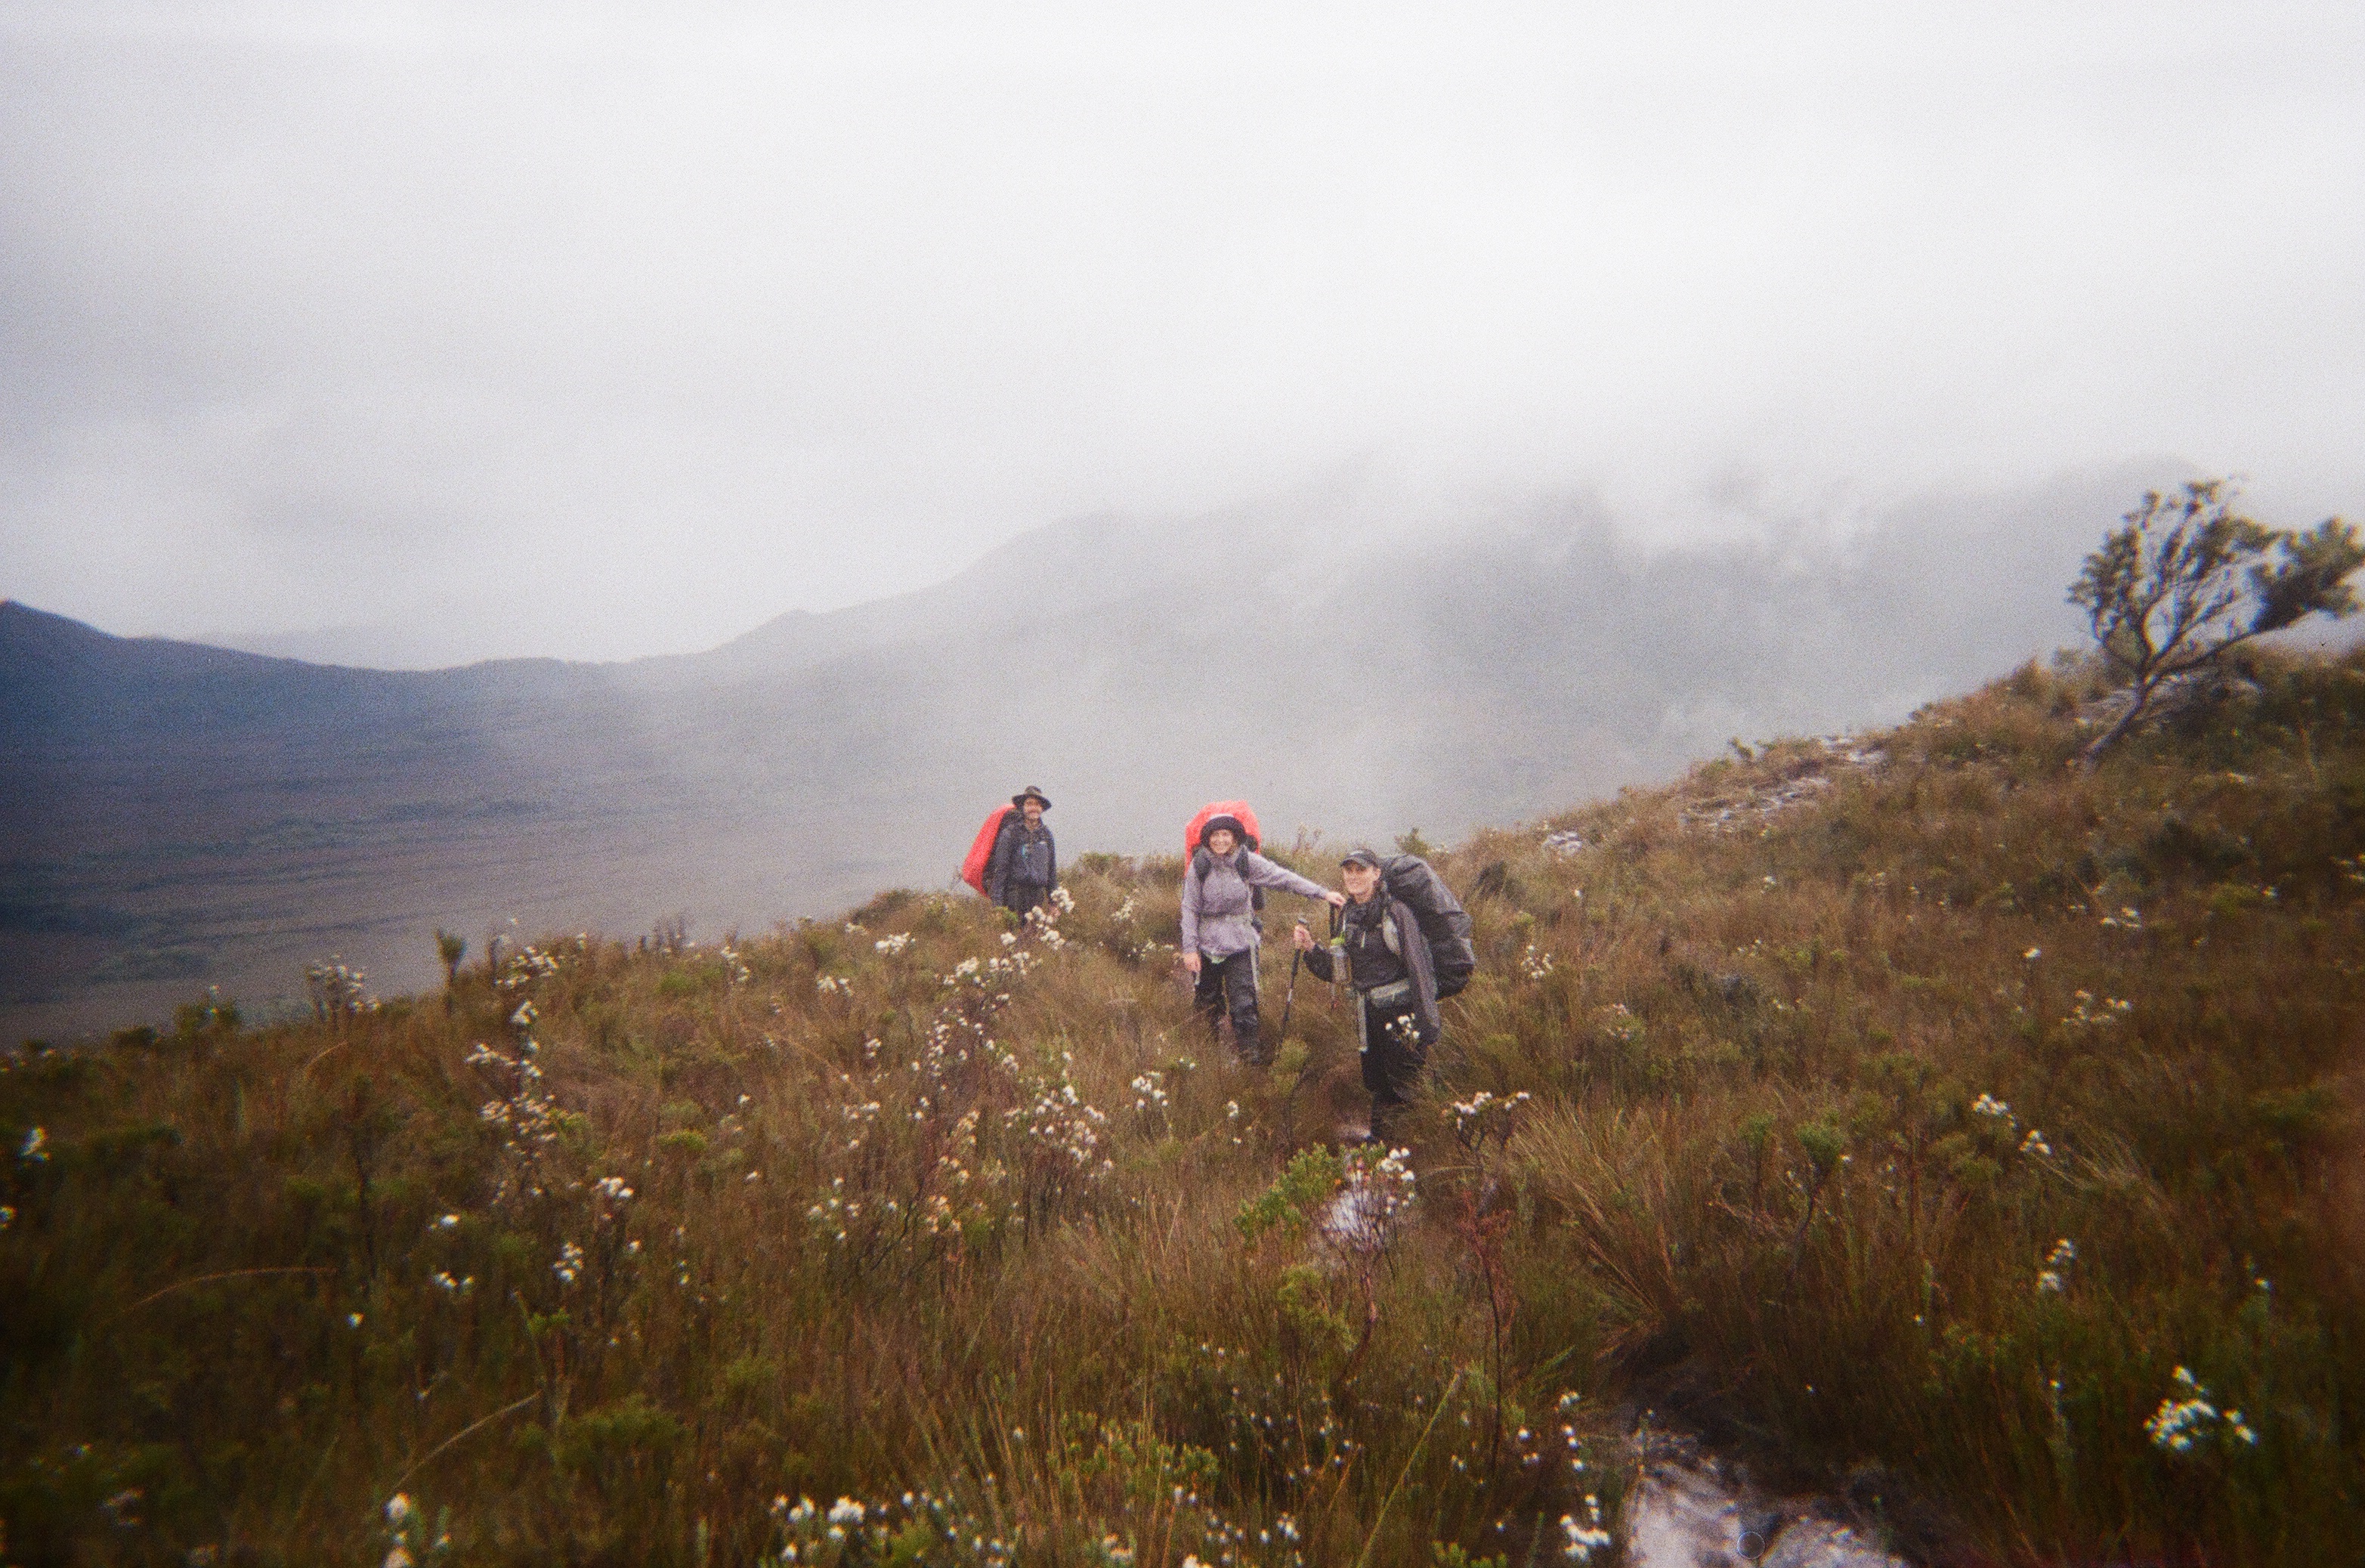
The sounds of Louisa River grew into a roar overnight. There had a been a lot of rain and it was continuing to rain lightly, but we couldn’t assess the wind in the protection of the forest. All the research we had done said not to attempt the Ironbound in bad weather, but we weren’t sure what constituted ‘bad weather’ in Tassie. From our walk the day prior, we could see there was about a kilometer of flat walking before the ascent begins, where we thought we could assess the weather and make a final decision.
We packed up and started walking, emerging from the forest and continuing along the boardwalk to the base of the mountain. It was very light drizzle and no wind, but some dark clouds overhead covering the top of the mountain. We reviewed the Chapman guidebook and noted there was a high camp and a low camp option if we didn’t make it to Little Deadmans Bay, and felt that gave us come contingency plans if the weather changed and we were unable to complete the full section today.
So we started up the mountain. This was a relentless climb. Very steep up uneven steps, and at times the steps were very large (hip-height). This climb was slow-going and we locked into grit step mode, breaking sections down into smaller more digestible pieces. There were death stares when the Garmin-wearer of the group commented we’d need to up our pace as we were doing 500m/hour. After a couple of hours of walking we’d made some decent progress, but the weather quickly changed and was suddenly very windy, heavy rain and very cold. And when you didn’t think it could get worse….it hailed.
The track turned into a full-on creek with cold water streaming down the track. You can’t see this well in the photos, but it was truly a fast-flowing creek we were working against. The climb has many false bluffs and it was difficult to determine how much track was left to be covered due to low-lying cloud. We continued on in this weather for hours, constantly climbing with little reprieve. We kept ourselves motivated with singing songs, playing games and regular snack stops. At moments this climb was pretty scary, but we kept pushing those feelings aside and continuing on. For several minutes at a time the weather would suddenly clear and there were beautiful ocean views, and the wildness of the country was clearer than ever.
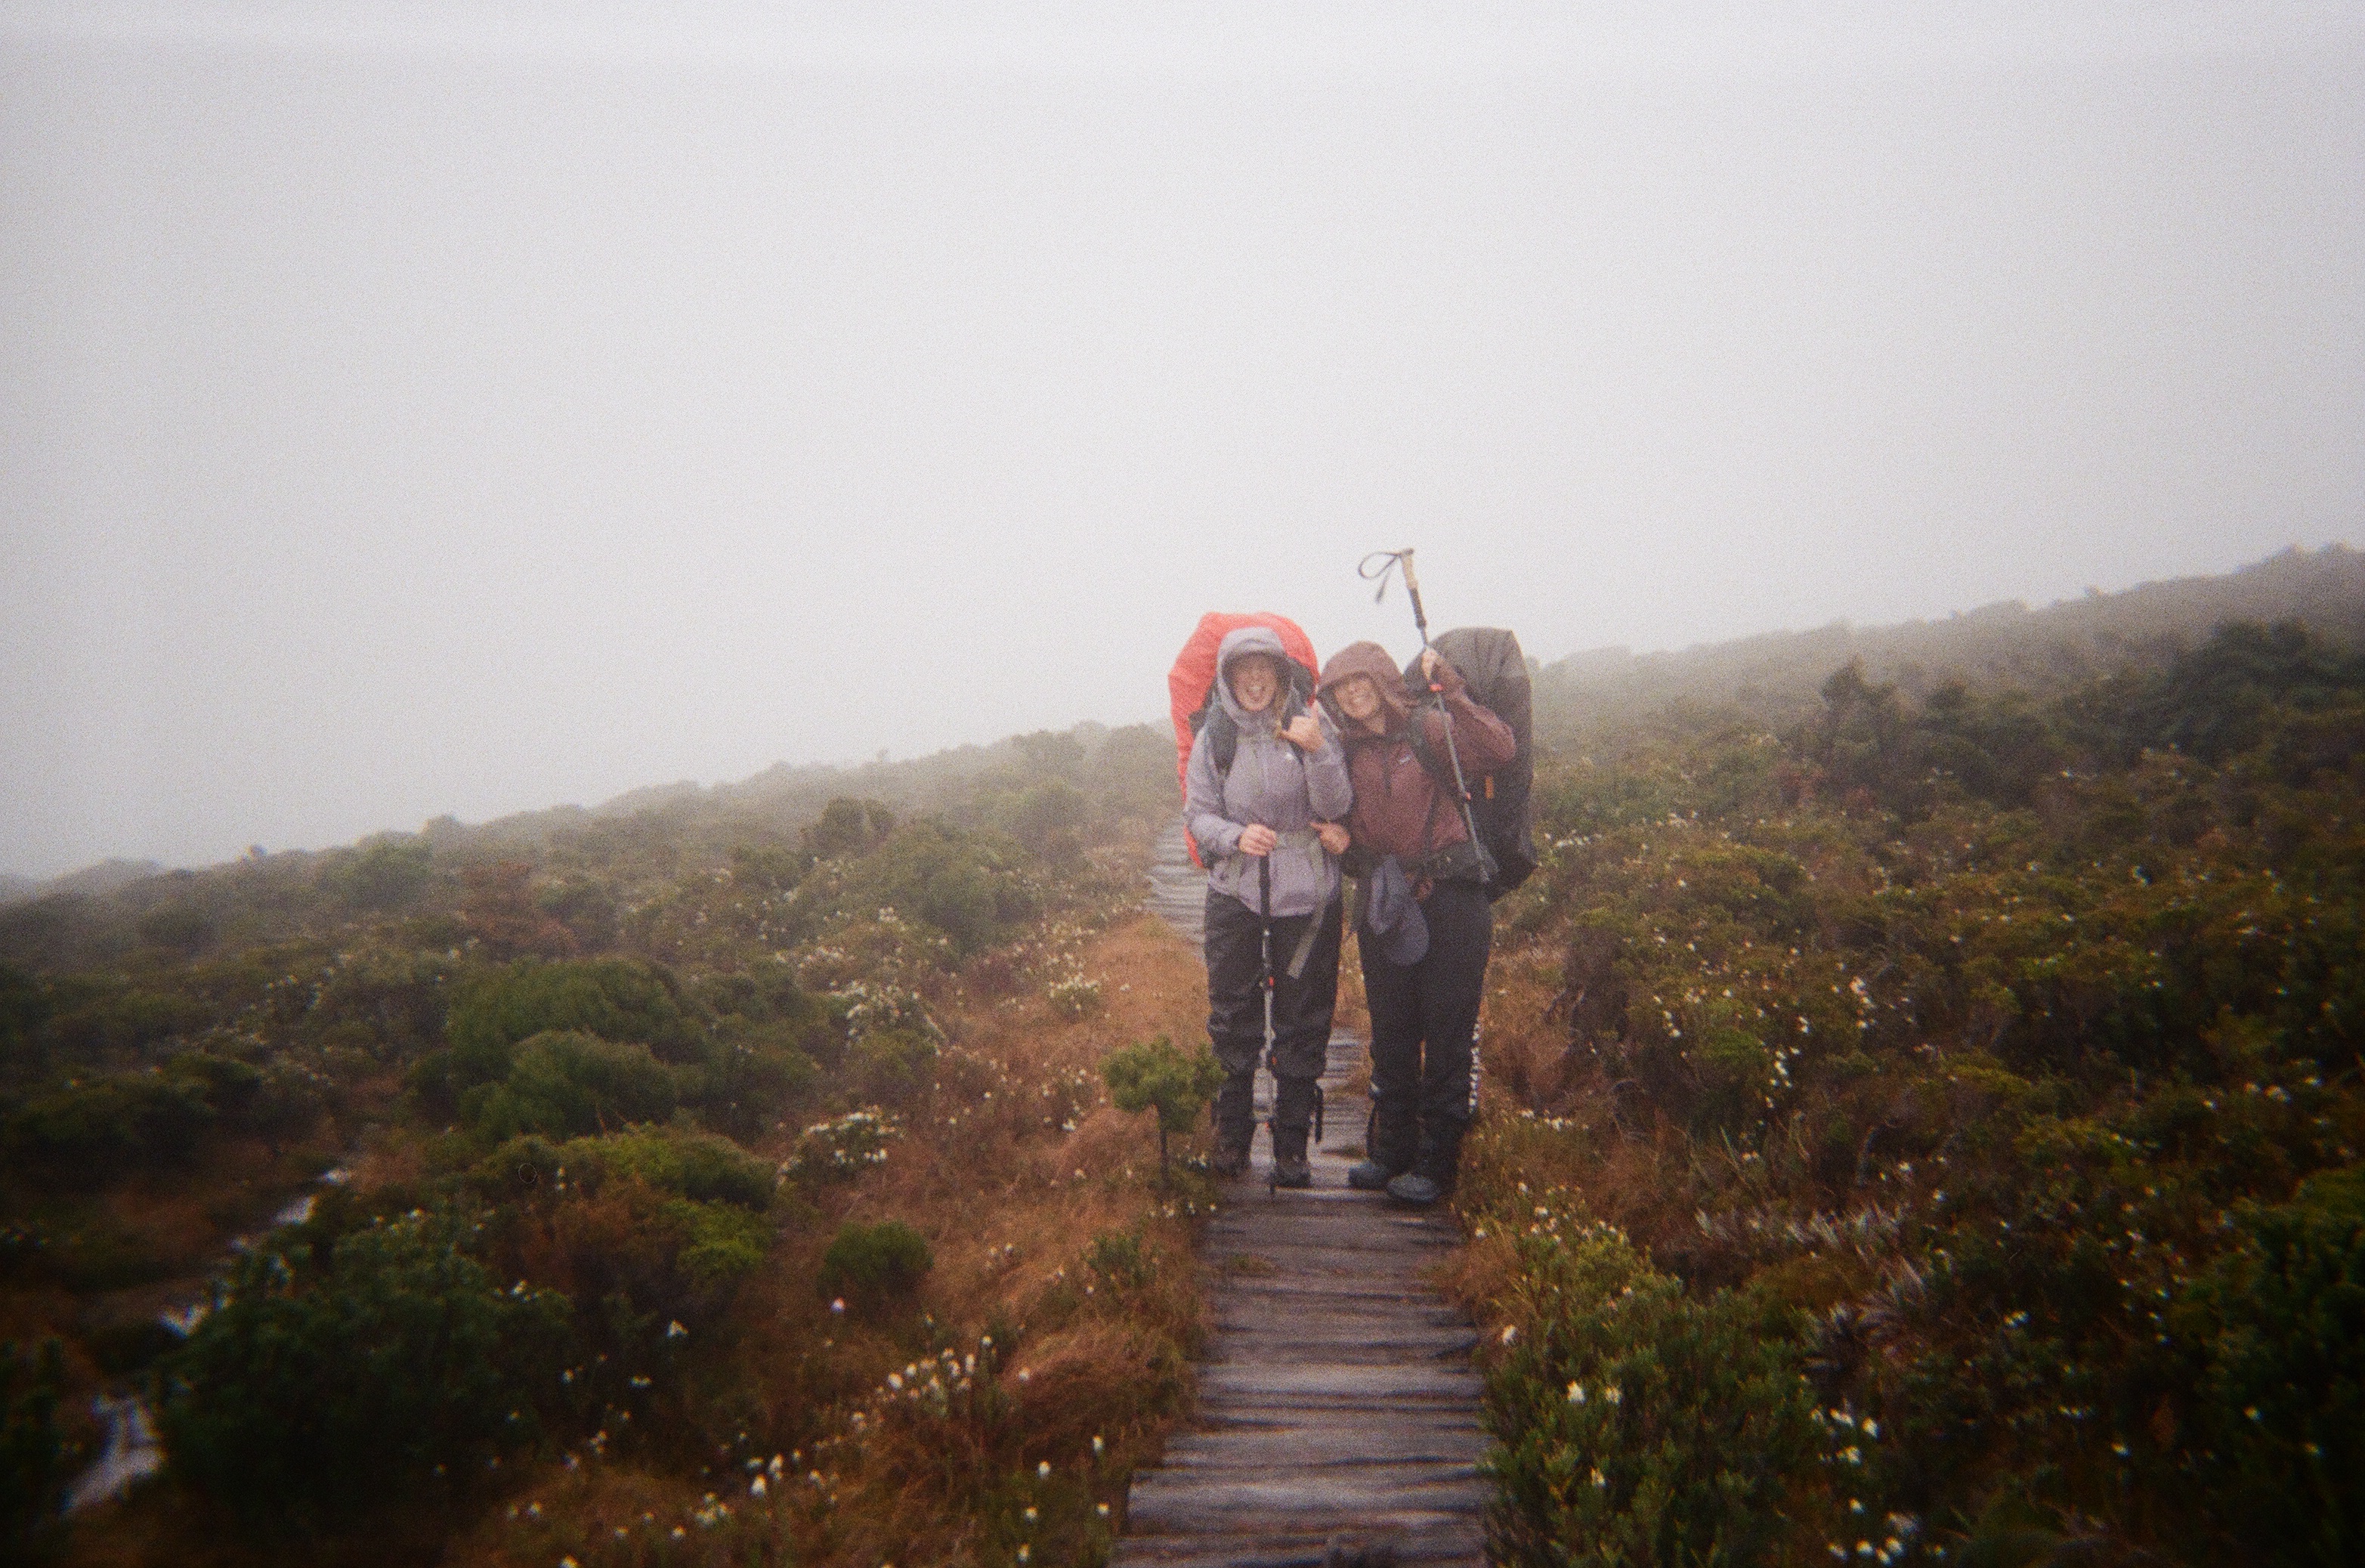
Eventually the climb turns into a gentler boardwalk which seemed to go on longer than we had expected. The summit was white-out, and by this point we were pretty keen to get off the mountain. It was very windy at the summit, to the point we were getting blown over and it was hard to stay on track. There are a few steel poles at the summit which help show the track, but it would be easy to get lost up there in white-out conditions.
By this point, we’d been walking saturated for hours and were feeling the cold. With half the kilometers of the day still in front of us, some concern about exposure started to set in and we thankfully had a thermos of boiling water to have a cup of hot noodles each before starting the descent. We passed what we think was the high camp mentioned in the Chapman guidebook, but it was very exposed and seemed to be for emergencies only.
There was a big sigh of relief when we started the descent and we were keen to put the mountain range as far behind us as possible. Little did we know this would be a very long descent. We had read in other blogs that this descent was tough, but we didn’t realise how physical it would be. It’s very steep and muddy, riddled with tree roots and fallen trees, which involves having to lower yourself down steep sections. This was a full arm workout, and also very mentally involved as required a lot of attention to detail and careful foot placement. This was fun at first when we were running on an adrenaline high after the summit, but eventually this section dragged and was possibly slower than the ascent.
There aren’t really any good break spots on the descent until you make it to the wooded section at the bottom. We had lunch near the low camp where we briefly considered stopping for the day, but decided to press on for the final few kilometers. There is a river crossing about 300m past the campsite.
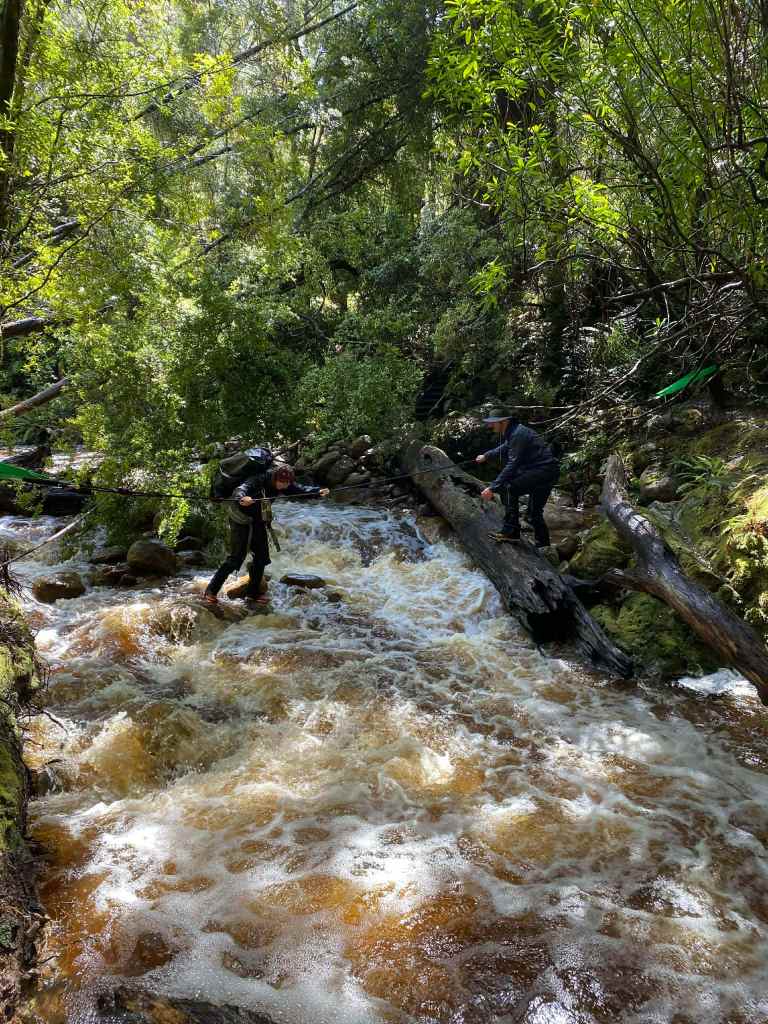
At the river crossing we saw the full effect of the heavy rain overnight and throughout the day. The crossing was fast flowing and close to knee-depth. It’s not a wide crossing, but just too far to jump or step over, and there is a waterfall with a drop of a couple of meters immediately downstream. We went back and forth about whether to cross, shocked and insulted by there being another scary hazard to deal with for the day. Wary that the water level was only going to get higher given all the rain, we sent our tallest team member over first who could more easily step across the creek. We then passed the packs across the creek, with one person passing over the bags, one person holding onto the passer, and the fourth person standing a couple of meters downstream as a back-up if anyone fell in. After packs had safely been transferred, we each stepped across the creek with the help of our teammates.
There was a sigh of relief and a team cheer before scrambling up to the right to follow the trail. The path was fairly flat or downhill for the remaining leg of the walk, passing small creek crossings before eventually coming to Deadmans Bay where we did the final creek crossing along the stony beachfront to make it to the eastern camp.
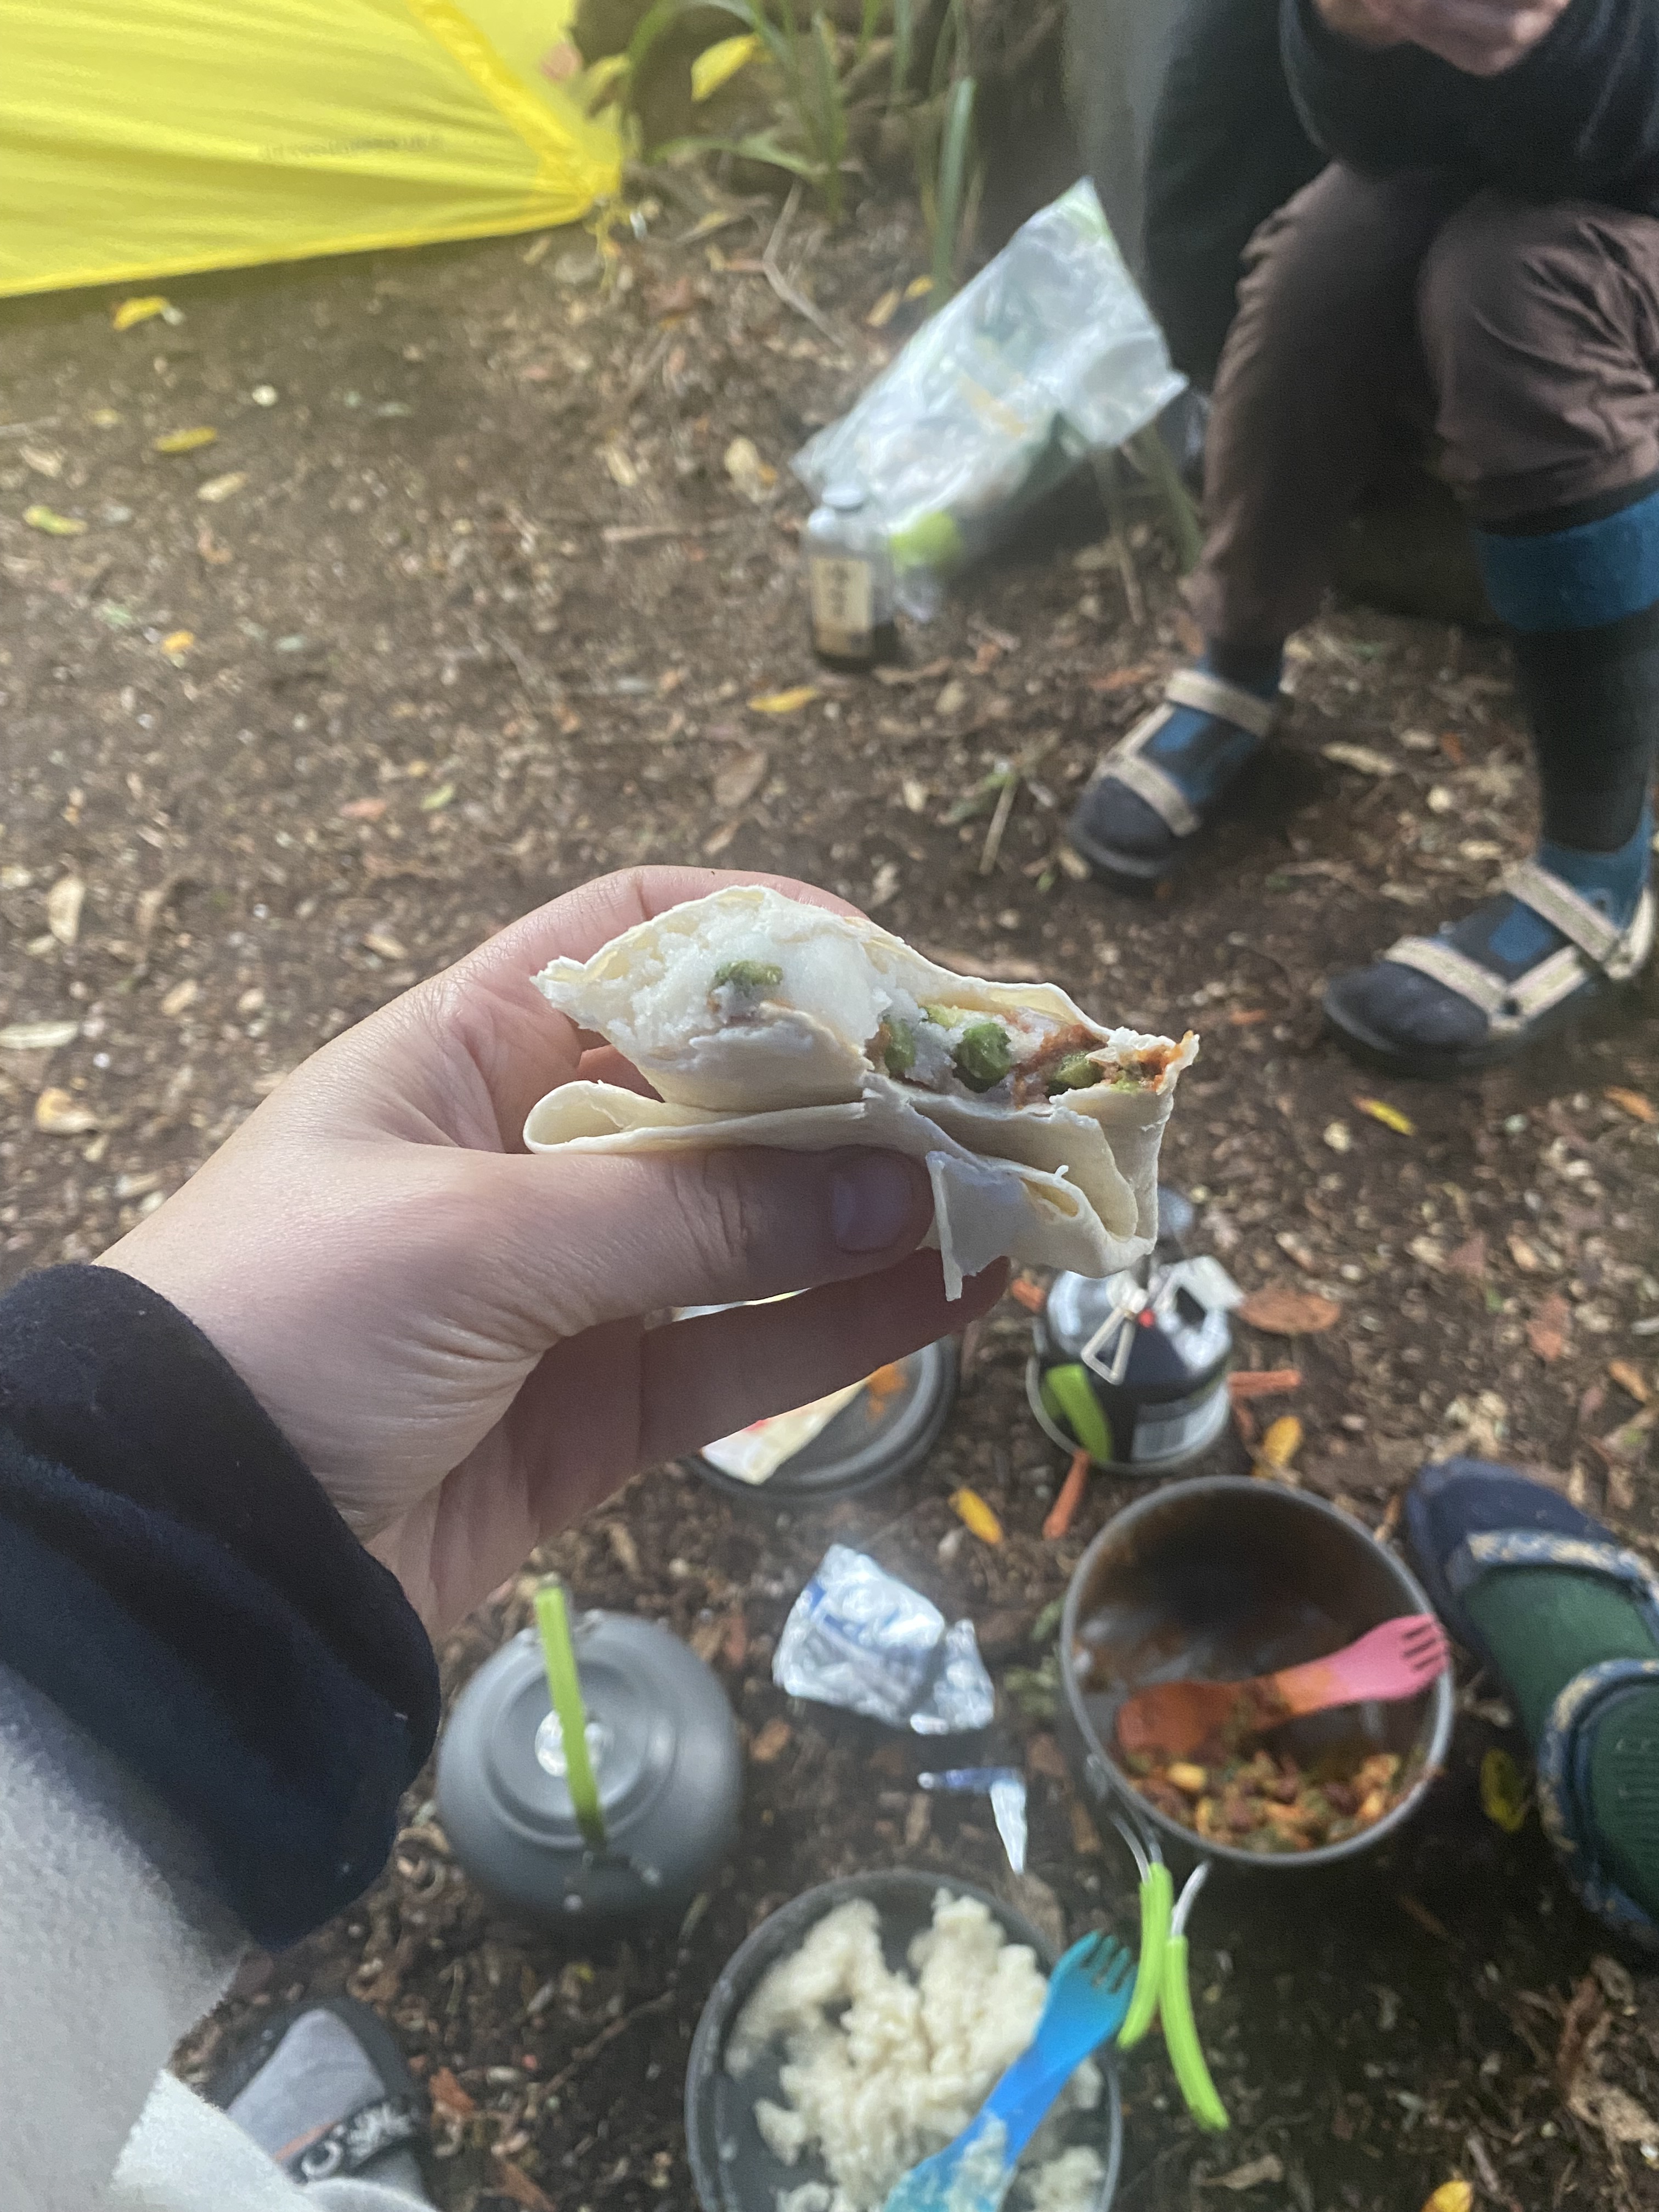
We quickly set-up camp, and the two weariest warmed-up in the tents while the others made dinner and hot water bottles out of our nalgene bottles. It was Mex beans and instant mashed potato (our best meal) in bed. After a very physical day, cold weather, too few calories and the constant wet it was very difficult to get warm again, and there were some fleeting thoughts of hypothermia which we all quickly pushed aside in our minds hoping tomorrow would be better.
Peaks & Pits:
Peak: Stunning views up the mountain, adrenaline rush from Type 2 fun
Pit: Possible hypothermia, almost being blown off a mountain
Day 4: Little Deadmans Bay to Prion Boat Crossing
Distance: 9km
Duration: 6hr 15min (including breaks)
Highlights: New Lagoon boat crossing, Prion Beach 4km beach walk, amazing sea and shore birds
With a day that felt like hell behind us, the sun was shining when we woke up at Little Deadmans Bay and we enjoyed a sleep in the sunshine. Still harbouring some resentment from the day prior but hopeful for a more pleasant day. We emerged from the tent only for it to immediately hail. Unfortunately this morning we also woke to a hole gnawed through a rain jacket pocket by a four-legged critter.
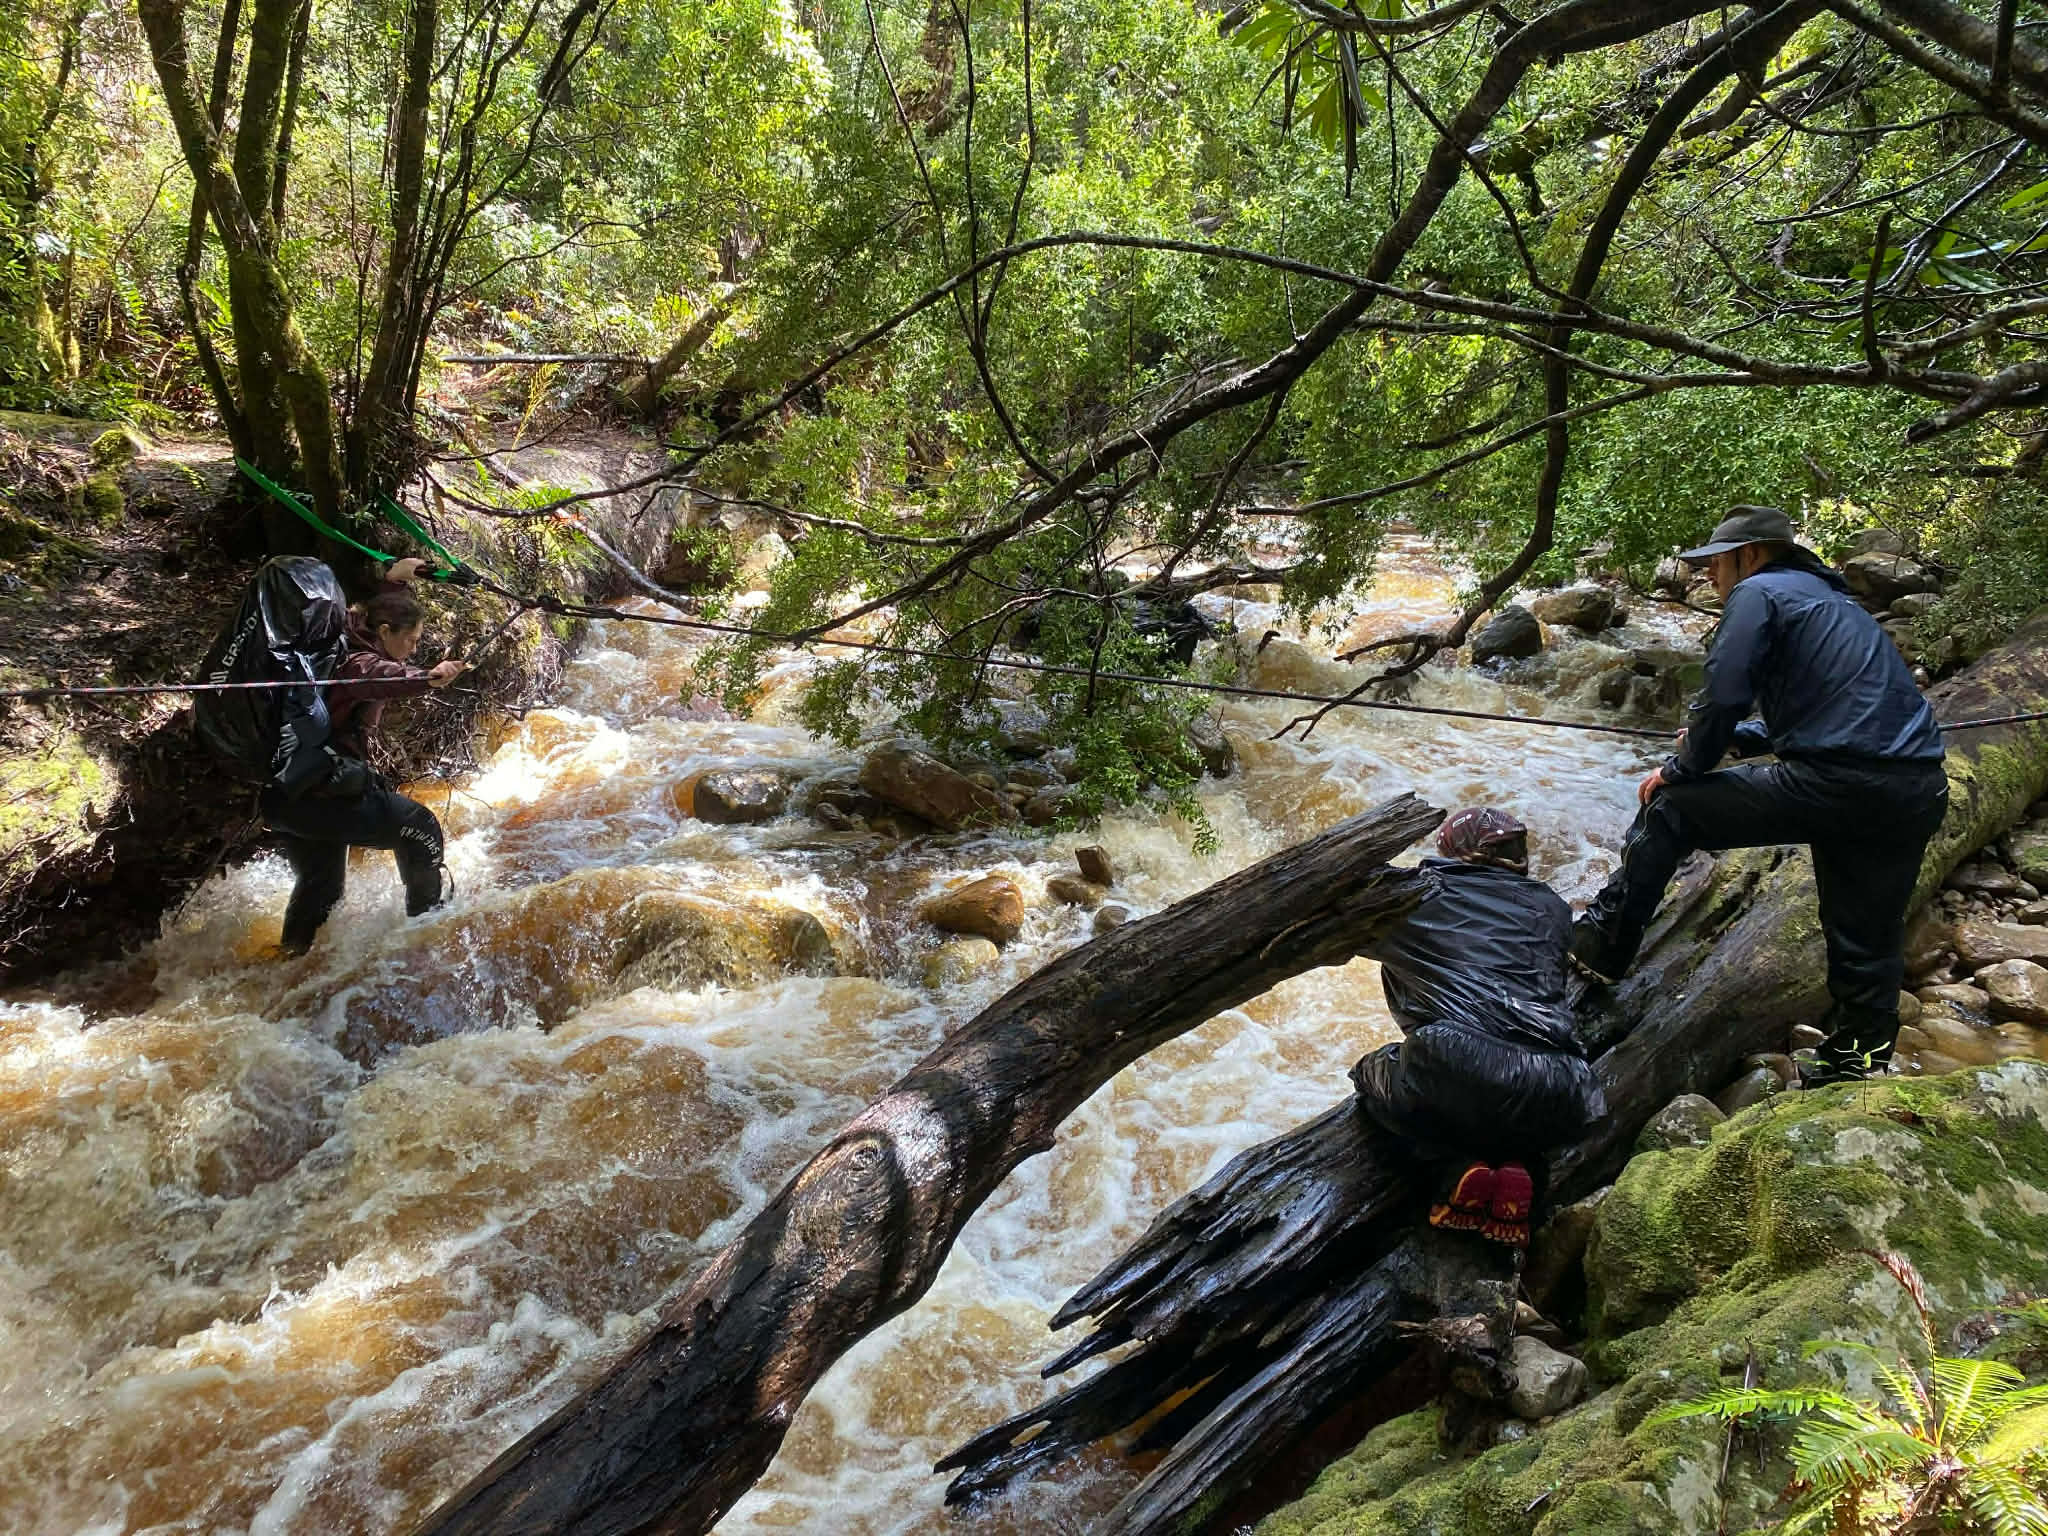
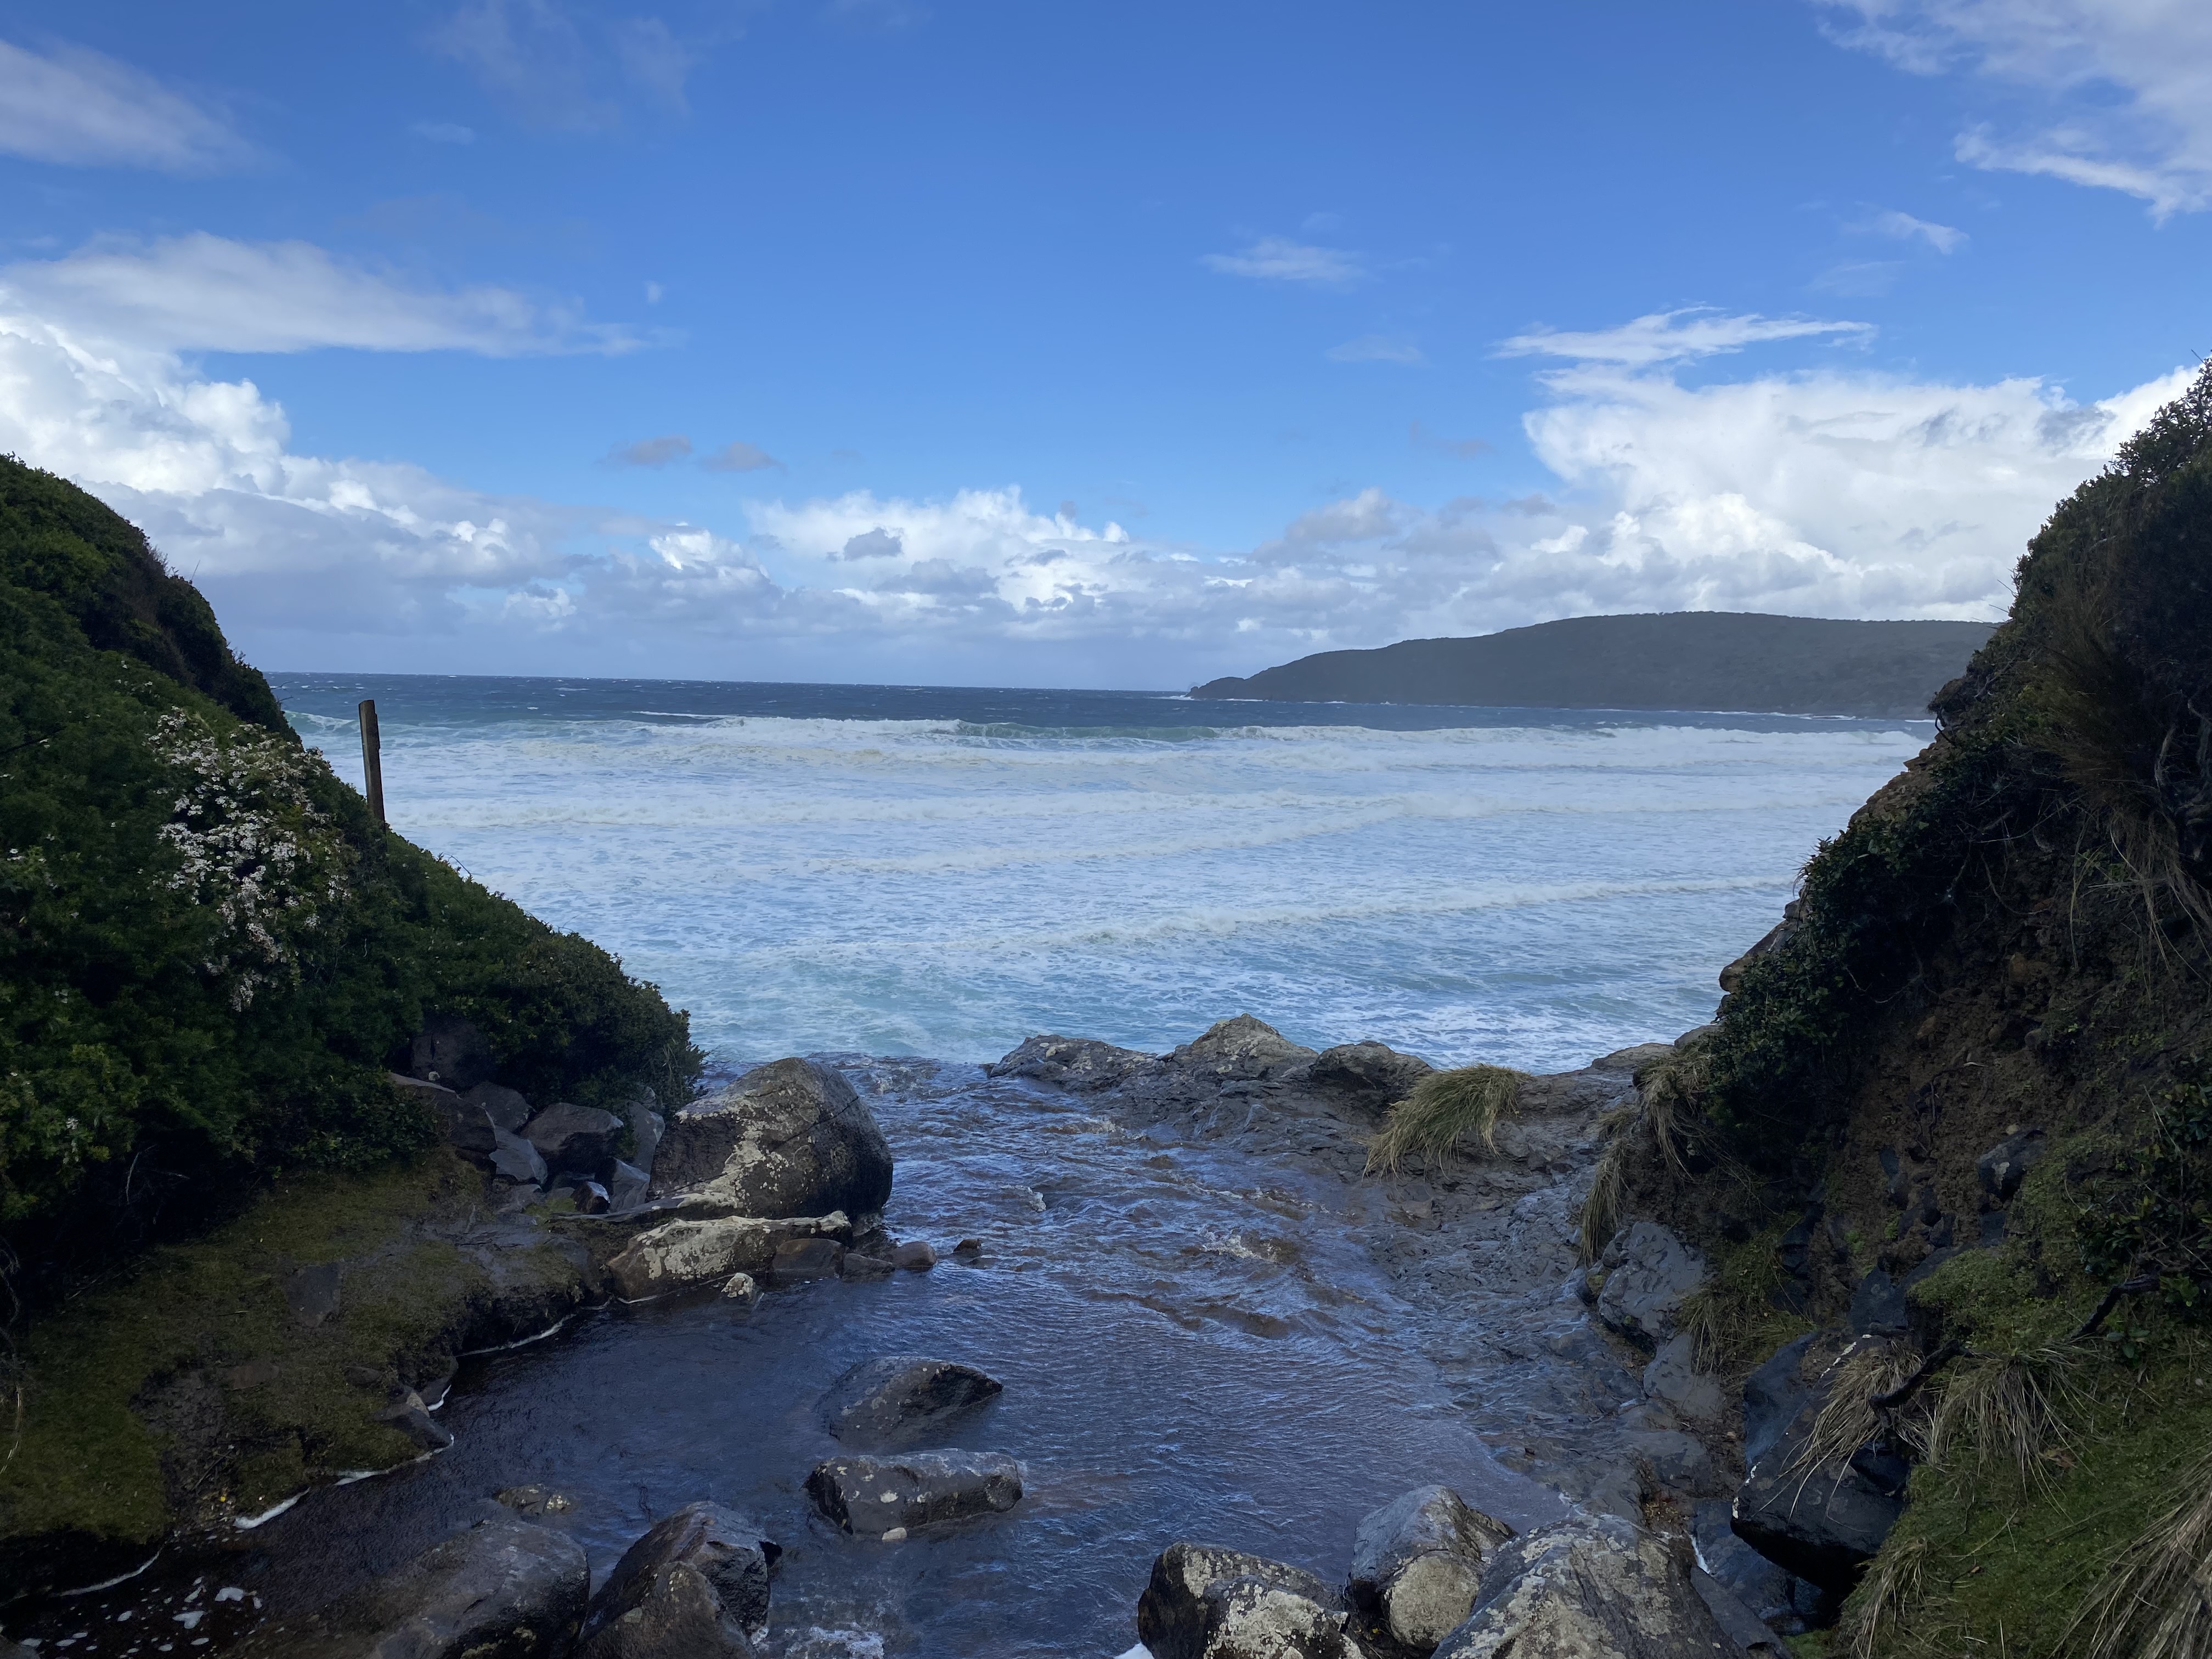
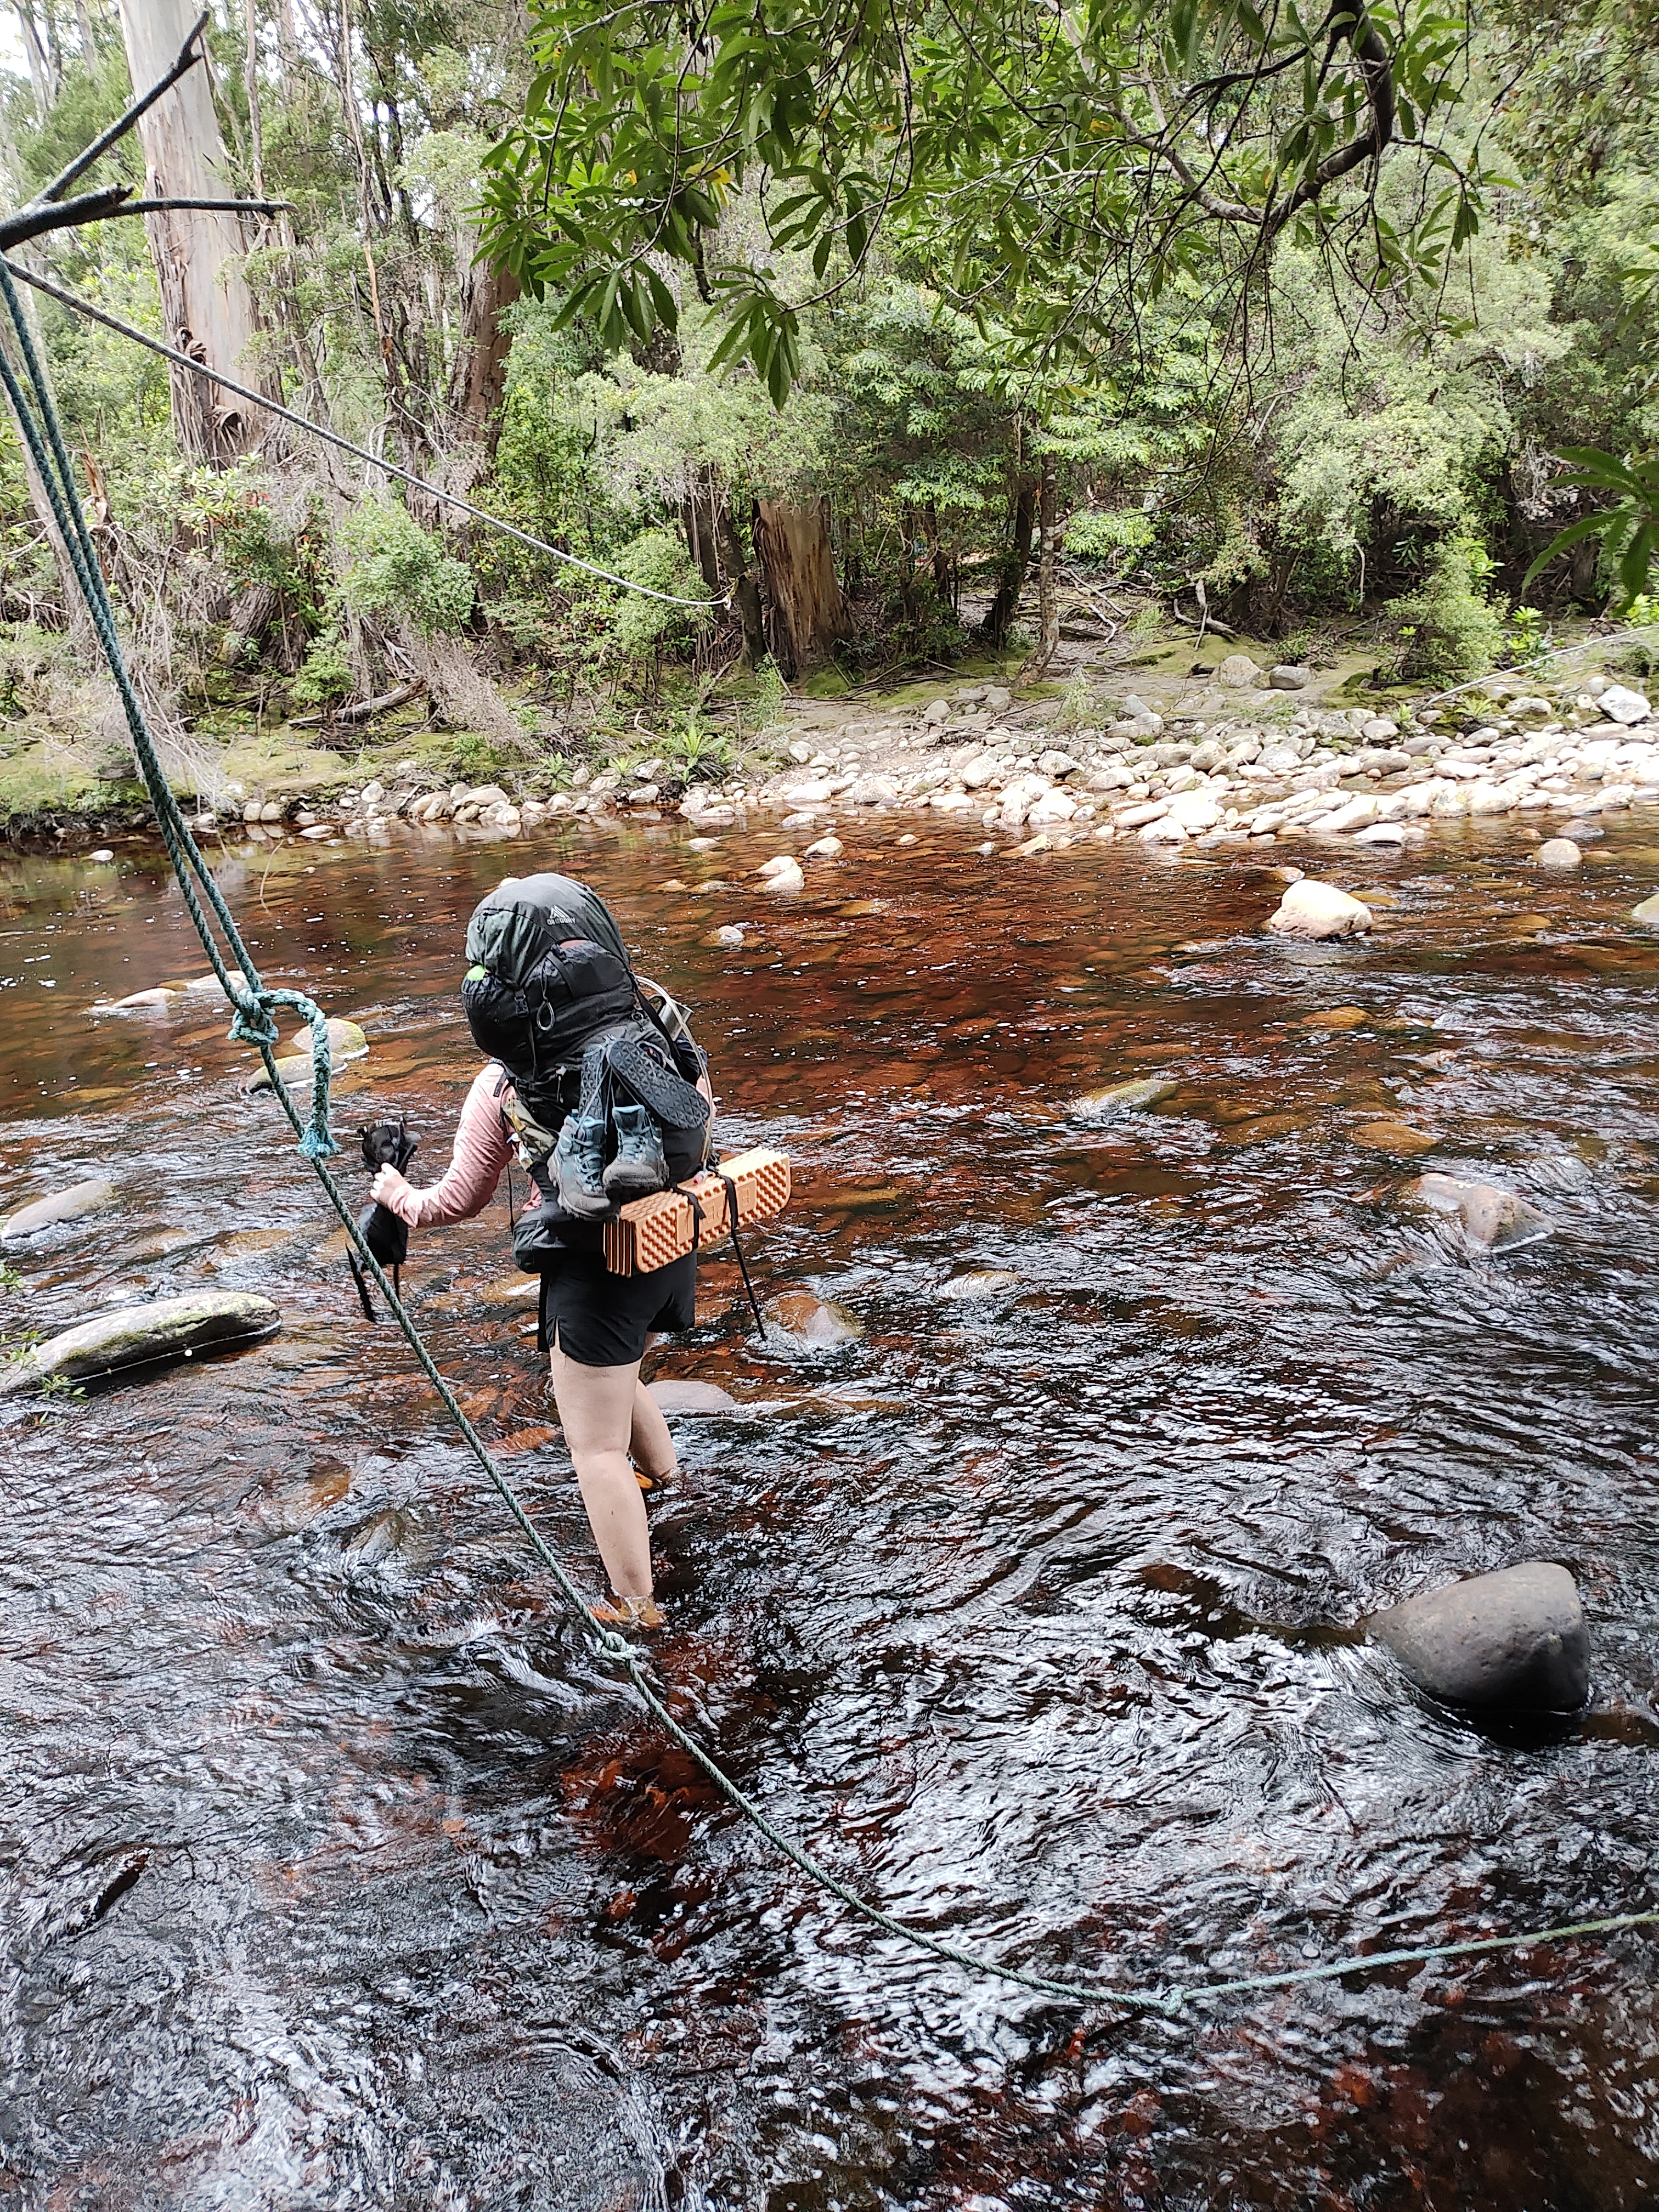
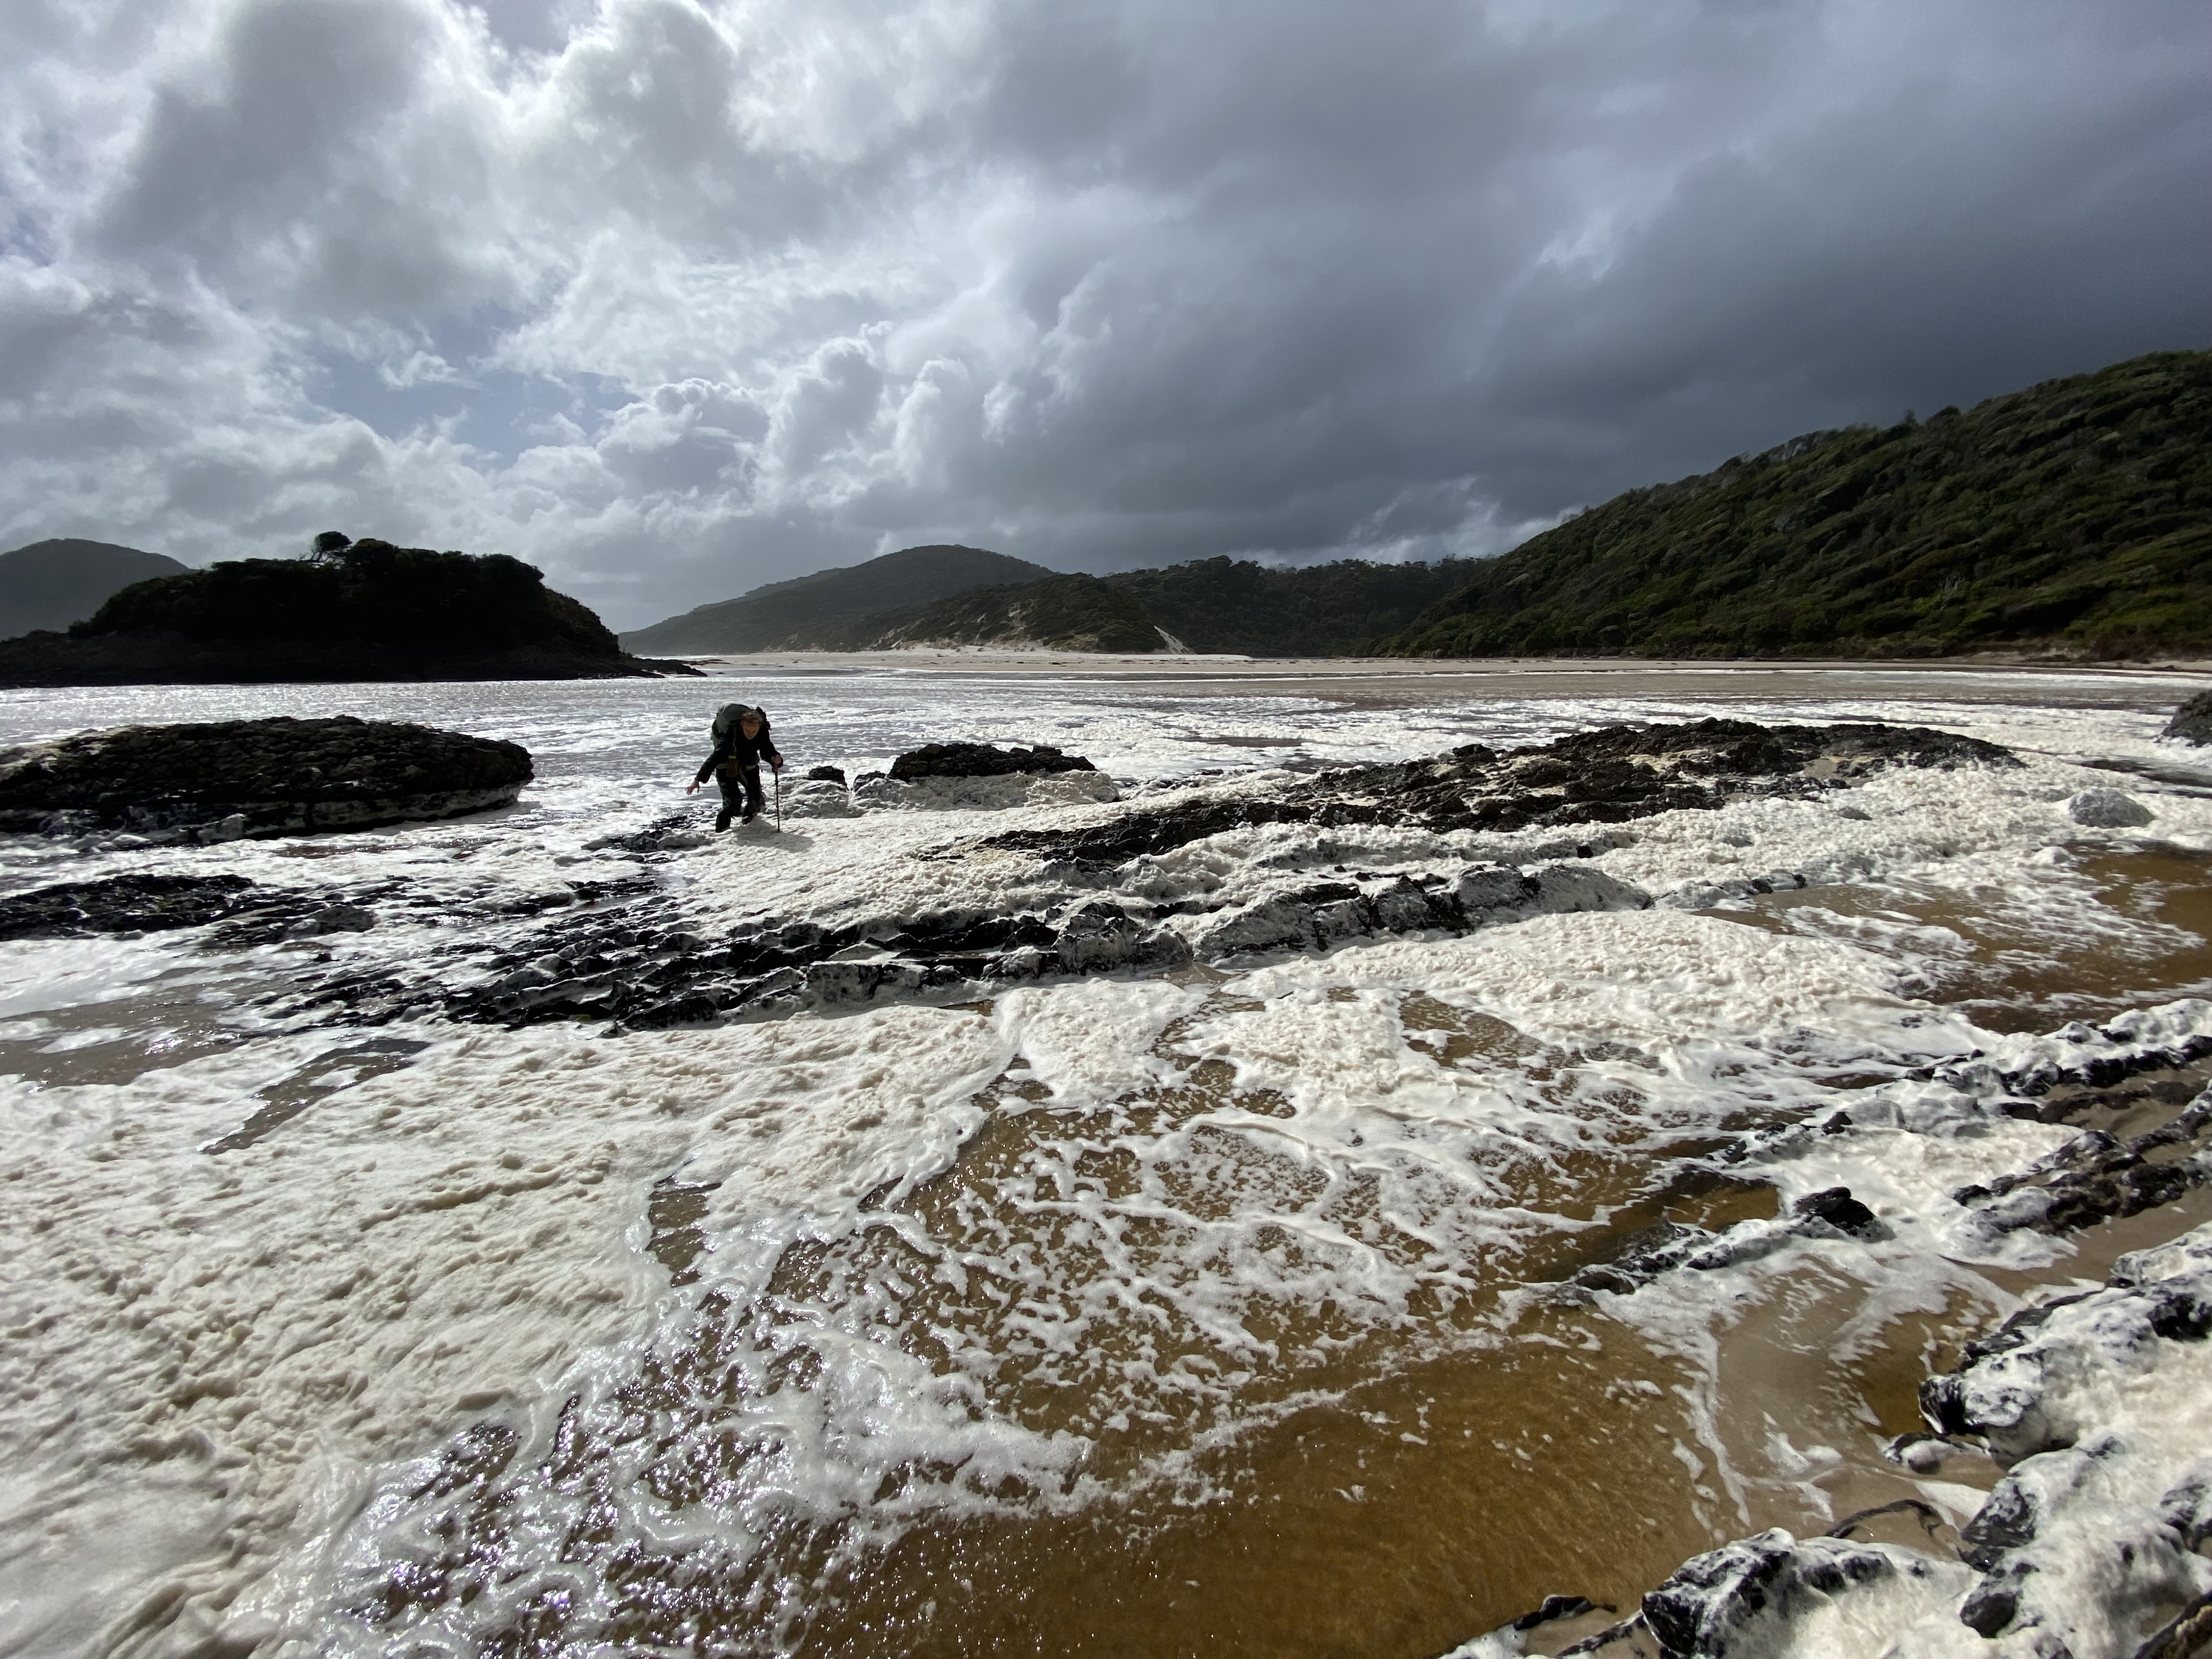
The trail started through buttongrass plain before moving into a wooded area where we came to our first hazard of the day. Feelings were still tense from the day before, so a fresh hazard first thing in the morning wasn’t welcome. We heard the river crossing well before we saw it. Swollen with rain from the last few days it was a very fast-moving river, foaming with the speed and volume of water.
We spent some time considering our options but were concerned that the water level was only going to get higher, and we couldn’t go back over the Ironbound. In the moment it felt like that didn’t leave much choice, but with some time and distance, I wish we had been more considered in that moment and hadn’t crossed. This was a really dangerous crossing after so much rain, and a few meters downstream was a log before a small drop-off and waterfall. I genuinely think that had any of us fallen, there would be a very high chance of drowning at this spot. We all made it across ok, but in retrospect I just don’t think the risk was worth it which is a learning for future trails.

The crossing itself was about 5m wide with a rope. The rope was strung along the side of the riverbank, then across the river forming an L shape. The rope hangs relatively loose, so I suspect it’s more as an emergency back-up as there’s no tension unless you were to be falling or holding it at an angle. This was the only crossing where we really had to use the rope, as the water was up to knee height and was very strong. When we took a step, it was like the water was sweeping your leg away if you didn’t plant it hard enough or wedge it against something.
We sent our tallest team member over first with pack-on but left unclipped to be able to drop in an emergency, then followed one by one. I was pushing back thoughts of a recent documentary we watched, The River, about a man whose leg was amputated after becoming lodged between rocks in a Tassie river (highly recommend watching, just not directly before going on a trip to Tassie with water crossings). After making it most of the way across the water, there was a large log we had to climb over which was only possible with the help of teammates at the other end helping to pull each-other over. Our sacrifical walker then had to cross back to collect his pack and make the final crossing back to our side of the river. There were some genuine tears of relief once everyone had made it safely across.
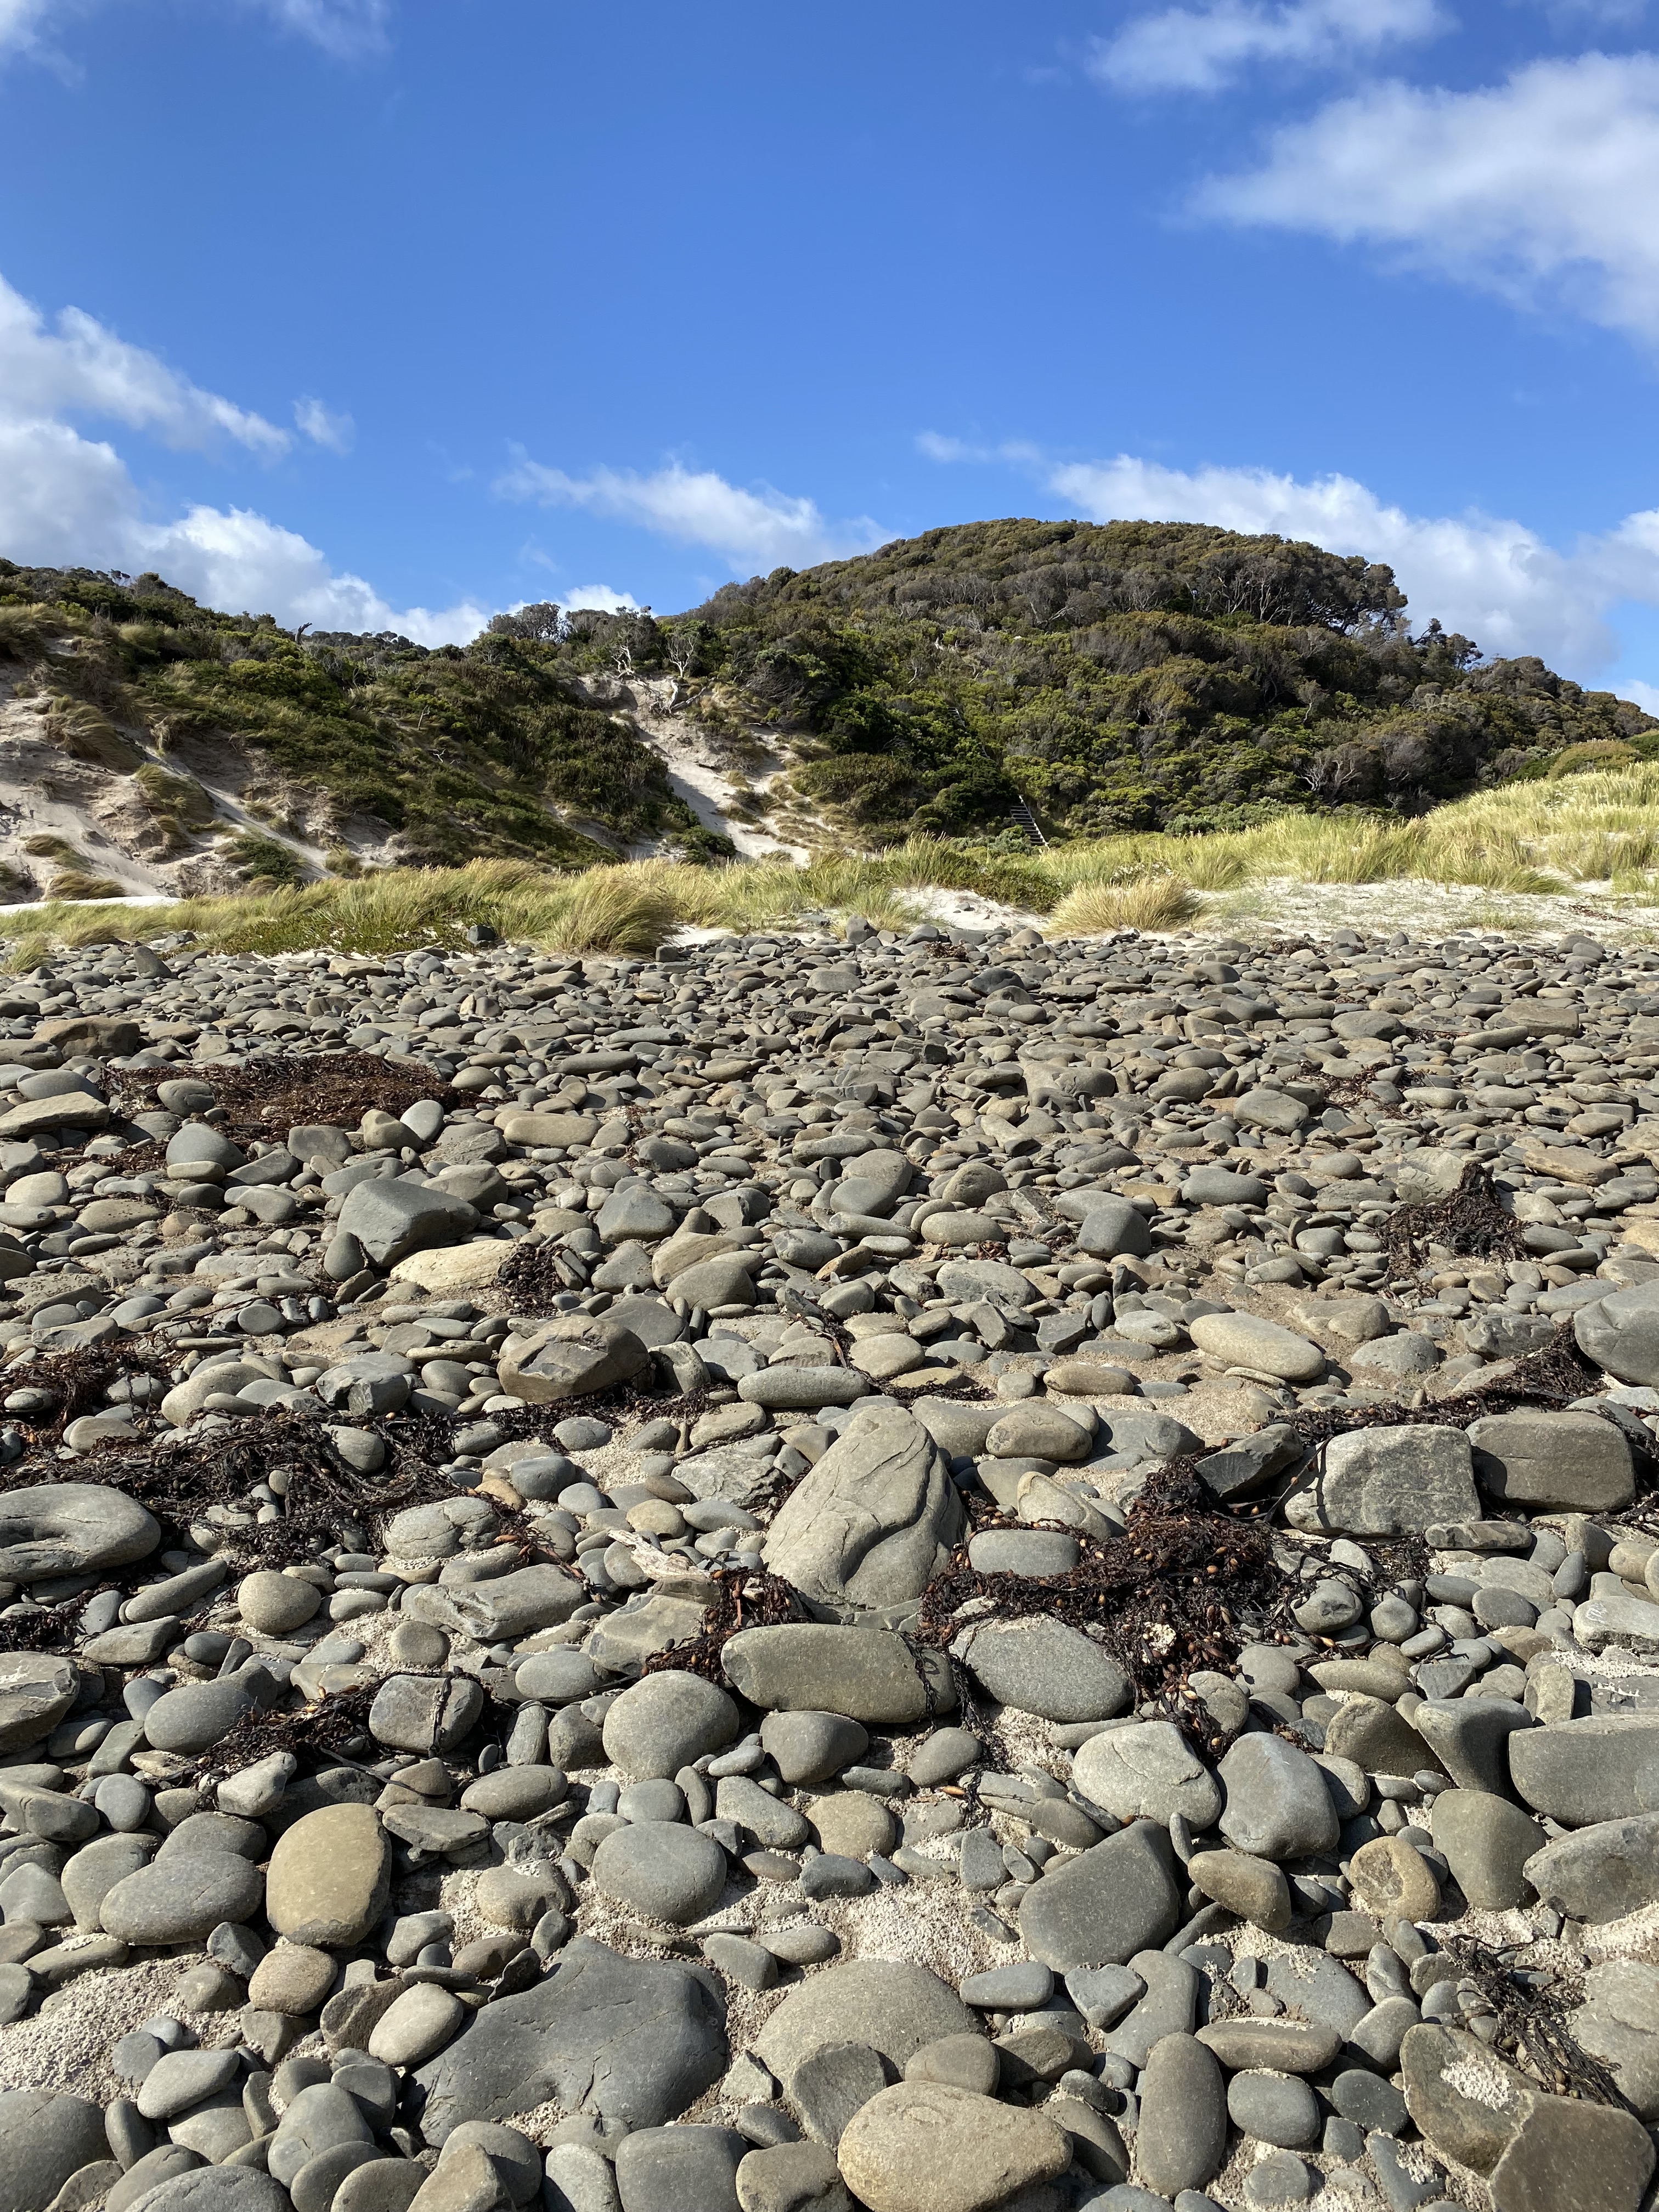
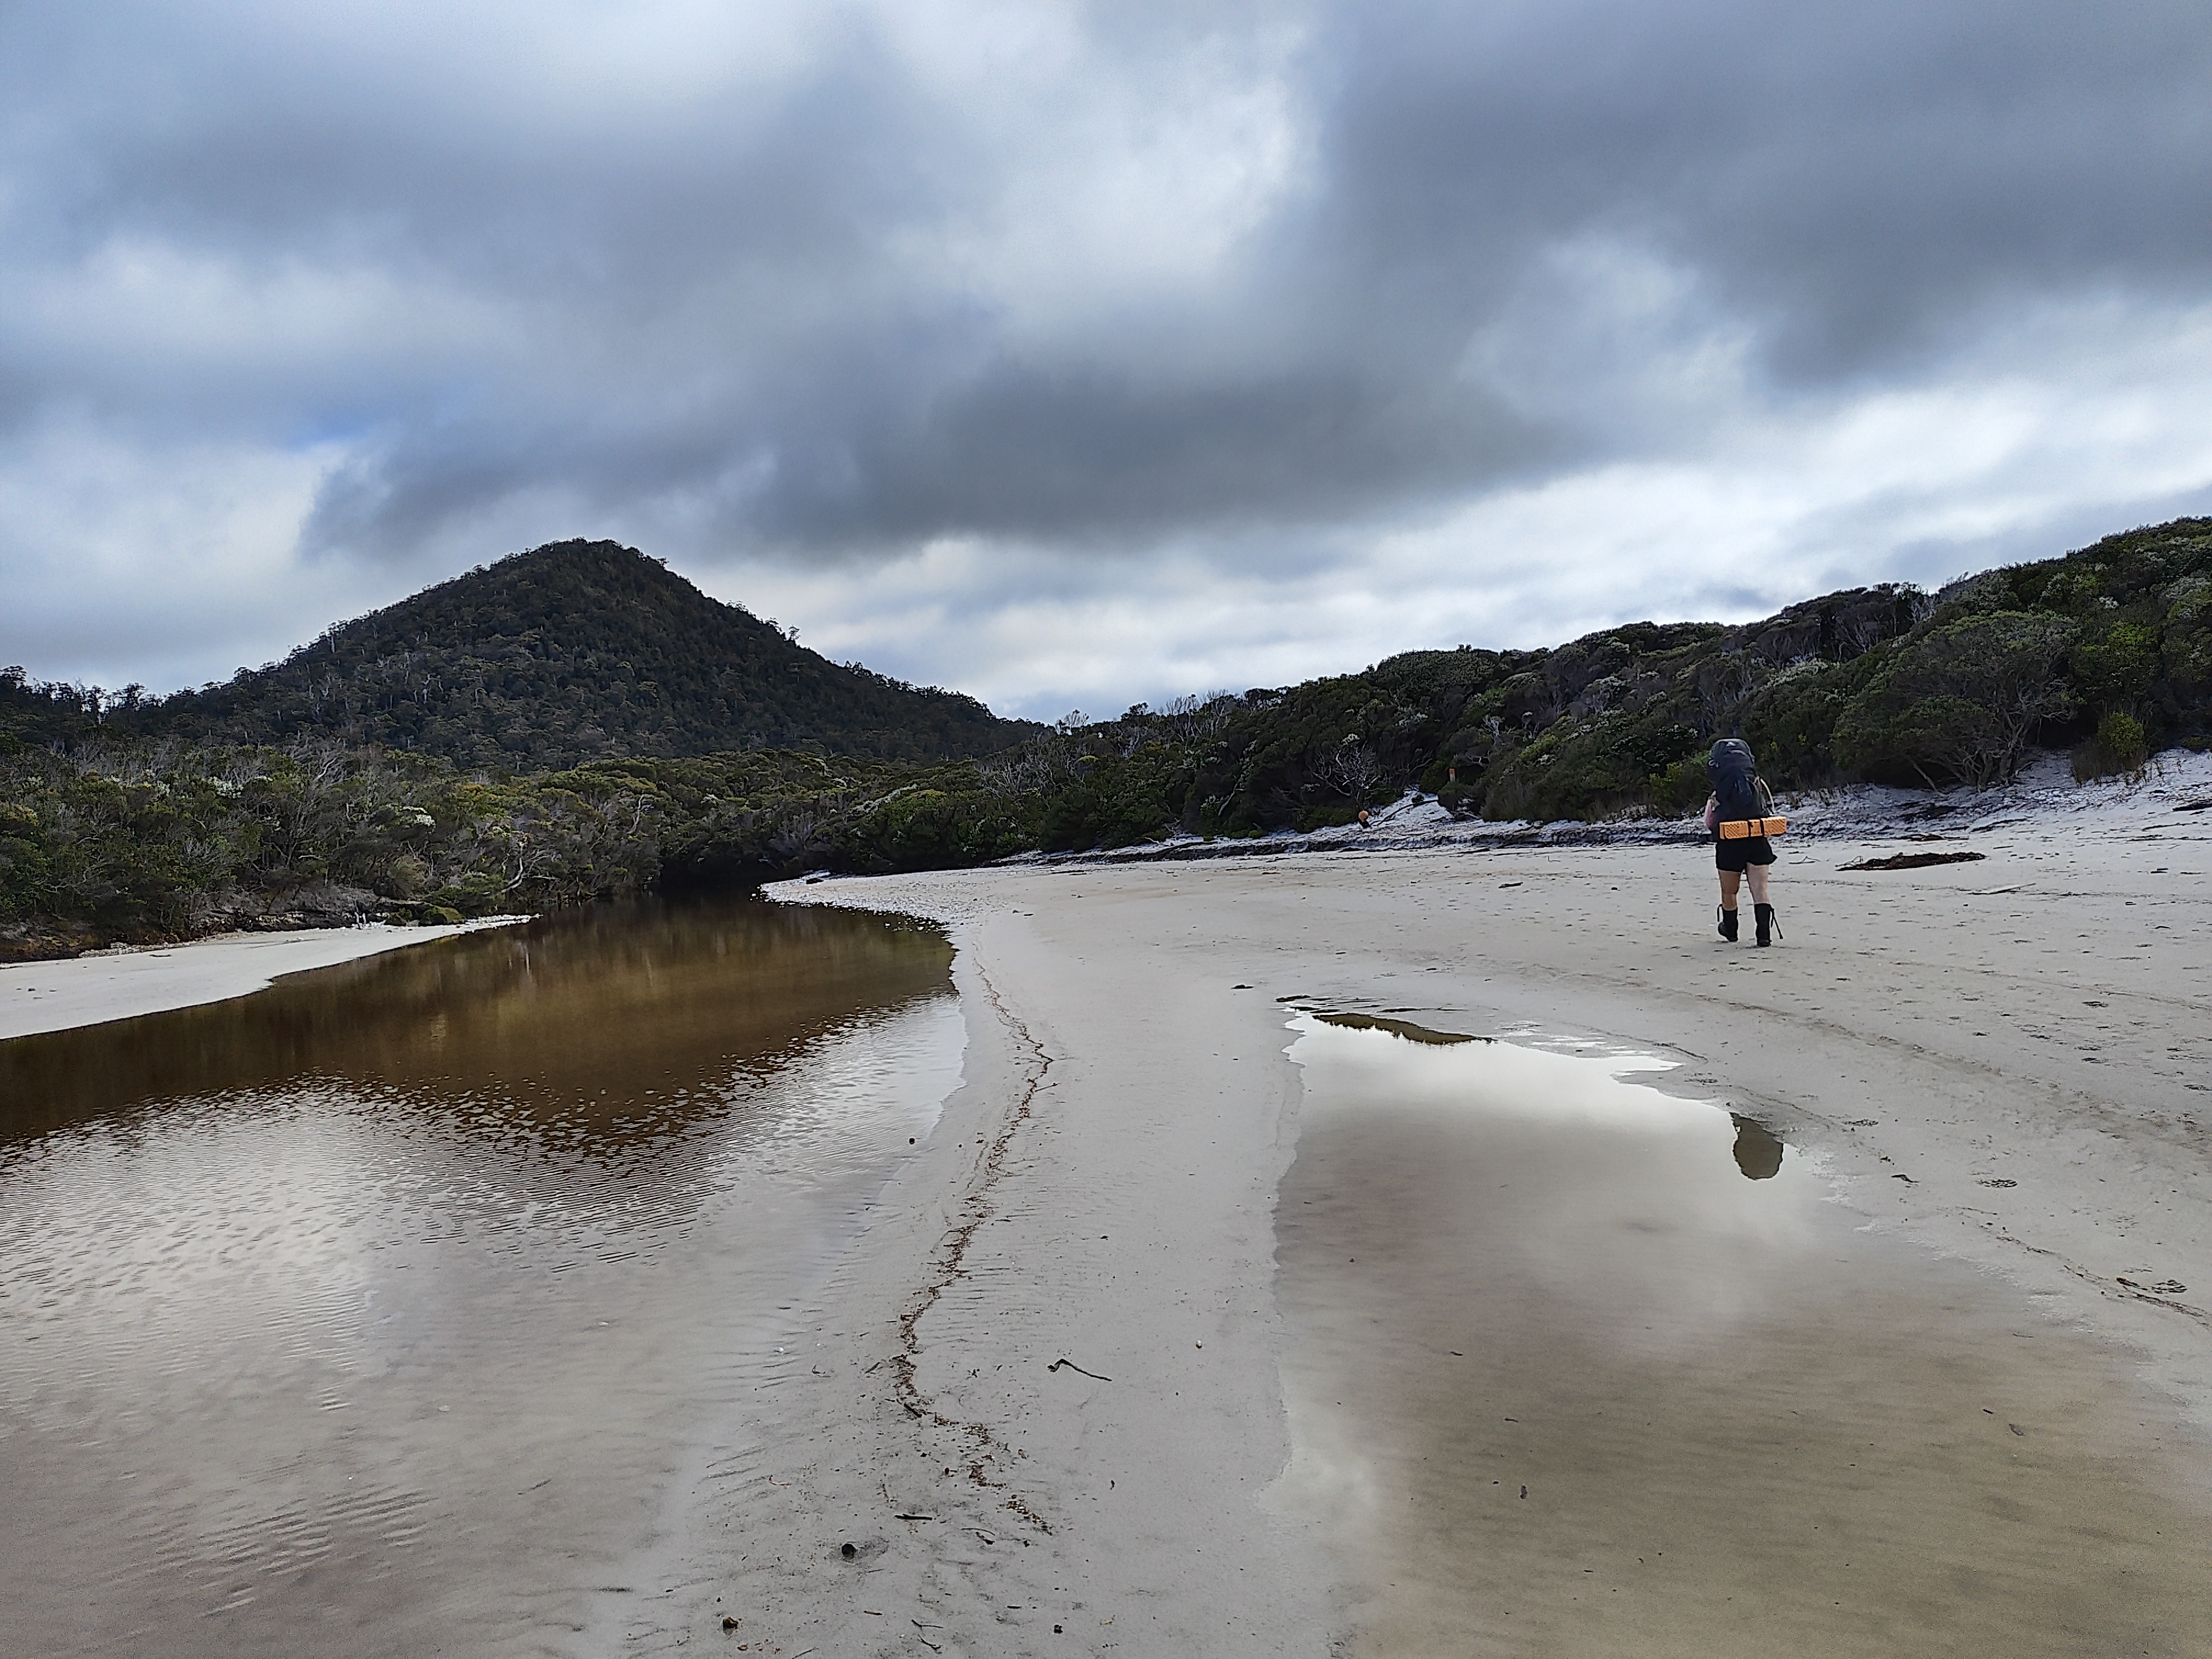
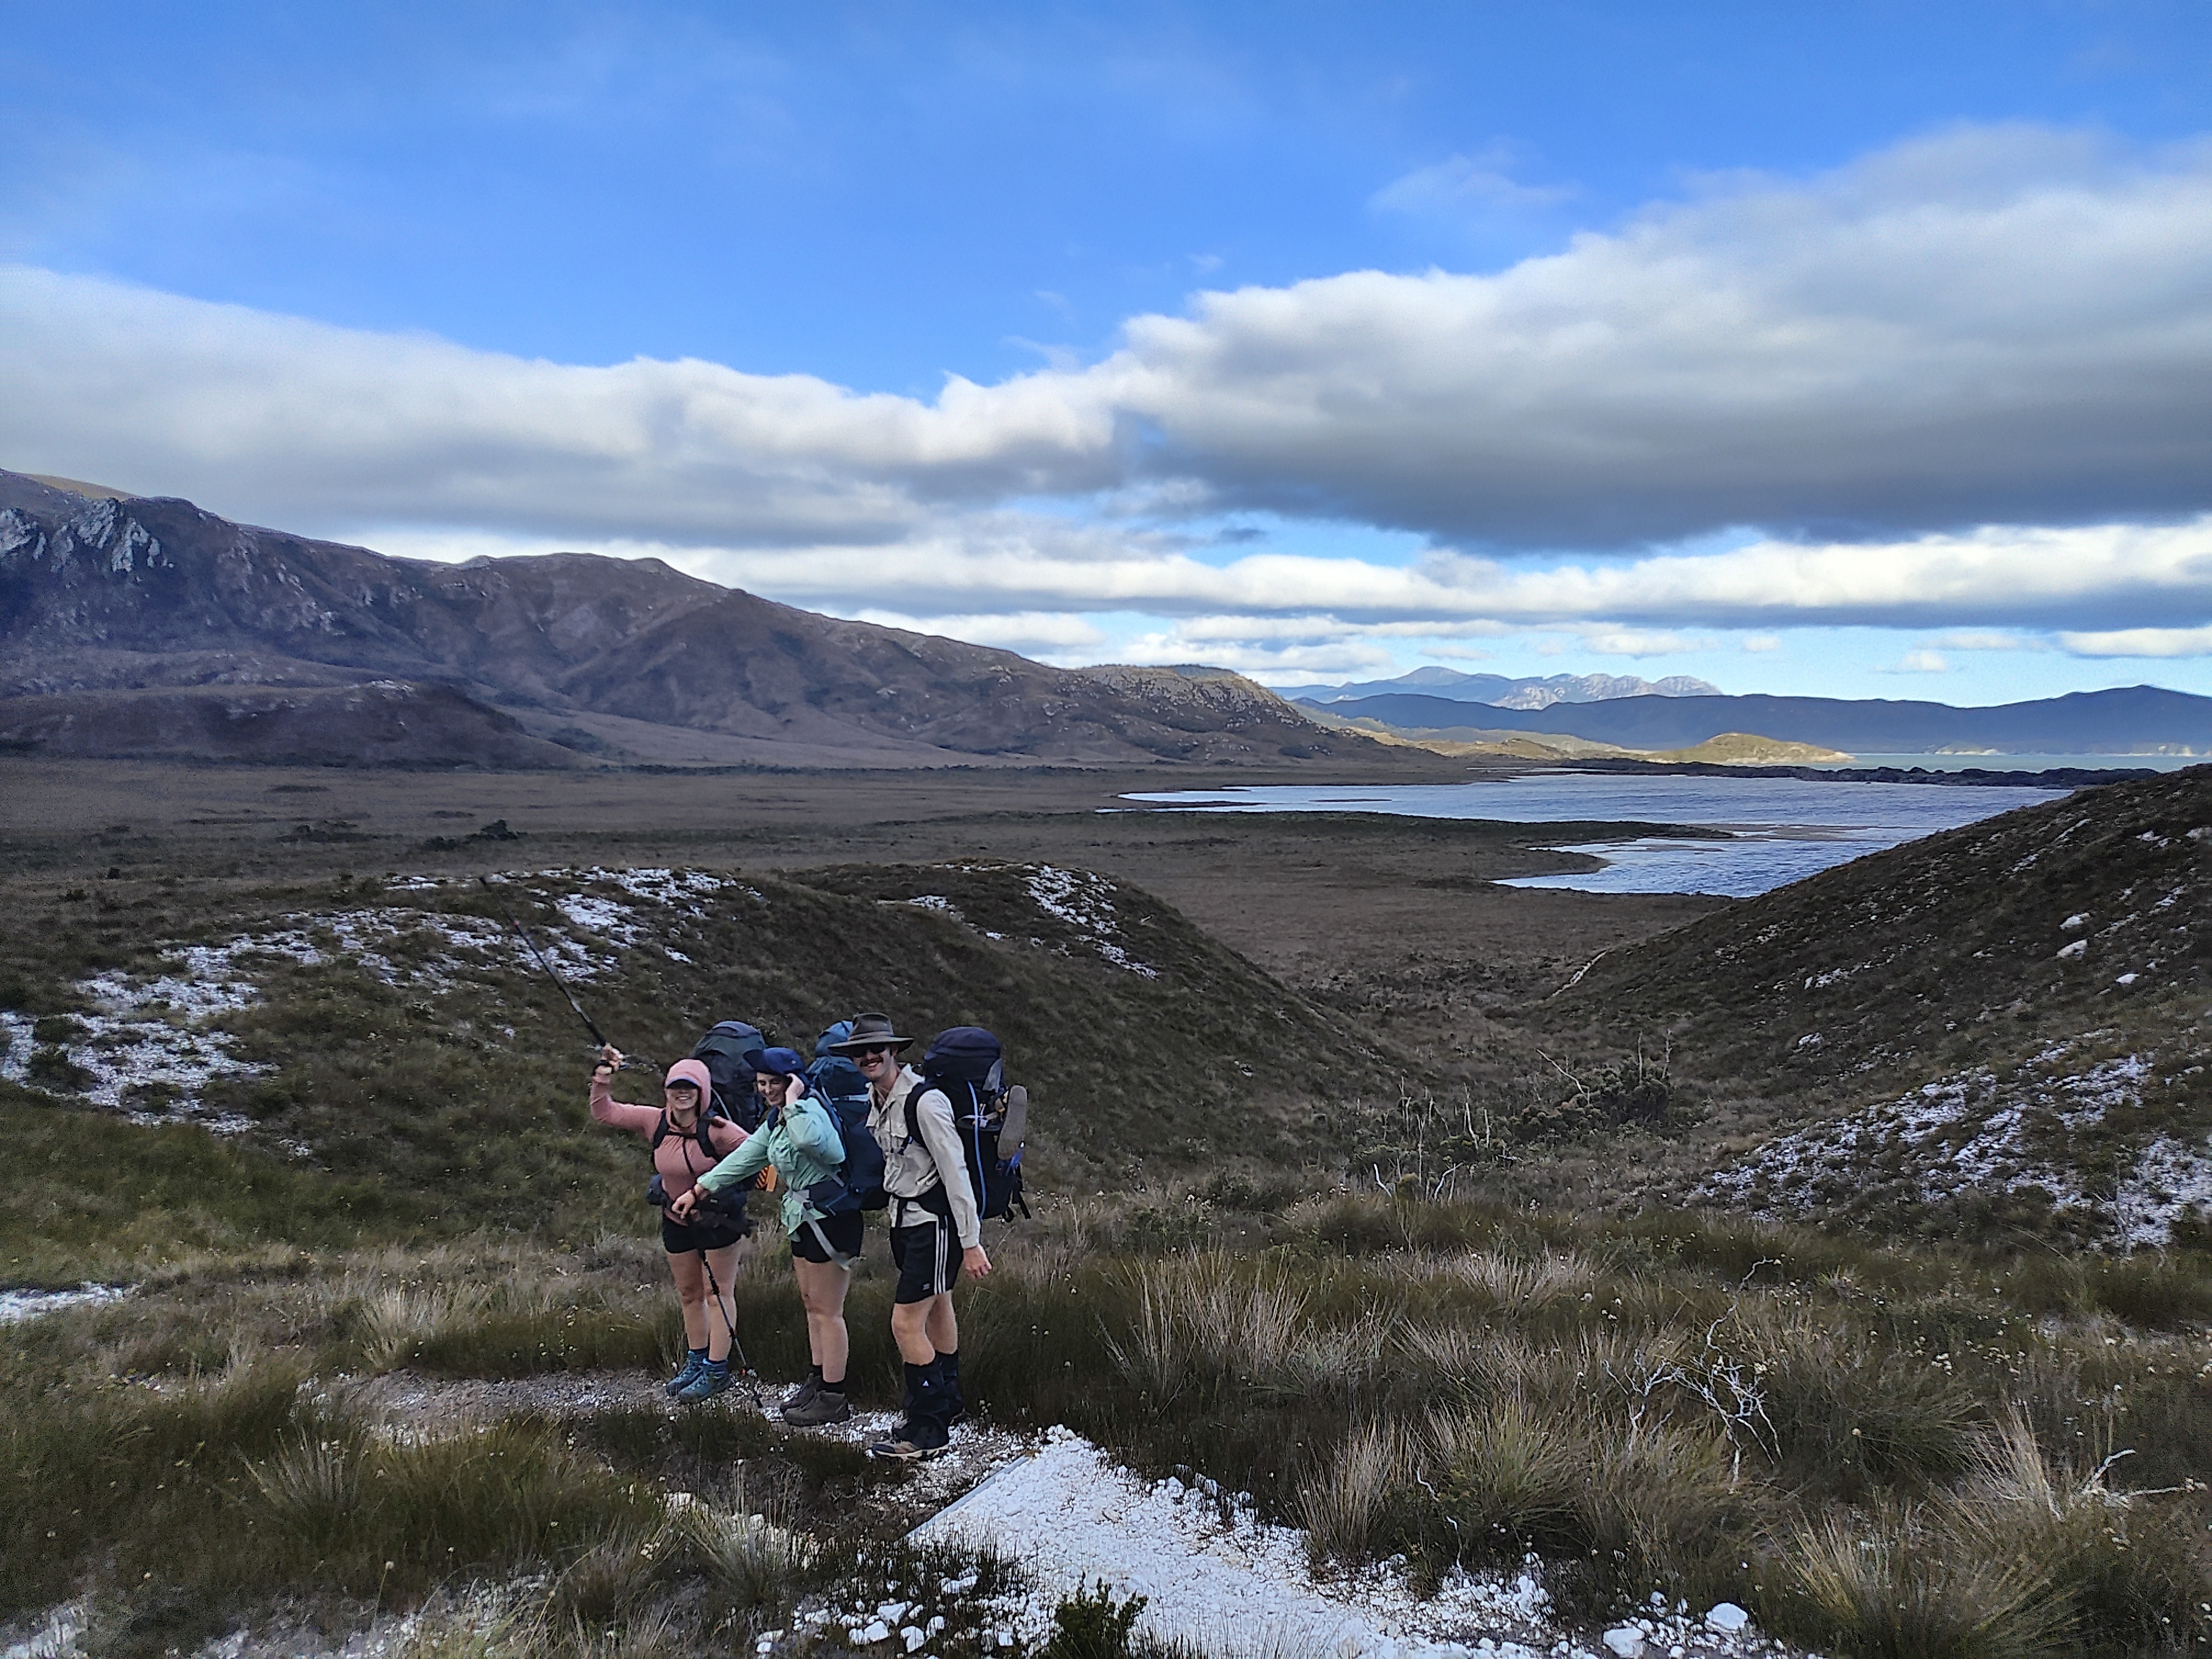
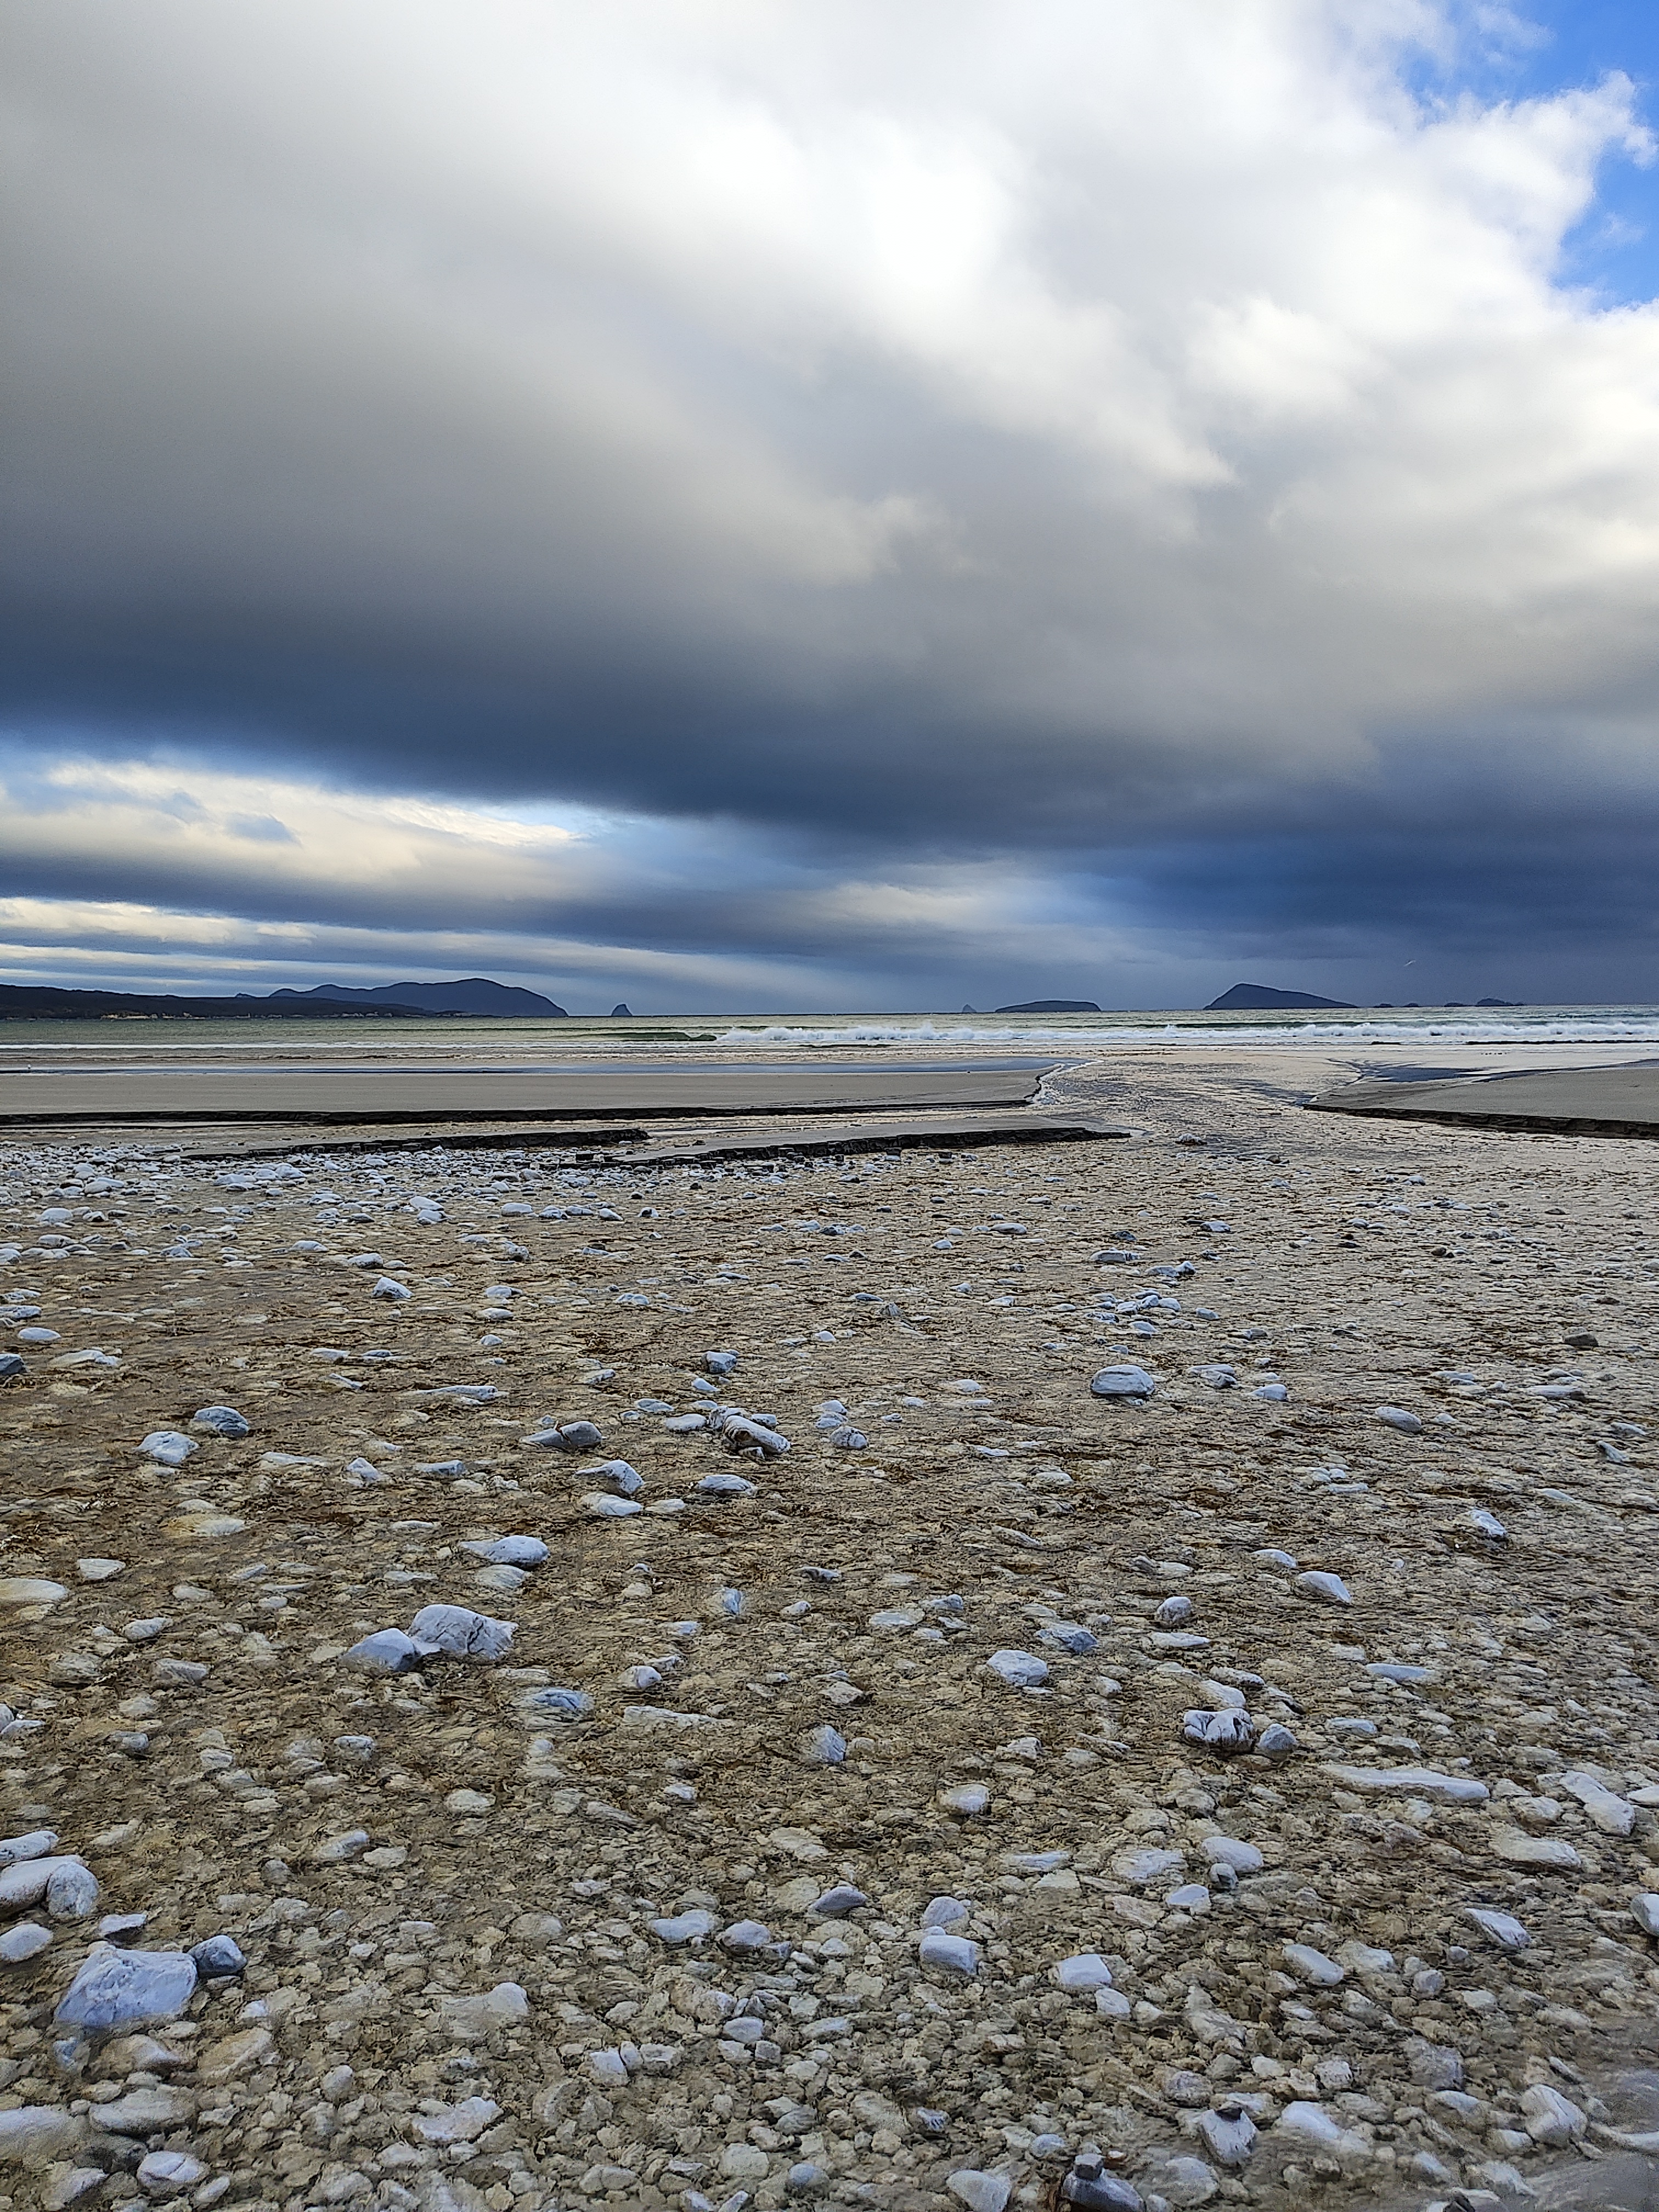
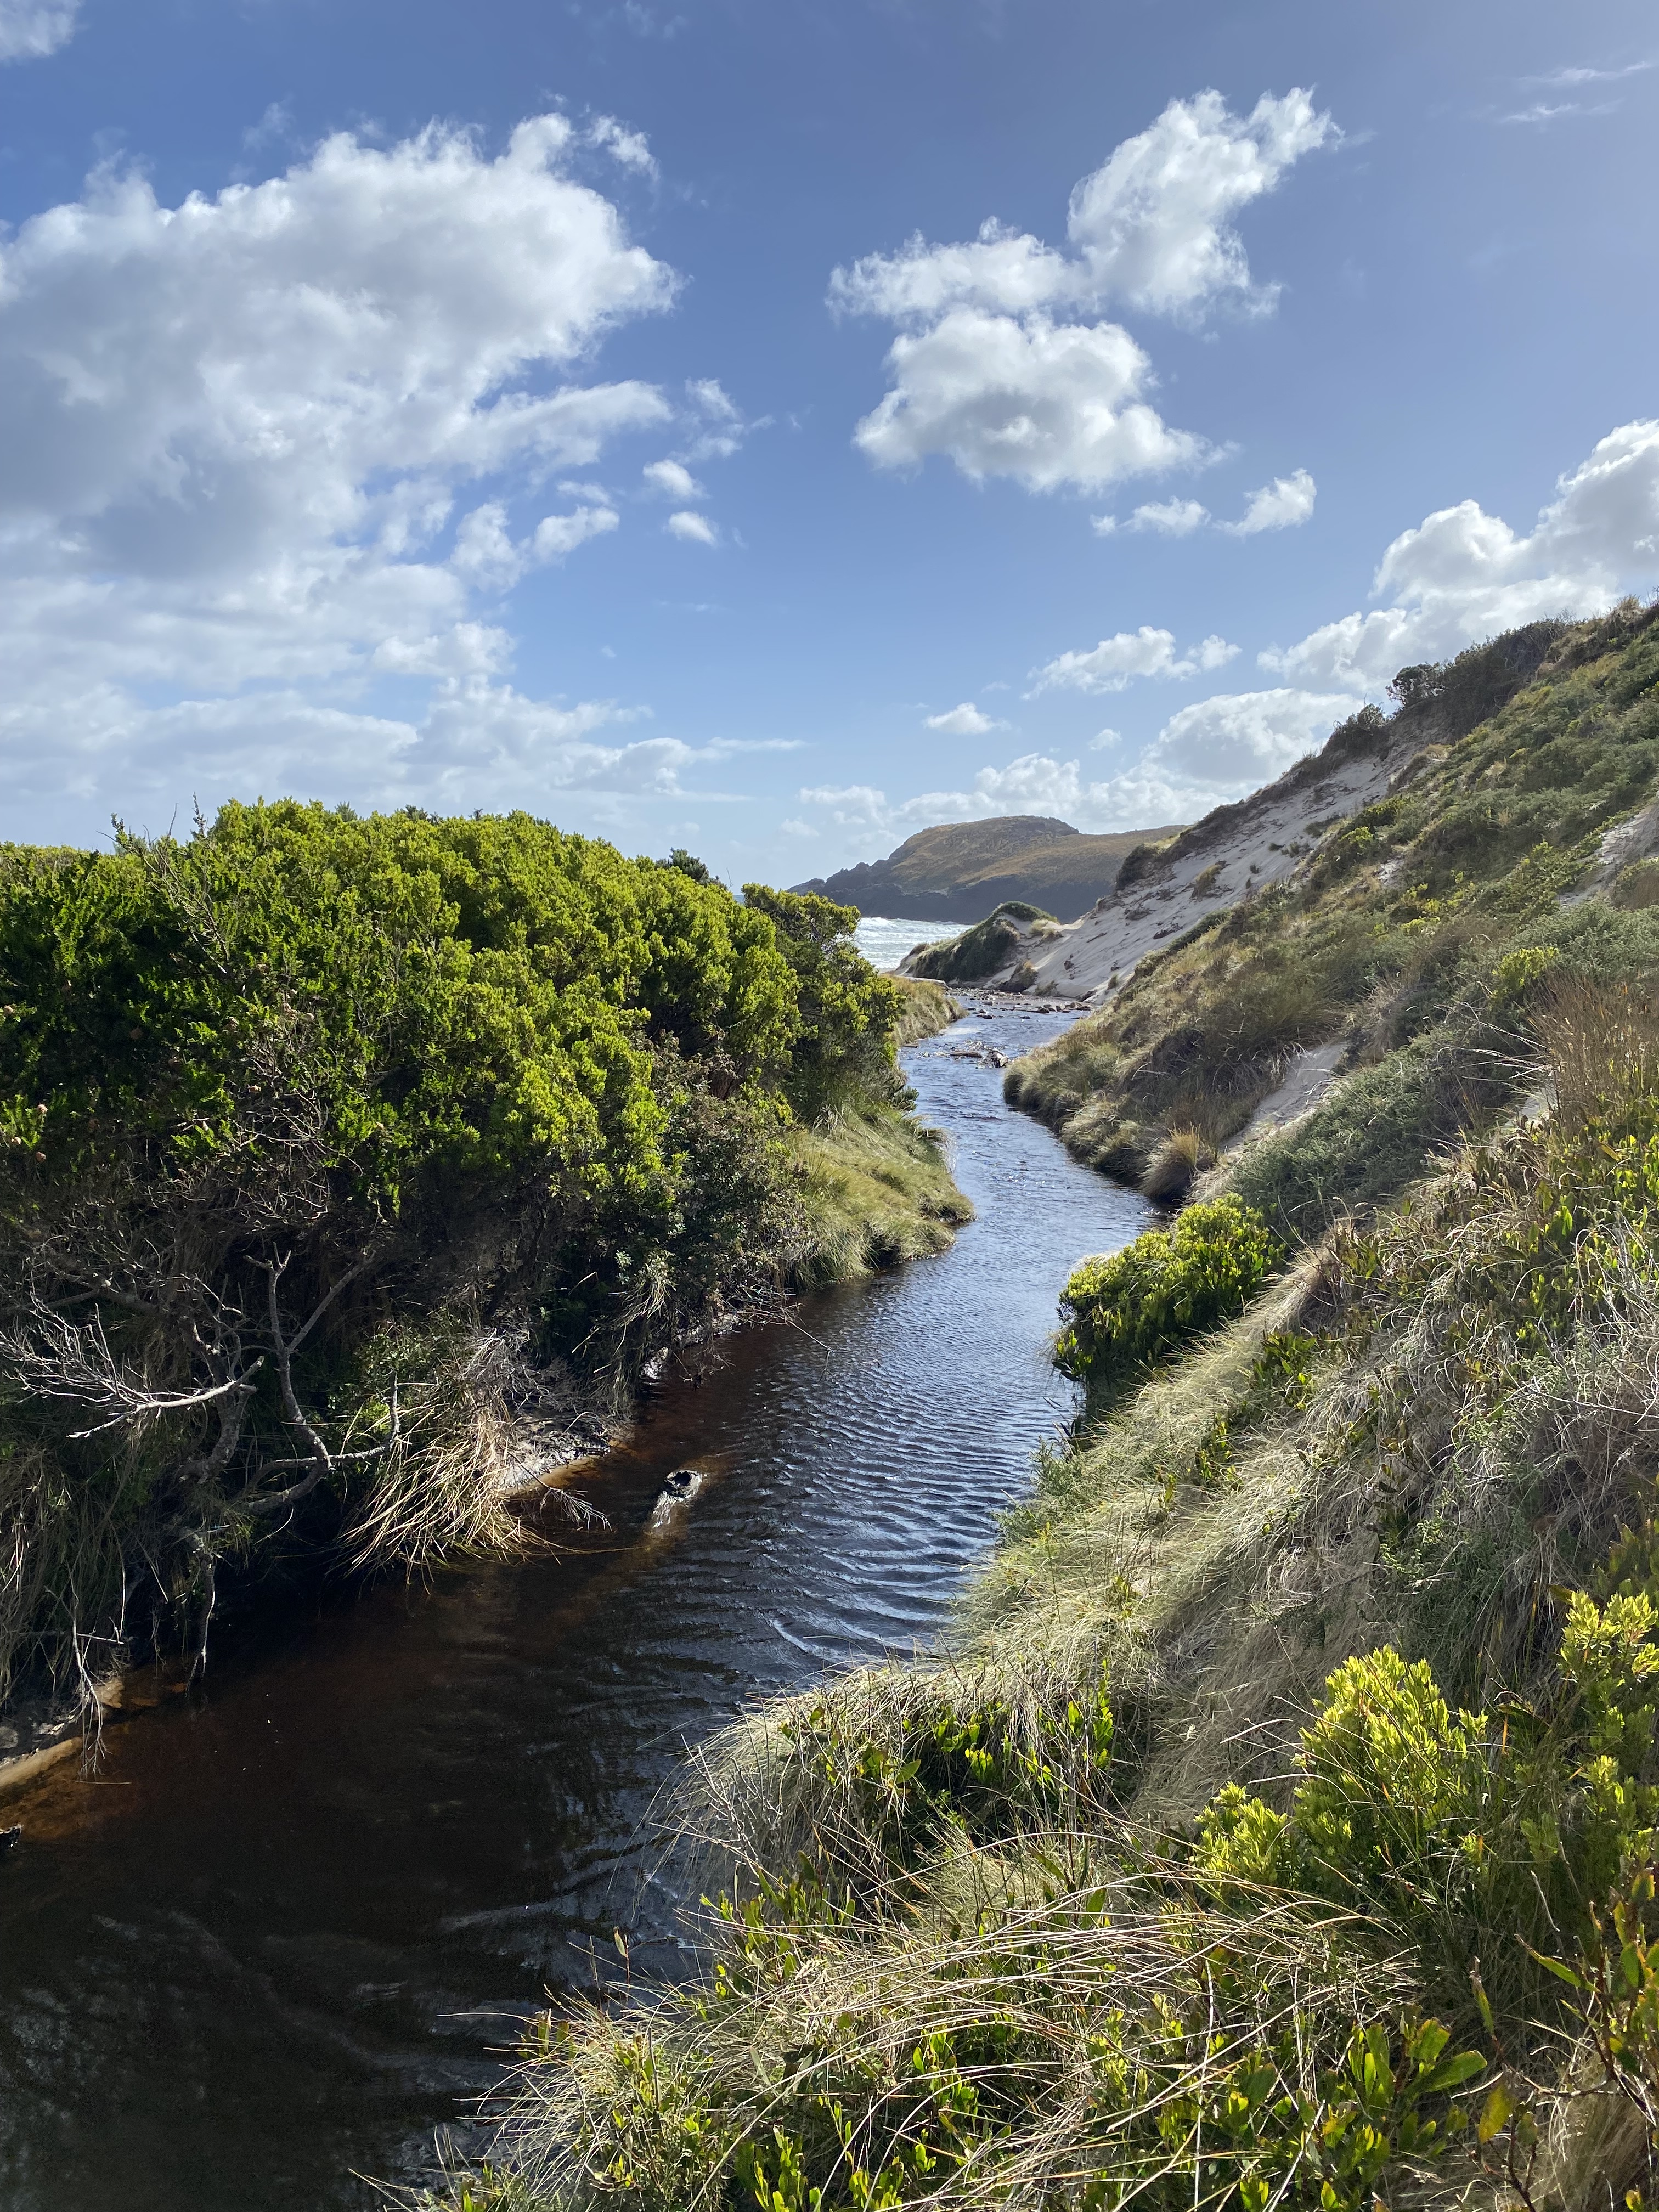
After surviving this hazard, the rest of the day was fairly easy walking along beach and through forest with some modest climbs. There is a steep descent to Grotto Creek where we filled up our water before continuing along Prion Beach for 4km. This section of beach was wild and willy, but a nice break from the mud. There were also so many amazing sea birds along the beach stretches, including sea eagles and plovers!
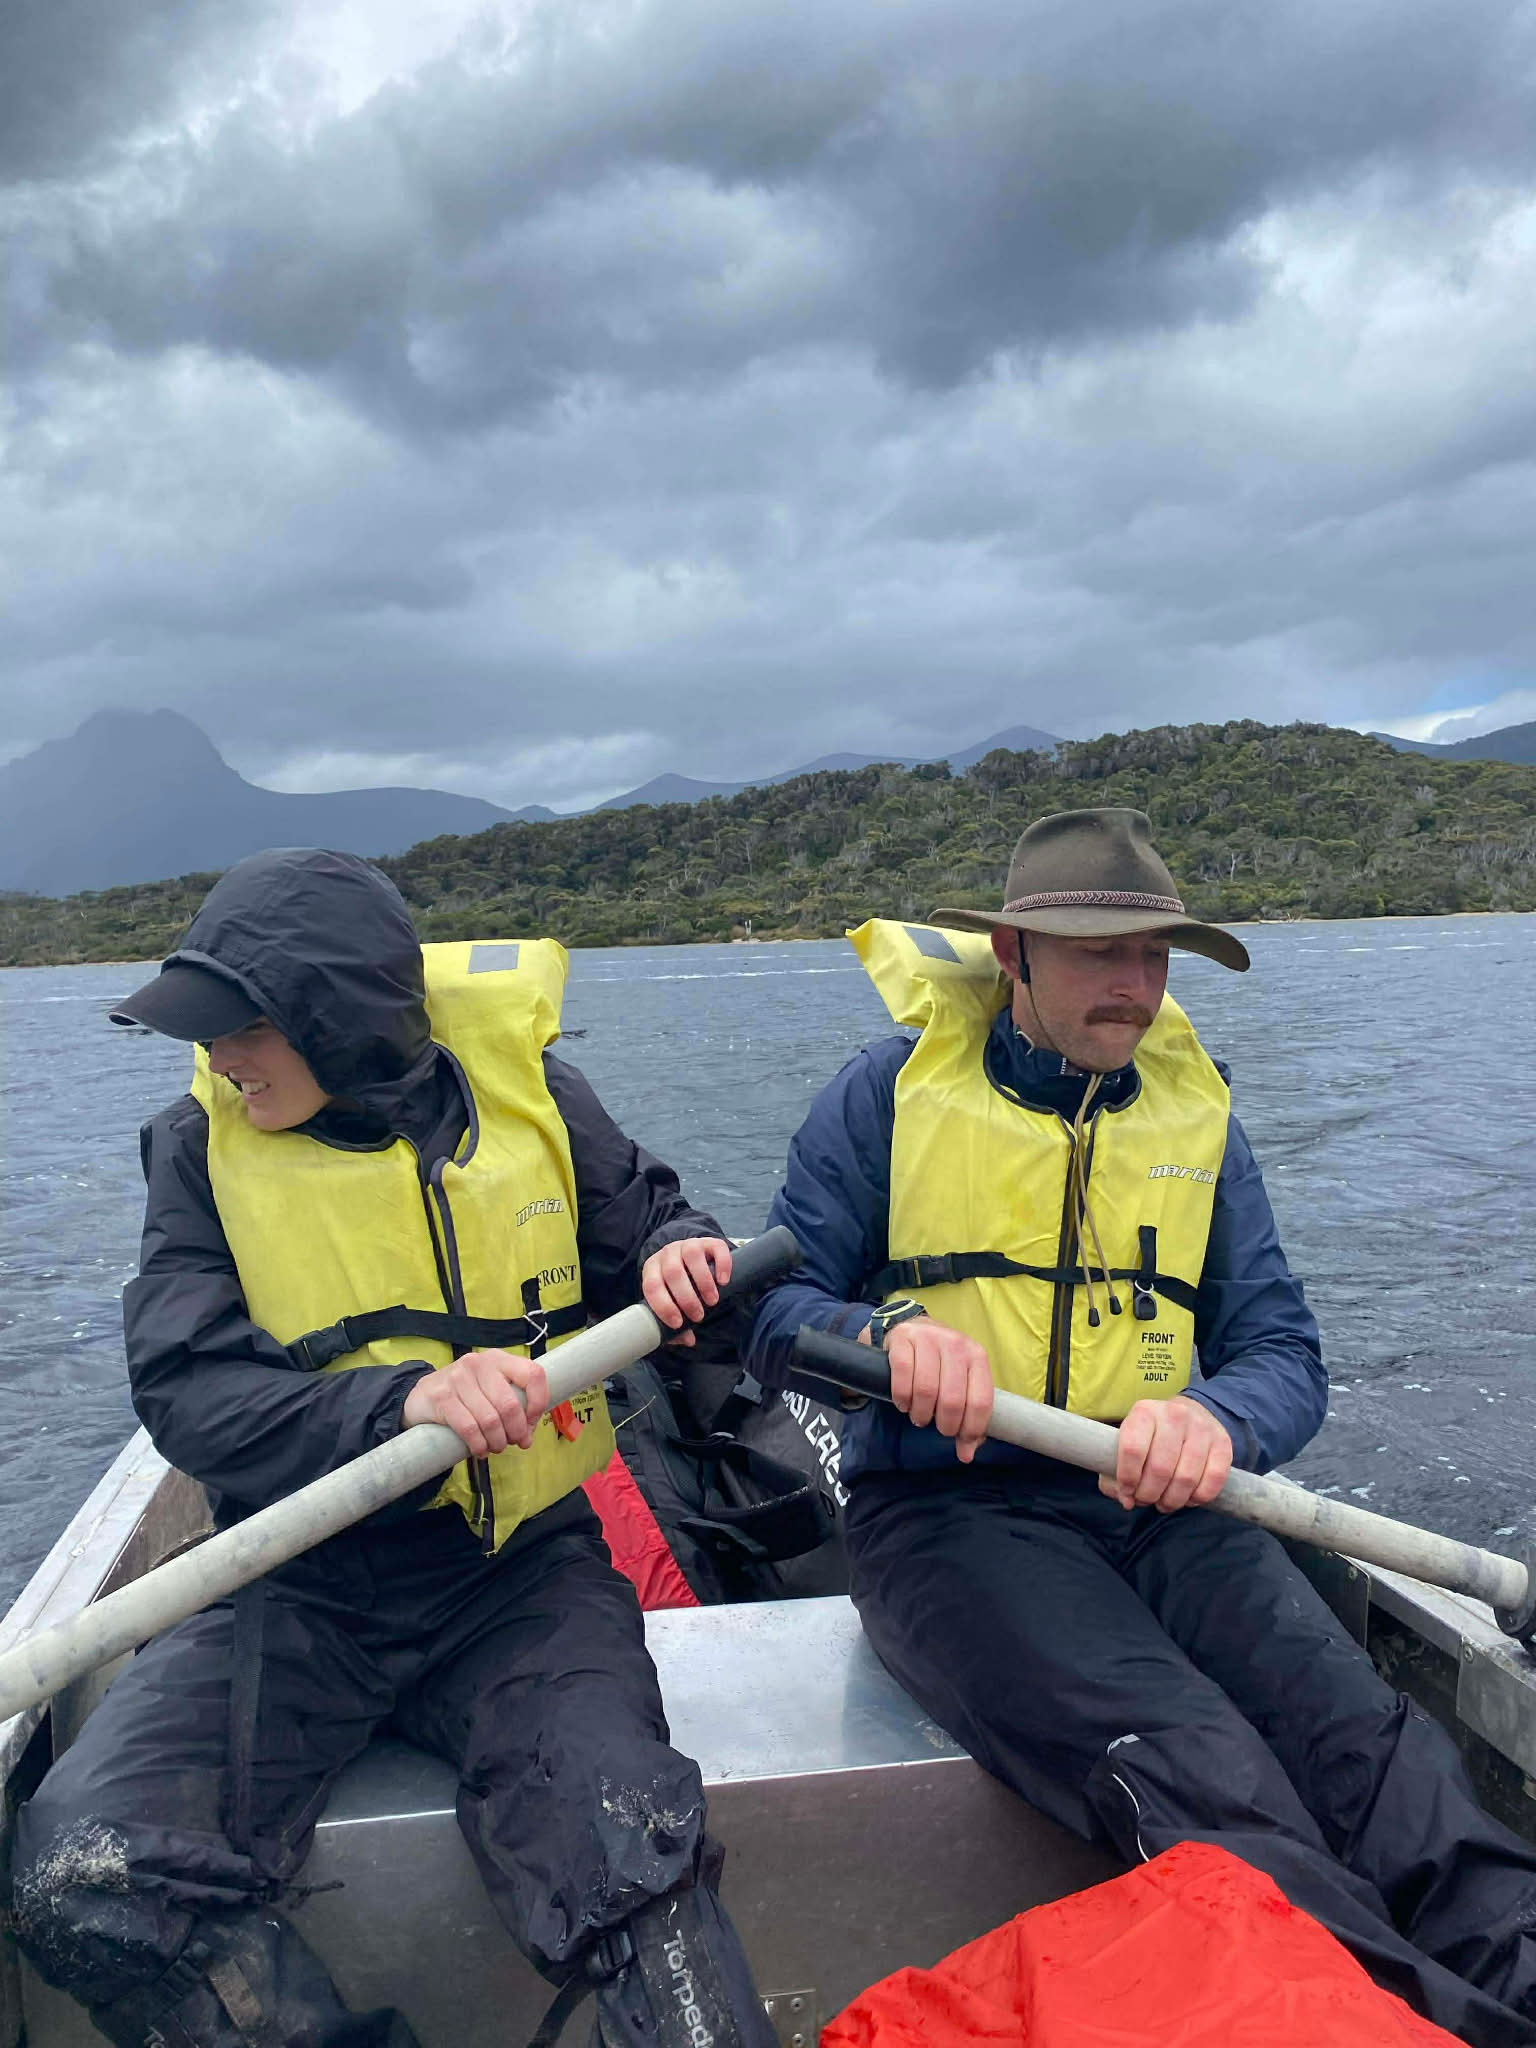
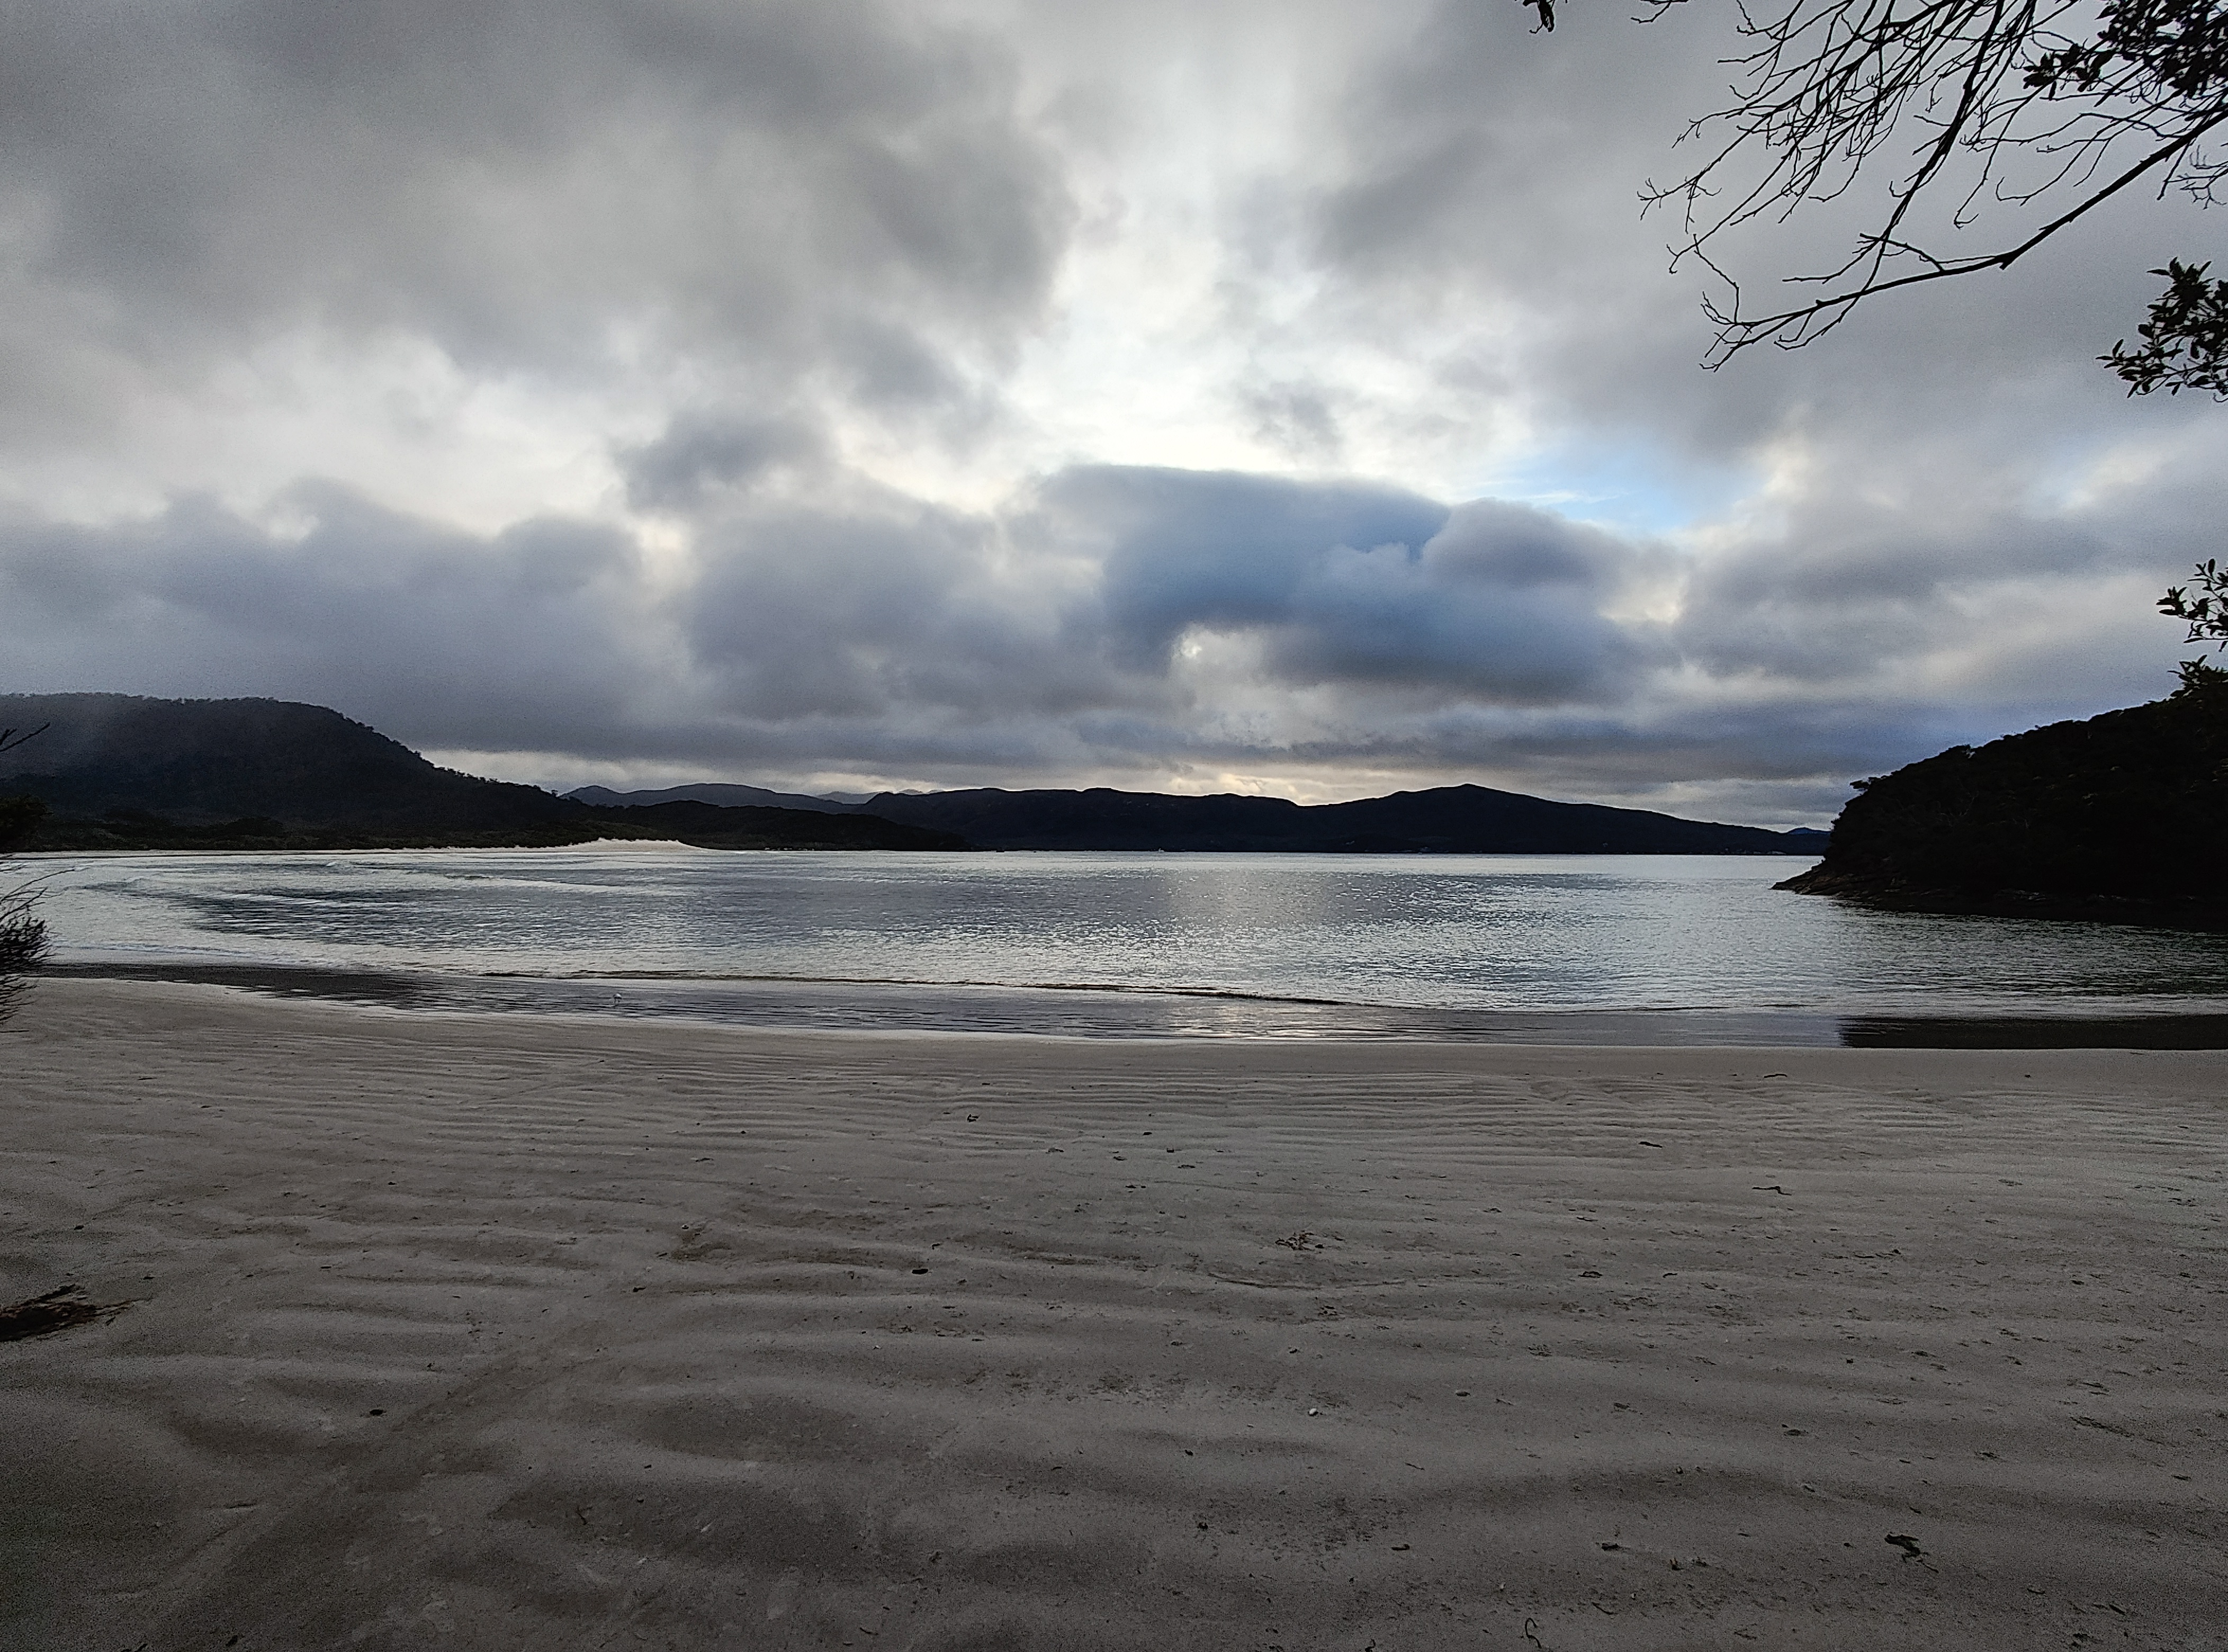
As the vegetation on the left began to become sparse and the sand dunes became less pronounced, we swung around to the left and found New River Lagoon. We were lucky to have two boats on our side and one on the other, which meant that we only had to do one trip across the lagoon. If you’re unlucky enough to get stuck without a boat, you have to wait until others come from the opposite direction. Apparently there is quicksand if you attempt to walk around or through the lagoon (which could be tempting as it doesn’t seem too deep).
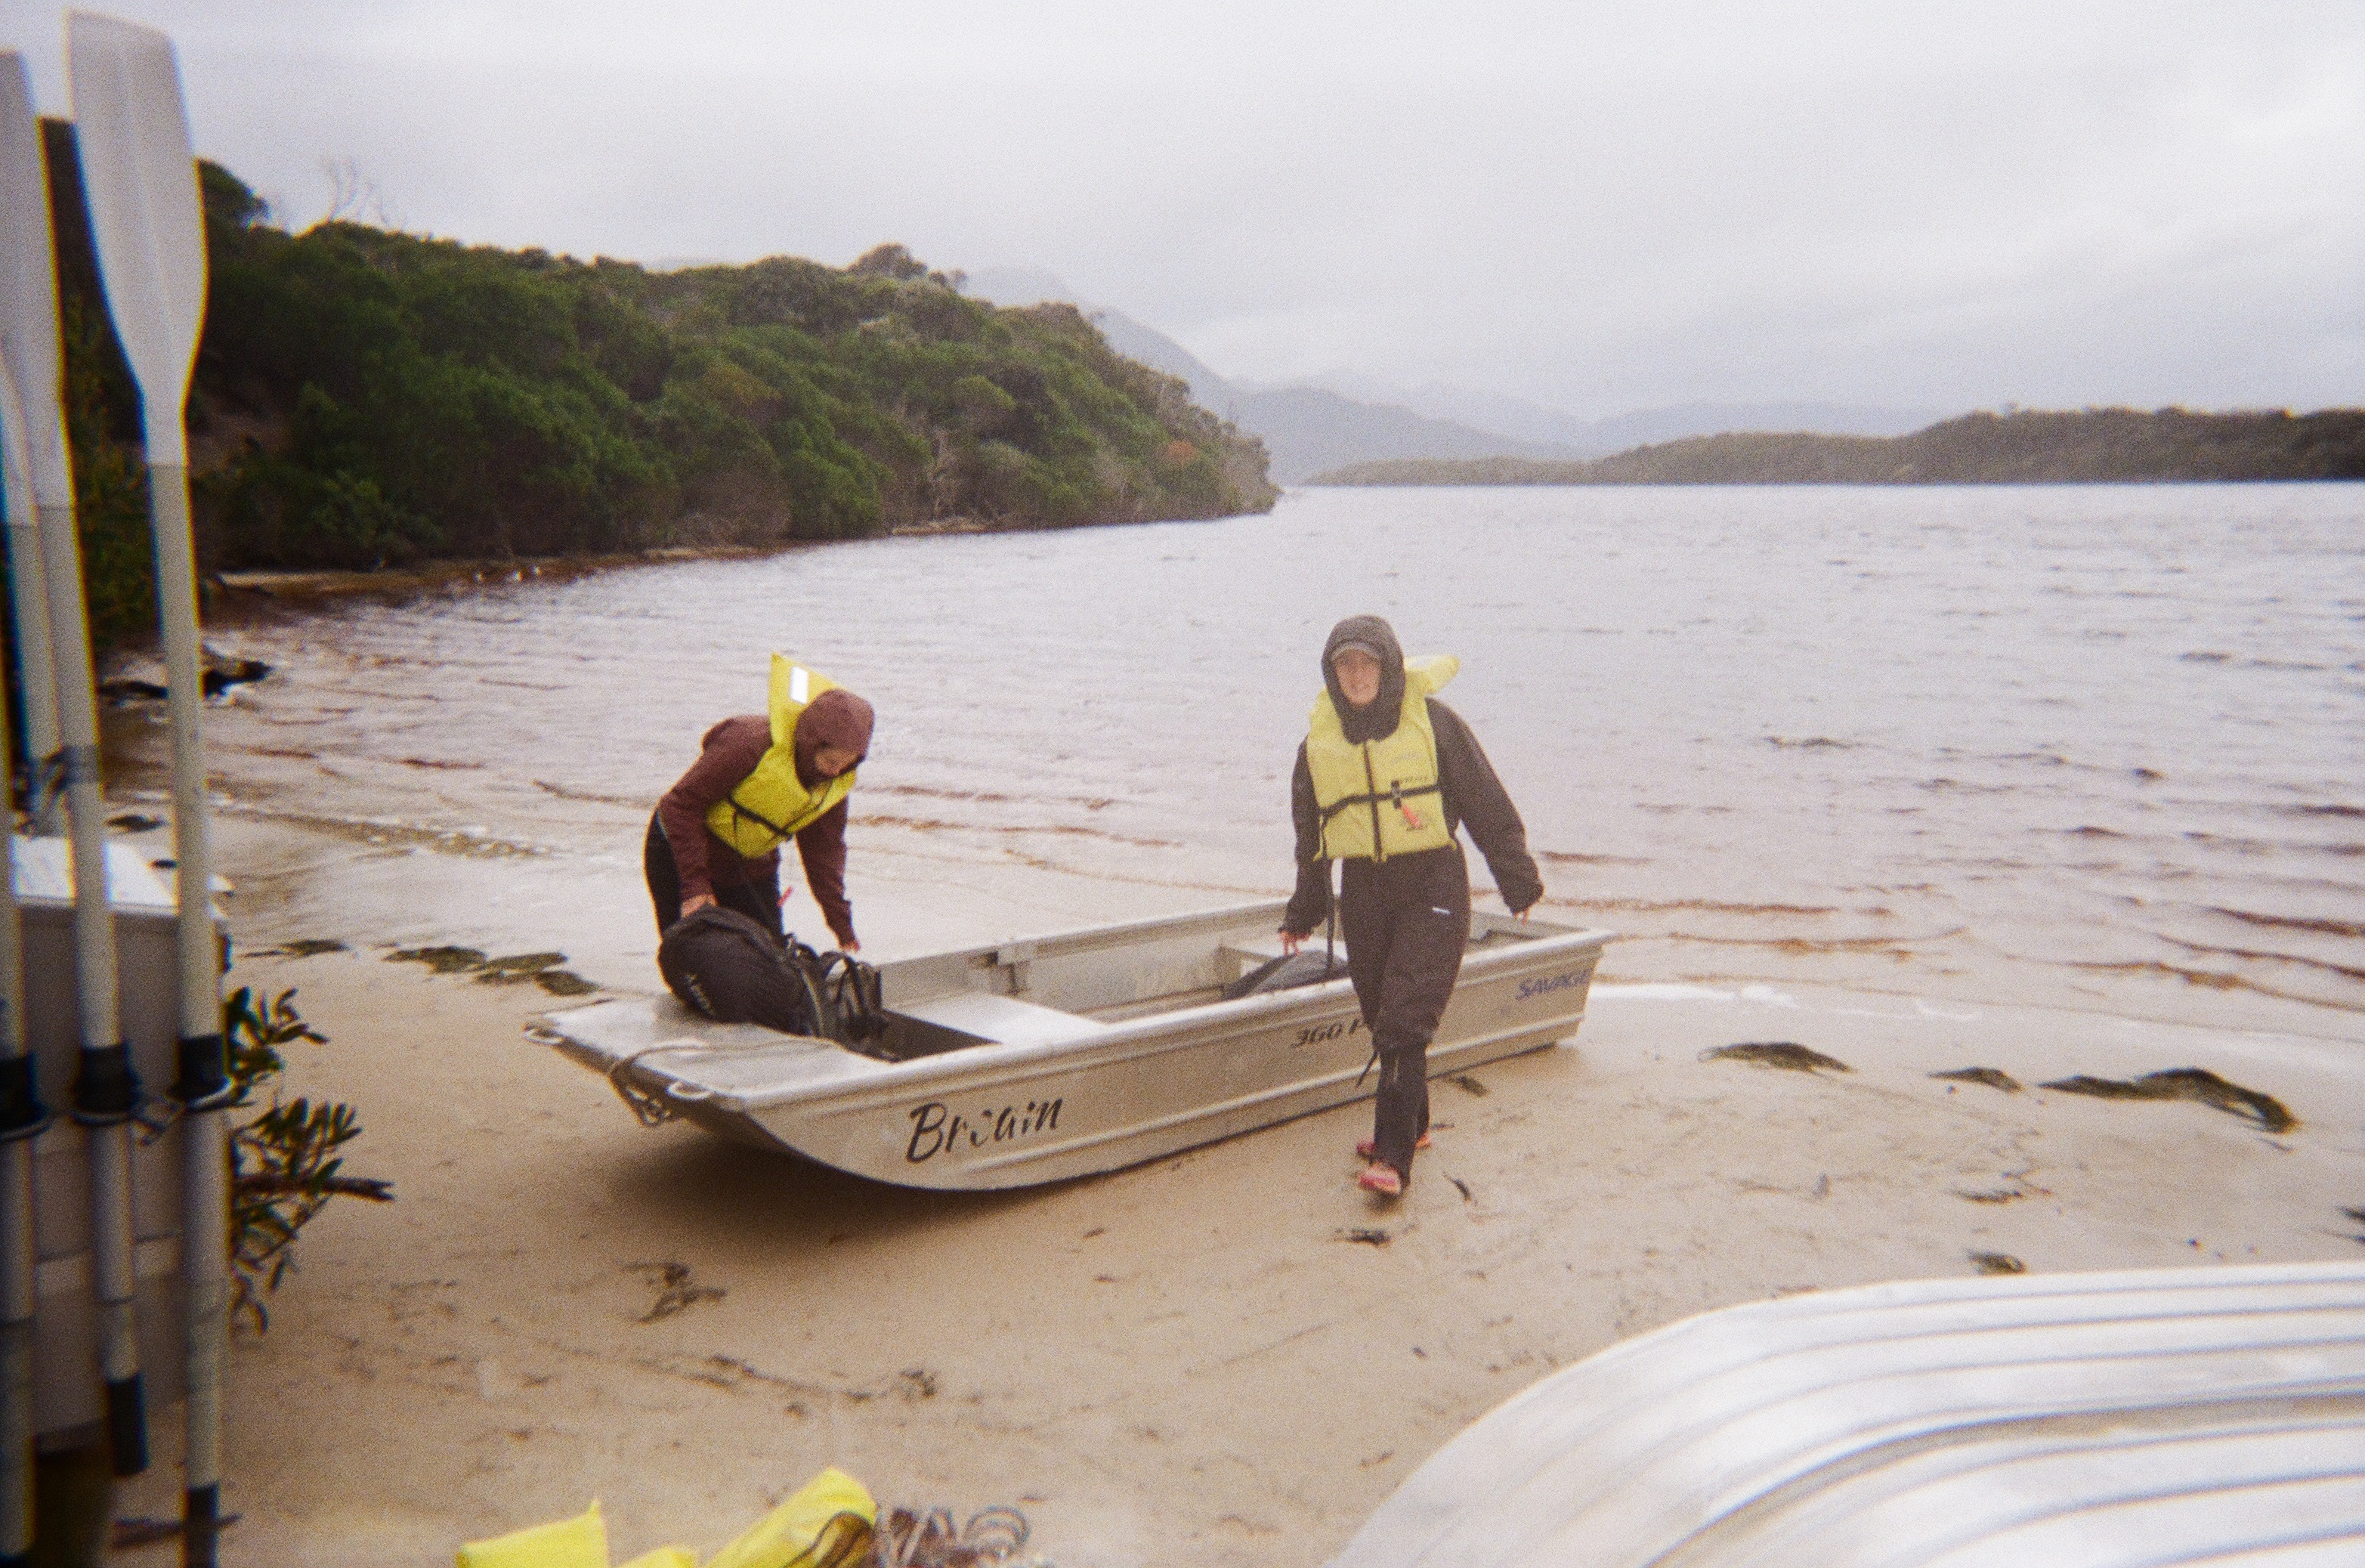
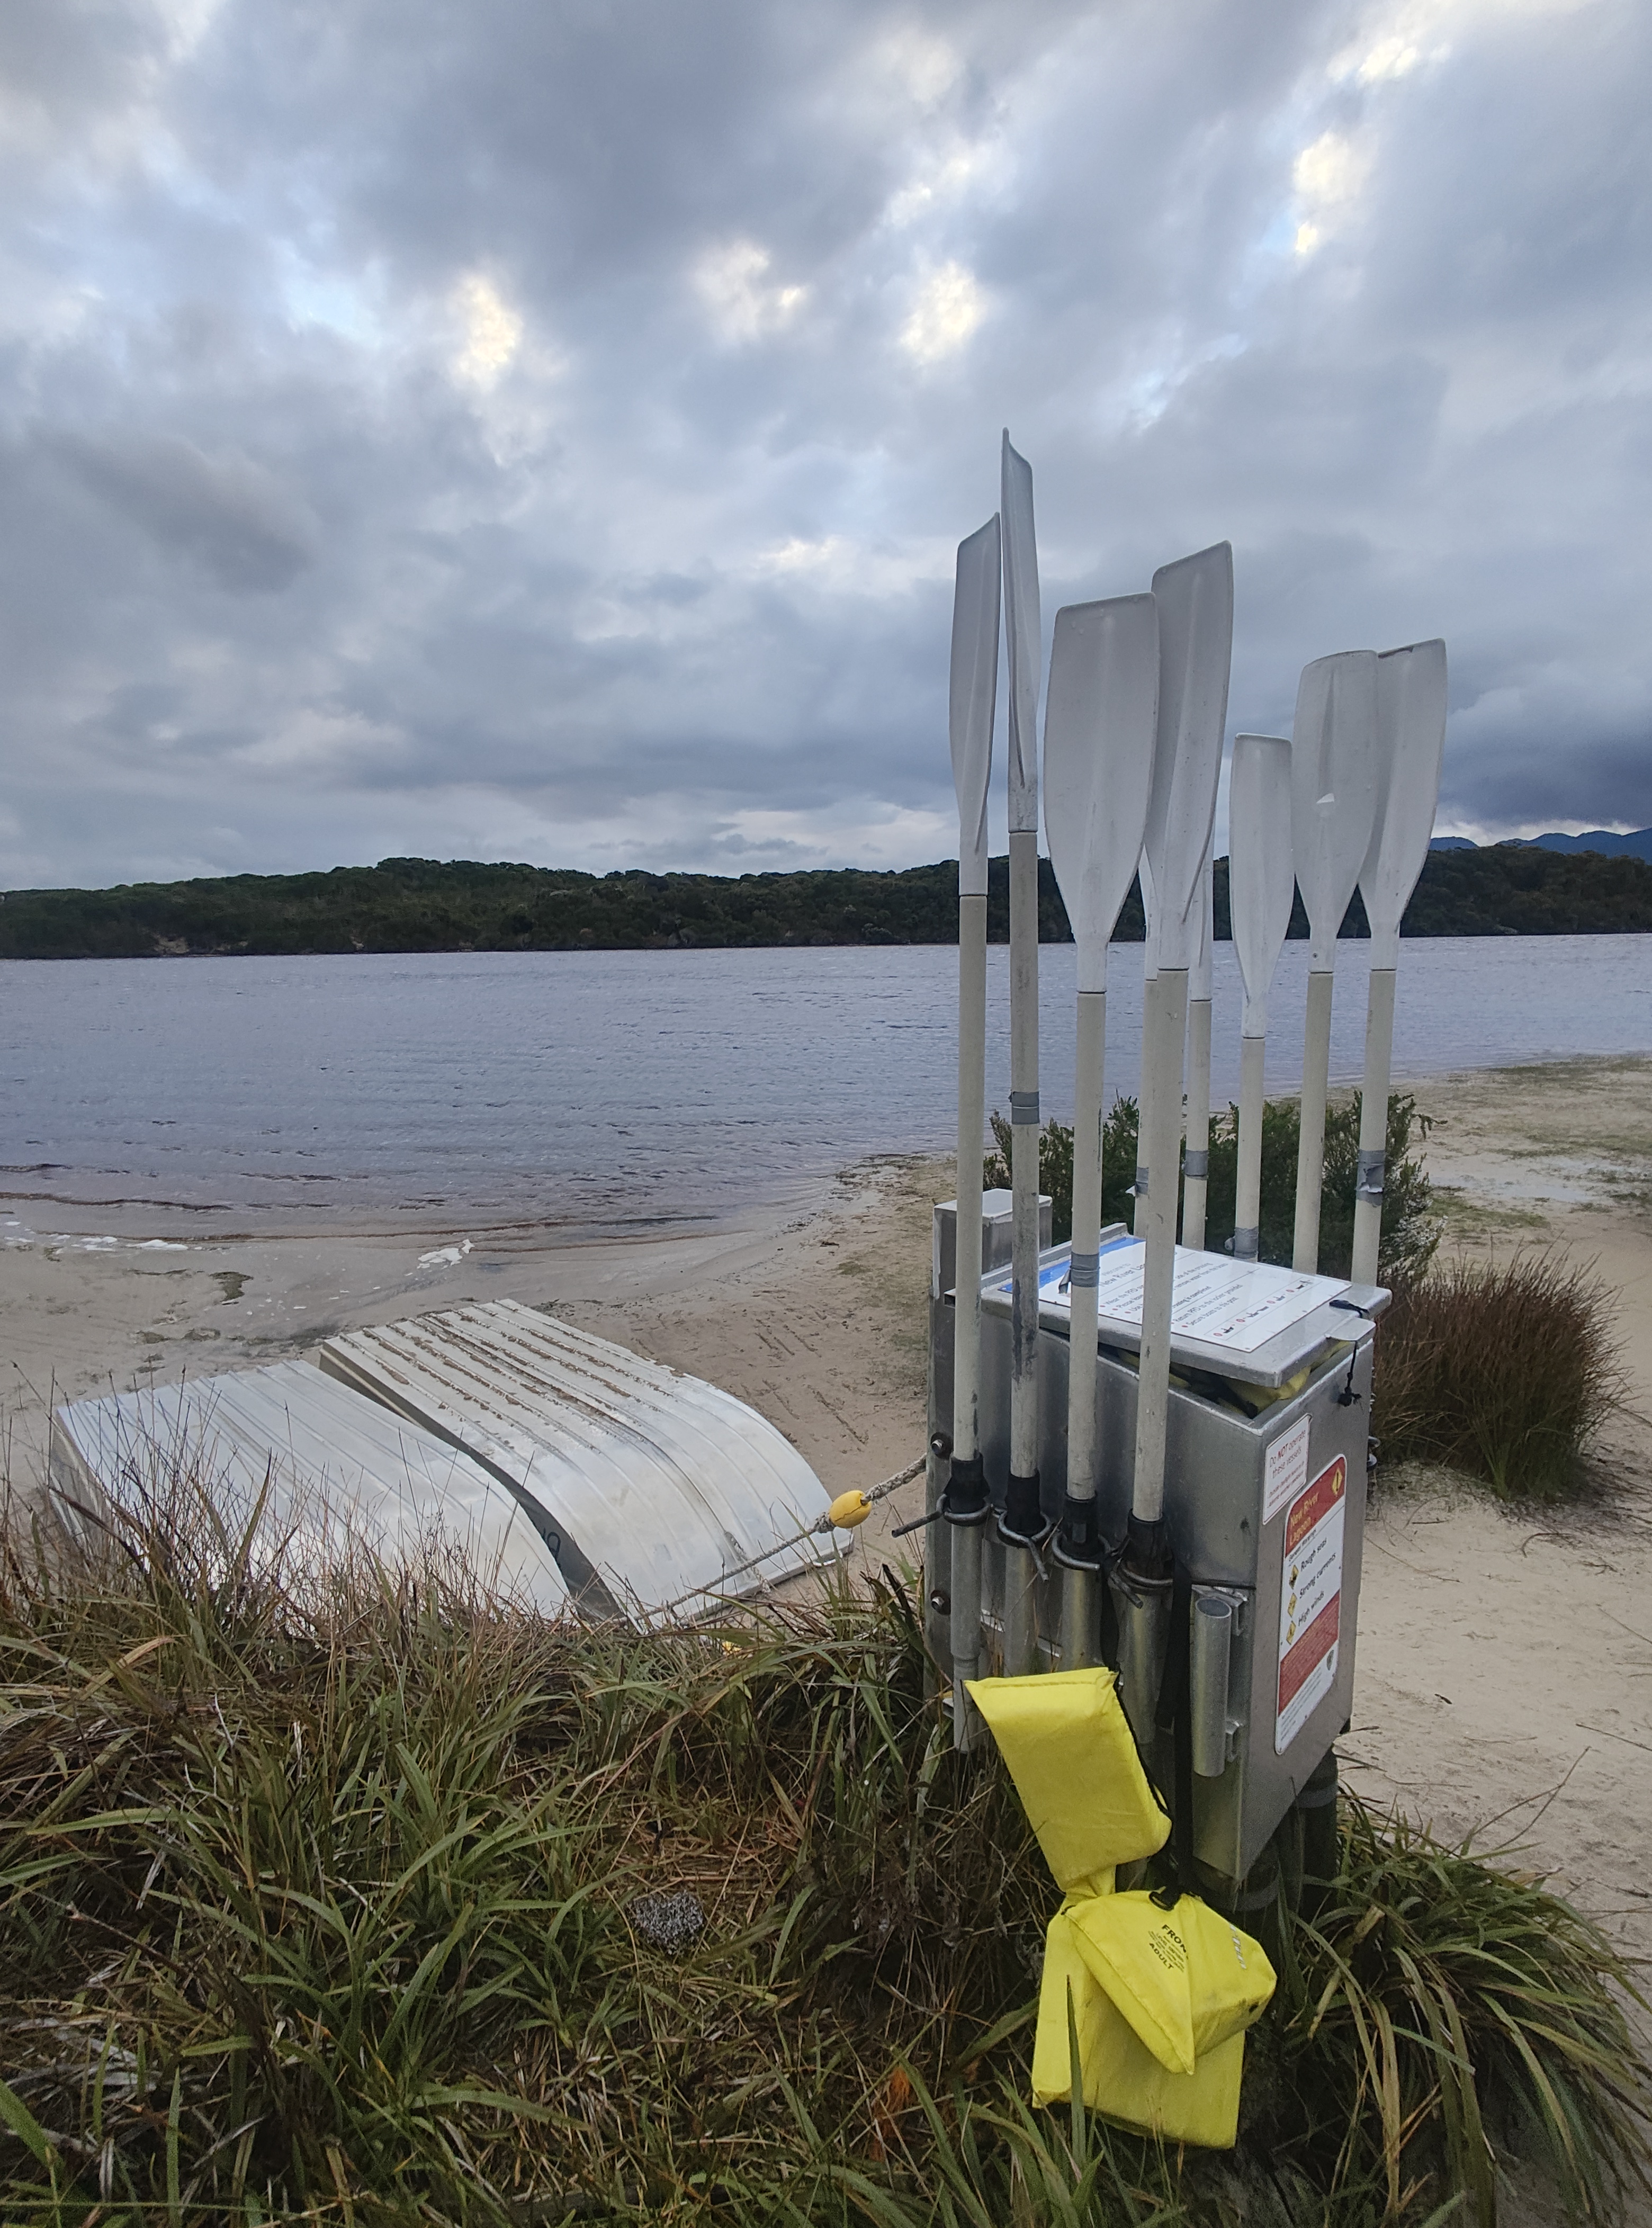
The crossing is about 150m across and there was a fairly strong current through the middle, and we felt we very adventurous with dramatic mountains behind and heavy weather sweeping through. We saw four black cockatoos as we crossed the lagoon which felt like some kind of sign. All four of us and our packs went across in one boat-load, and made it fine despite being slightly over the weight limit. The boats were very heavy to drag into the water, and it would have been difficult to manage this yourself. At the other side, we dragged the boat up the shoreline and attached to the anchor. There were life jackets with the boats which we stowed back in the metal container.
We had arrived at Prion Boat Crossing and enjoyed a break in the weather for several hours to set-up camp, hang out and have a second round of dhaal (not as popular with the troupe second time around). At this point we started to feel the buzz of being on the downhill stretch, and having survived another major hazard today.
Peaks & Pits:
Peak: Dramatic rowing at Prion Boat Crossing
Pit: Nearly dying at the scary river crossing

Day 5: Prion Boat Crossing to Surprise Bay
Distance: 9km
Duration: 6hr 50min (including breaks)
Highlights: New River, Surprise Bay
At this point we were counting down the days based off the remaining hazards (i.e. how many more times were we going to be scared silly). Although the weather was starting to ease, there was still some concern about upcoming river crossings. With this in mind, we left camp later in the day to ensure we were arriving at New River rivulet around low tide (this would mean arriving at Surprise Bay where there is also a river crossing at higher tide, but we were more concerned about New River).
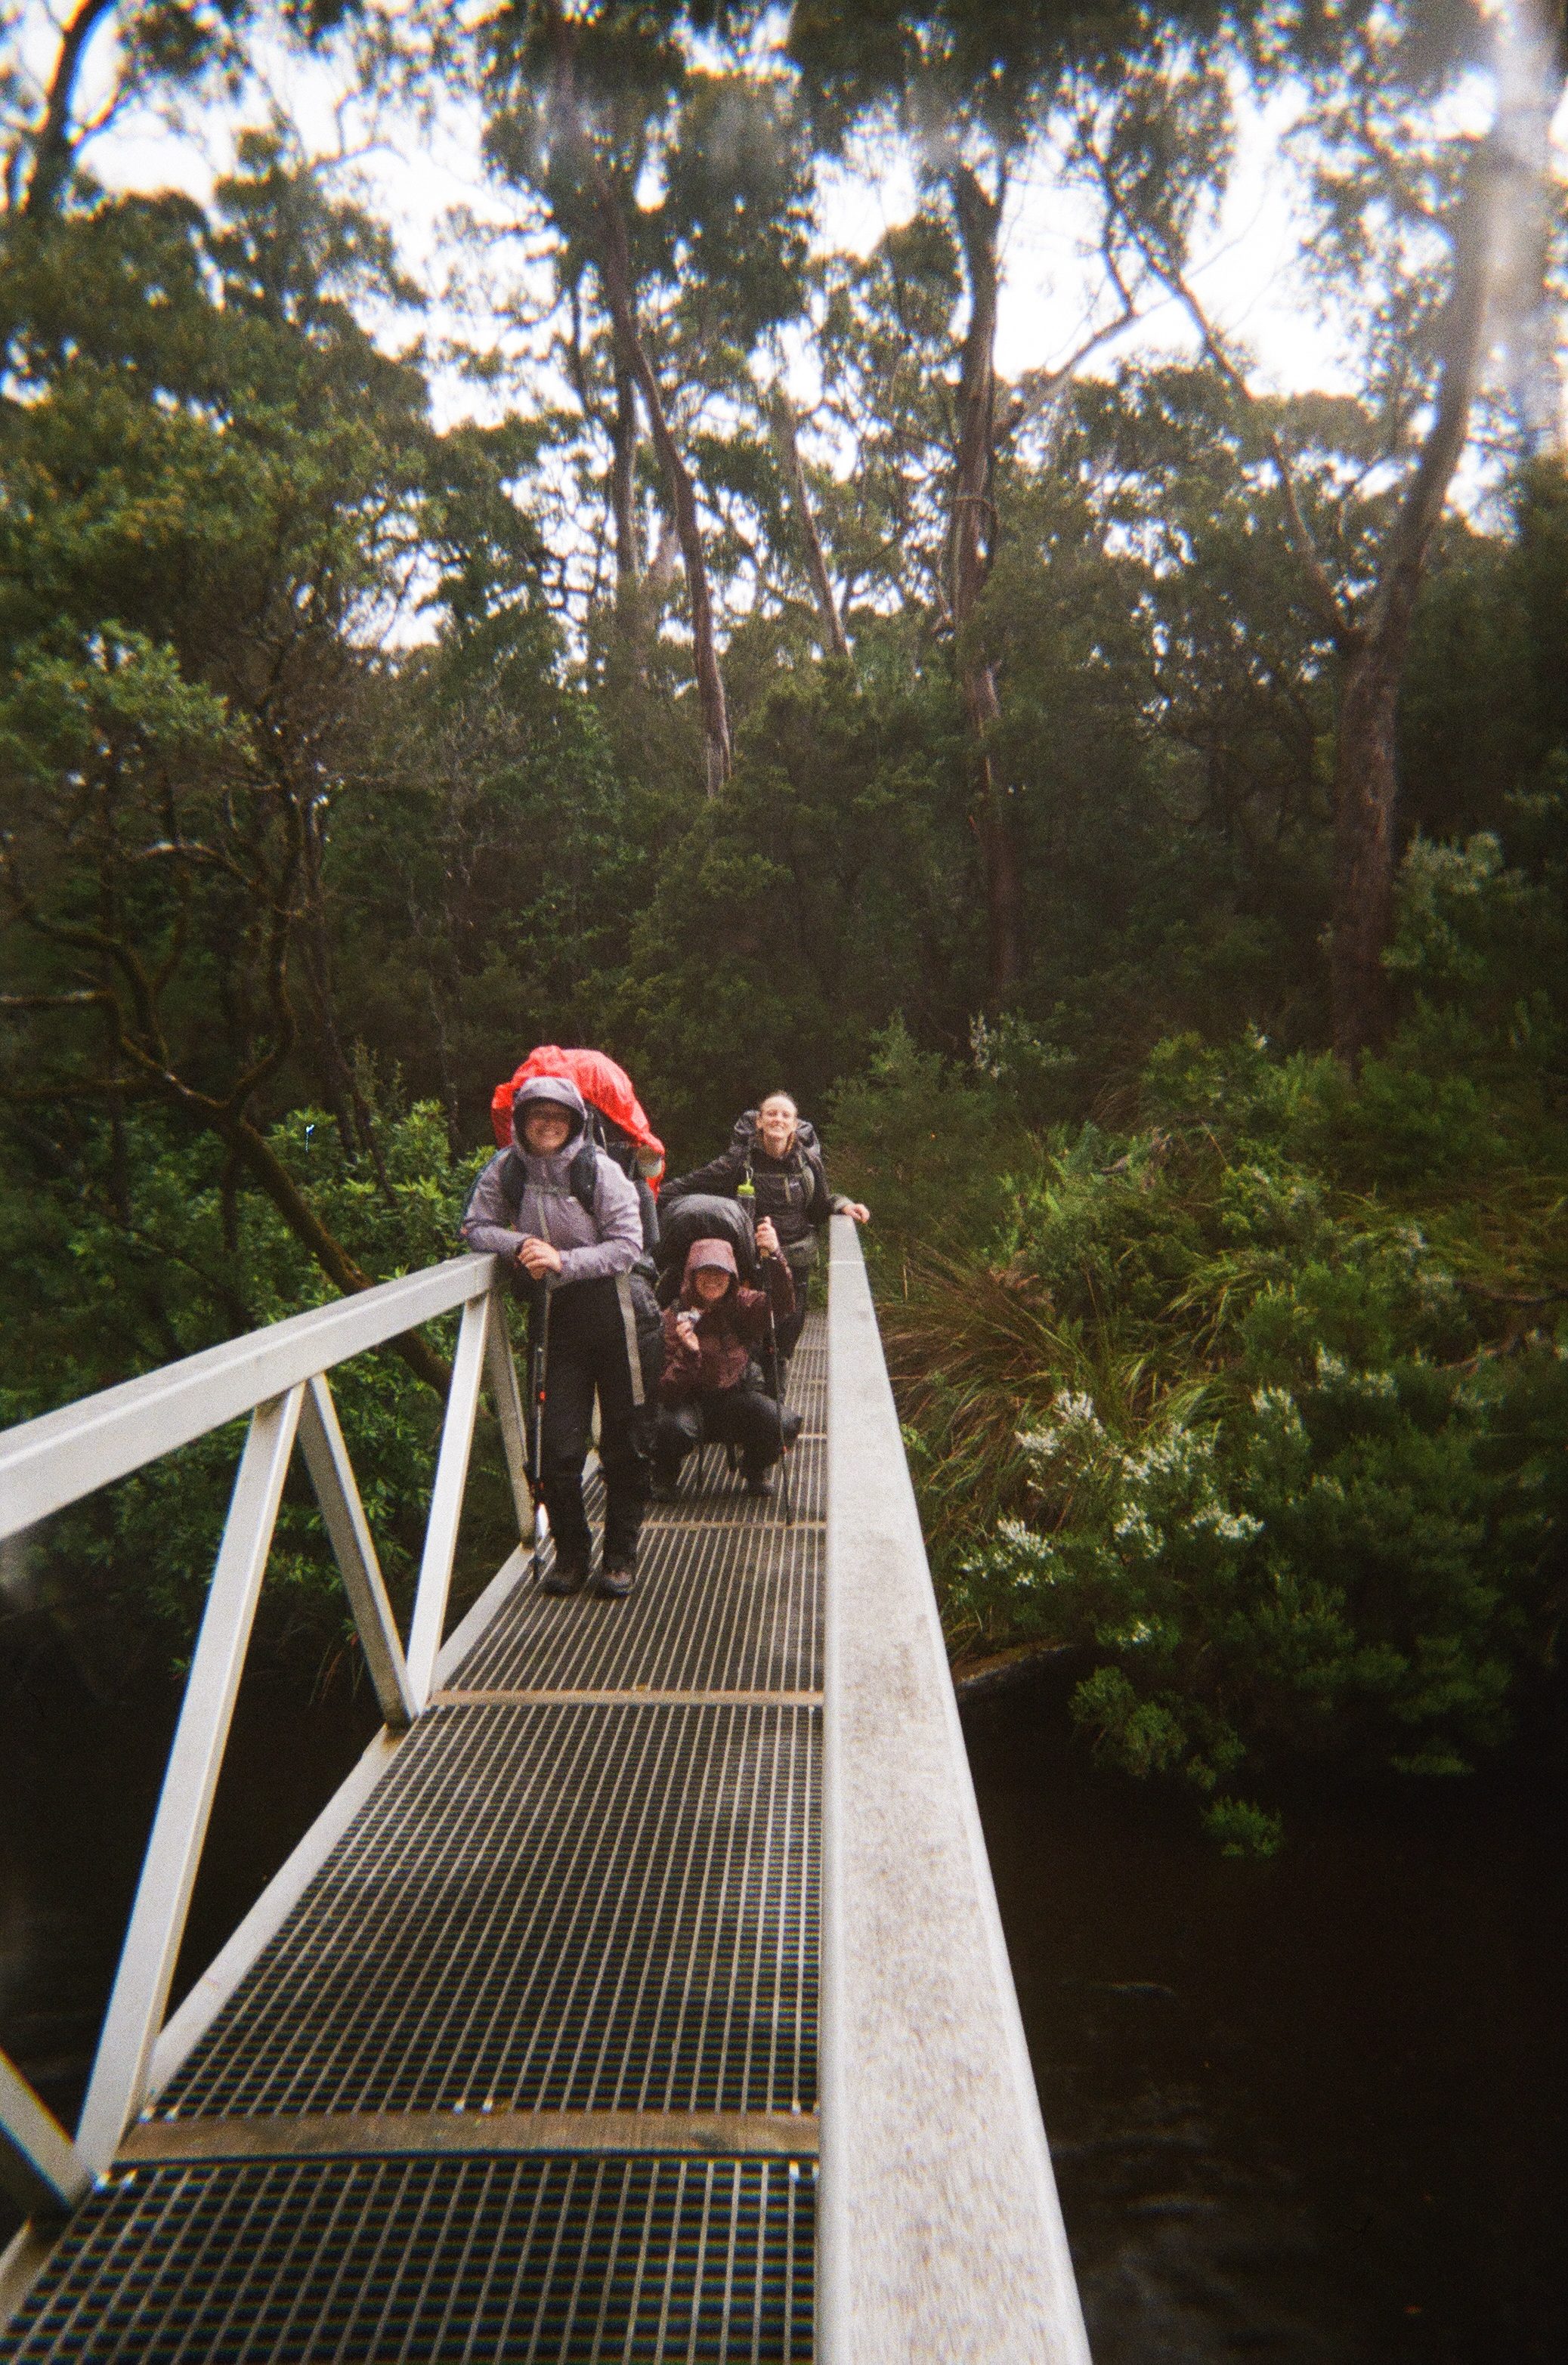
We walked along forested dunes for about 2km and had intermittent views of the beach and sandbar. This section was not very muddy so we made quick work of it, all while anticipating the upcoming river crossing which never arrived. We eventually came to some new stairs and a fairly new bridge which we are assuming has replaced the river crossing since the resources we used had been published. The river looked very deep even at low tide, so we were very happy with this outcome and continued on through the forest.
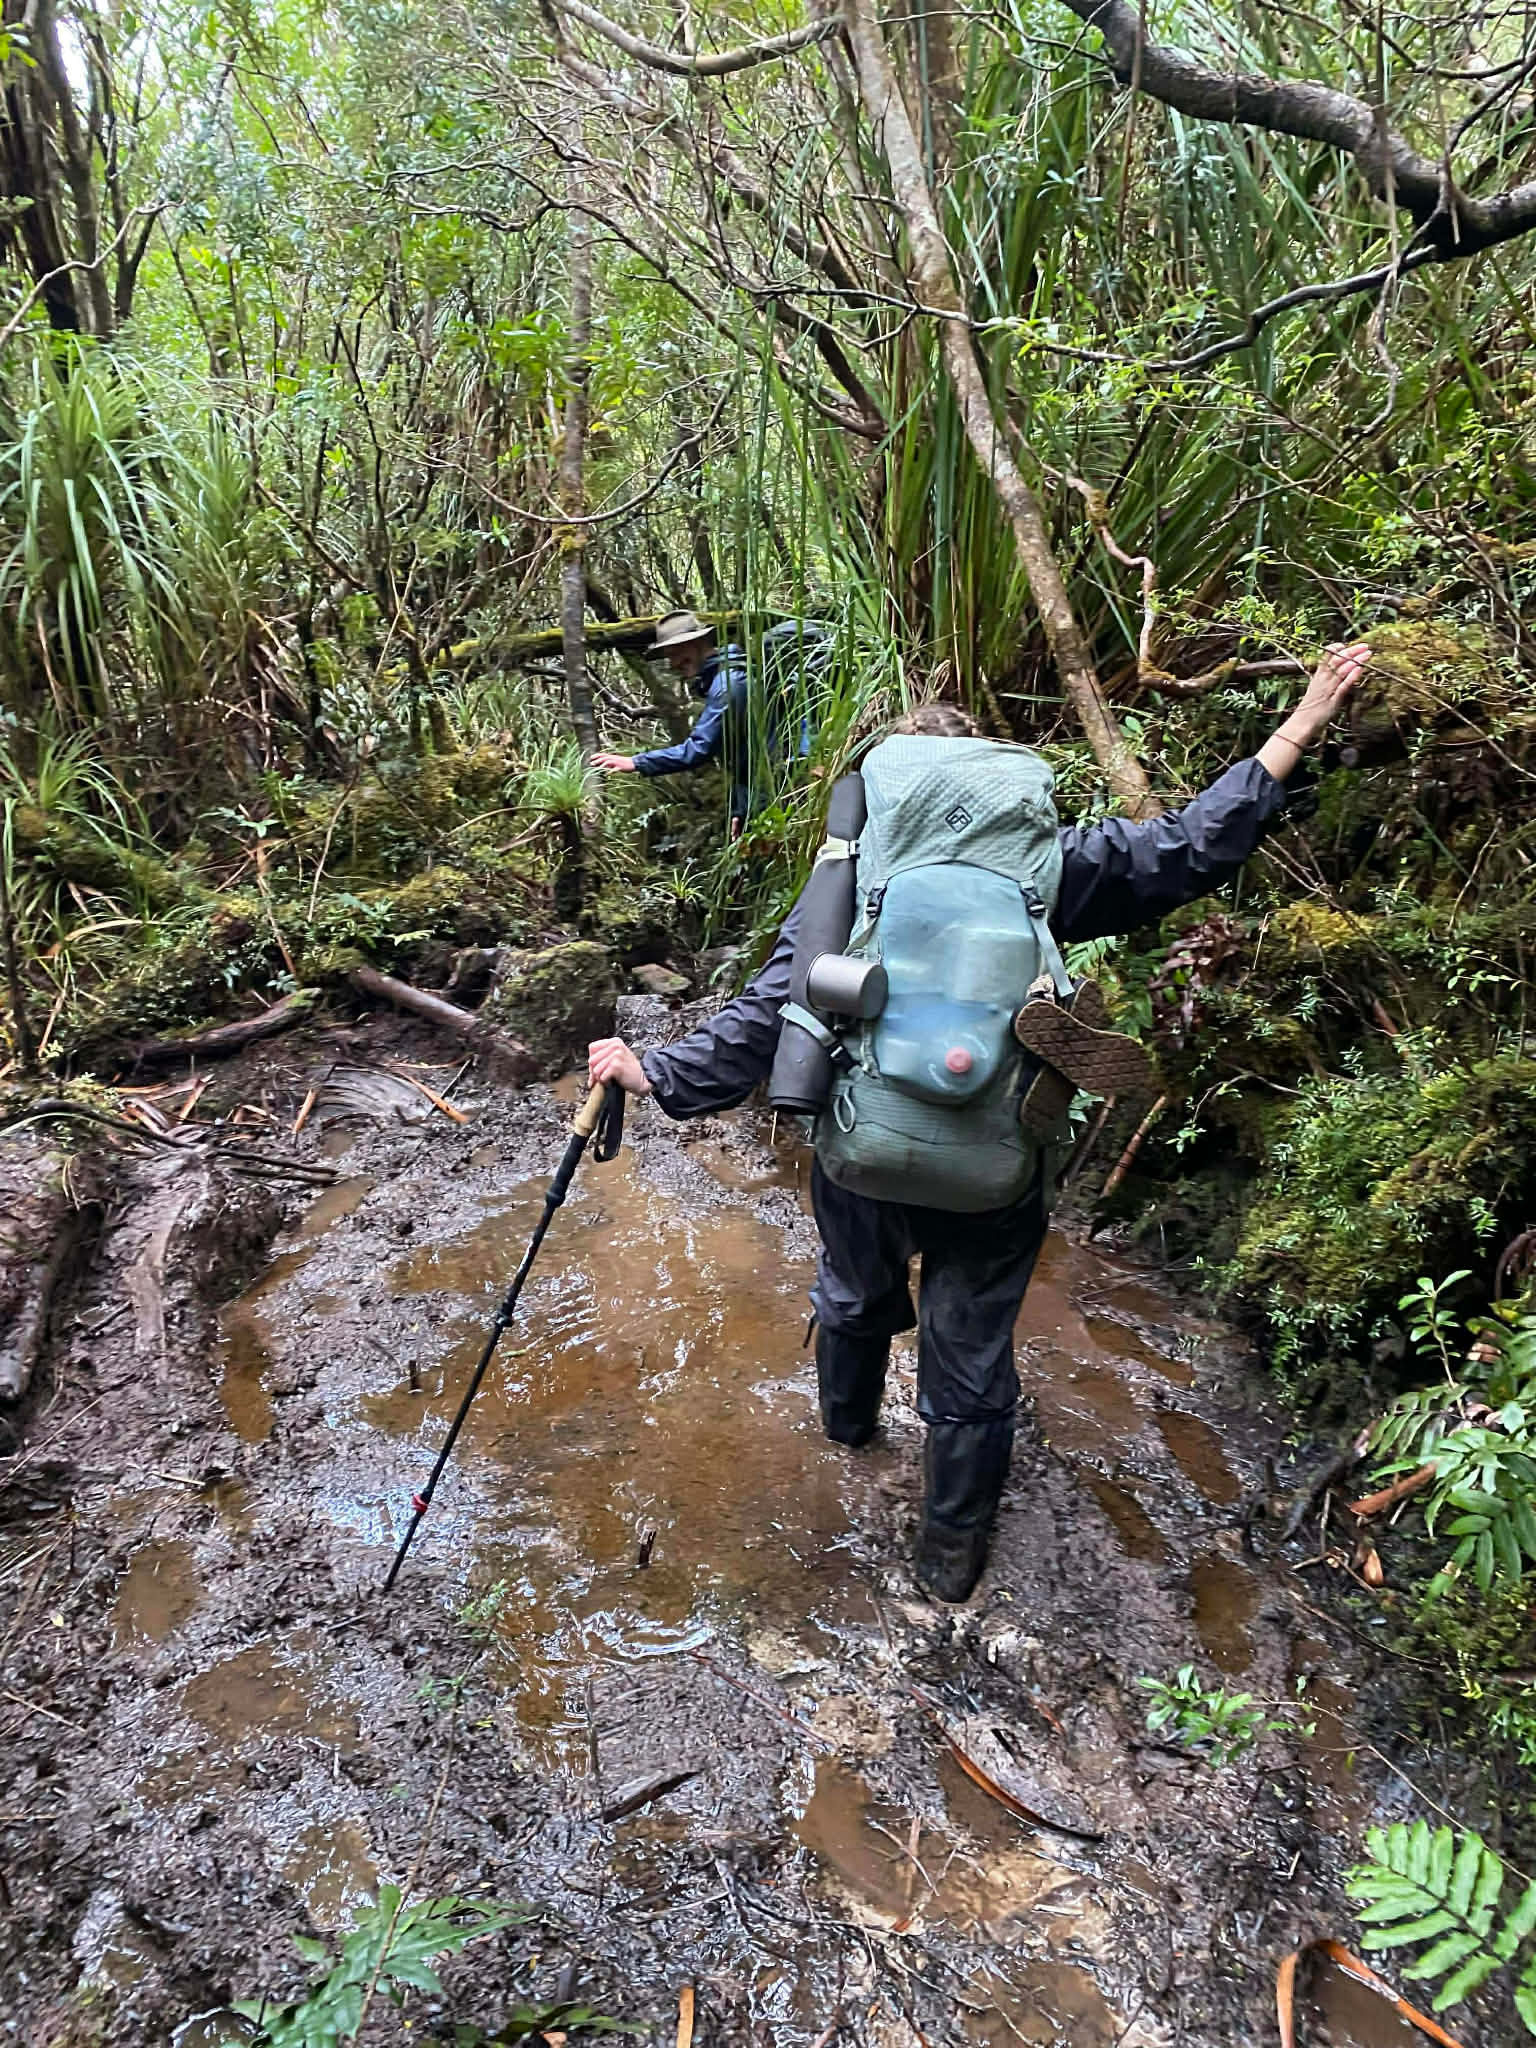
The trail moves into swampy terrain and there is very deep mud here, we’re talking at least waist deep mud, possibly deeper. The walking sticks went completely under mud and who knows how much longer they would keep sinking. So, this section was very slow. We passed the Osmiridium Beach turnoff, and were passed by our friends Father and Son who were glad to see we’d survived the Ironbounds, and returned to us a set of sunglasses that we’d thought was lost to the wilderness. When we asked how they went with the terrifying river crossing, Father responded in classic Tassie style, “yeah, they were a bit deeper than I was expecting” while Son rolled his eyes. This was our first human interaction in 4 days and it was nice to have even a brief interaction.
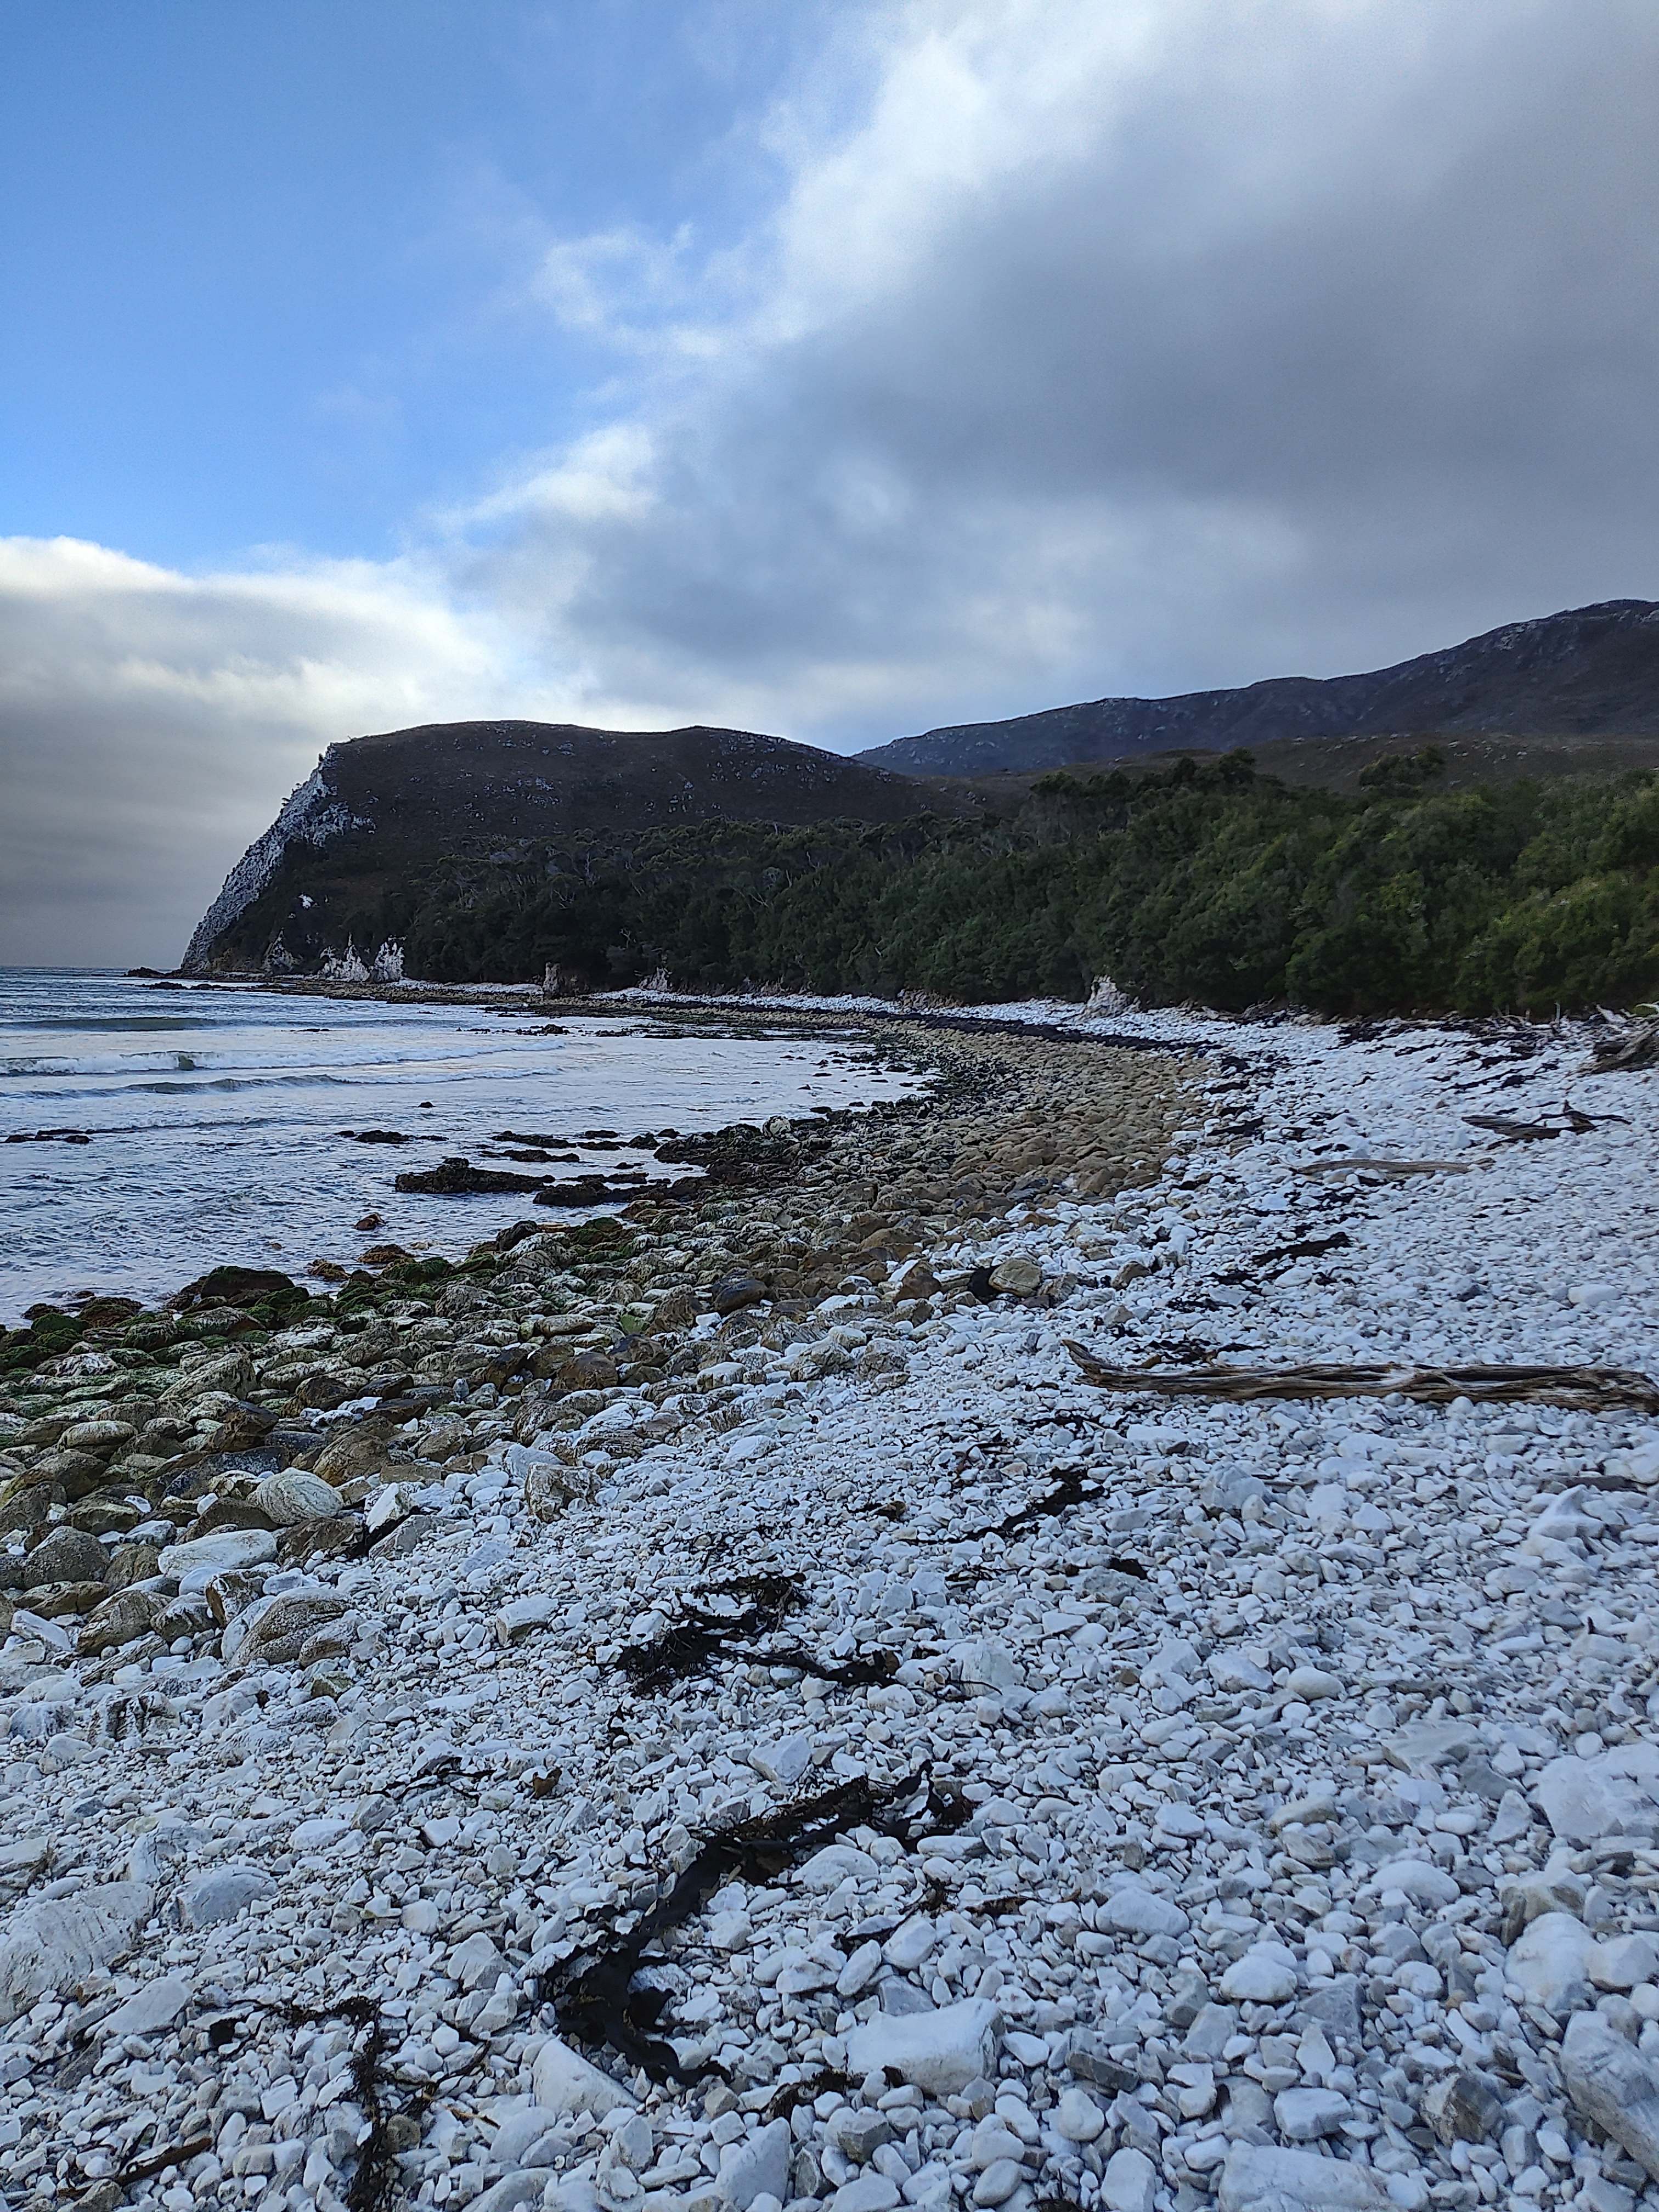
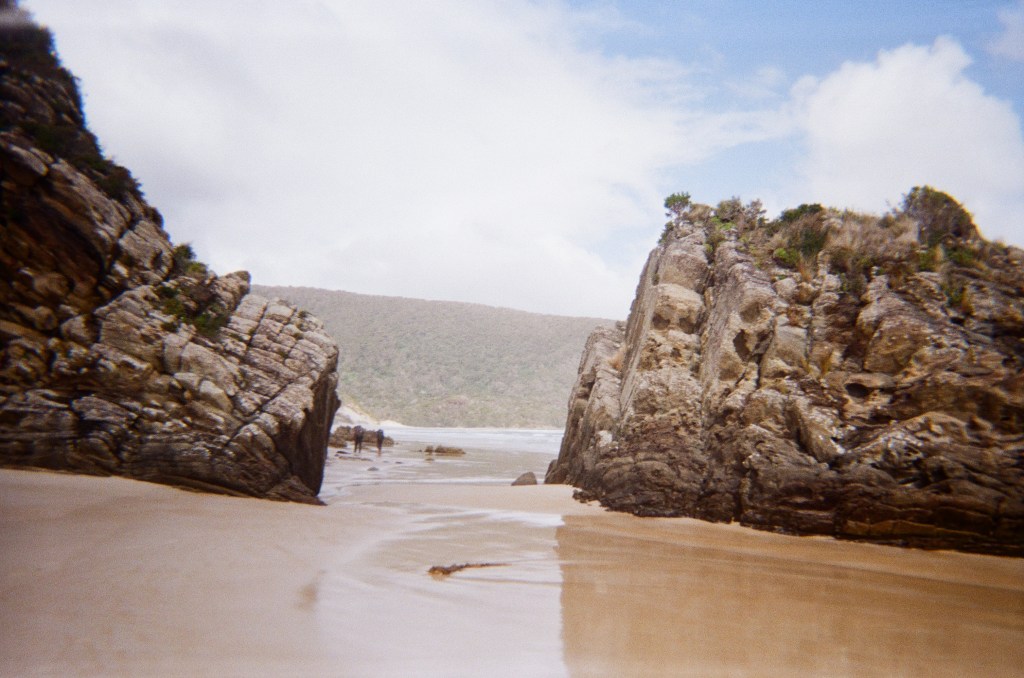
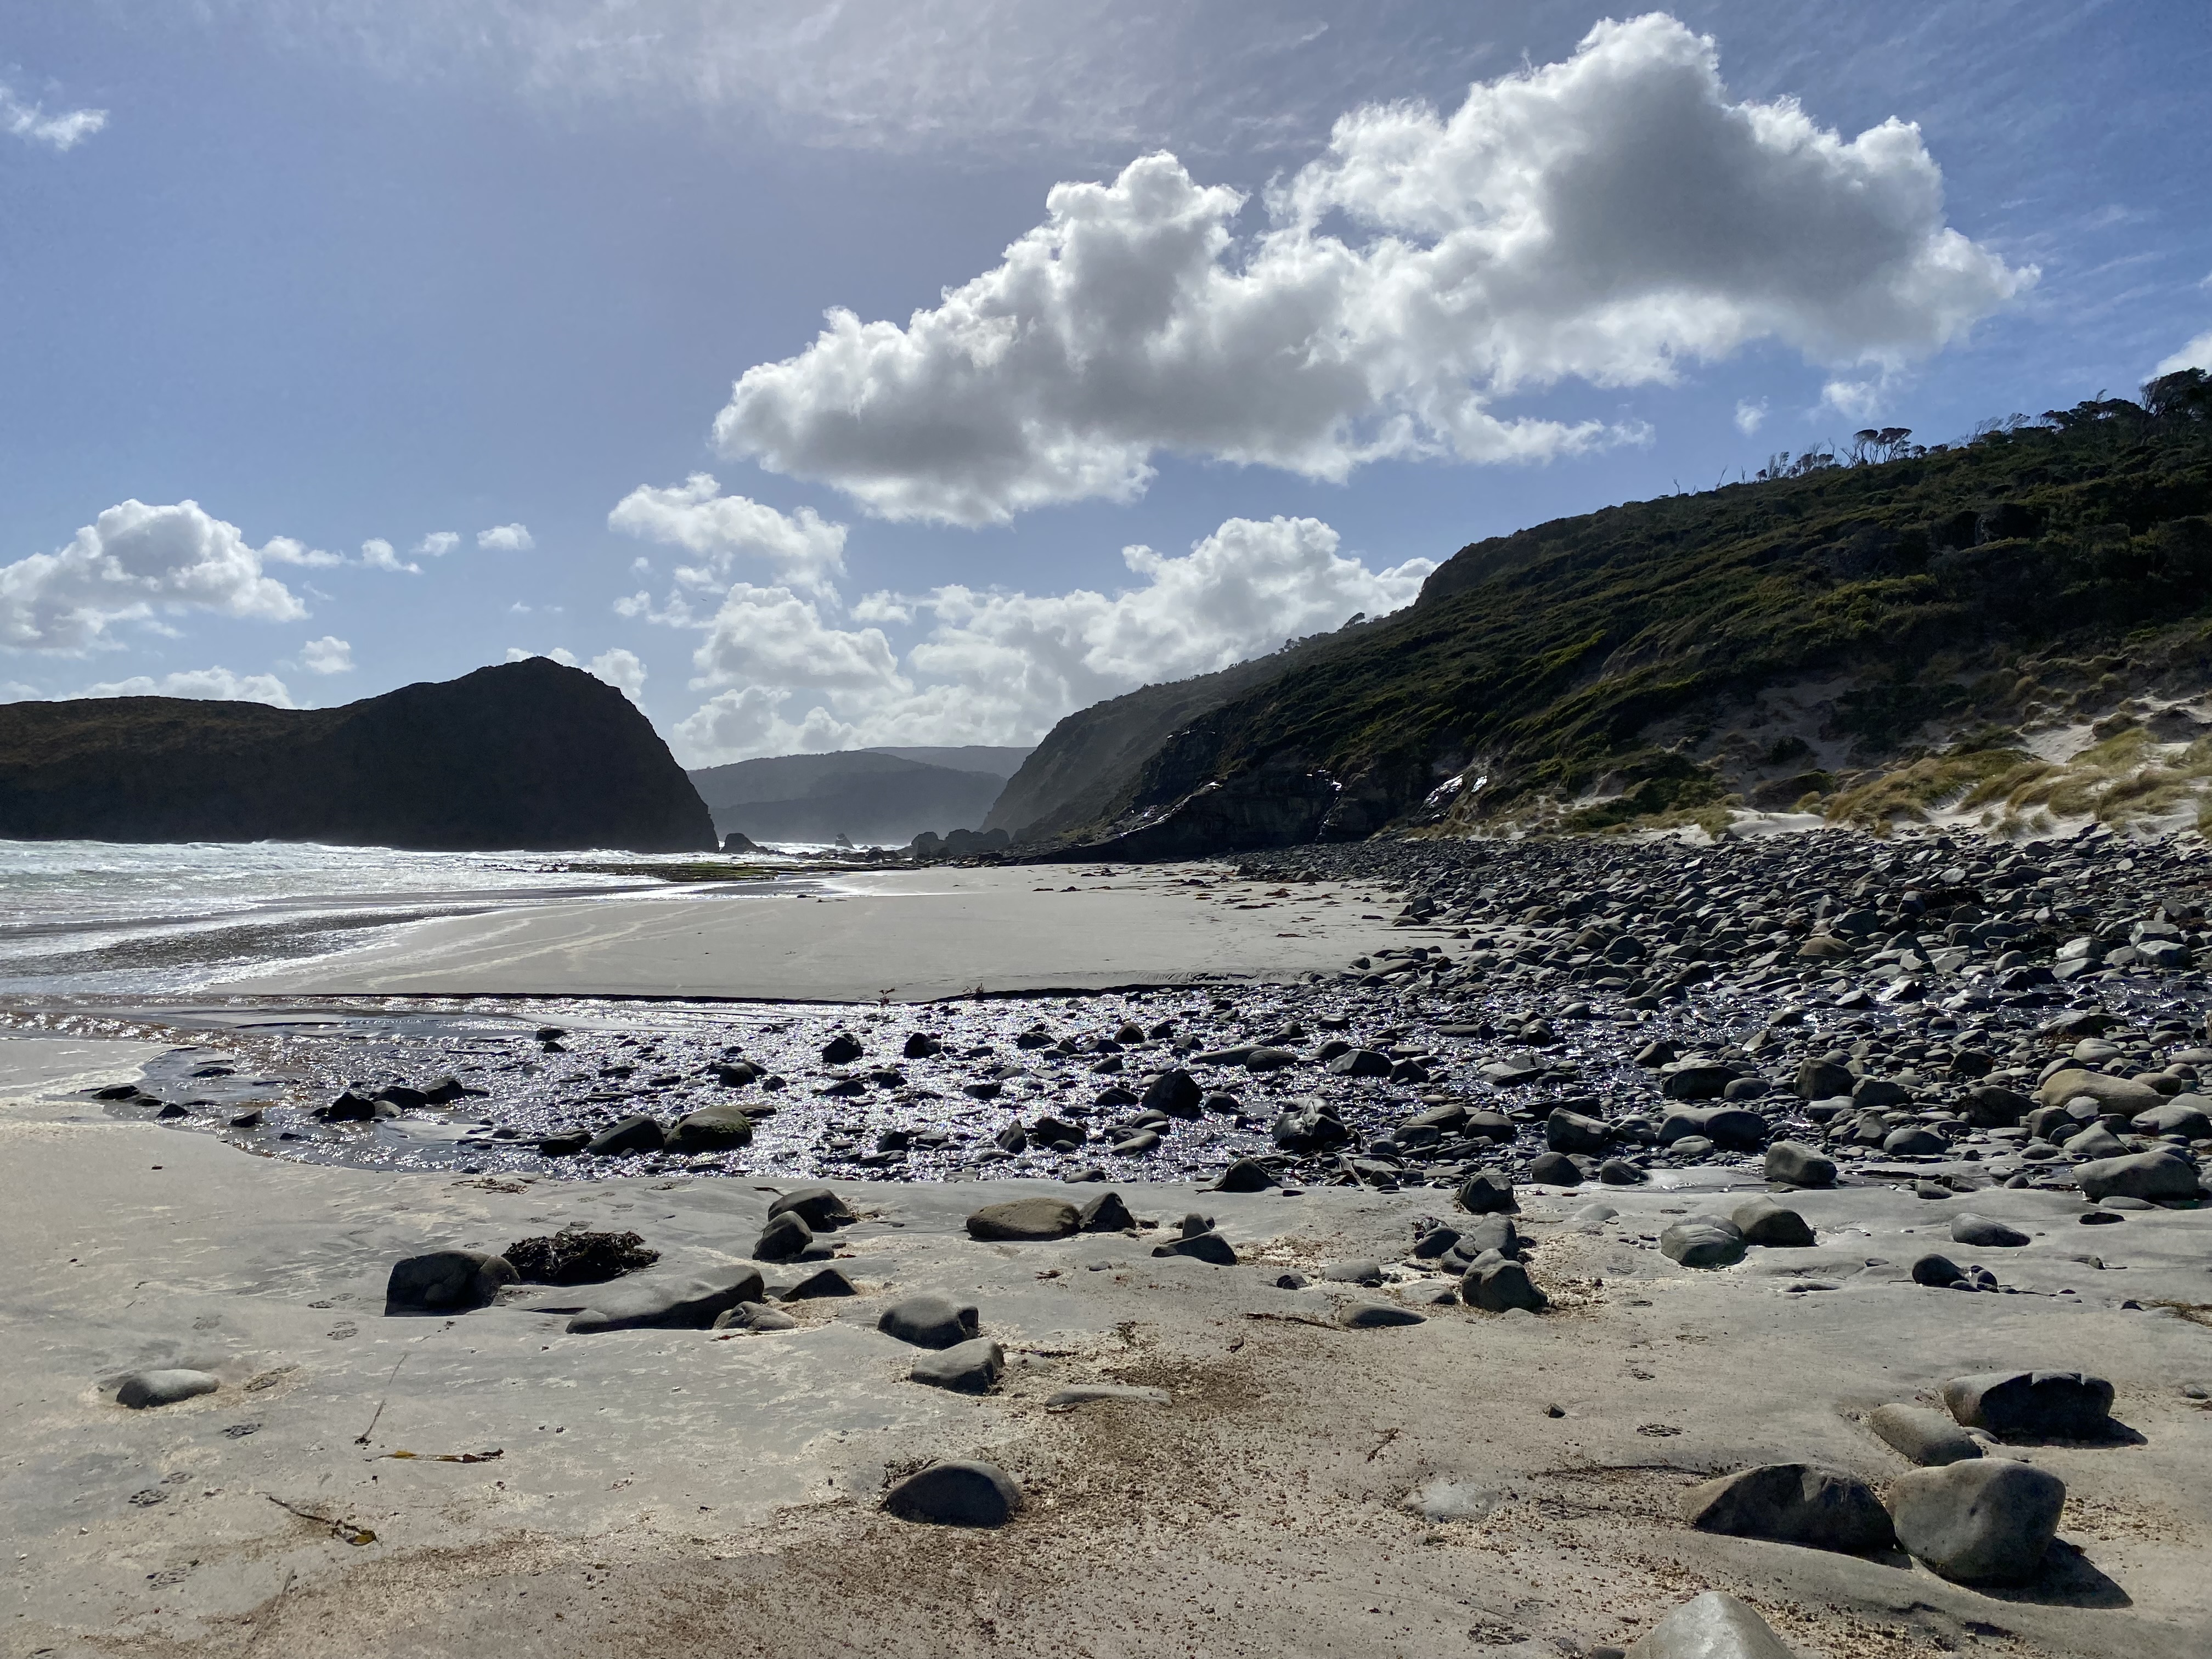
The mud continued as we headed into a beautiful, mossy, lush section of forest unlike anything else we’d see on this trail. Here we found lots of obstacles, climbing up and over fallen trees and crawling below branches. This section was slow-going with the mud, and a wrong turn after our lunch break. Eventually the trail emerged into more solid footing in the forest and steps took us down onto Surprise Bay beach. Immediately we were struck by two massive boulders with a clearway directly between them.
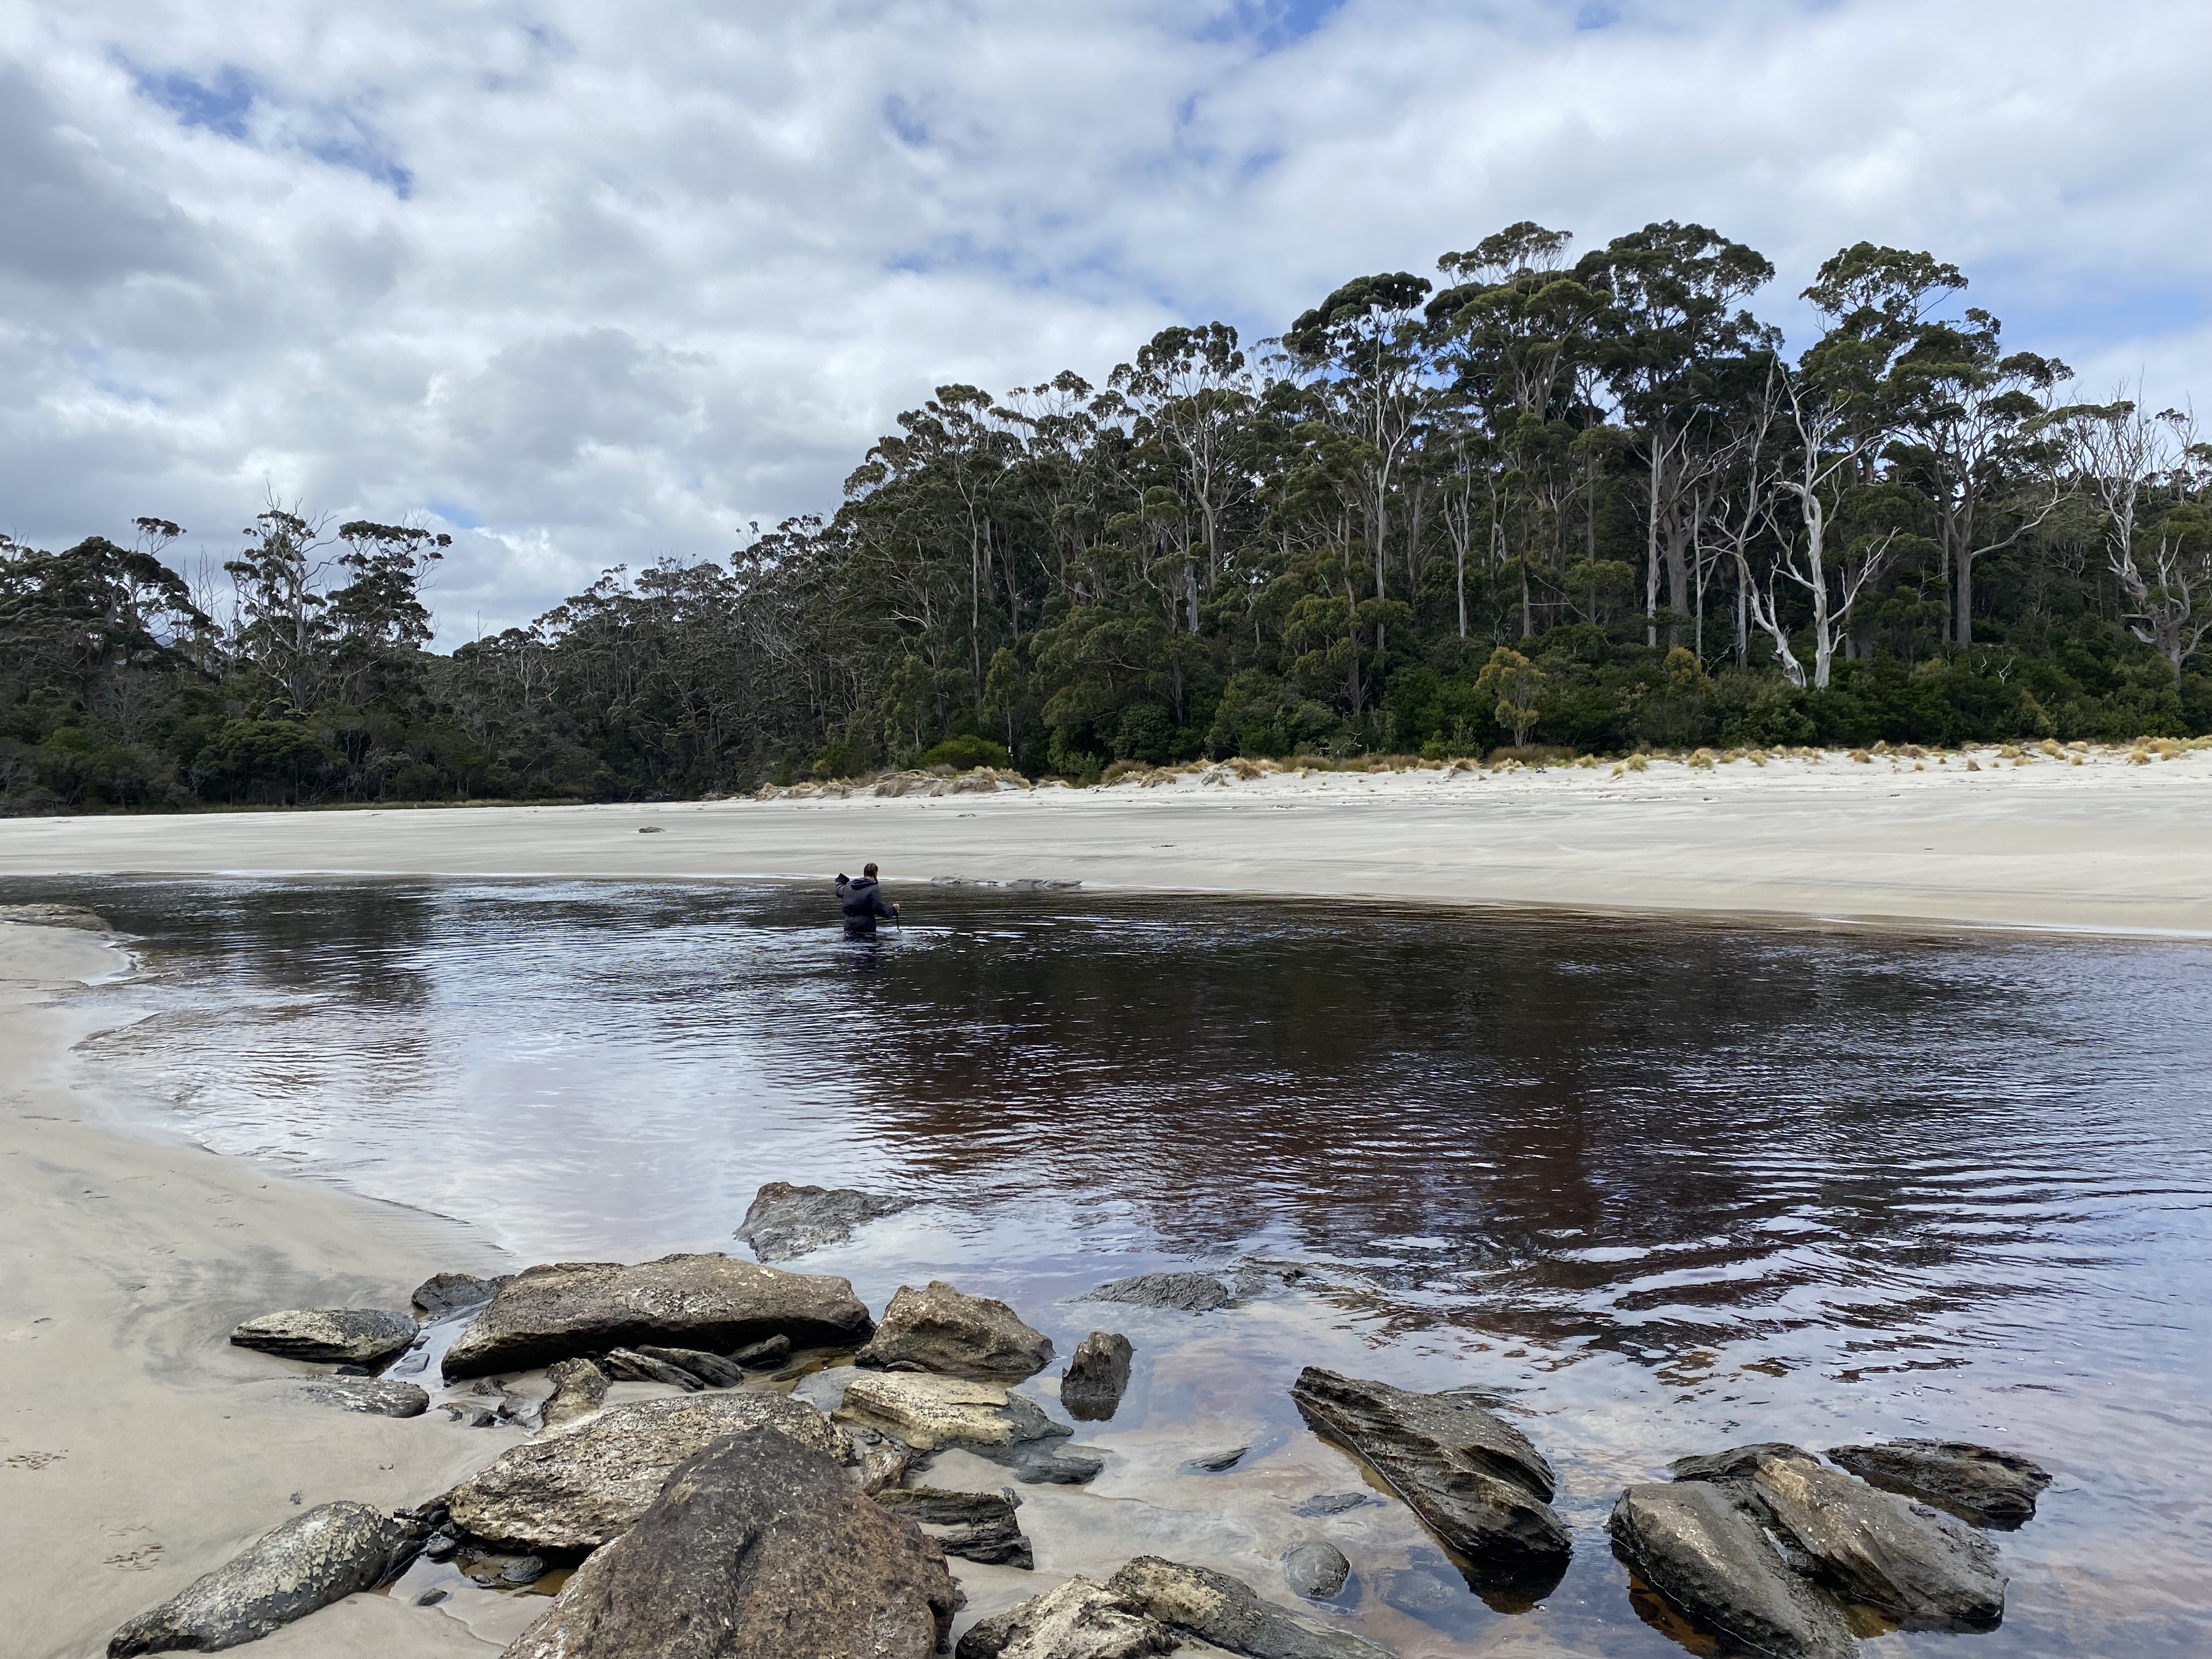
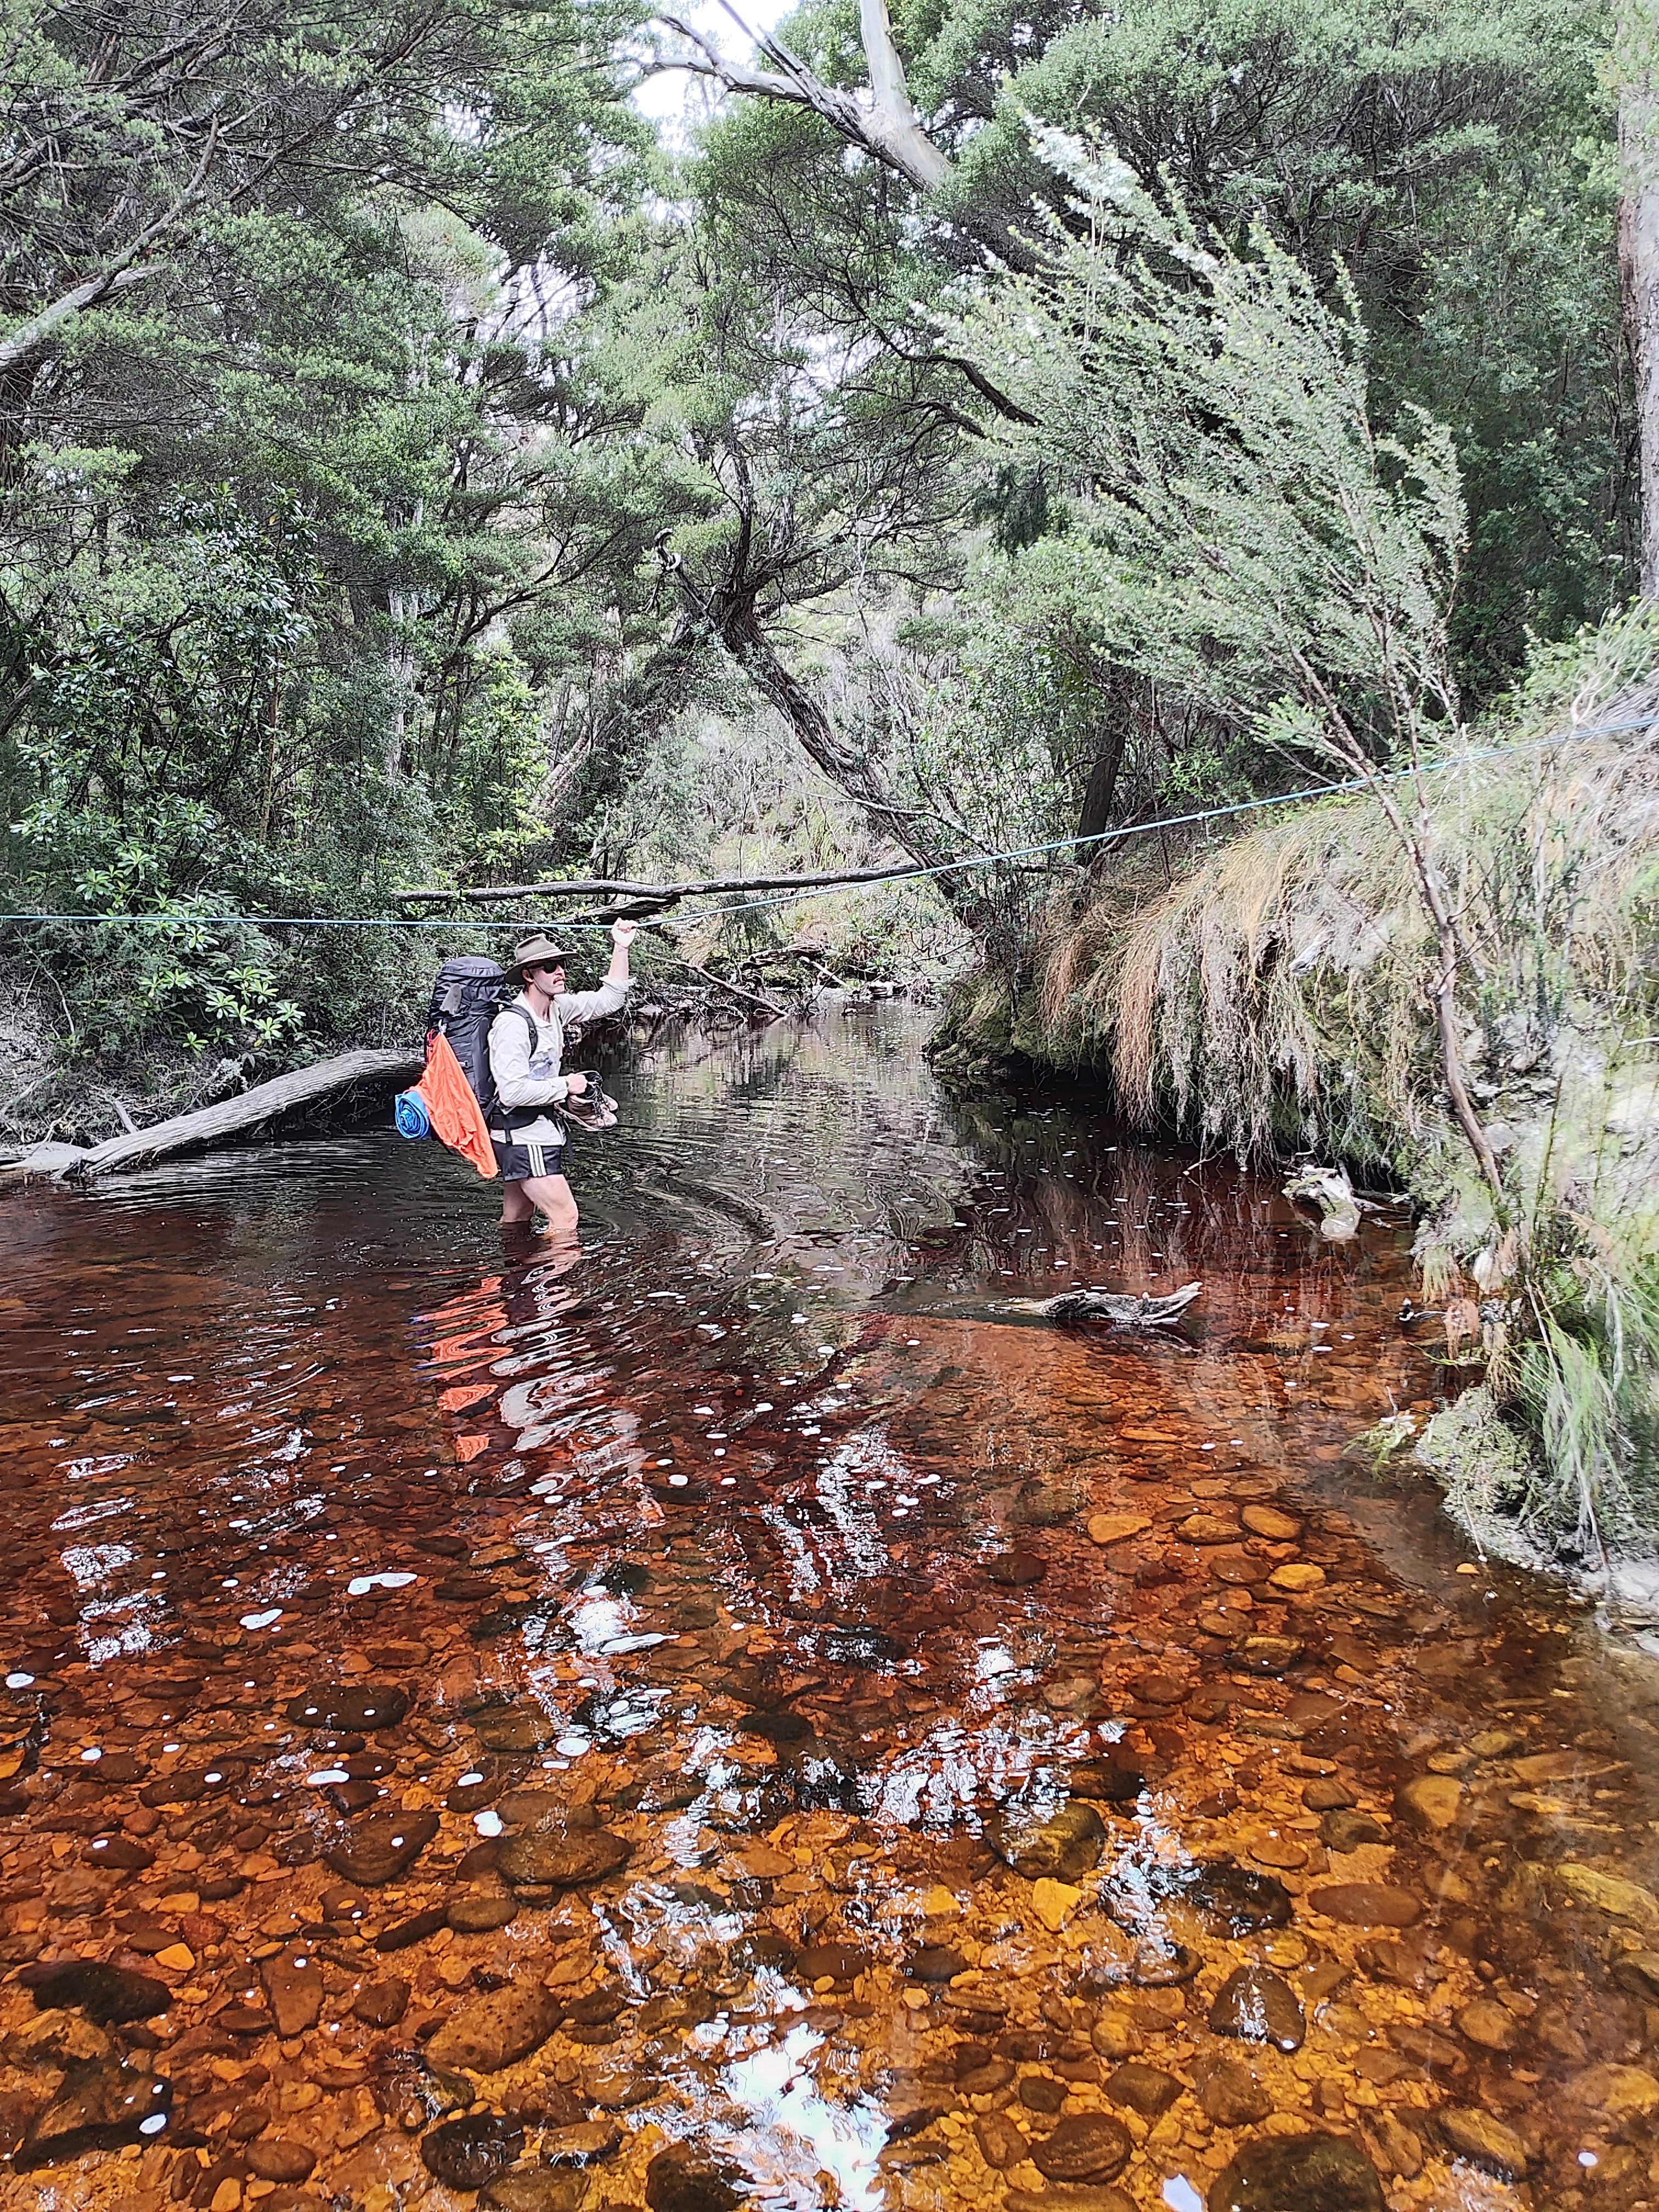
We walked about 900m on the beach where we even saw some sunshine, and came to the river crossing. The river snakes around the back of the beach and opens into the beach at the shoreline. We crossed where the river met the beach which was covered in thick foam. At this point we were feeling pretty fearless and walked straight through without really watching for waves or testing the depth, which isn’t recommended but worked fine in our situation. The water came up to about hip height and we tilted forward slightly to keep our packs out of the water.
On the other side, it’s a steep but short scramble (with rope to assist) then climb up rocky steps to camp. We had originally planned to try and push on to Granite Beach, but at this point we were tired, our pace was slow and bad weather was moving in so we made the decision to stay at Surprise Bay.
Here we were reunited with Father and Son for Christmas Eve and set-up camp near them. This was a great campsite with incredible sunset views if you’re prepared to walk back down the rocks to the headland. We cracked open the rum and gin before singing a few Christmas carols and having fajitas for dinner.
Peaks & Pits:
Peak: Surprise Bay Beach walking and river crossing
Pit: Long slog in the mud with obstacles
Day 6: Surprise Bay to Granite Beach
Distance: 3km
Duration: 2hr (including breaks)
Highlights: Granite Beach, waterfall
We woke to a Christmas miracle; it’s sunny! We hoped this would be a good omen that we’d make it the whole way to Lion Rock today, but injury and illness was hitting the team hard this morning and our early wake-up slowly turned into a 2-hour pack-up which put us behind.
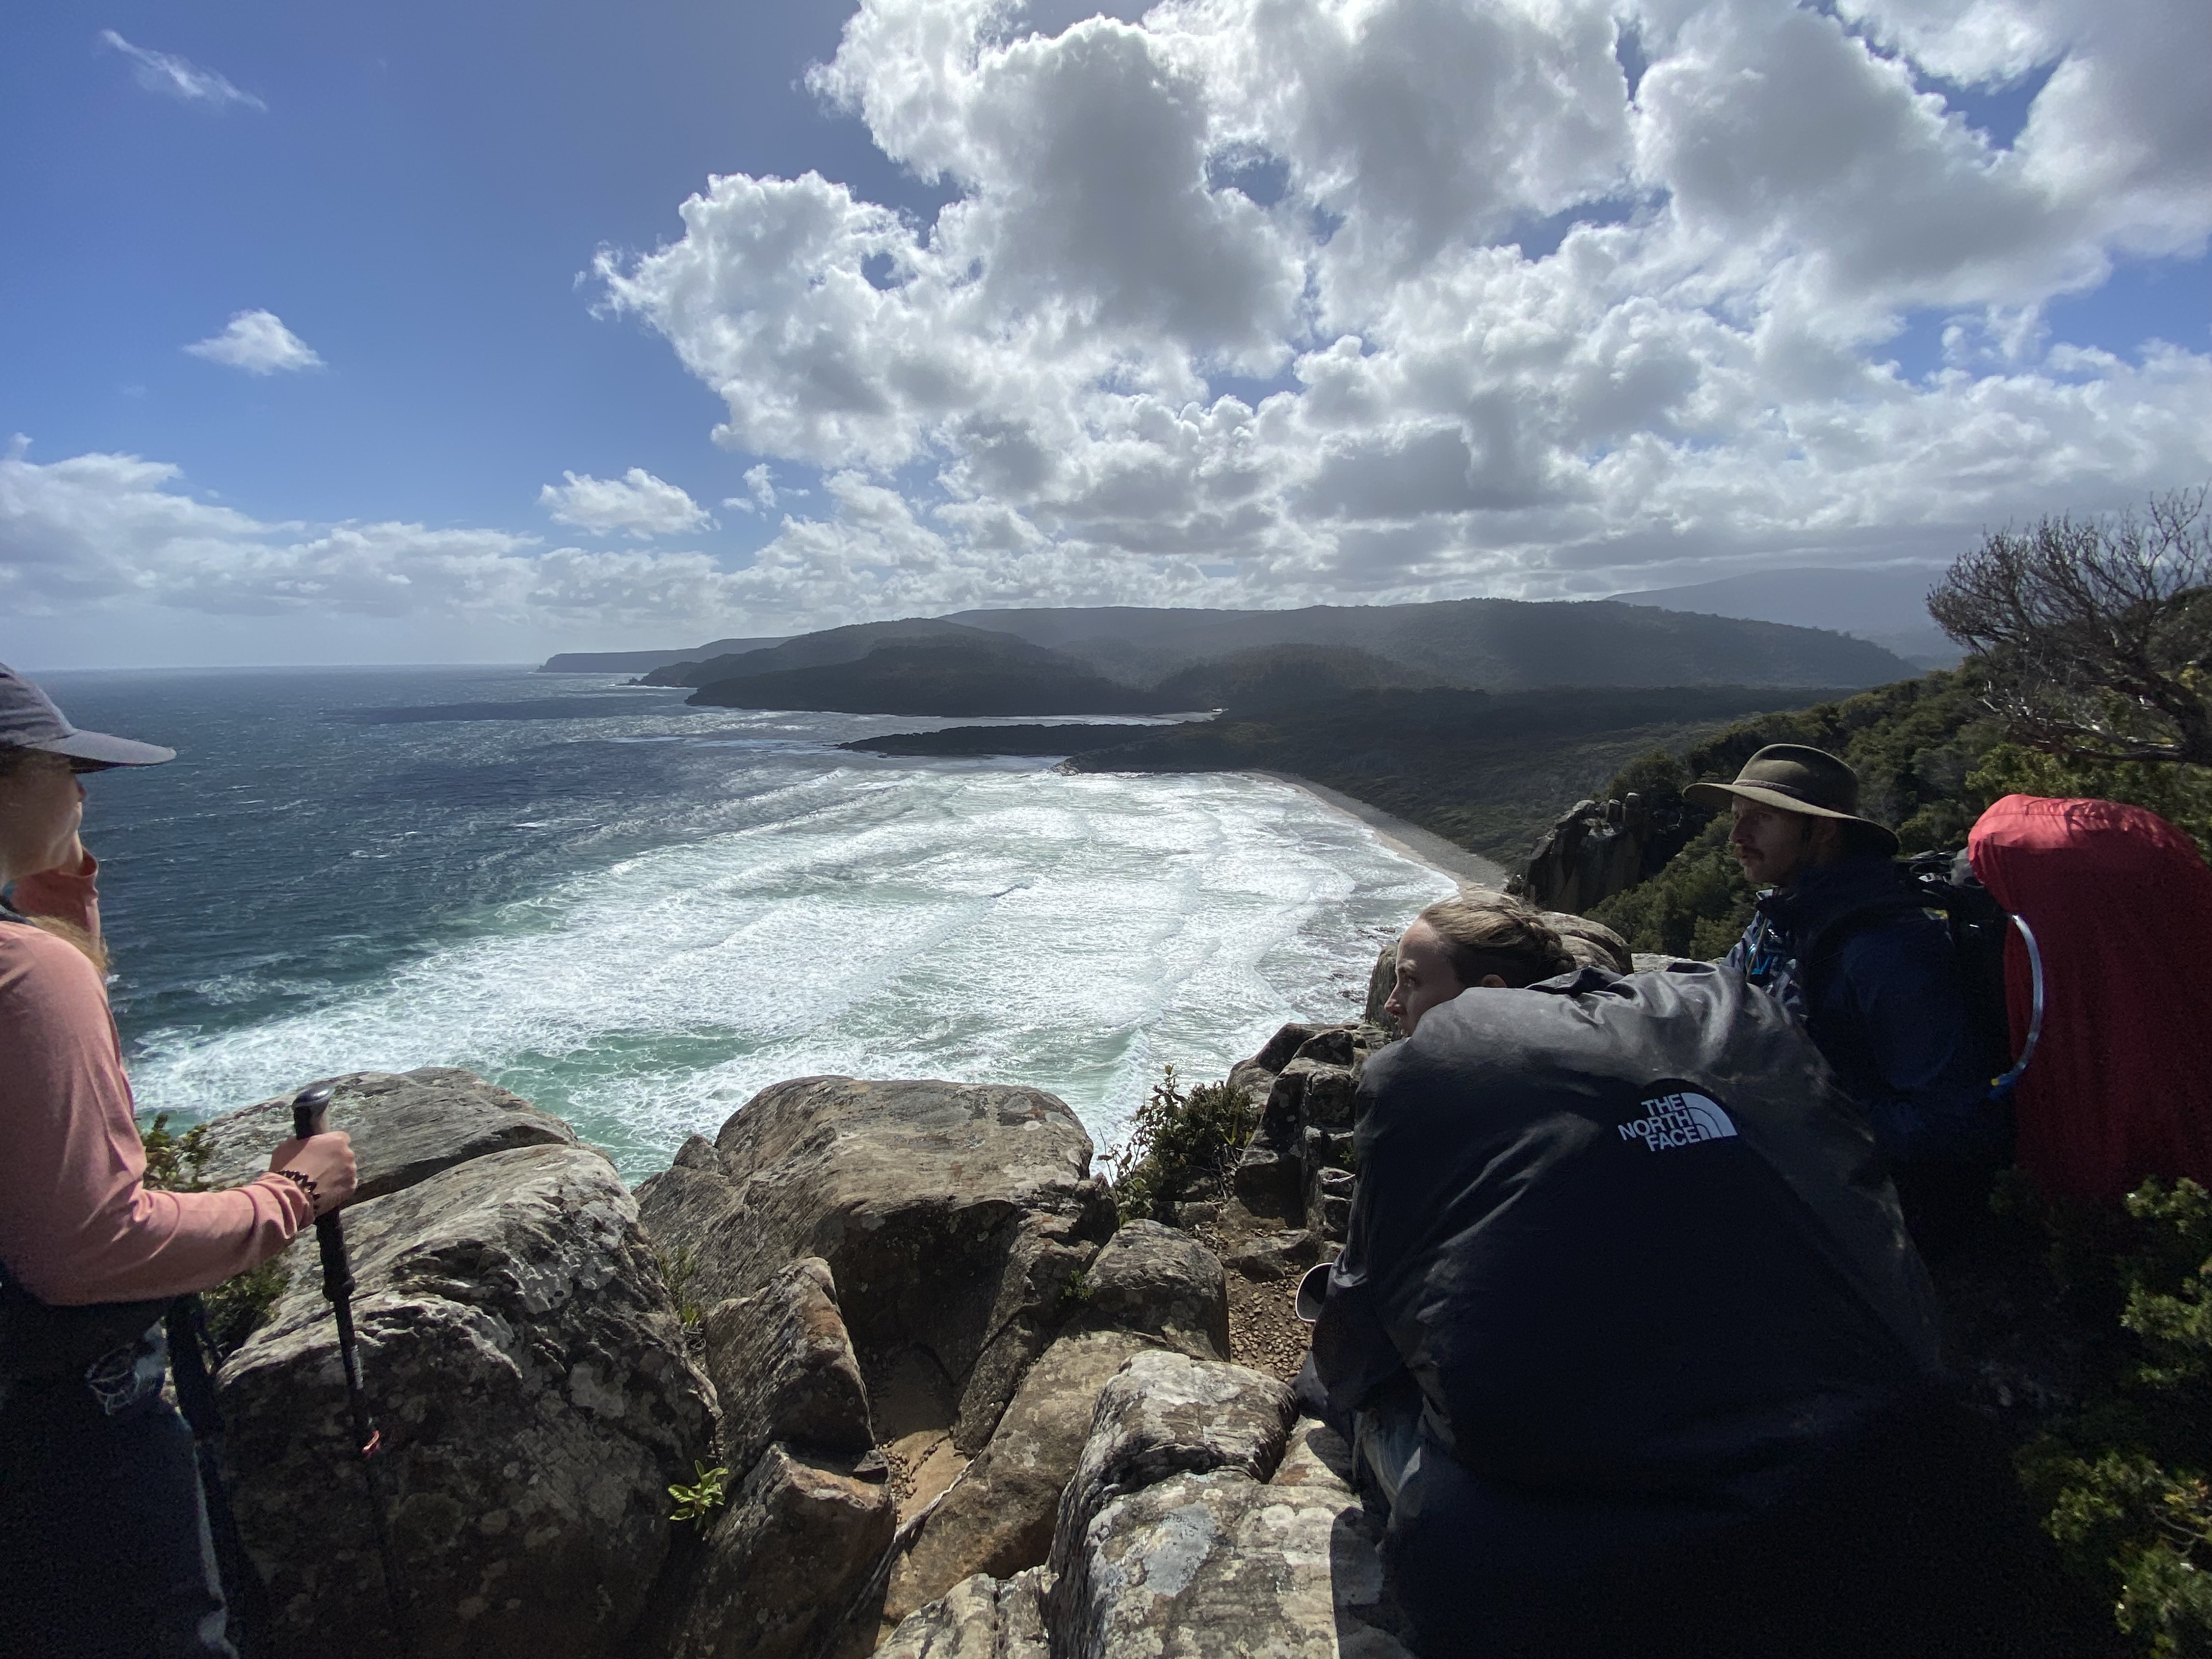
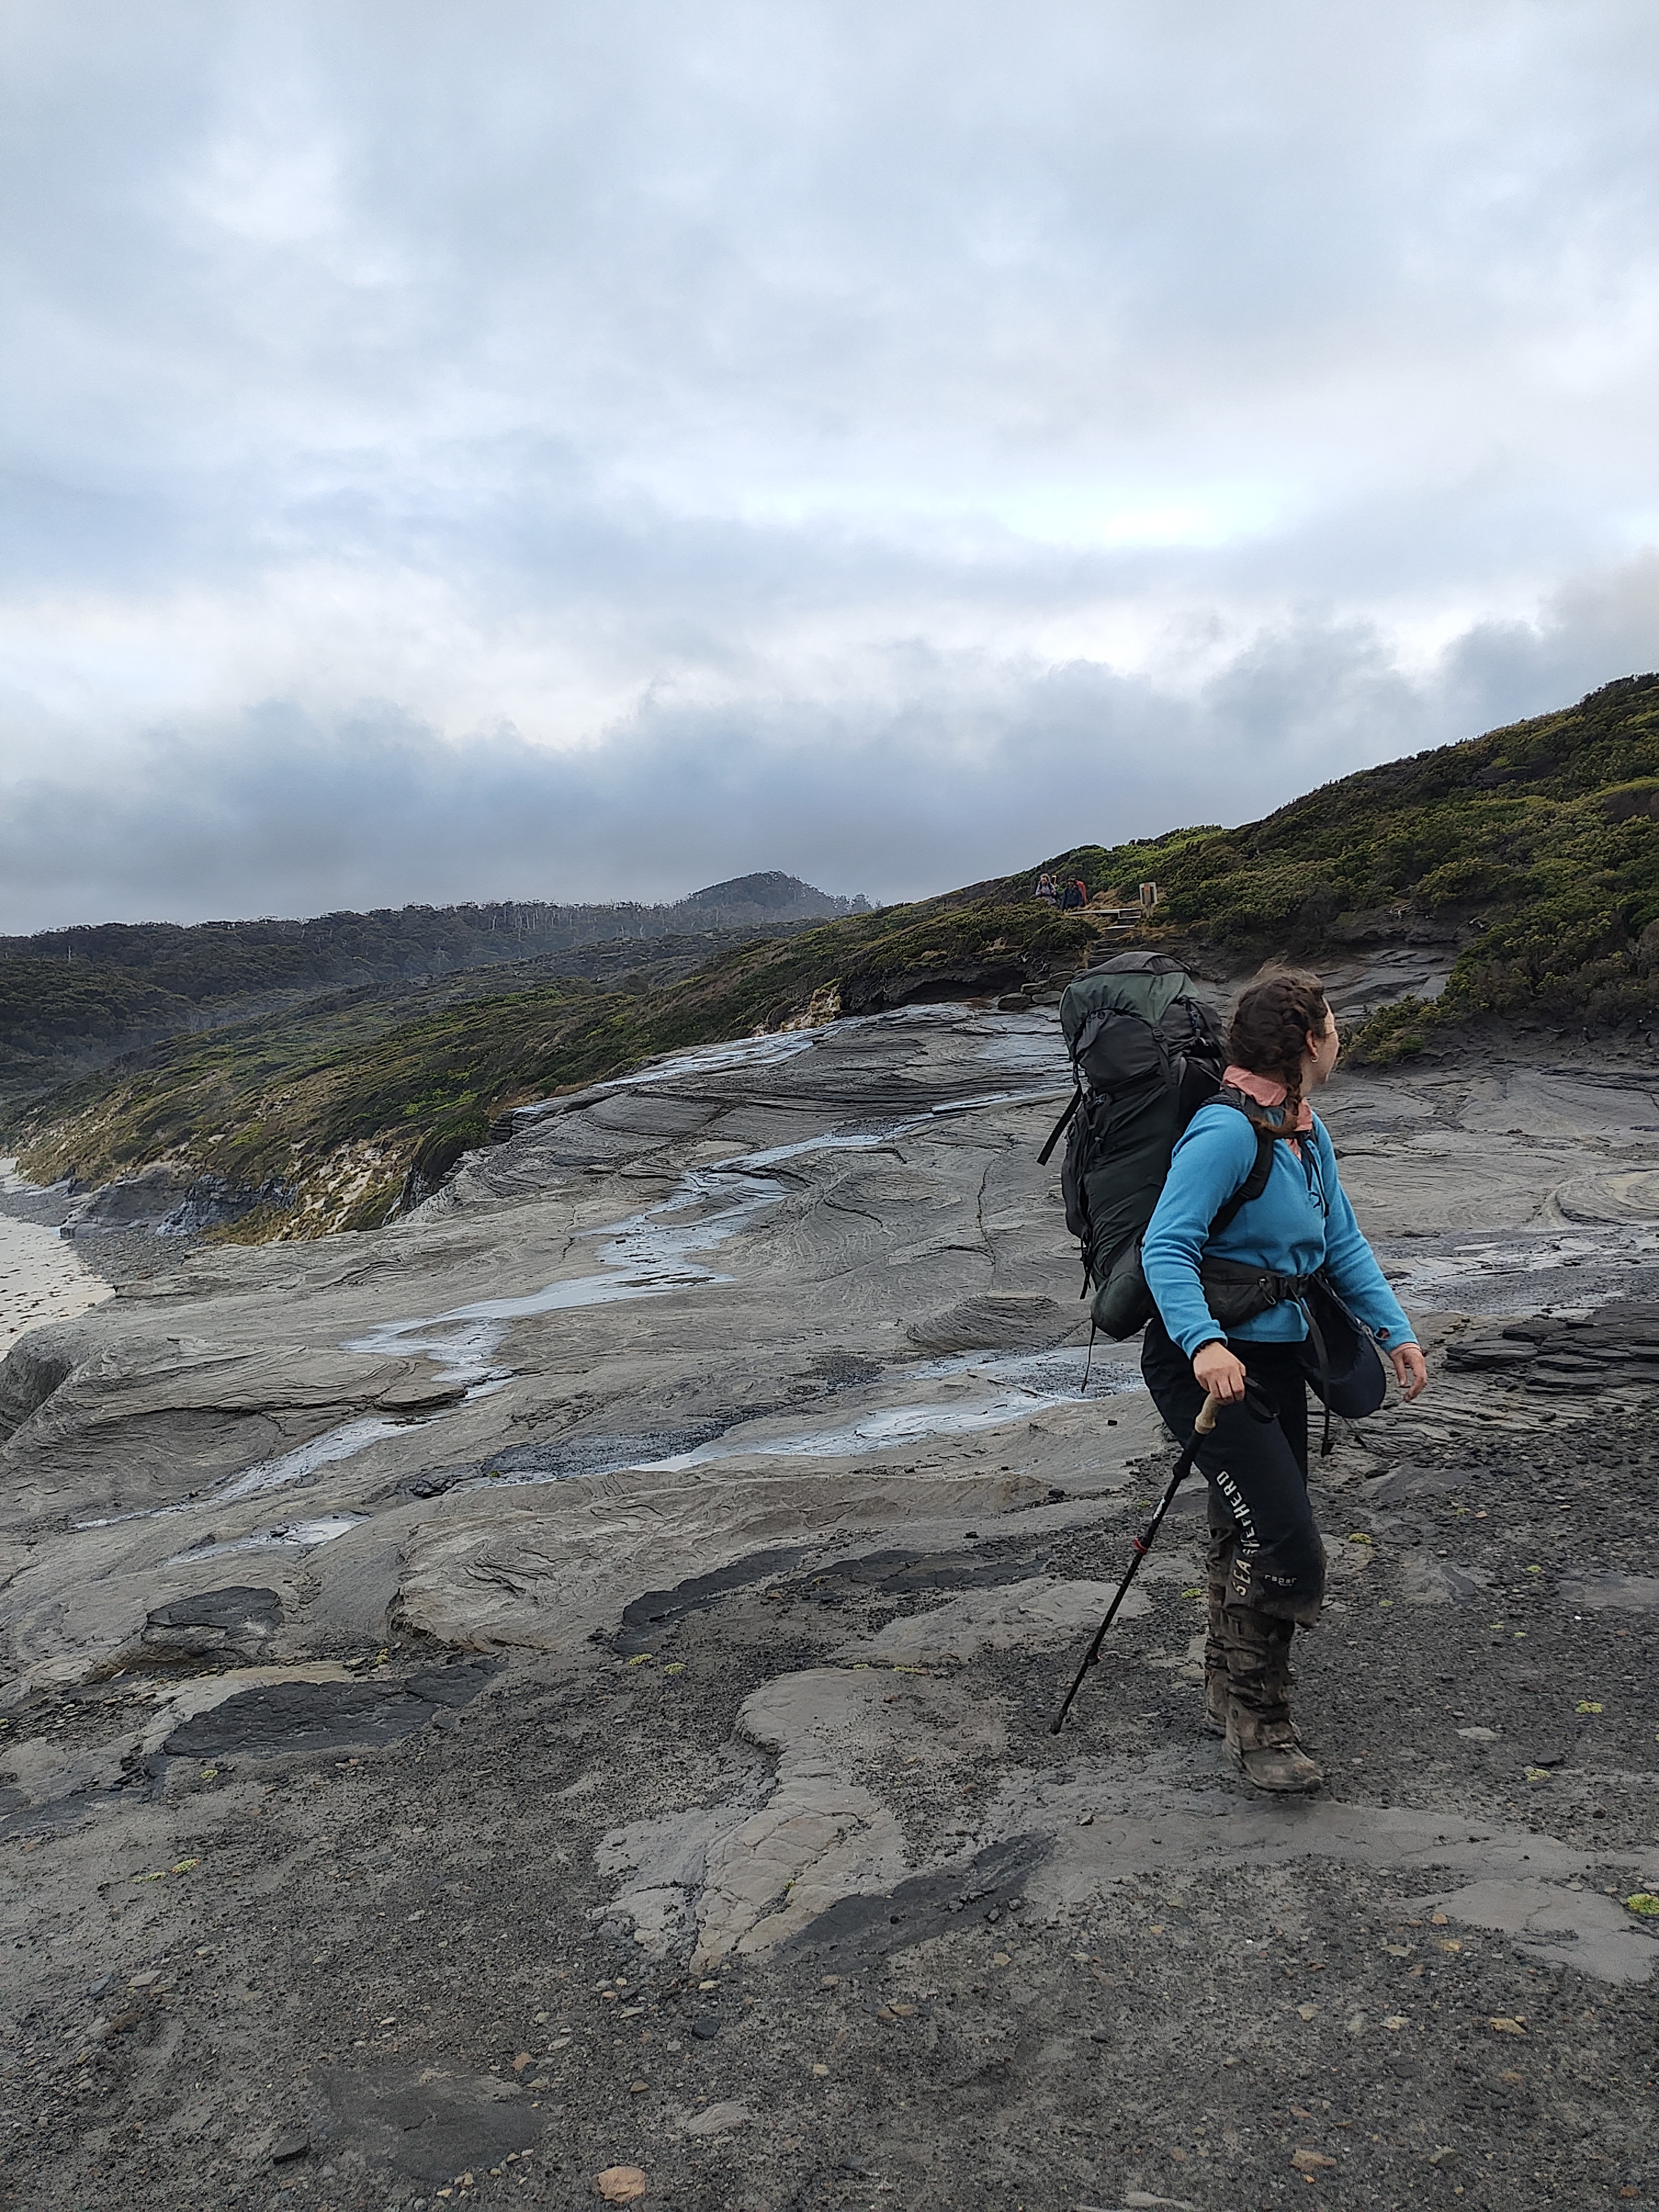
The track headed straight into a steep climb, and while this was nothing compared to previous days, we were all finding it difficult. It was only about a 1km climb but was steep and muddy before descending into a muddy downhill track. At the bottom we found ourselves in tall grass (head height and taller). This made it very difficult to stay on track and we repeatedly had to stop and check if we were still on the correct path. Eventually we heard waves and followed the sound, climbing over a small sand dune to see Granite Beach on the other side. We were very close to getting lost during this section, and had we been coming the other direction, it would be very difficult to identify and then follow the path.
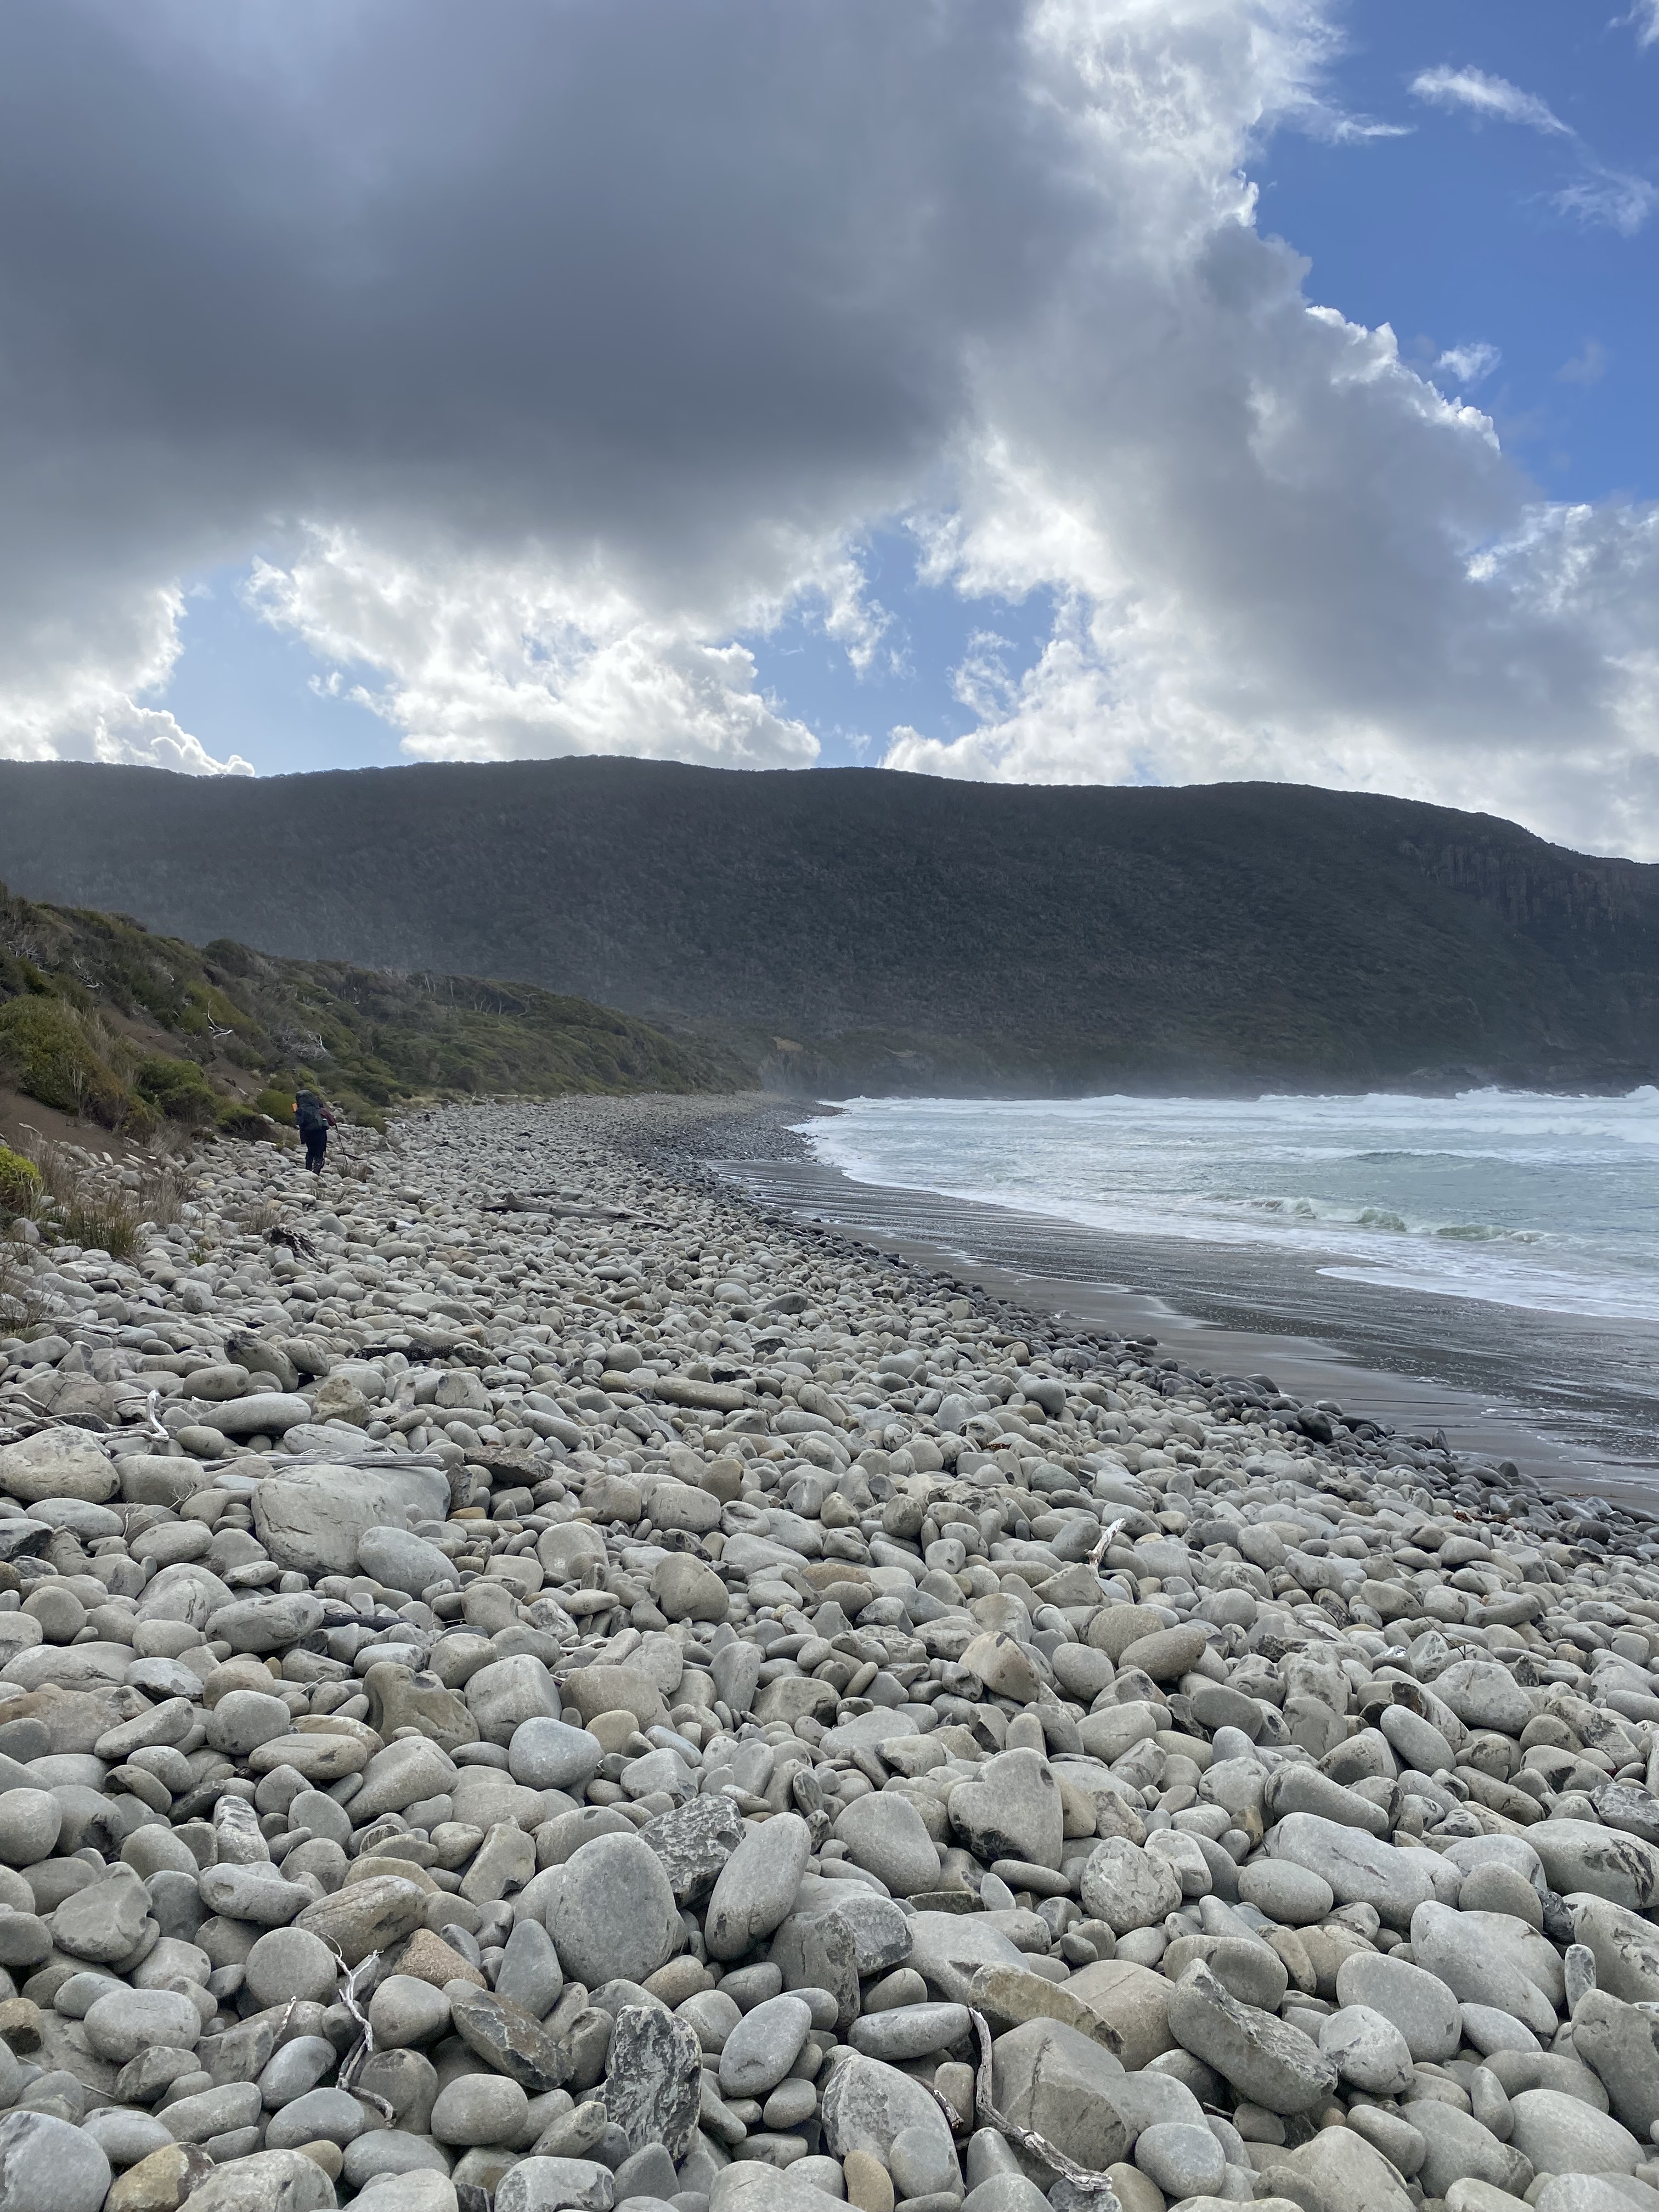
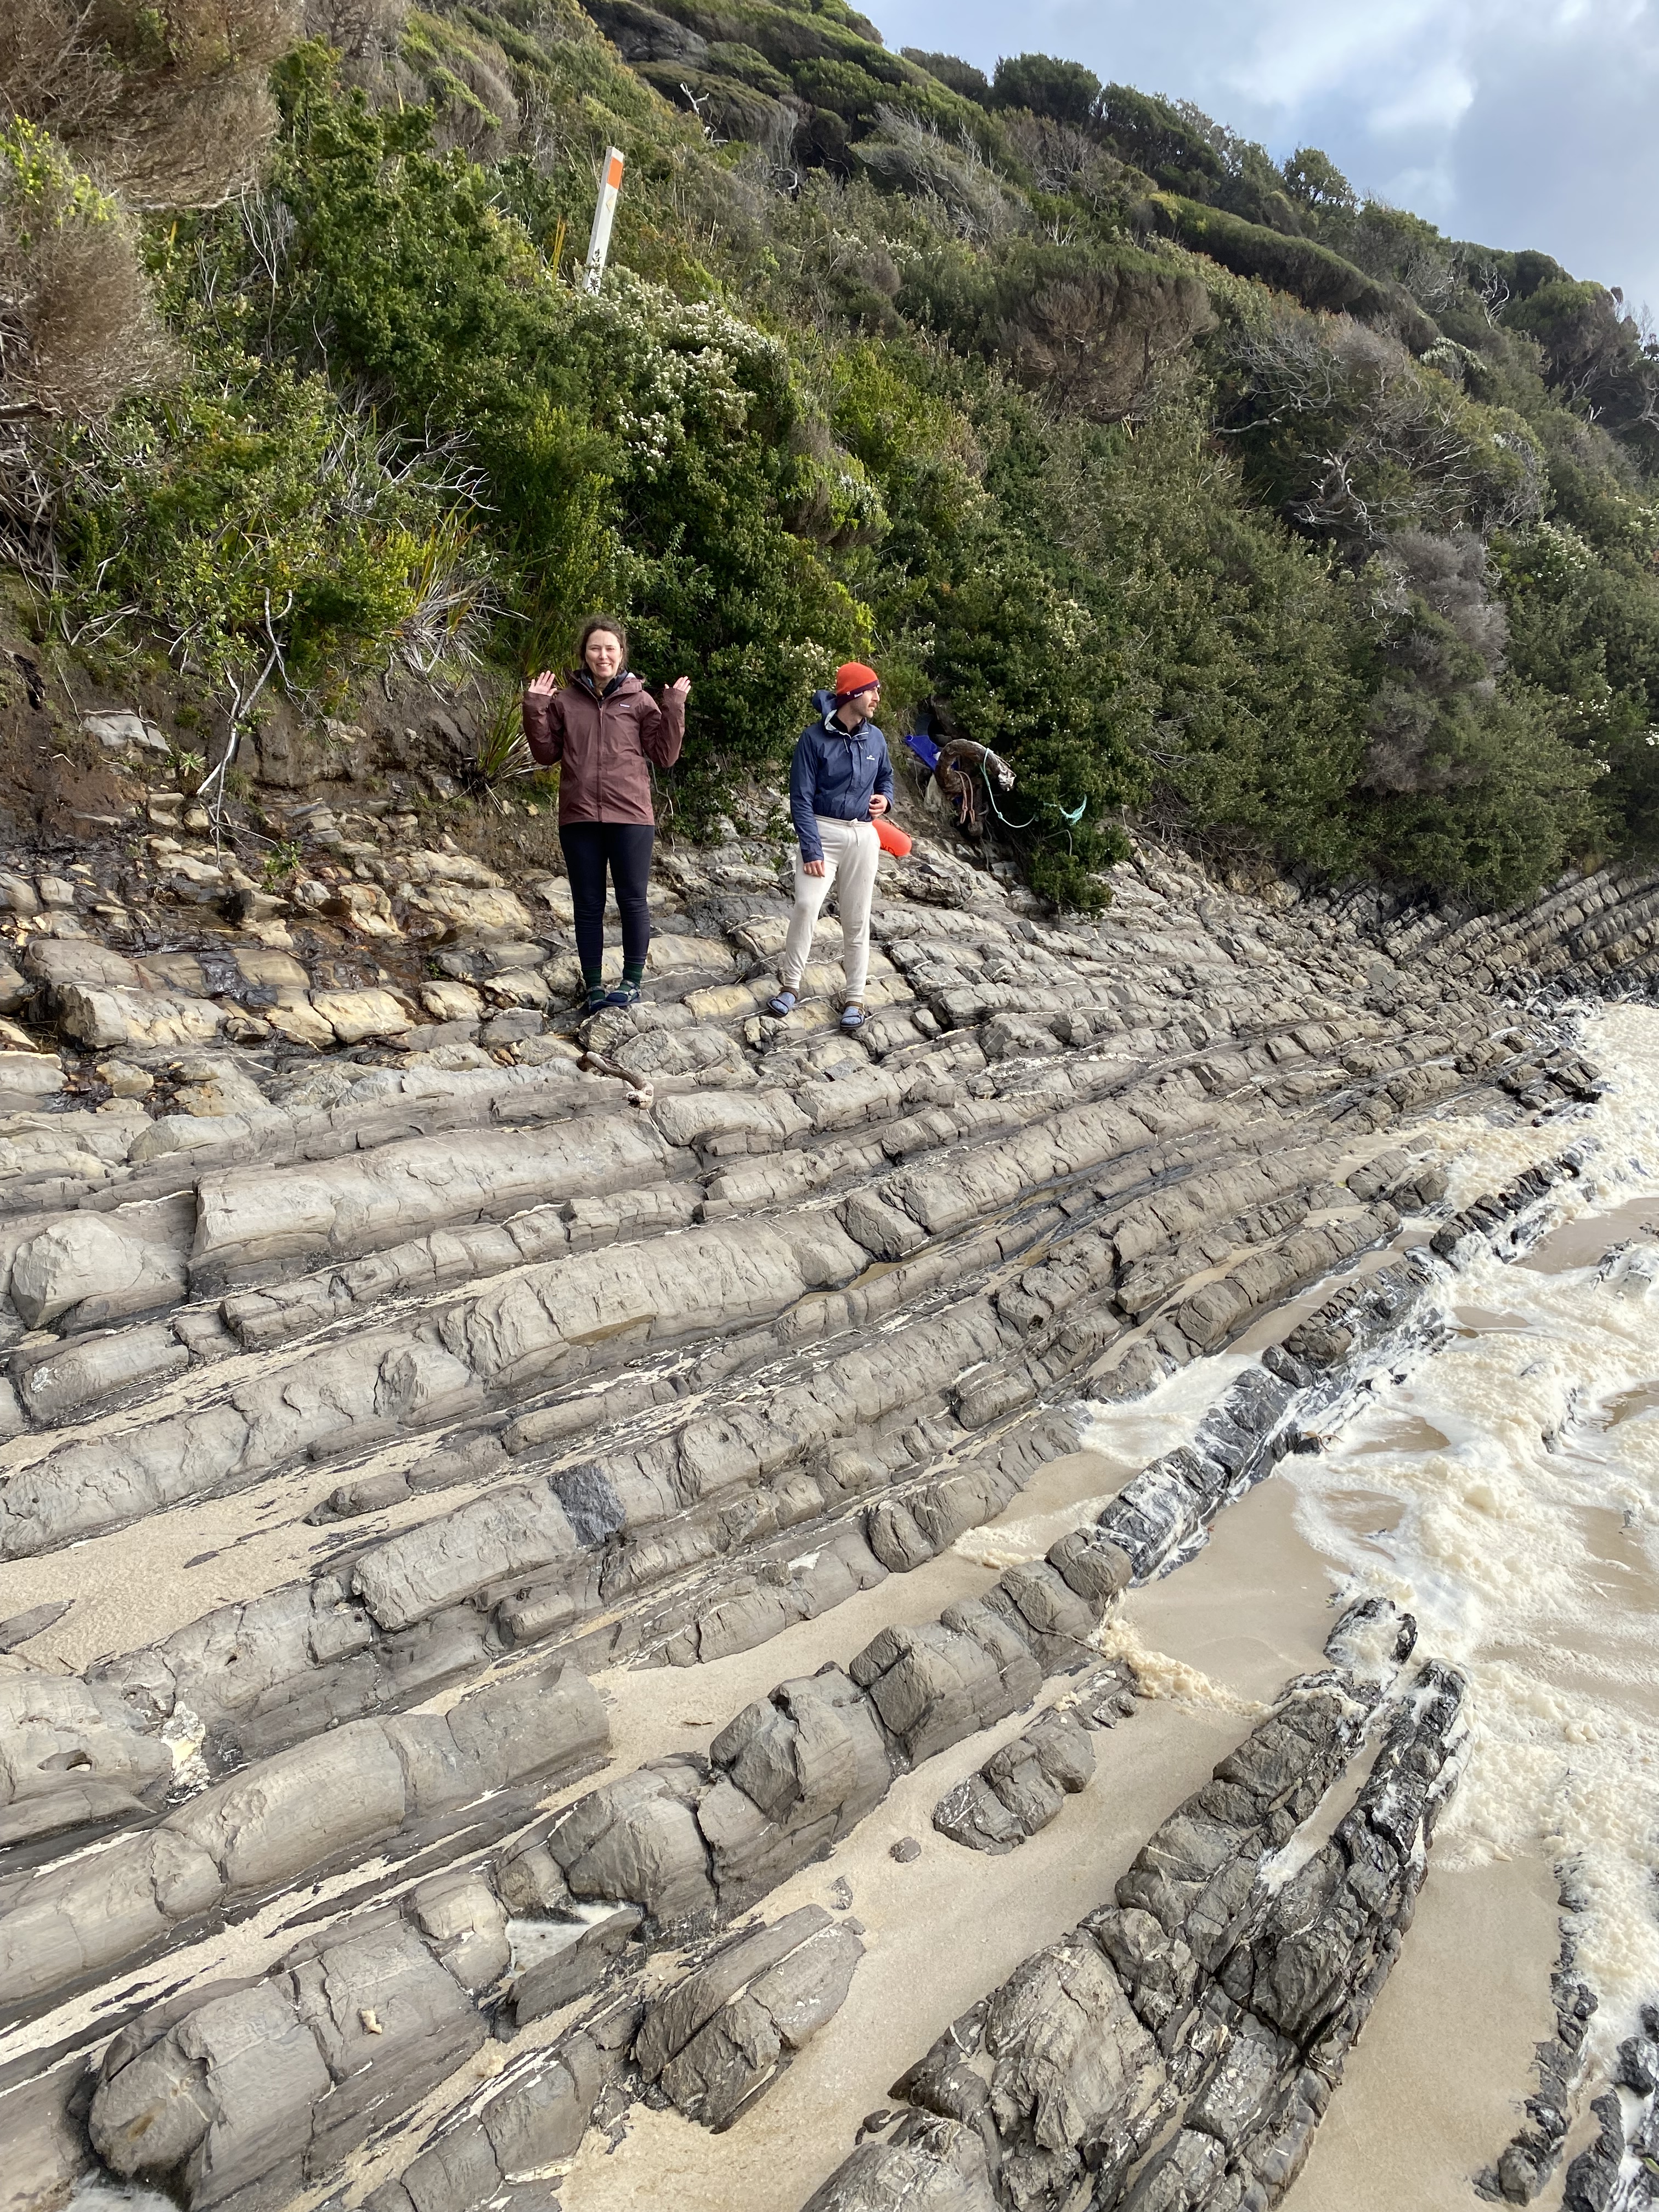
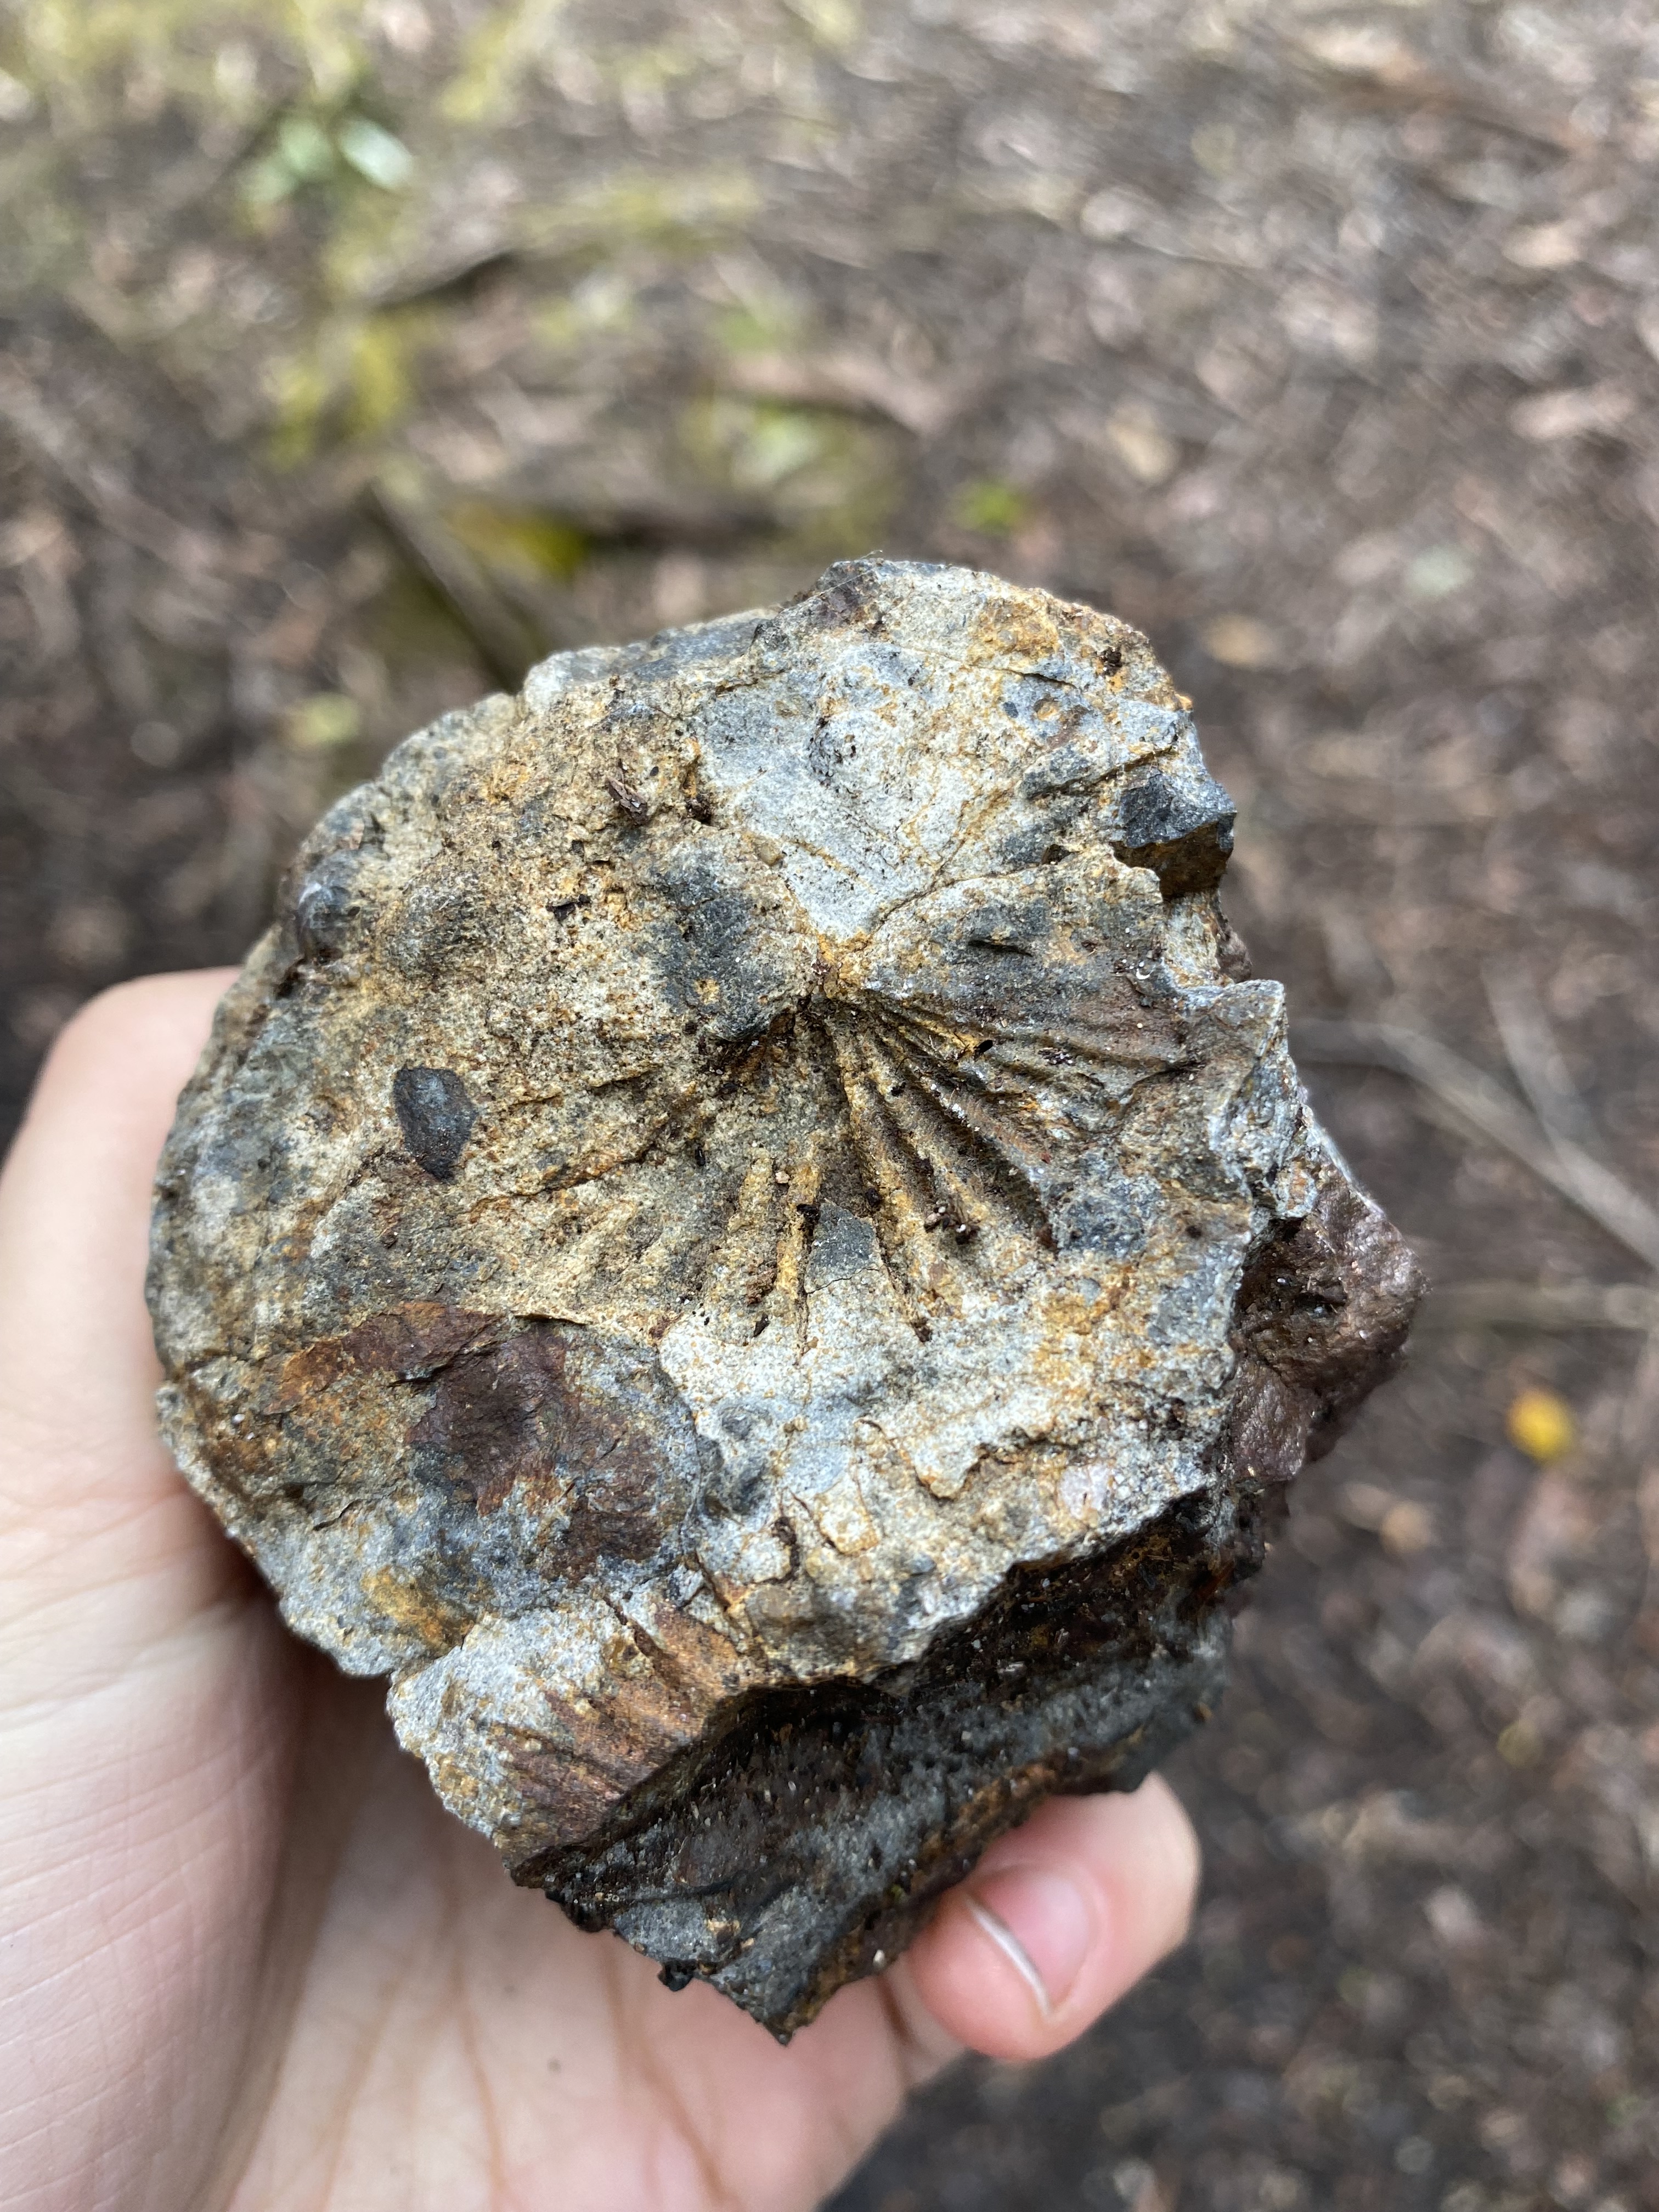
We walked along Granite Beach which is covered in large smooth stones. Our comrade with the sore hip flexor was struggling with the uneven surface, and it was slow progress on the rocks. There were several small water crossings where water was streaming down towards the beach. We saw several fossils in the stones on the beach, and with the dramatic southern ocean behind, it was an incredible reminder of the age and remoteness of this coastline. While we timed the walk along Granite Beach to avoid high-tide, the water was still quite high and we felt some discomfort with big waves to our right and a hard cliff-face to the left, not leaving much room for error if we misread the waves. If you could time this section of walking to low tide, there would be more space which may be more comfortable.
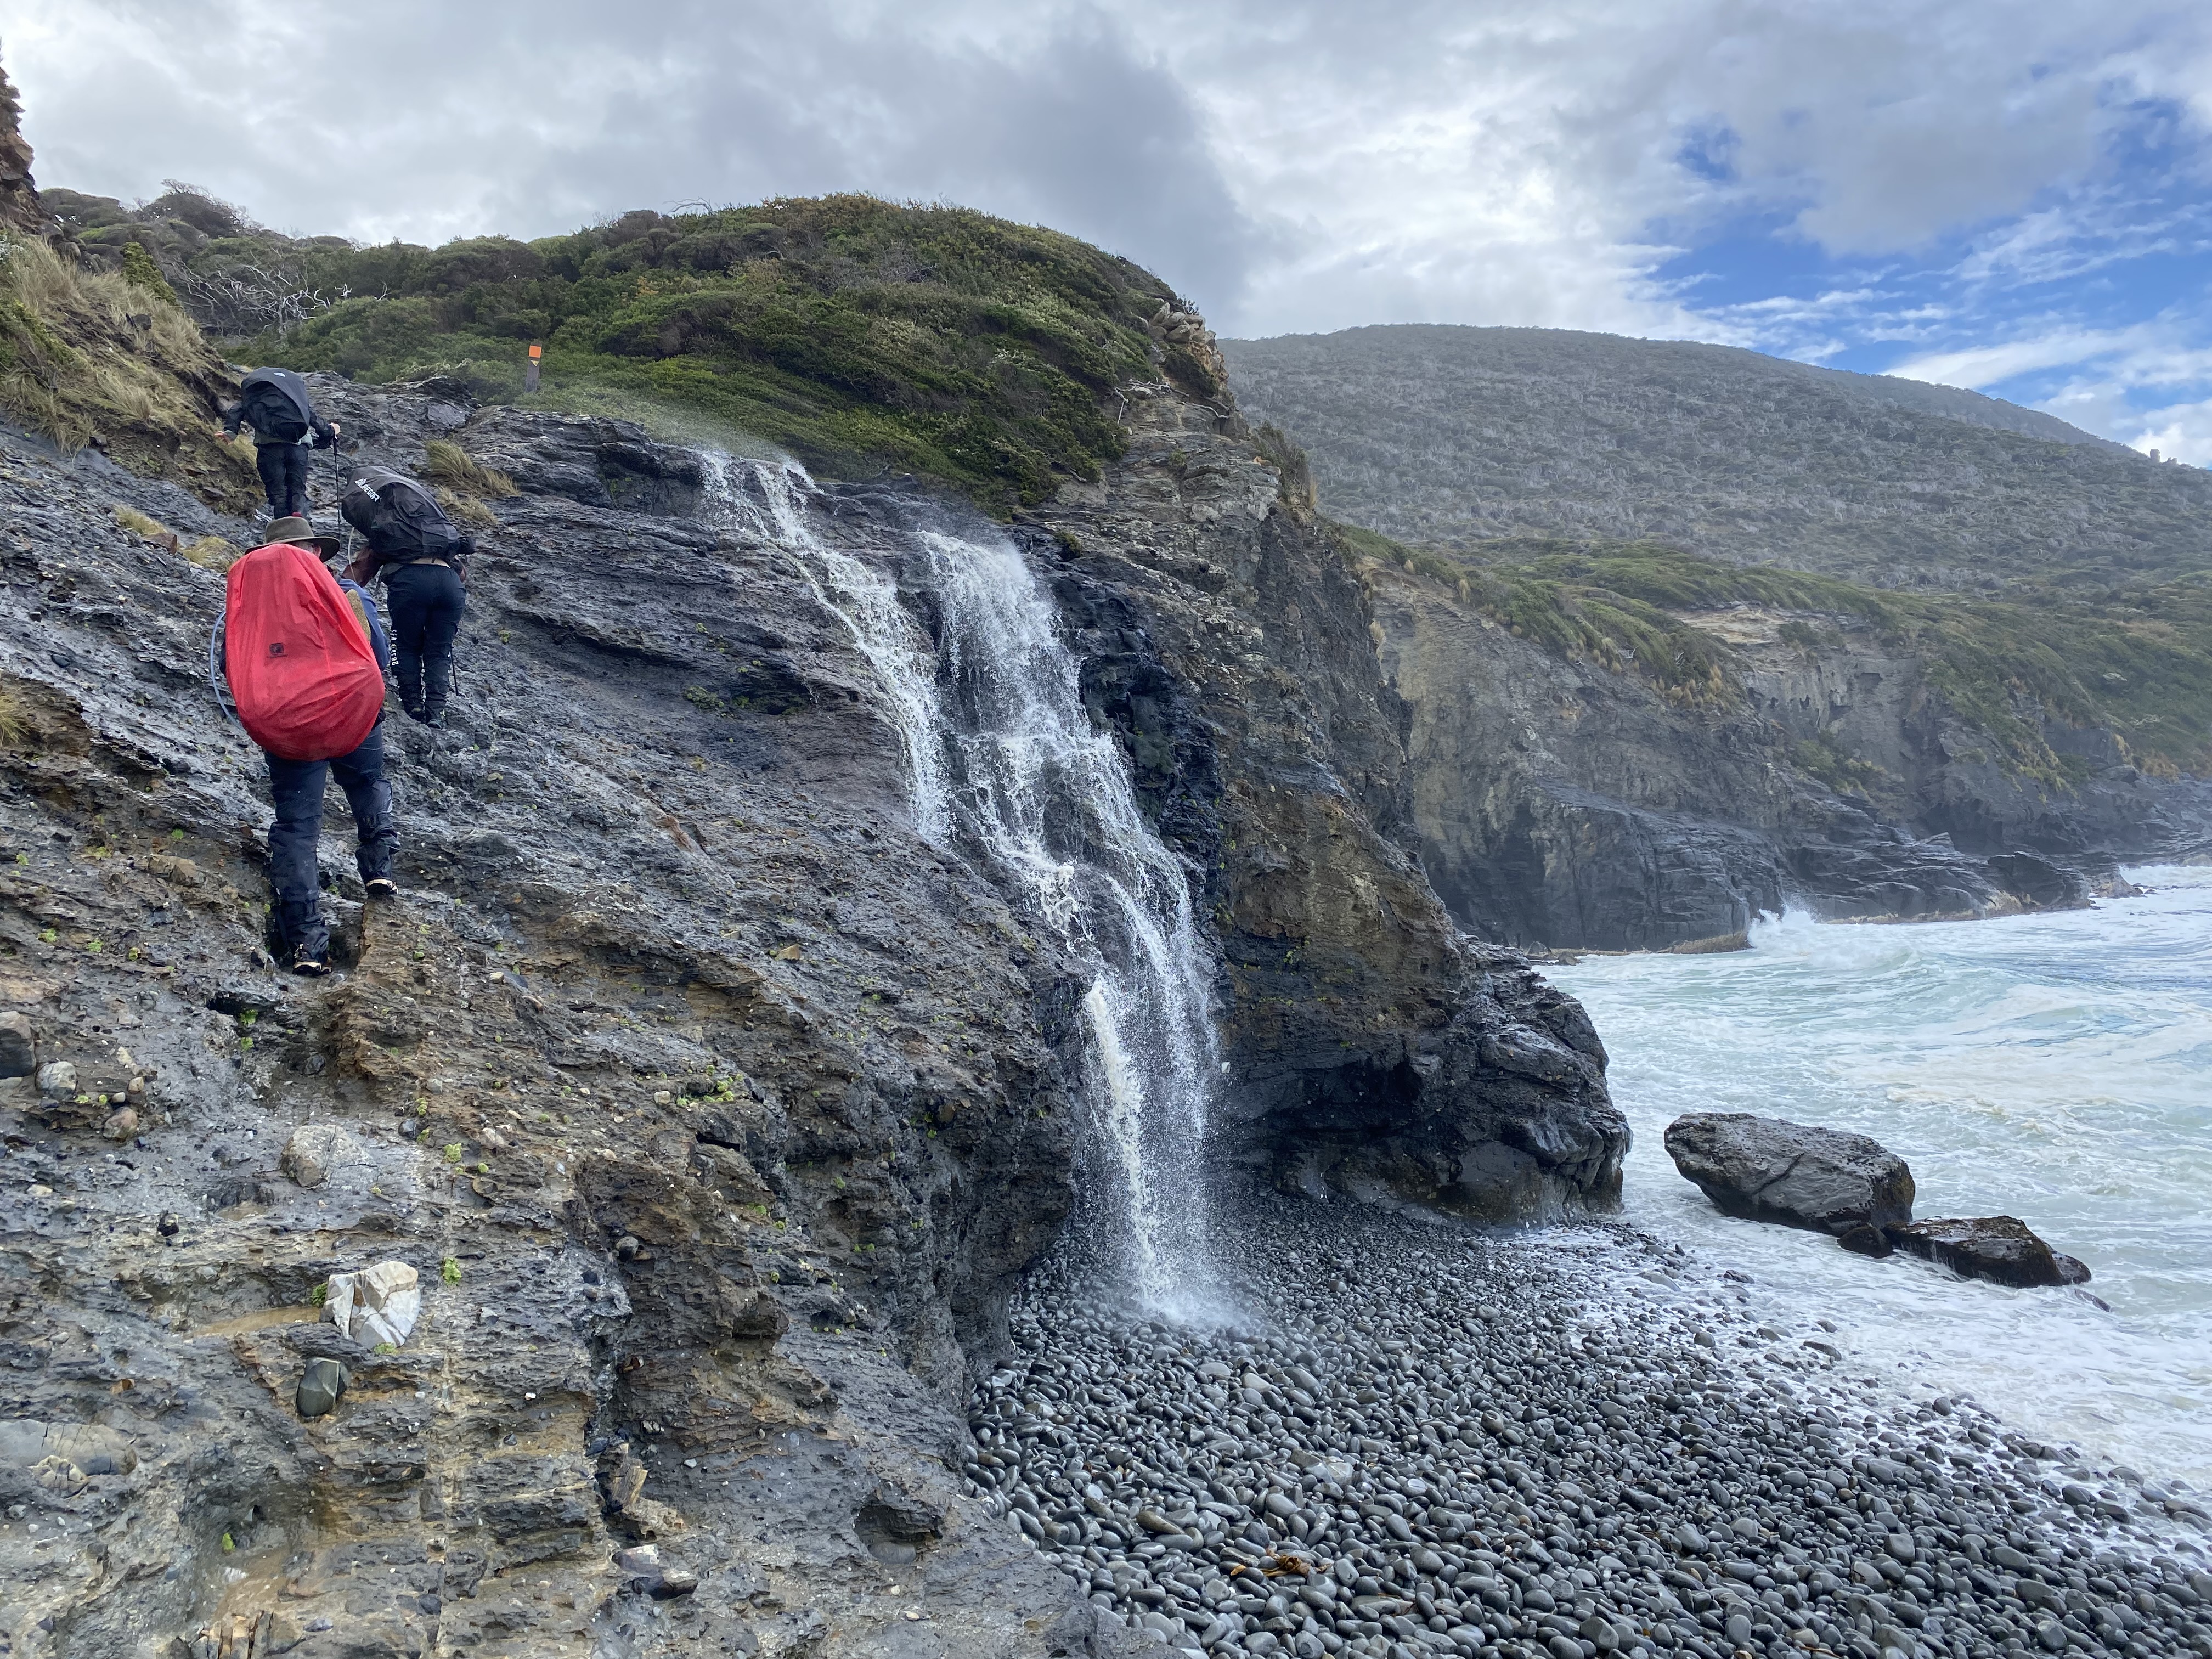
Here a waterfall fell from the cliff face above and we saw the trail, a short scramble up the side of the waterfall. And you guessed it…it starts to hail. The scramble actually looked more difficult than it was, the rock is very grippy and there are lots of easy hand and footholds. This bit was really fun, a good mix of adventure, a little bit scary but mostly exciting. At the top we found the stream turning into the waterfall as water crests the cliff face.
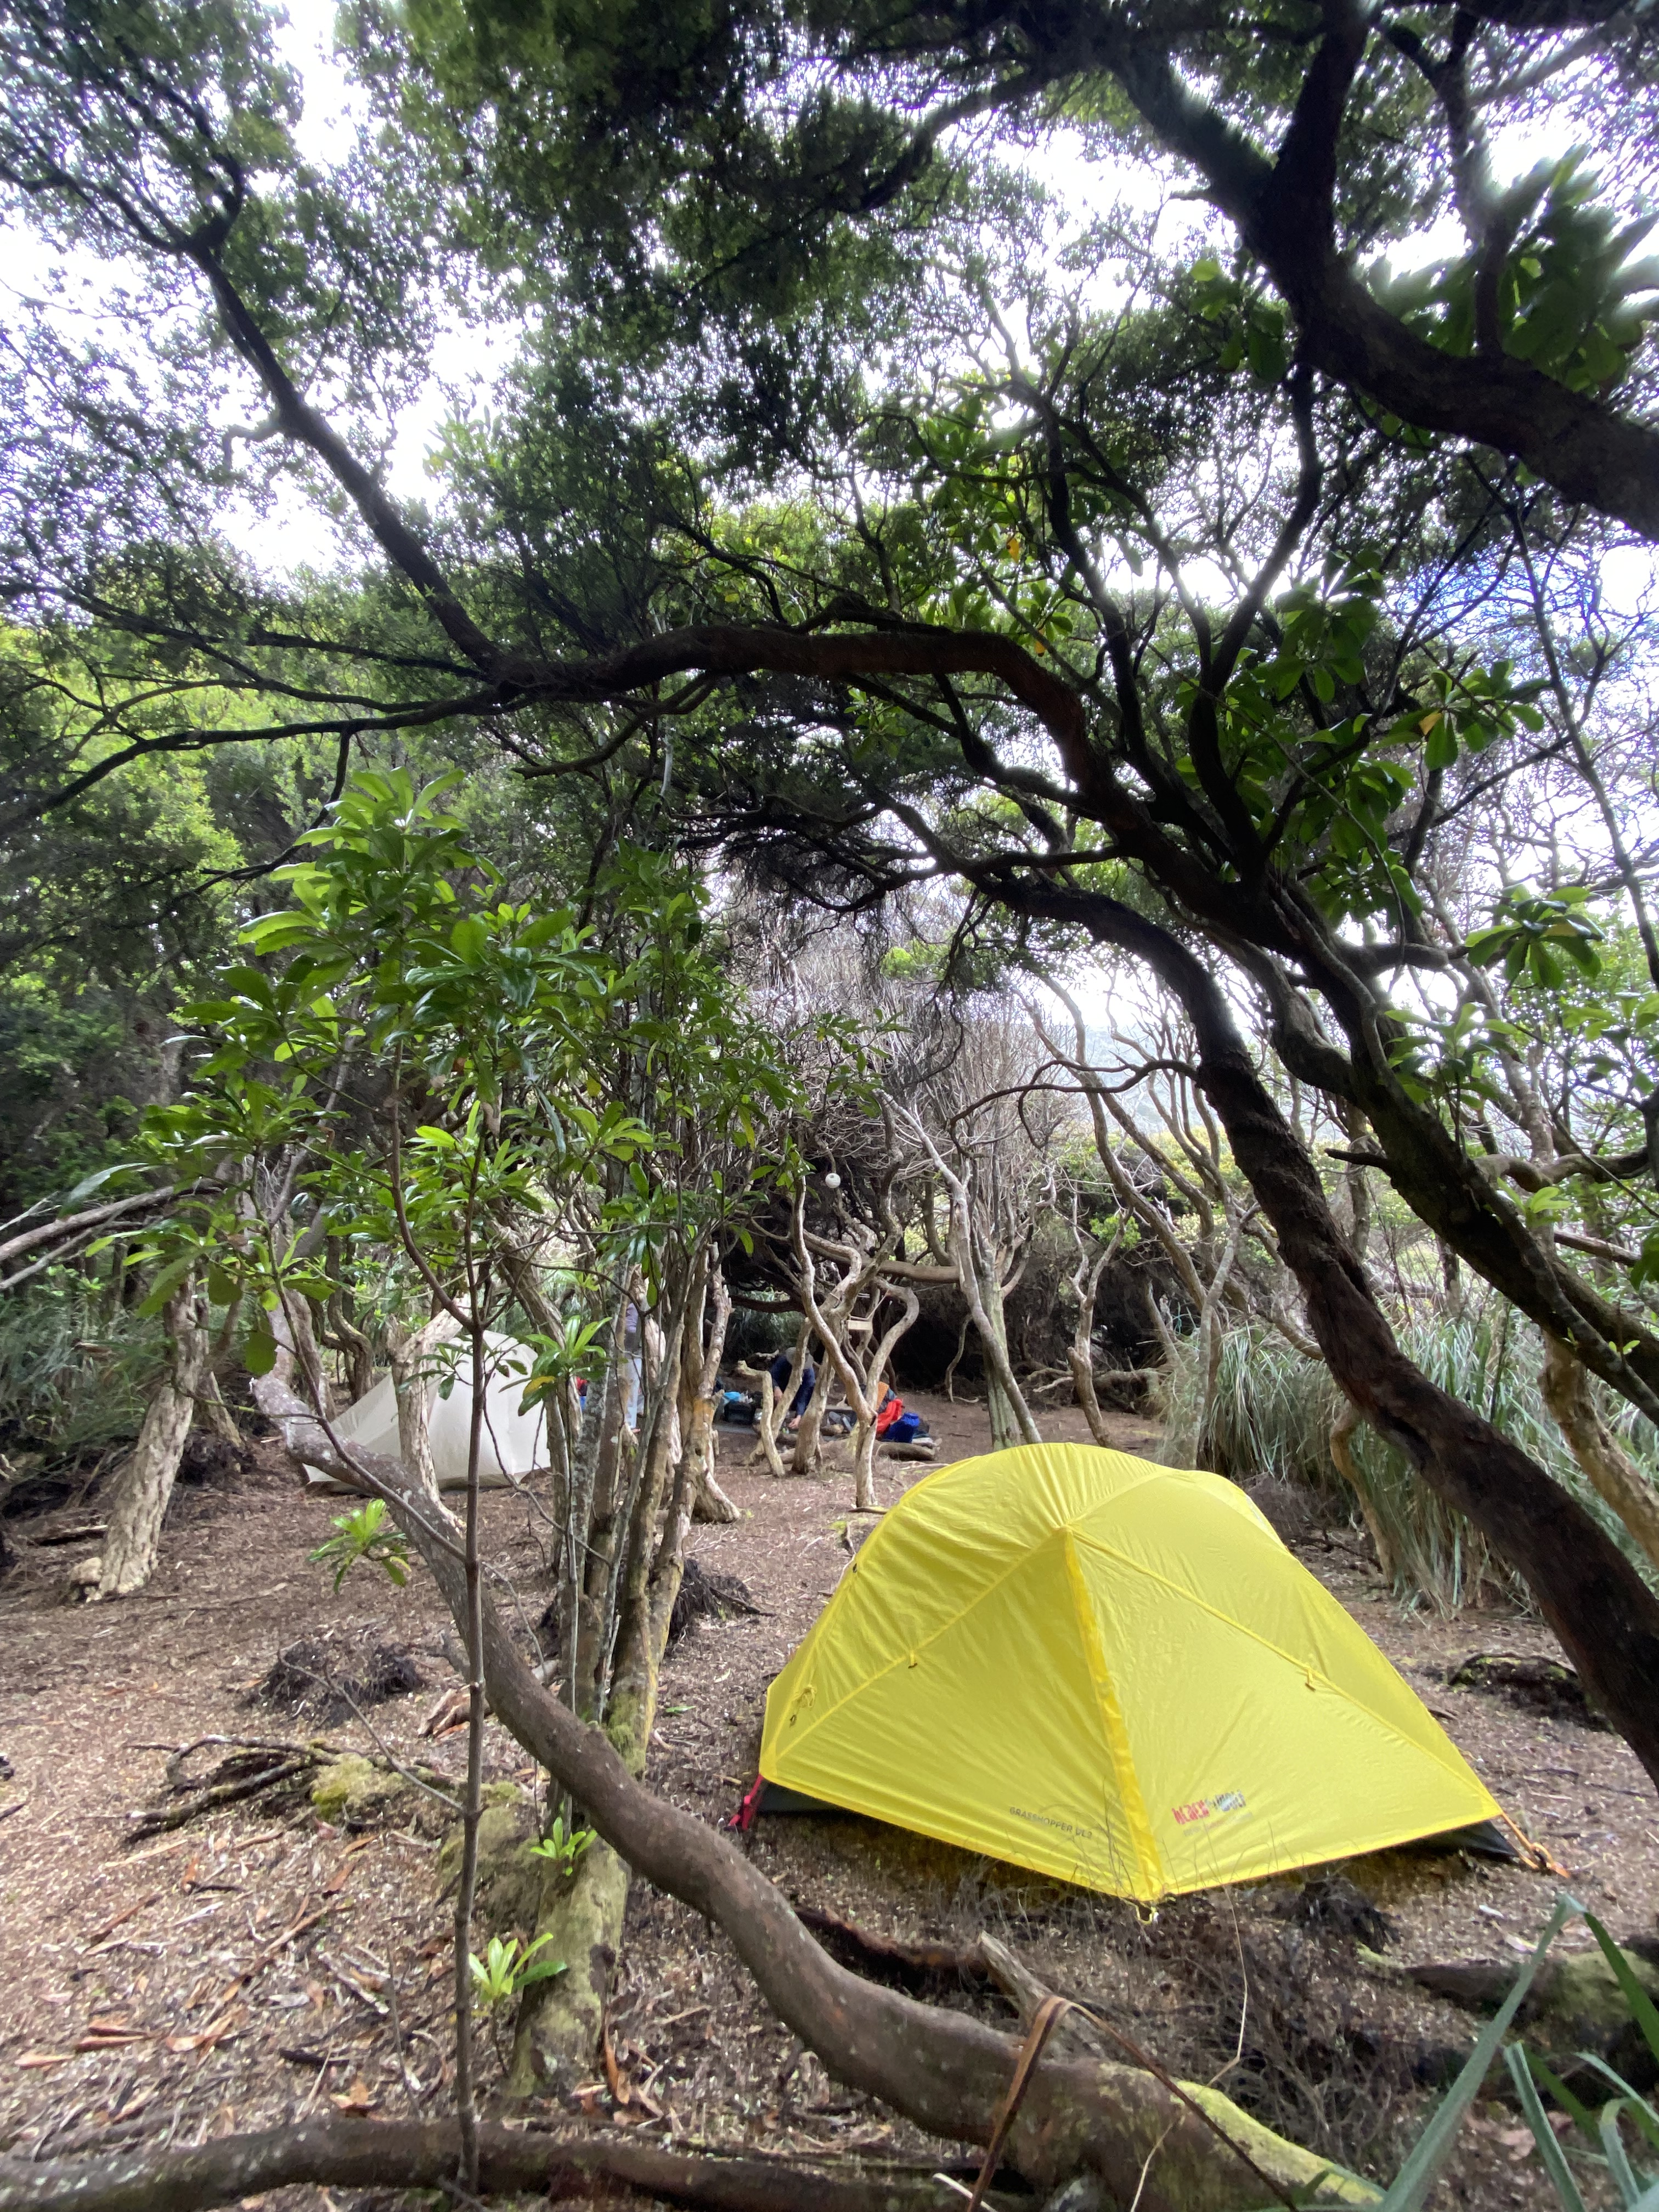
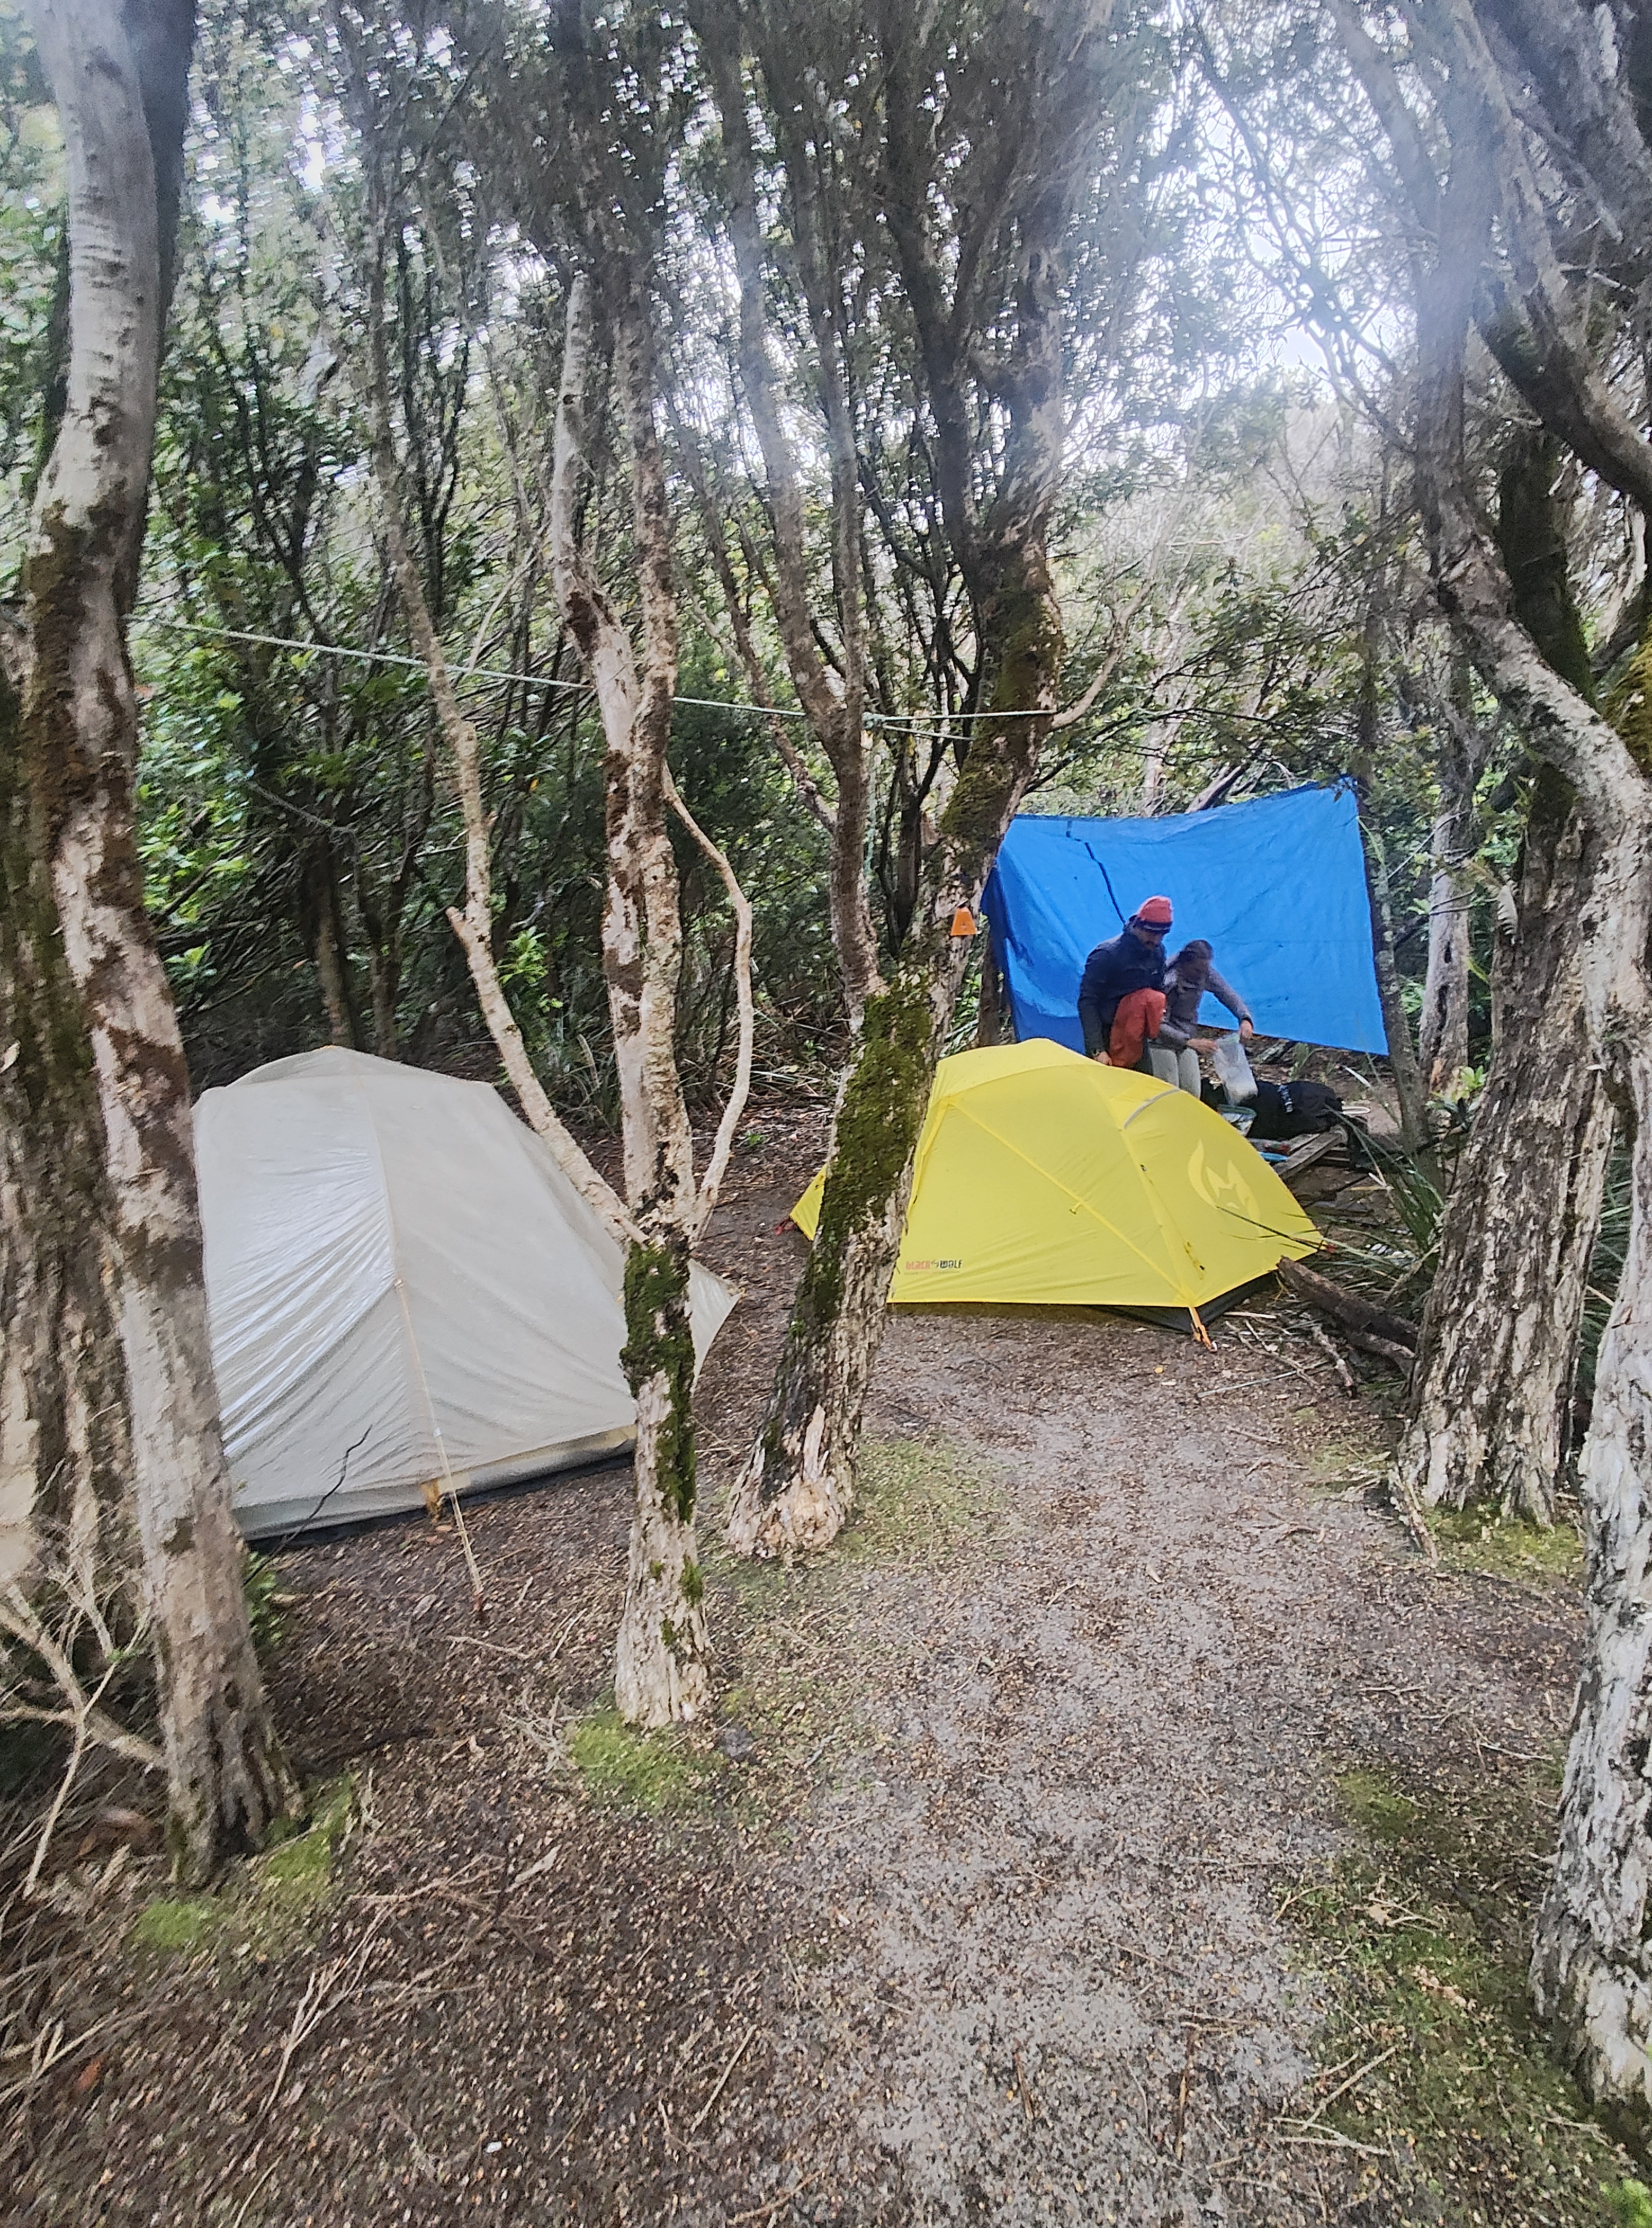
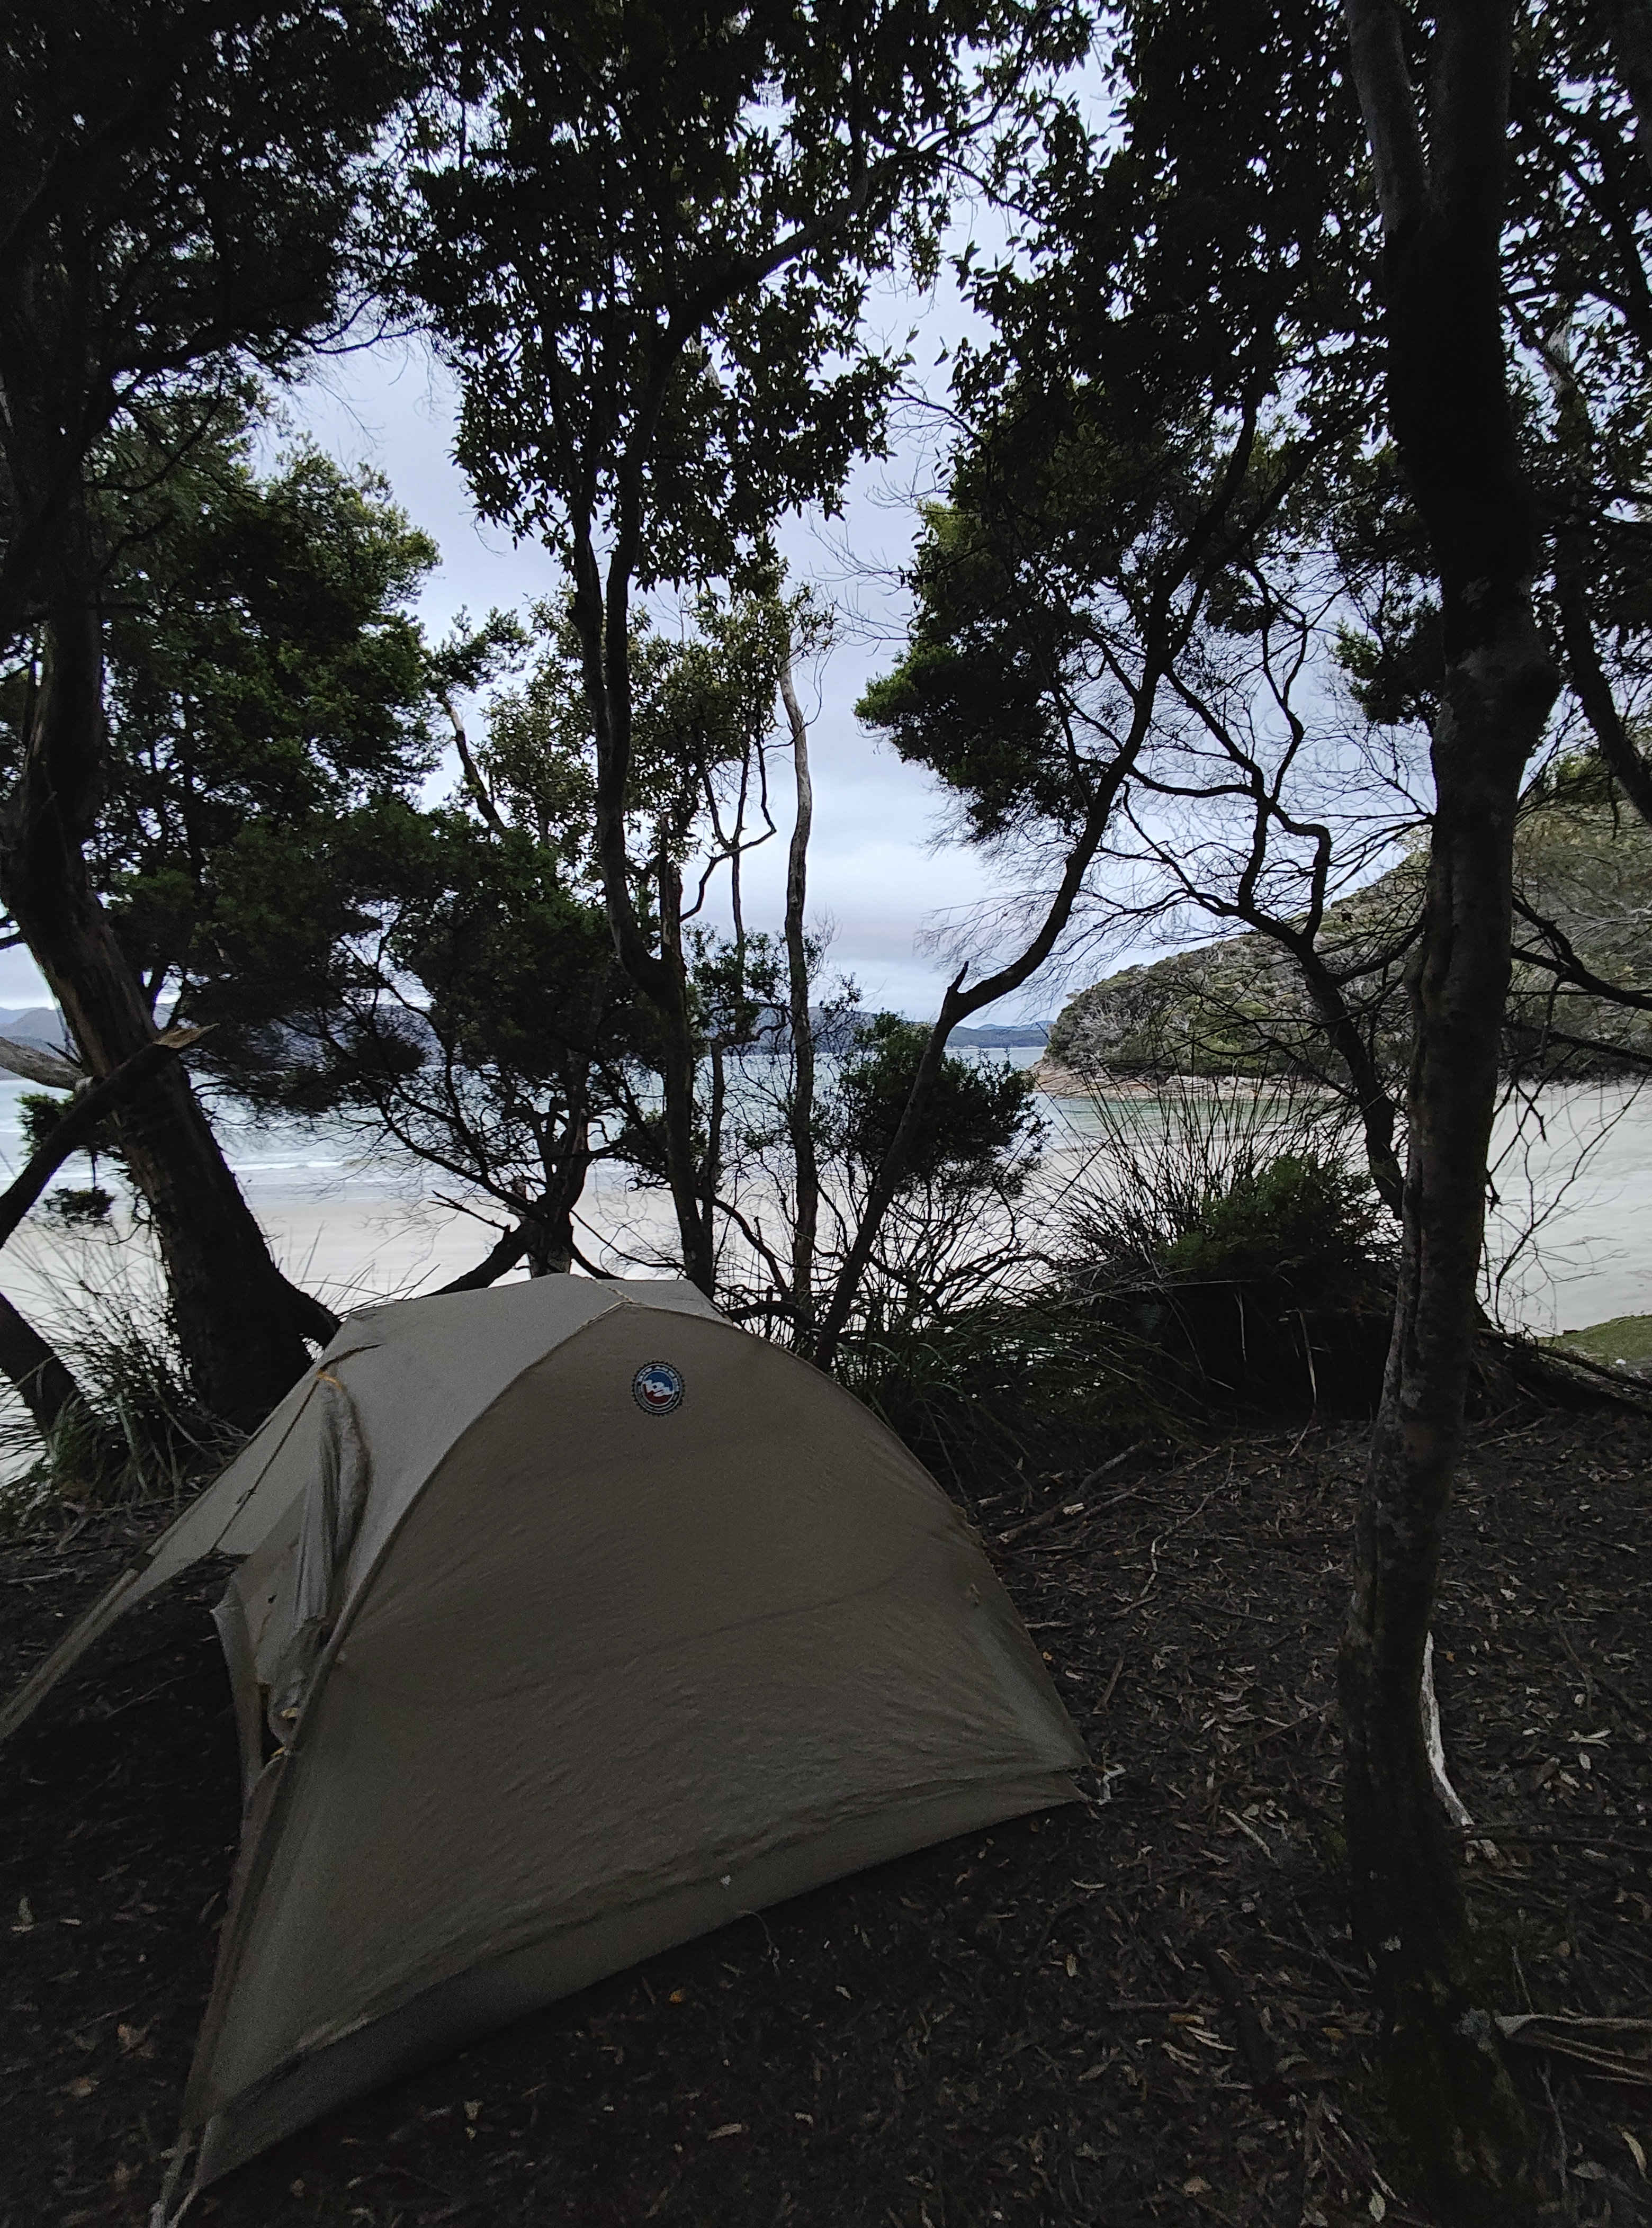
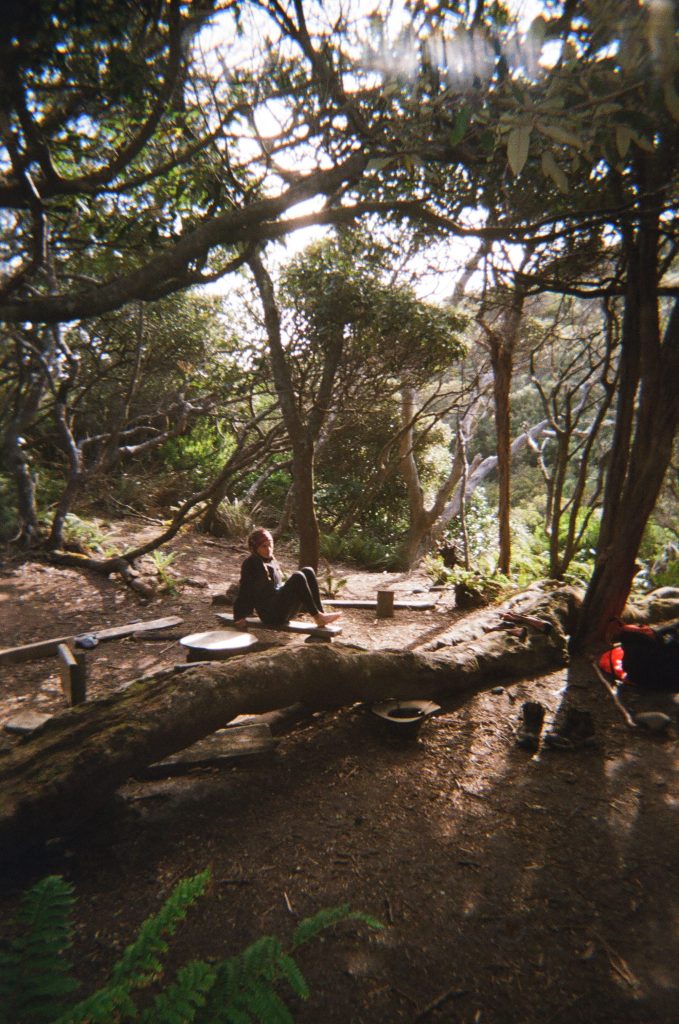
After a short walk uphill we came to Granite Bay campsite which was one of our favourite campsites of the trip. While we’d planned to make it to Lion Rock, we ultimately decided to have a rest day. After all, it was Christmas, and some recovery time was needed. It was so early in the day that we had the campsite to ourselves, and set up our ultimate camp like kids making a cubby house. There was incredible wildlife at this campsite including dusky robins, swamp wallabies and what our flora/fauna guru believes may have been a pardalote.
We had a water stream close by so it was a day of endless cups of tea, two minute noodles, lollies, rum and card games. By the later afternoon, we has new neighbours with about 4 groups arriving from the opposite direction. It was nice to have some fresh people to share our stories of bravery and survival with. And there are some characters out there on the trail, including Surfboard Man who looked like he’d been dipped in mud up to his underarms and was carrying a surfboard, which he reportedly planned to carry the whole trip. They all said there was a lot of mud in our future.
We had a classic Christmas dinner of vegetarian spaghetti bolognese, played more card games and rum before heading to bed, better rested than when we’d woken.
Peaks & Pits:
Peak: Climbing the waterfall!
Pit: Almost getting lost in the long grass

Day 7: Granite Beach to Lion Rock
Distance: 13km
Duration: 10hr 50min (including breaks)
Highlights: South Cape Range, South Cape Rivulet, Coal Bluff, Lion Rock
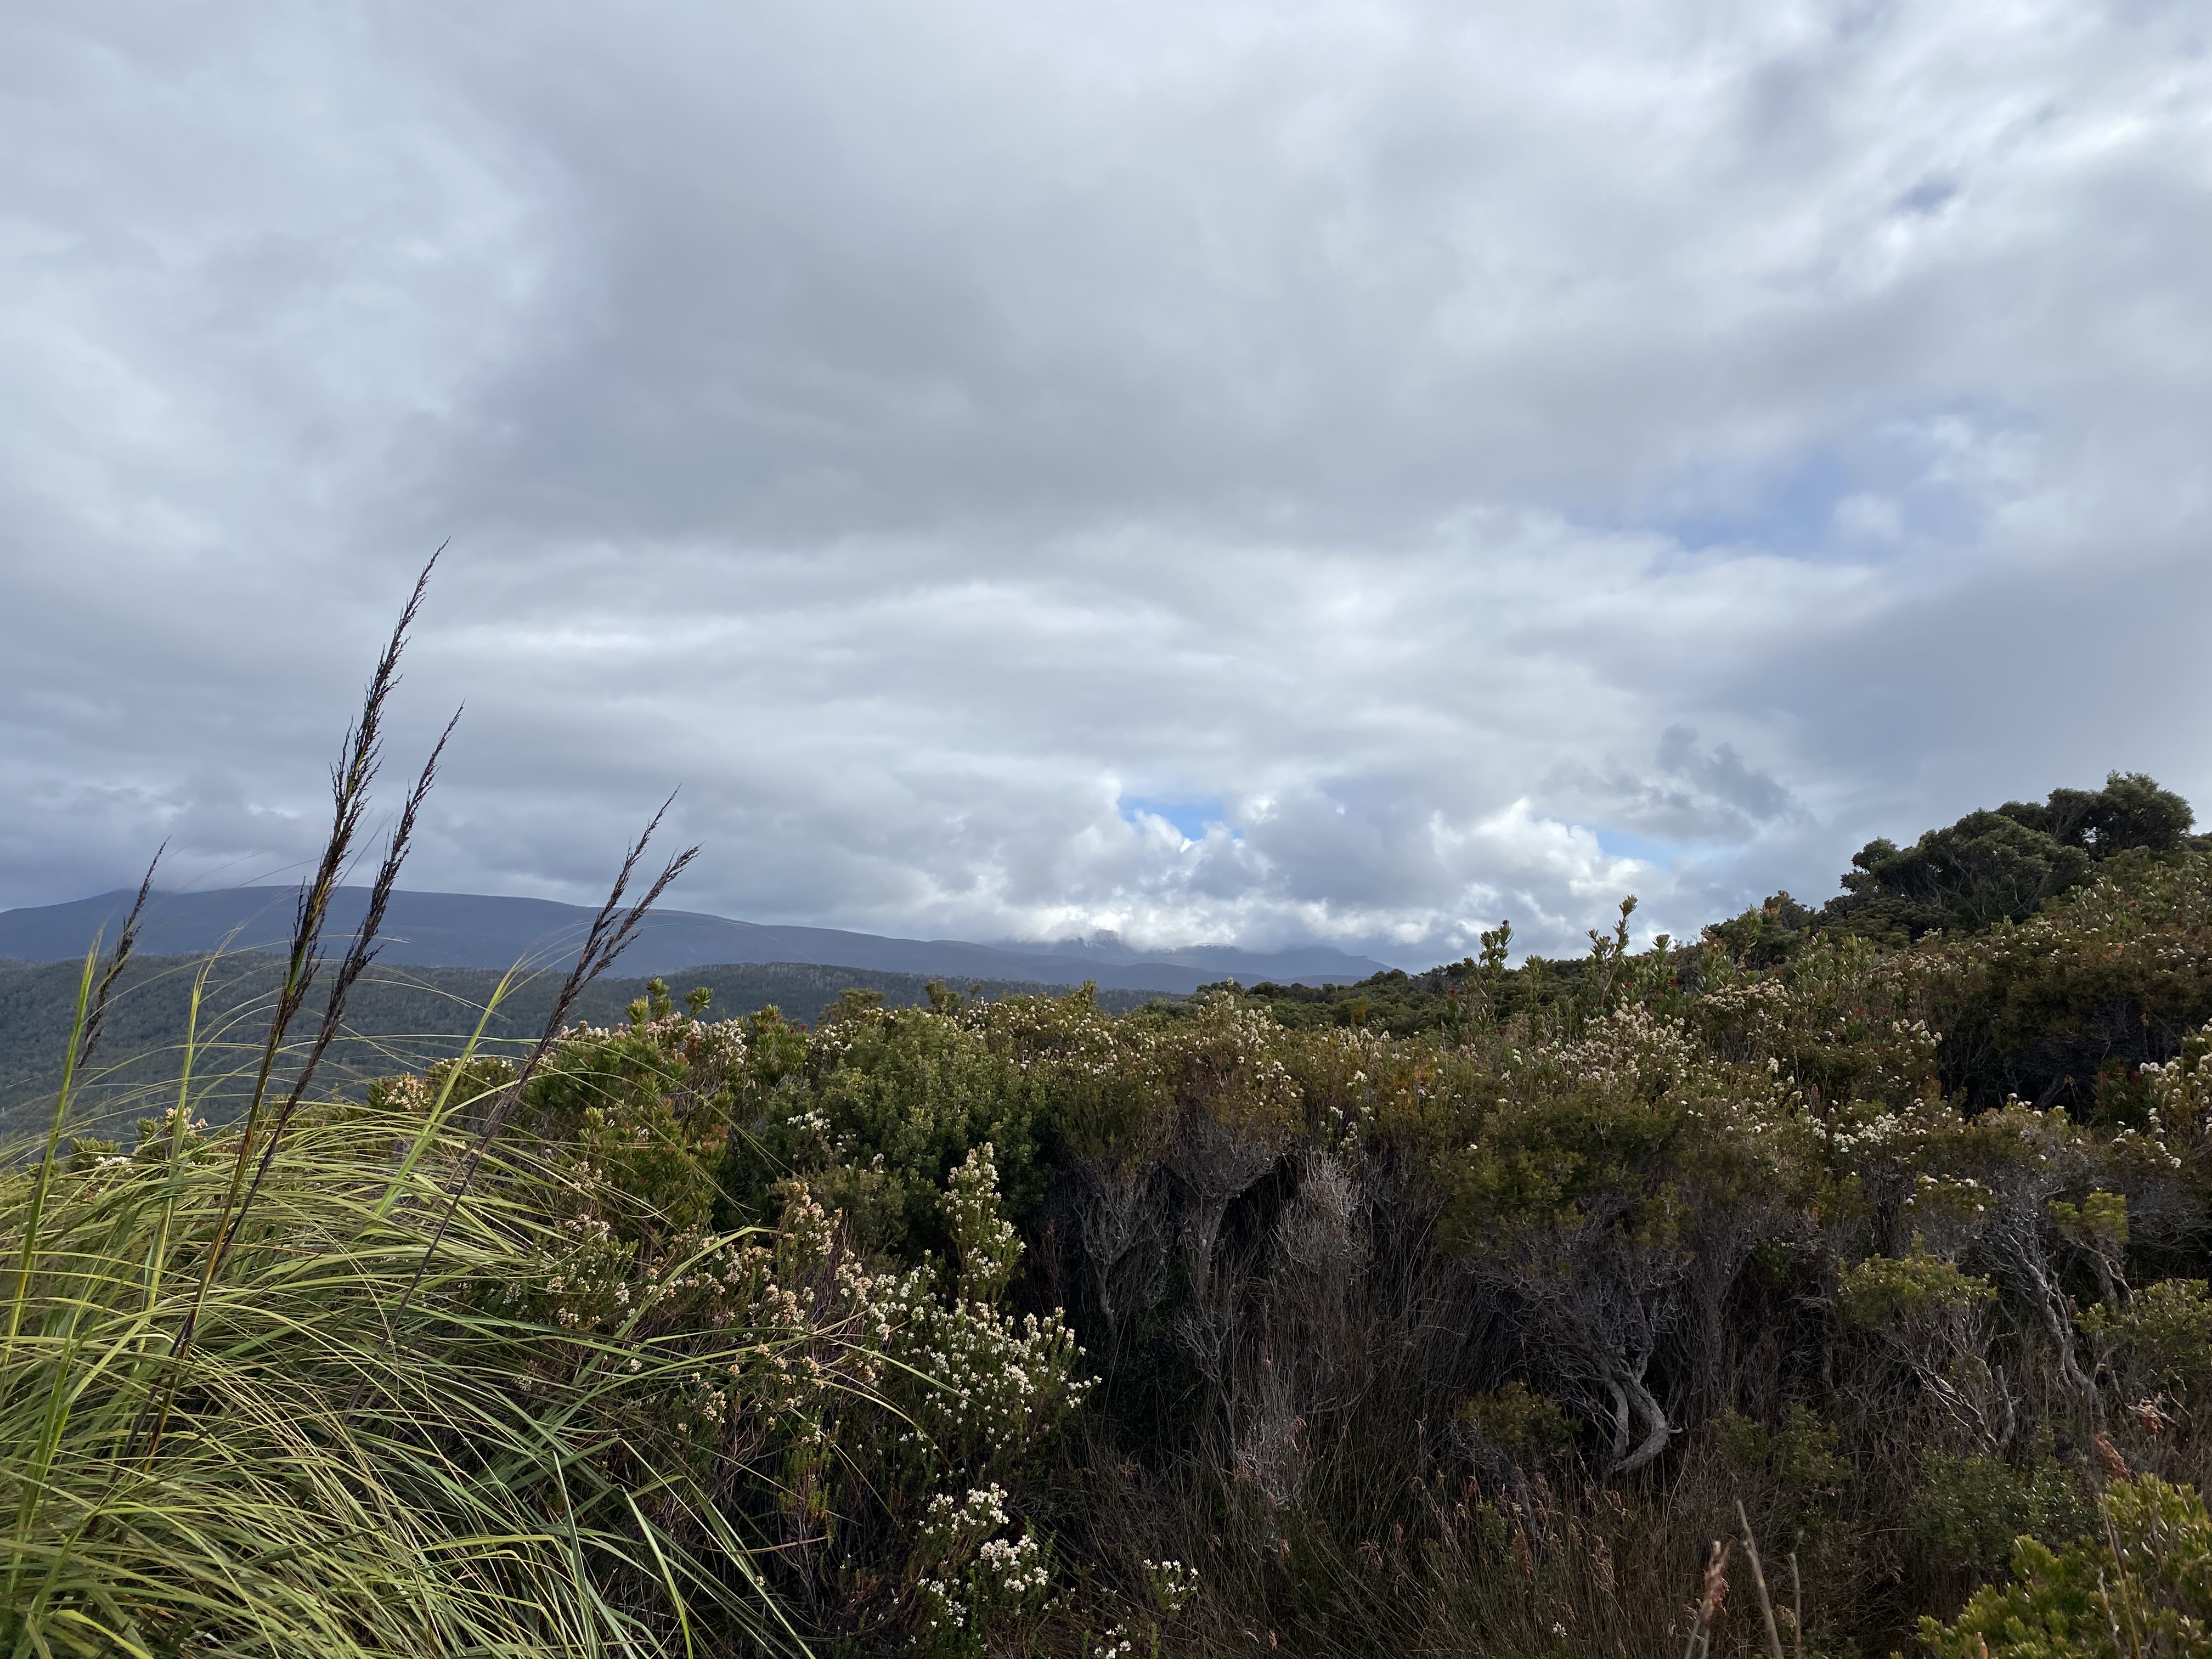
With the South Cape Range ahead of us, we started early and the trail immediately headed uphill on a muddy trail. The track was fairly steep with some of the deepest mud we’d faced yet. It was a stunning sunny day, and after a day of rest, the mood was high. There were lots of go-arounds which made it difficult to follow the track as the shrubbery was at head-height and difficult to see past. Eventually we emerged on a plateau which opened incredible views of the ocean, up to the snowy mountains above, the Ironbound Range and we could see the trail winding it’s way back to Melaleuca. We realised how close we were to the snow and the reason for the drop in temperature overnight.
We came to some boardwalk sections with great views over the hills and close-ups of wildflowers. The descent is through forest and passes small creeks. There is another section of climb before the Track Cutters campsite where we ran into three hikers coming the other direction. We chatted with the Trio who were on their second day and shared stories of our river crossings and the Ironbound Range. They mentioned they thought South Cape Range was supposed to be one of the hardest days of the trip, and we let them down gently as we told them about the Ironbound Range crossing. They told us about the upcoming crossing at the South Cape Rivulet, warning that it was deep and had a strong current. They also mentioned having run into Father and Son, who had been worried about The Queenslanders who they hadn’t seen for a couple of days. We were ecstatic to hear we had a trail nickname.
From here we started the long descent which was muddy and had lots of obstacles to climb over/under before a couple more ascents near the ocean, as we could hear the waves near us. Lots of this section was through sheltered bush which was a nice change to be under shade and see some different country. We bumped into two more couples, the first who were keen for a chat and to hear about the walk ahead. We again exchanged stories and they warned us of the track ahead being very muddy, the rivulet dangerous, and the walk around Cool Bluff being a scary encounter. The second couple was European, walking through the thick mud in socks and sandals, and told us they were planning to finish the walk in 4 days!
After some further descent we made it to the shore at South Cape Rivulet where we stopped for lunch. This is a beautiful spot on the beach, bright sand and then the tannin-stain of the rivulet. We crossed the rivulet about halfway between tides. It was deep in sections, but we found a point through the middle which was hip deep. The water is dark, so you can’t tell the depth before starting to walk,
While there is a camp at South Cape Rivulet, we decided to push on to Lion Rock to have a shorter day tomorrow as we had to make it to Cockle Creek by 12:30pm for the shuttle. If we’d learned anything from the past week, it was that the mud makes everything take longer so overestimate how much time you’ll need.
At the end of the beach we crossed the headland, walking along a second beach and then climbing a second bigger headland with stunning ocean views at the top. We returned back to walking along the beach until we spotted a sand dune with stairs leading up to Lion Rock campsite. The stairs were a tough end to the day, but led to a lovely campsite for our final night. We had our final meal of Mediterranean veggies, lentils and quinoa (and anything else we had left to eat) and reflected on the week we’d had.
Peaks & Pits:
Peak: Lion Rock beach
Pit: Slow descent from South Cape Range
Day 8: Lion Rock to Cockle Creek
Distance: 8km
Duration: 2.5hr (including breaks)
Highlights: Blowhole Valley, Cockle Creek
We headed off early feeling the pressure to make it to Cockle Creek by 12:30pm for our shuttle. We started along beach before taking the stairs up to the rocky headland. This was our final hazard of the trip, and it was funny imagining Surfboard Man walking around here catching the wind with his surfboard. This section didn’t feel like a hazard by this point of the trip, but may be a little scary for those afraid of heights. The track then splits, and we took the wooden stairs to head towards Cockle Creek.

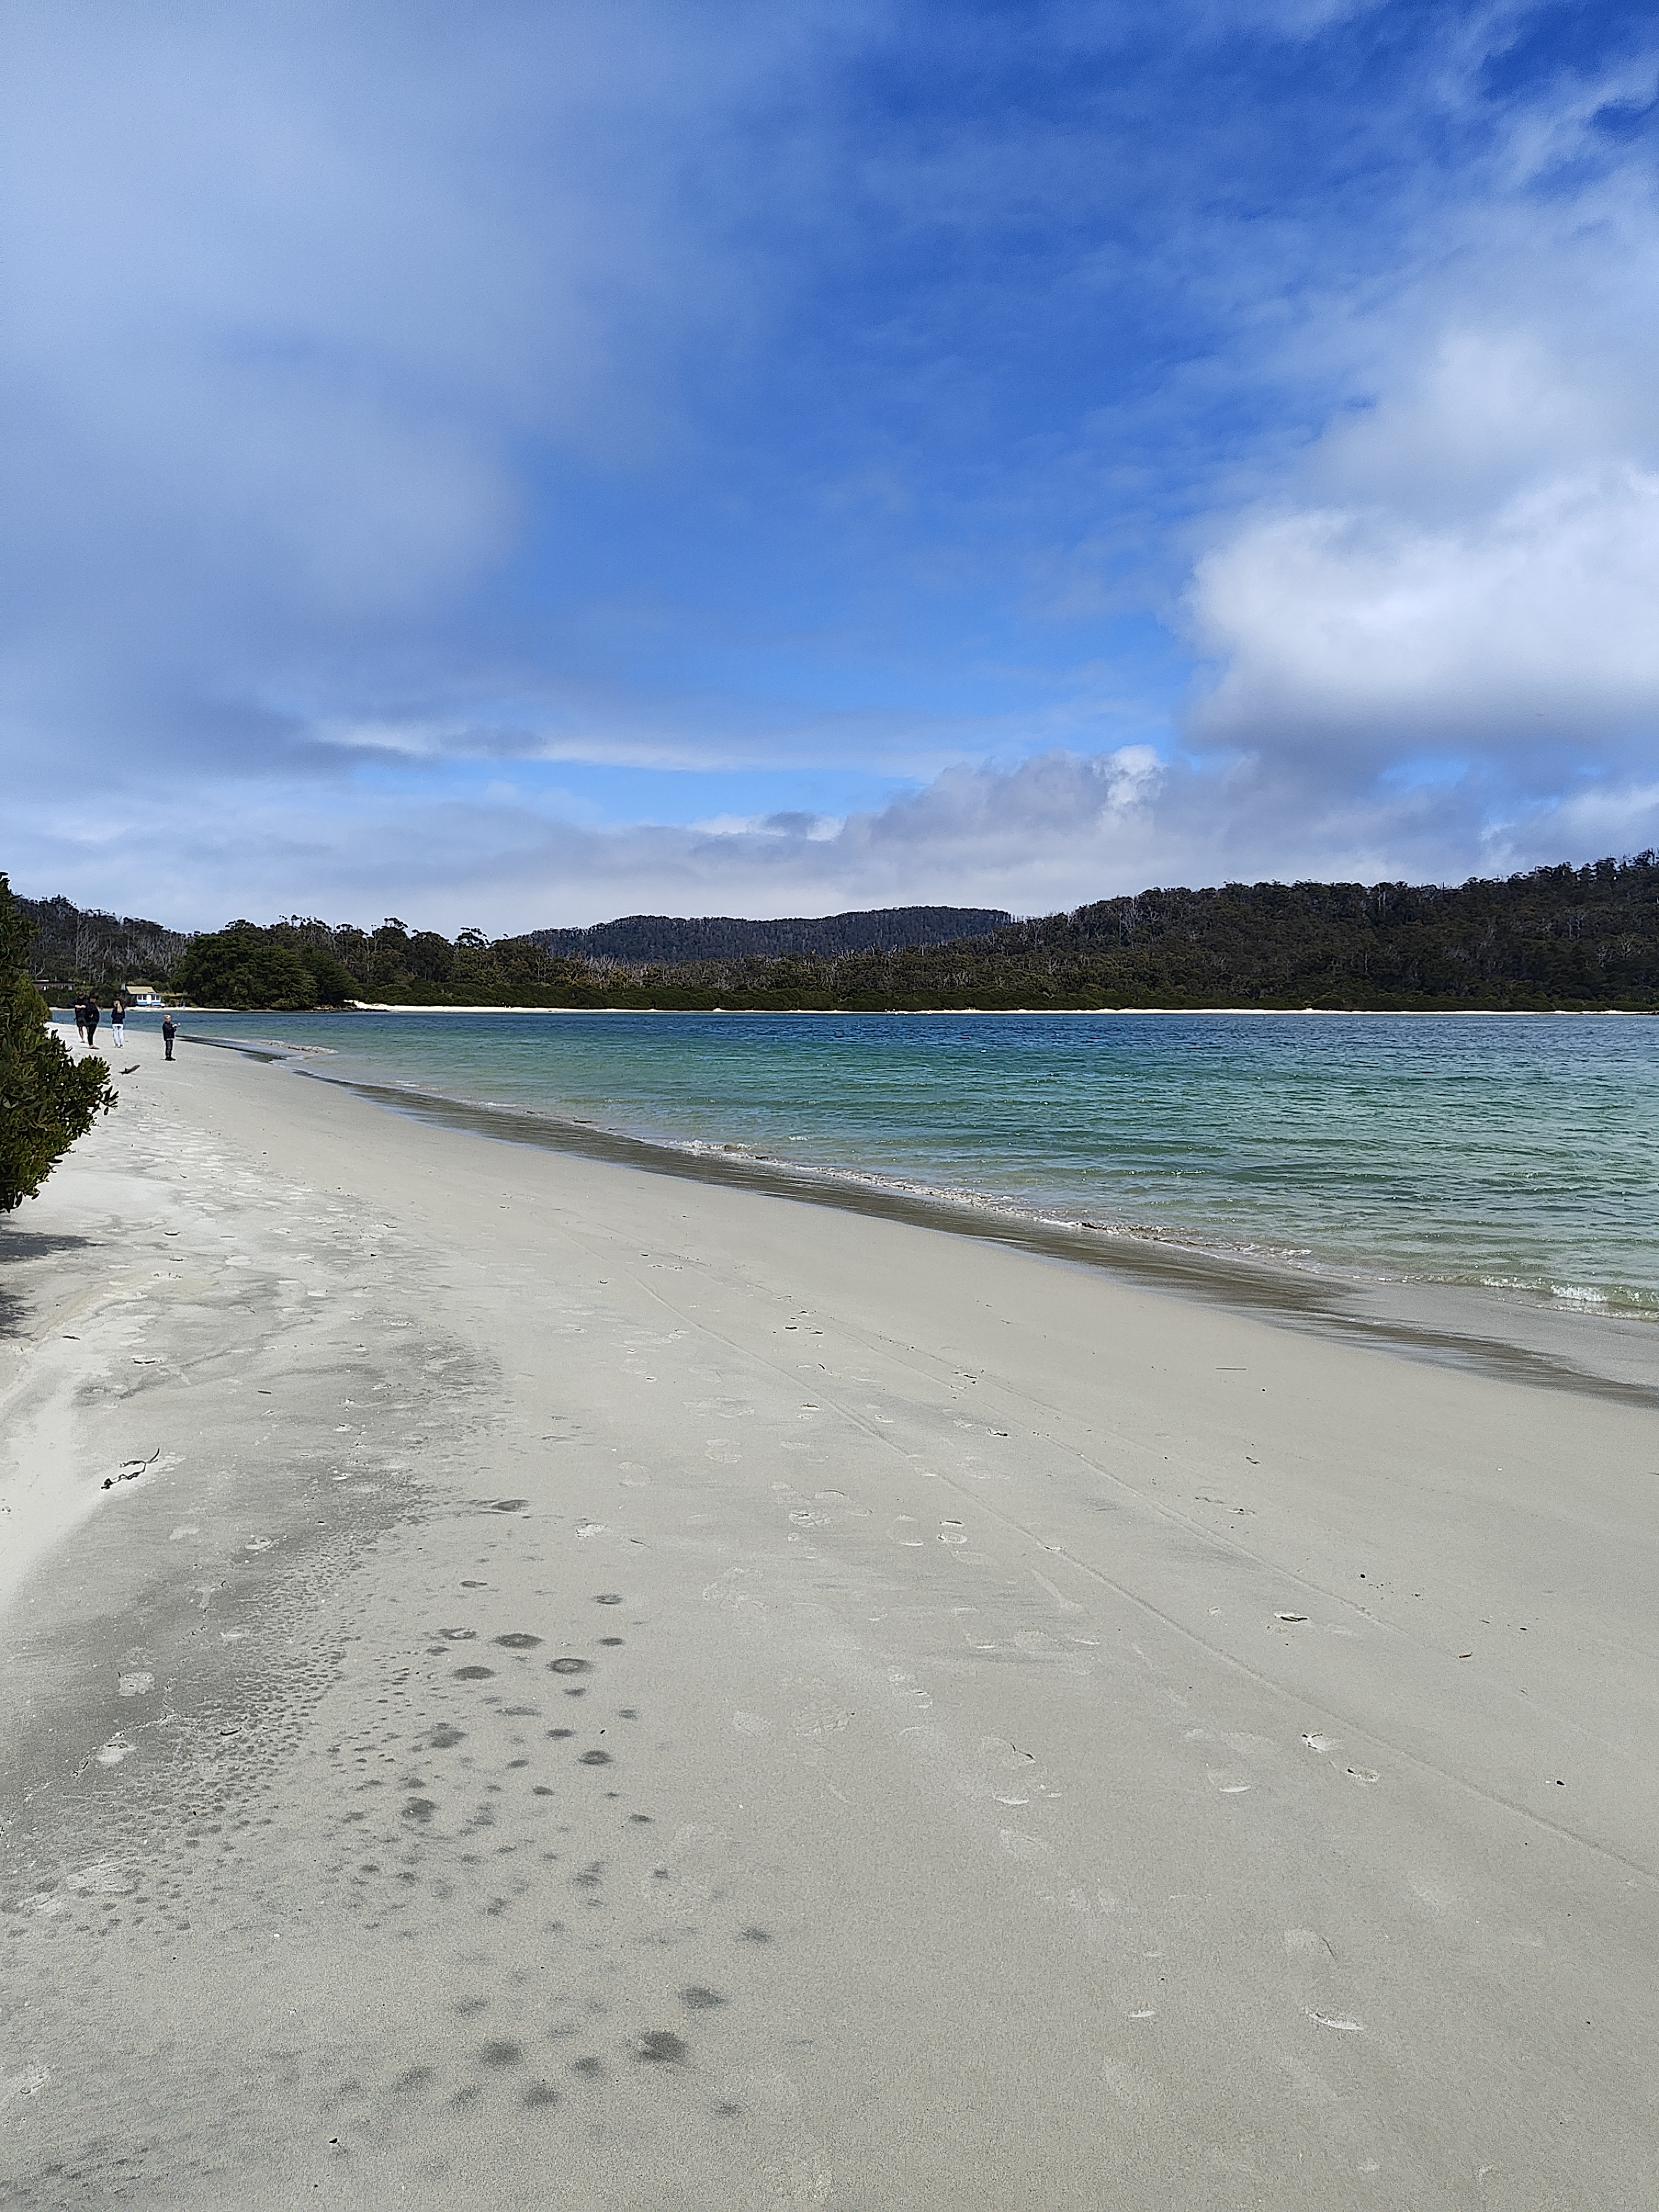
We passed through ancient Blowhole Valley which was nice and flat board-walk. With flat ground and our bags at their lightest, we were making a cracking pace. Lots of this track is through forest and bush, travelling alongside Cockle Creek as it made its way down to the beach. There is some gentle up and down, some mud (but nothing compared to previous days) and lots of birdlife. At the end of the track we came to an information hut where we signed out. About a further 350m along, there is the information centre where we waited for a few hours, made endless tea, called our families and reminisced about our trip. Cockle Creek is a beautiful spot, so we happy waited there for a few hours and enjoyed the sunshine before our shuttle arrived.
Peaks & Pits:
Peak: Walking around the rocky headland
Pit: Waiting for the shuttle
Reflections: Peaks & Pits
The South Coast Track is a true adventure, with stunning views of Tassie’s wild coastline and rugged mountain ranges. This trip was packed with adventure and excitement, starting from the airplane arrival, to river crossings, beach walking, scaling headlands and epic mountains. The remoteness brings potential for some difficult conditions including mud and unpredictable weather. Like any trail, you get what you get and you don’t get upset when it comes to the weather. This was more true on this trail that I’d experienced before, and I think it’s worth anyone thinking of doing the South Coast Track to consider how these conditions may impact your experience.
While this walk offered a lot of beauty and adventure, this came at a cost of less comfort as a result of the conditions. It was also a more physical walk than I was expecting, the mud in particular resulting in much slower walking times and sometimes requiring a lot of upper-body strength to navigate steep and slippery sections. For those of us who love our time at camp making dinner and playing cards, the camp time will be reduced due to long walking days when the weather is bad.
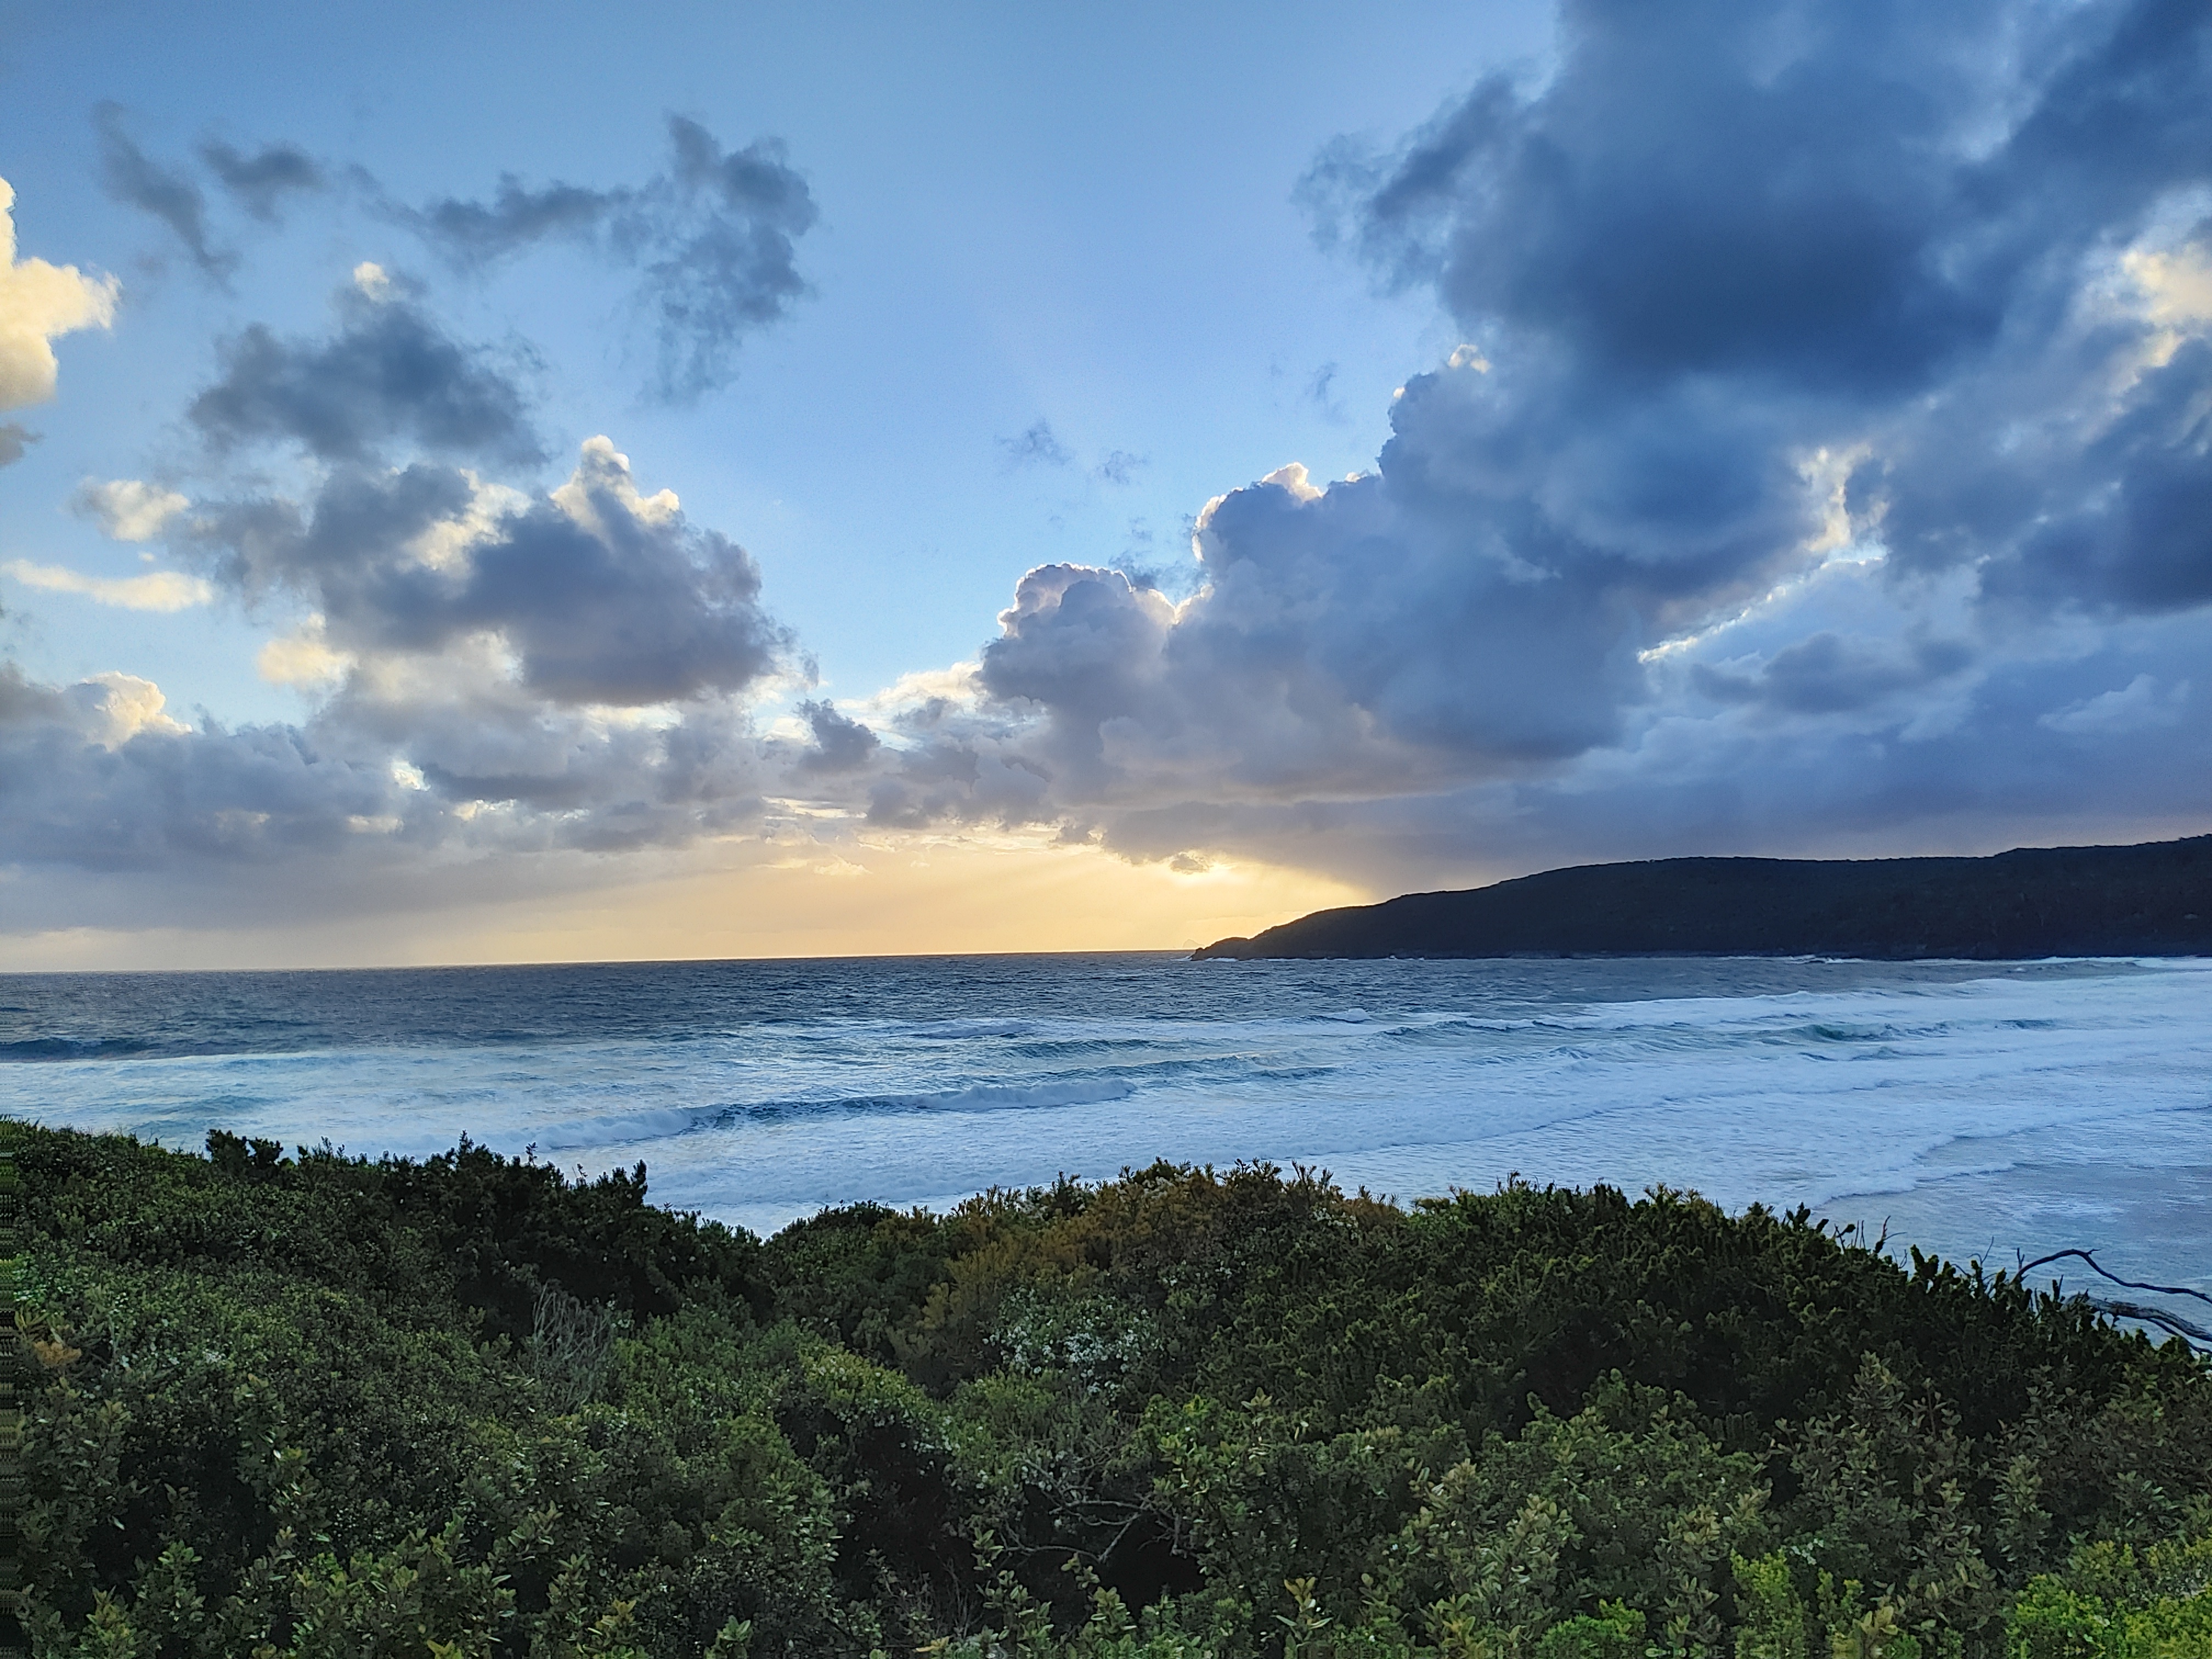
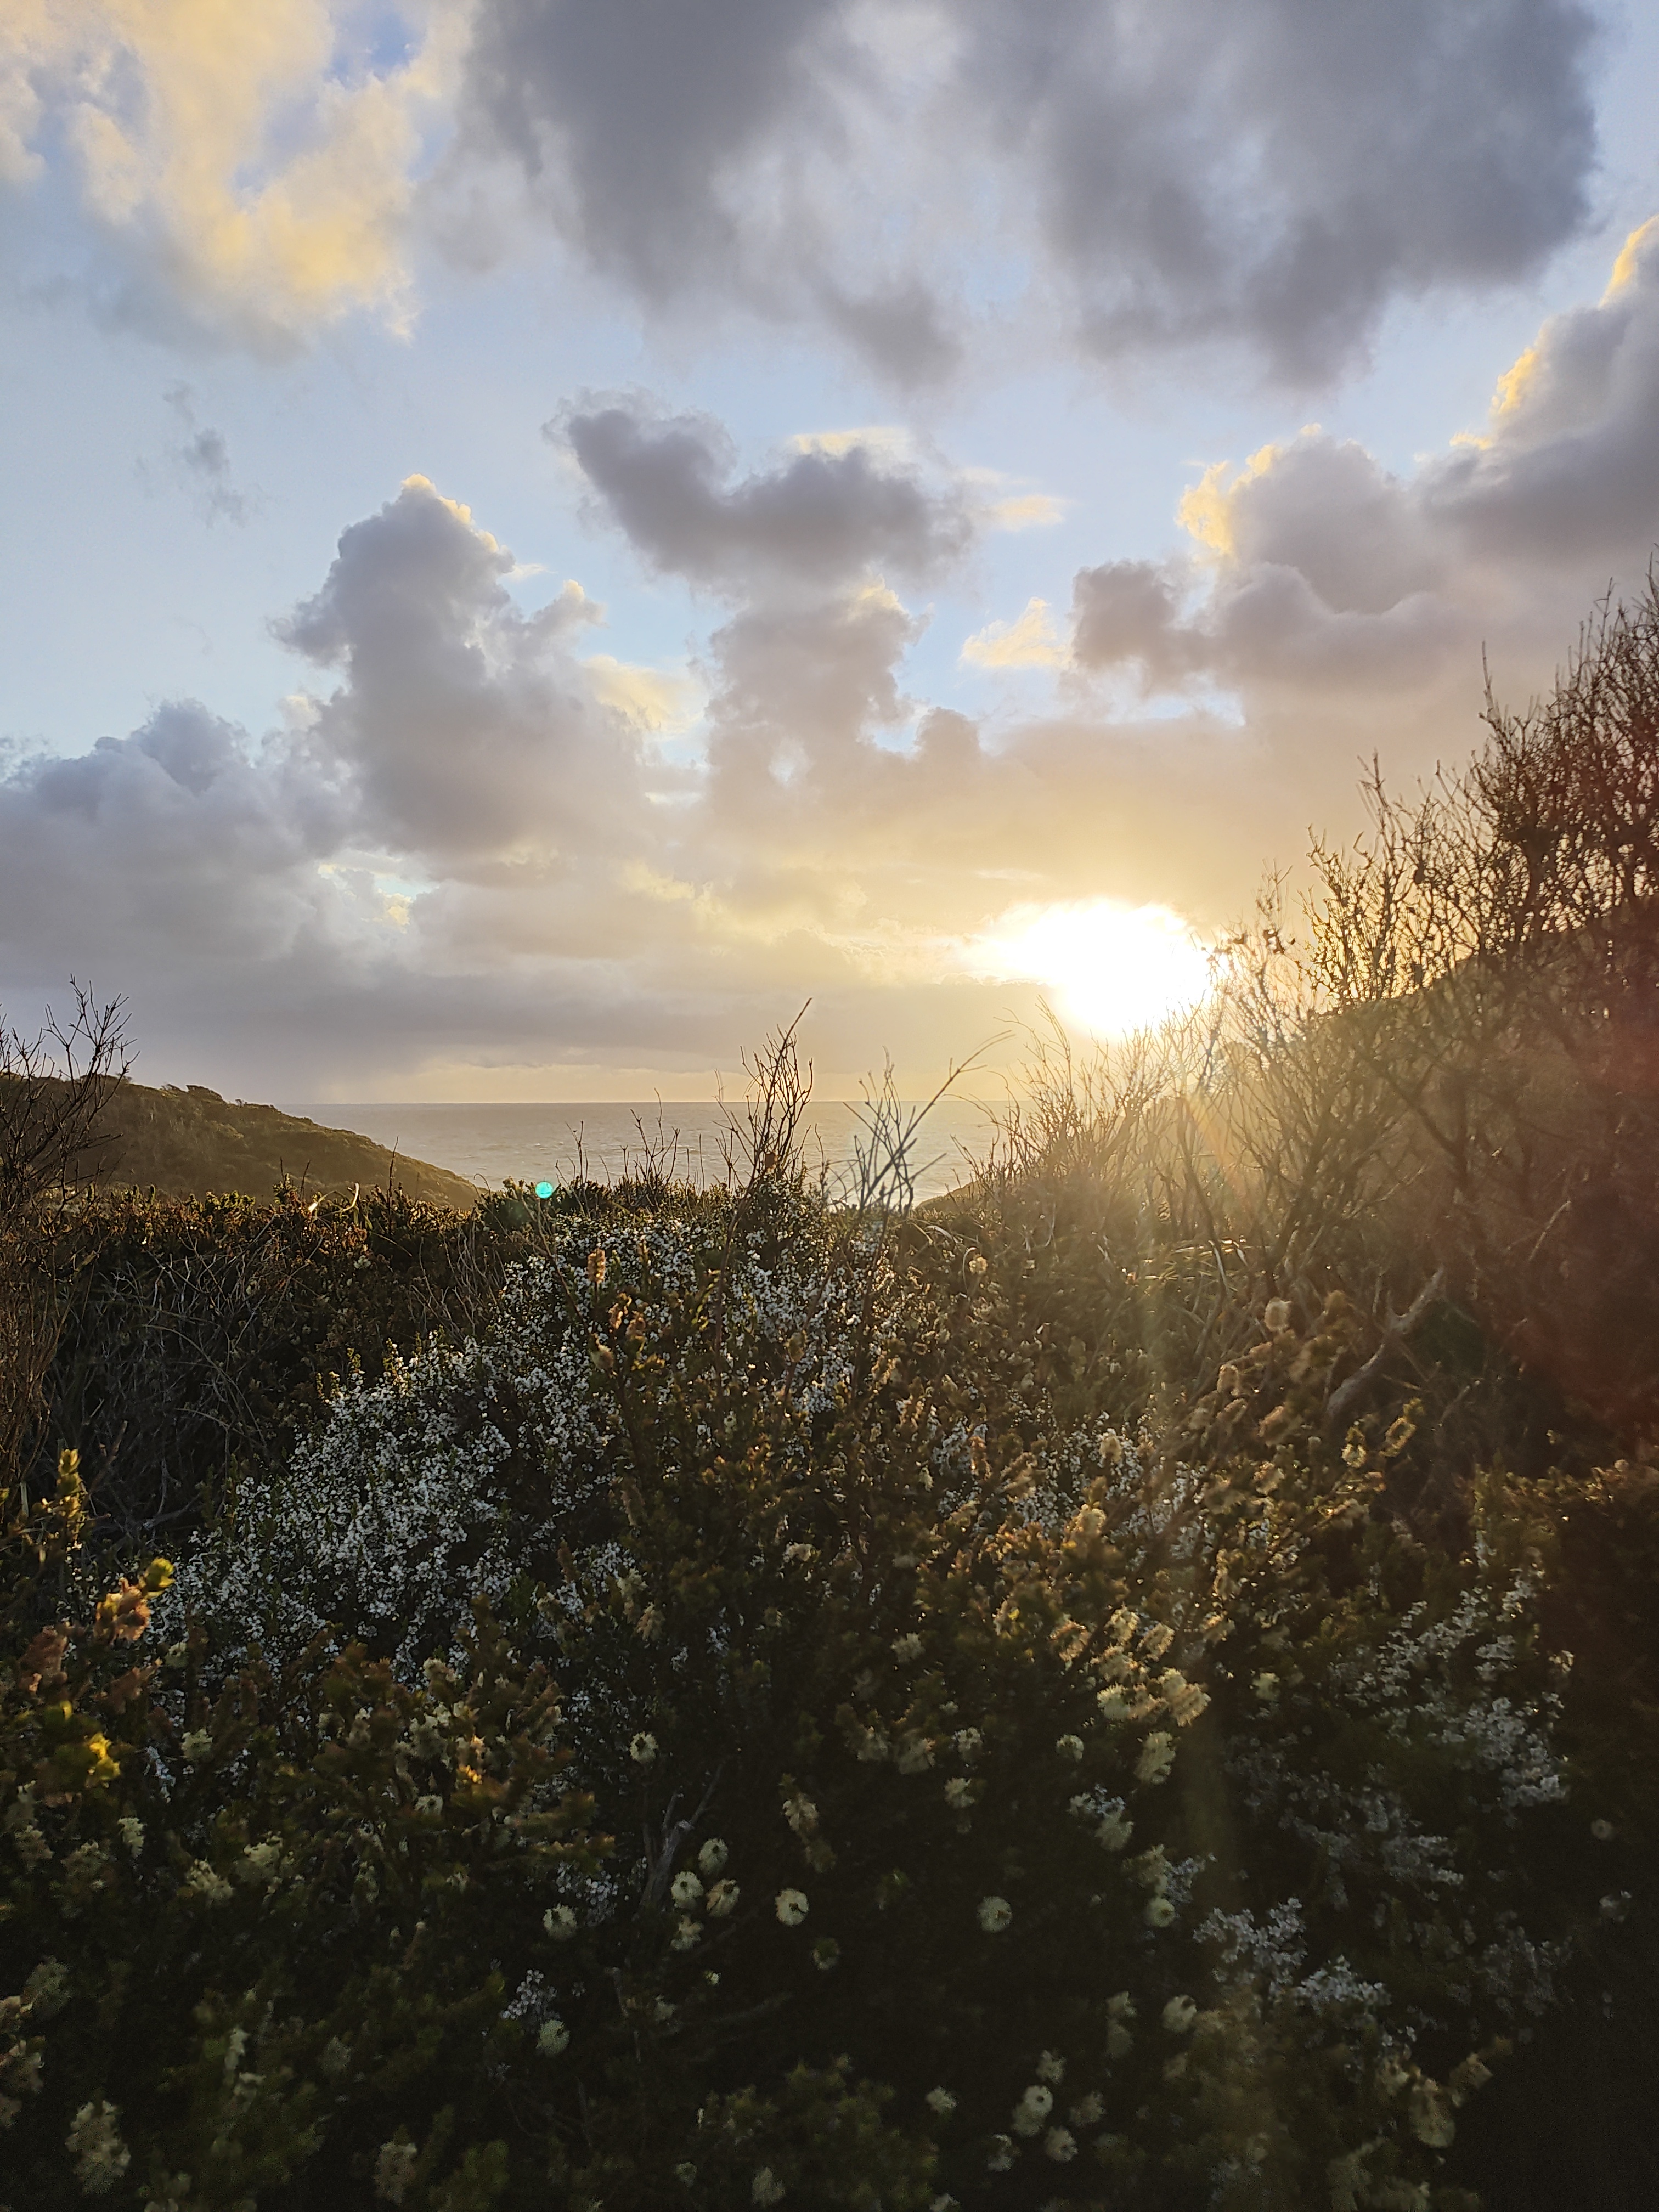
Looking back at the photos, we only ever had our cameras out when the weather was good, so they may give a more sunny and warm appearance than what we experienced. This walk if a lot of Type 2 fun, but we walked away with a new and challenging experience under our belt and lots of laughs along the way!
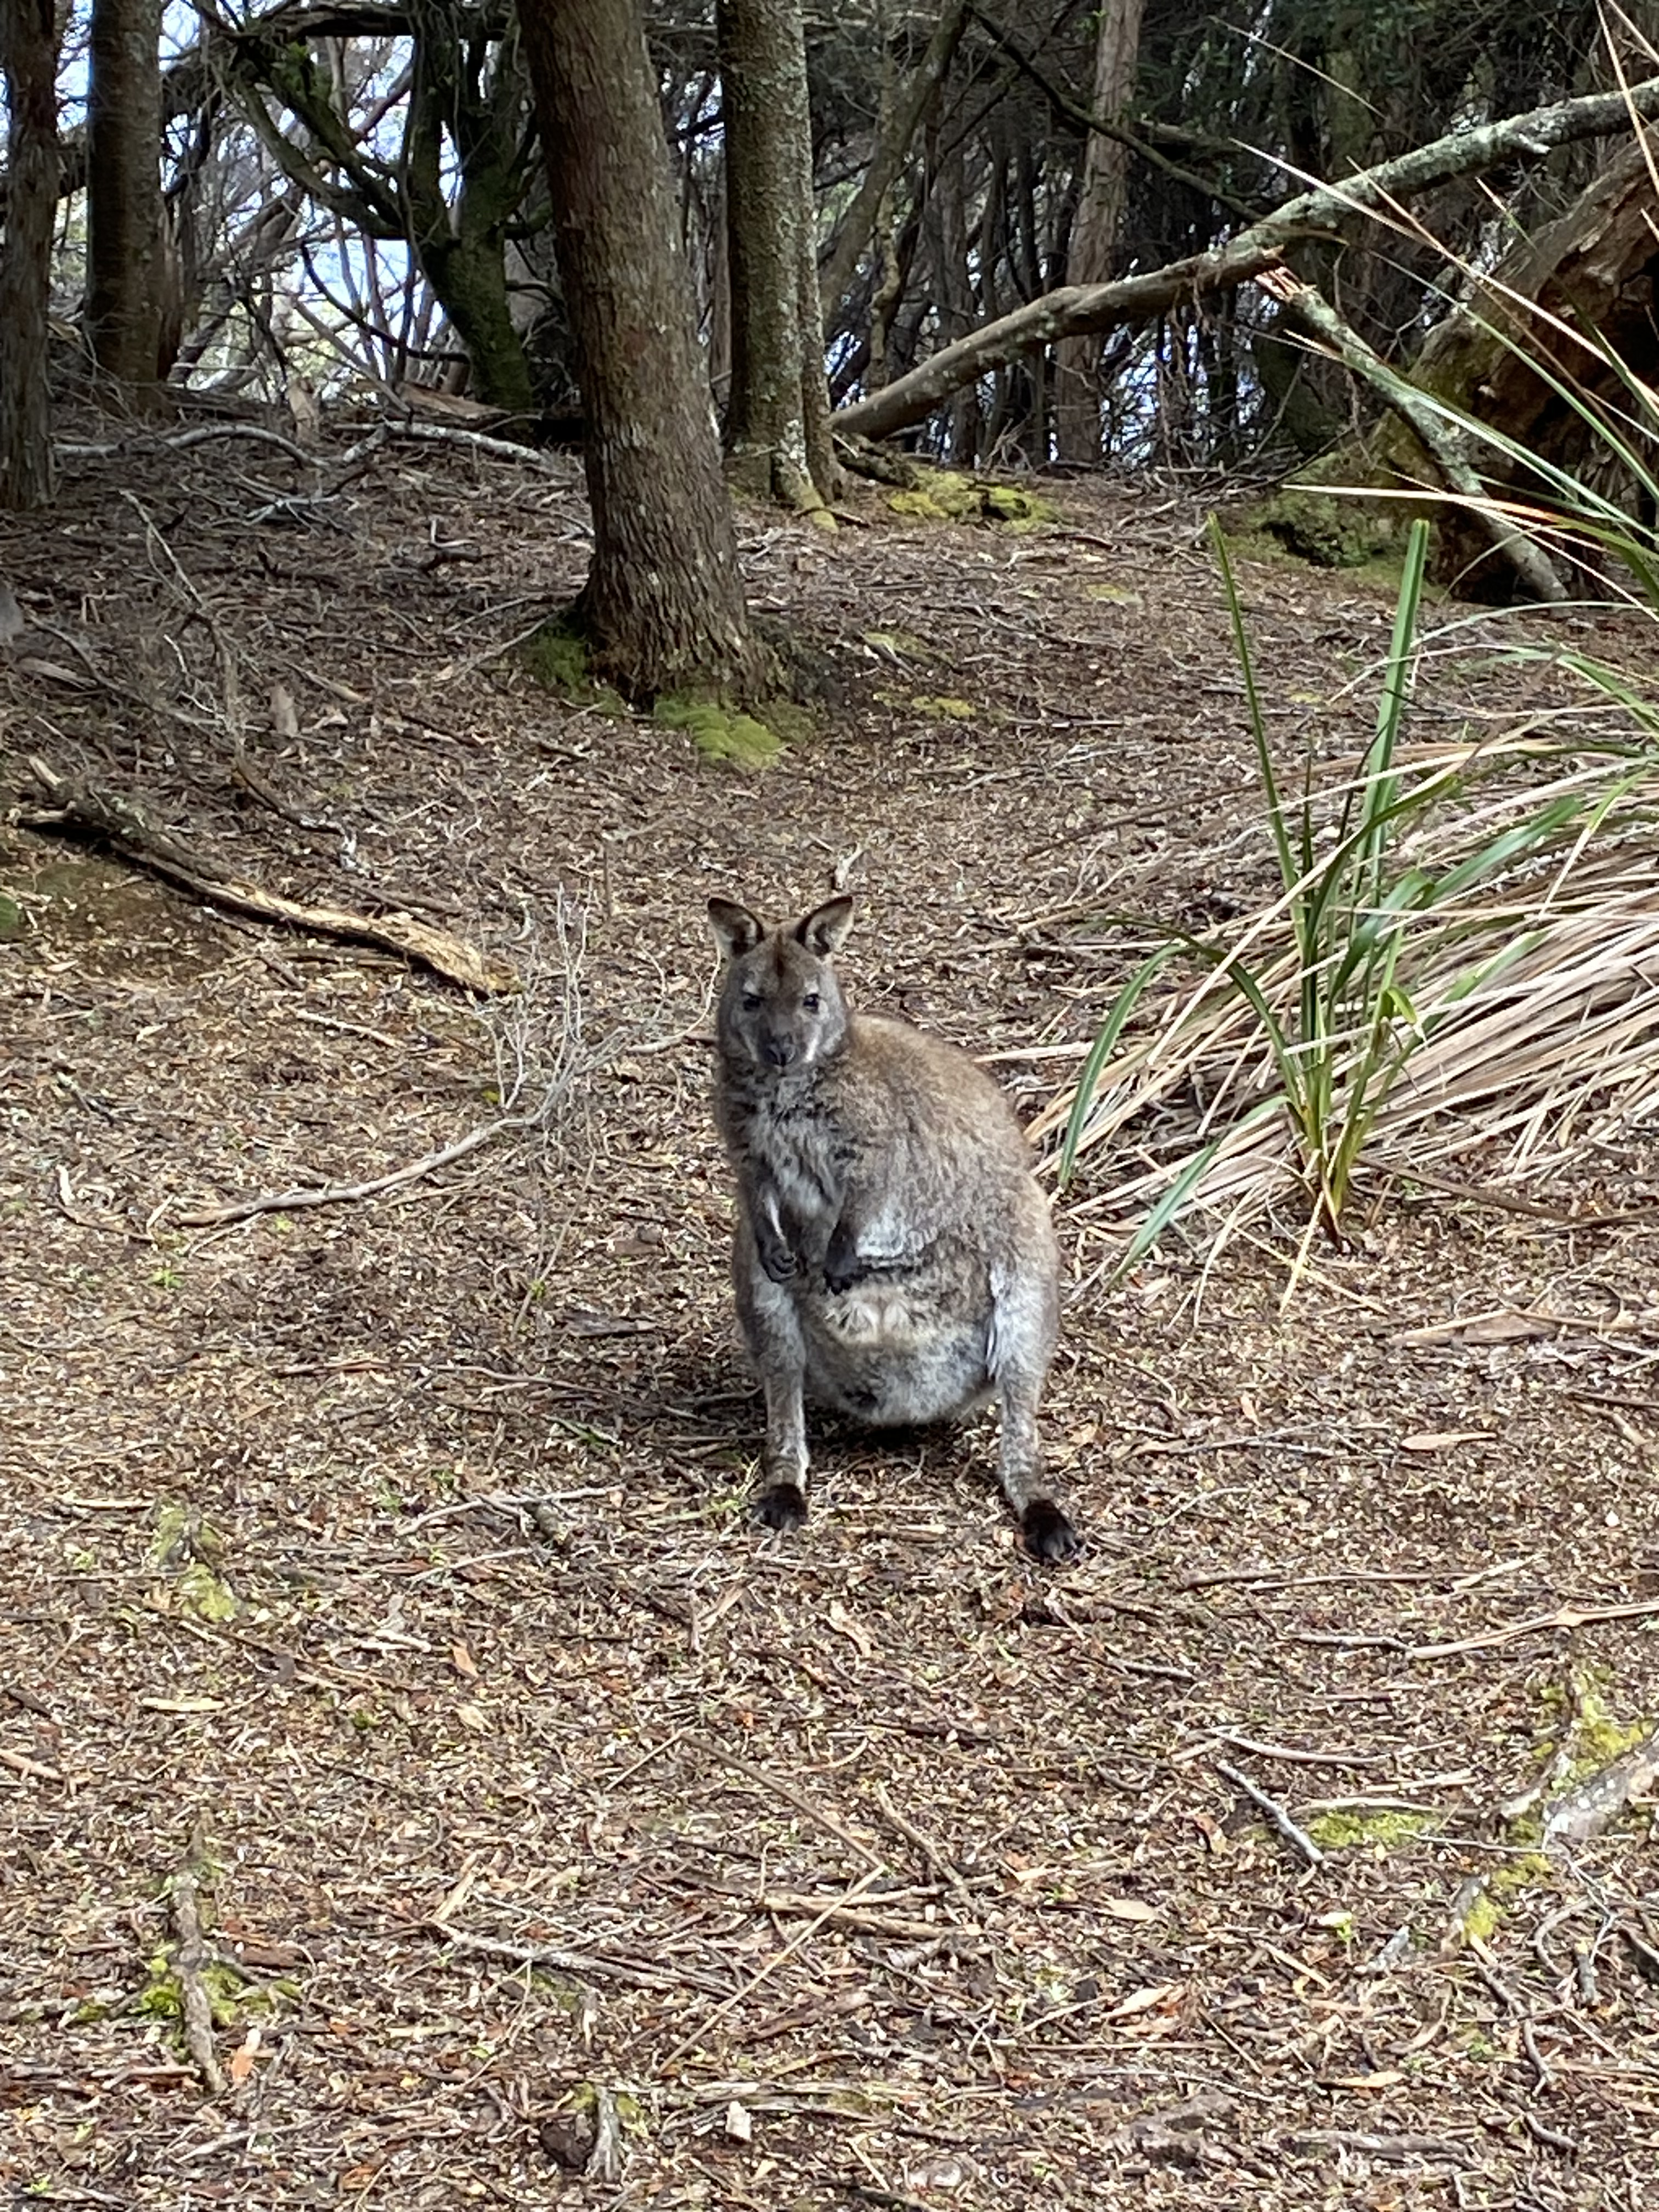
It’s always special to be in a place that can only be accessed by walking, where you know only a small portion of people have been lucky enough to see this area up-close. This area appears barren and desolate, yet is full of life from beautiful birds to wombats and native wildflowers. This walk tested our skills, courage and perseverance but offered valuable learnings which we’ll take into future walks.
Grit Step Ratings
Adventure
Scenery
Wildlife
Grit steps
Would recommend
We’re Glad we Brought:
To Walking Pole or Not Walking Pole:
As someone who doesn’t usually use walking poles, I think they’re 100% worth it on this walk. If nothing else, they can help you test the depth of the mud. But they came in much handier than that when trying to skirt around muddy sections, water crossings, big climbs and steep descents. There were only a few moments where we needed to be hands free, and otherwise I used one walking pole the whole trip.
Steamy Sleep System:
With snow on the mountains, it was very cold overnight and we were thankful for extra layers overnight. You’ll want a reliable sleep system. We were very thankful for our below zero rated sleeping bags and insulation mats which kept the cold ground at bay.
Tarp:
It rained most days, and it would have been miserable at camp if it weren’t for our tarp that kept us dry while we cooked dinner and played cards.
Warm Layers:
Waterproof pants and jacket were saviours on this trip, along with lots of layers. We were there in the height of summer, but it doesn’t mean it isn’t cold so prepare for the cold weather just in case.
Boots or Trail Runners?:
We had the trail runners versus boot debate before heading off to Tassie. Boots won for most of the group, and overall I think boots were the winner for some more protection from the mud and greater foot support. However, trail runners dried out much faster.
Gaiters were a must on this trip to protect feet and shoes from mud. There were moments that shoes would have been lost forever to the mud if it weren’t for the gaiters keeping them locked in.
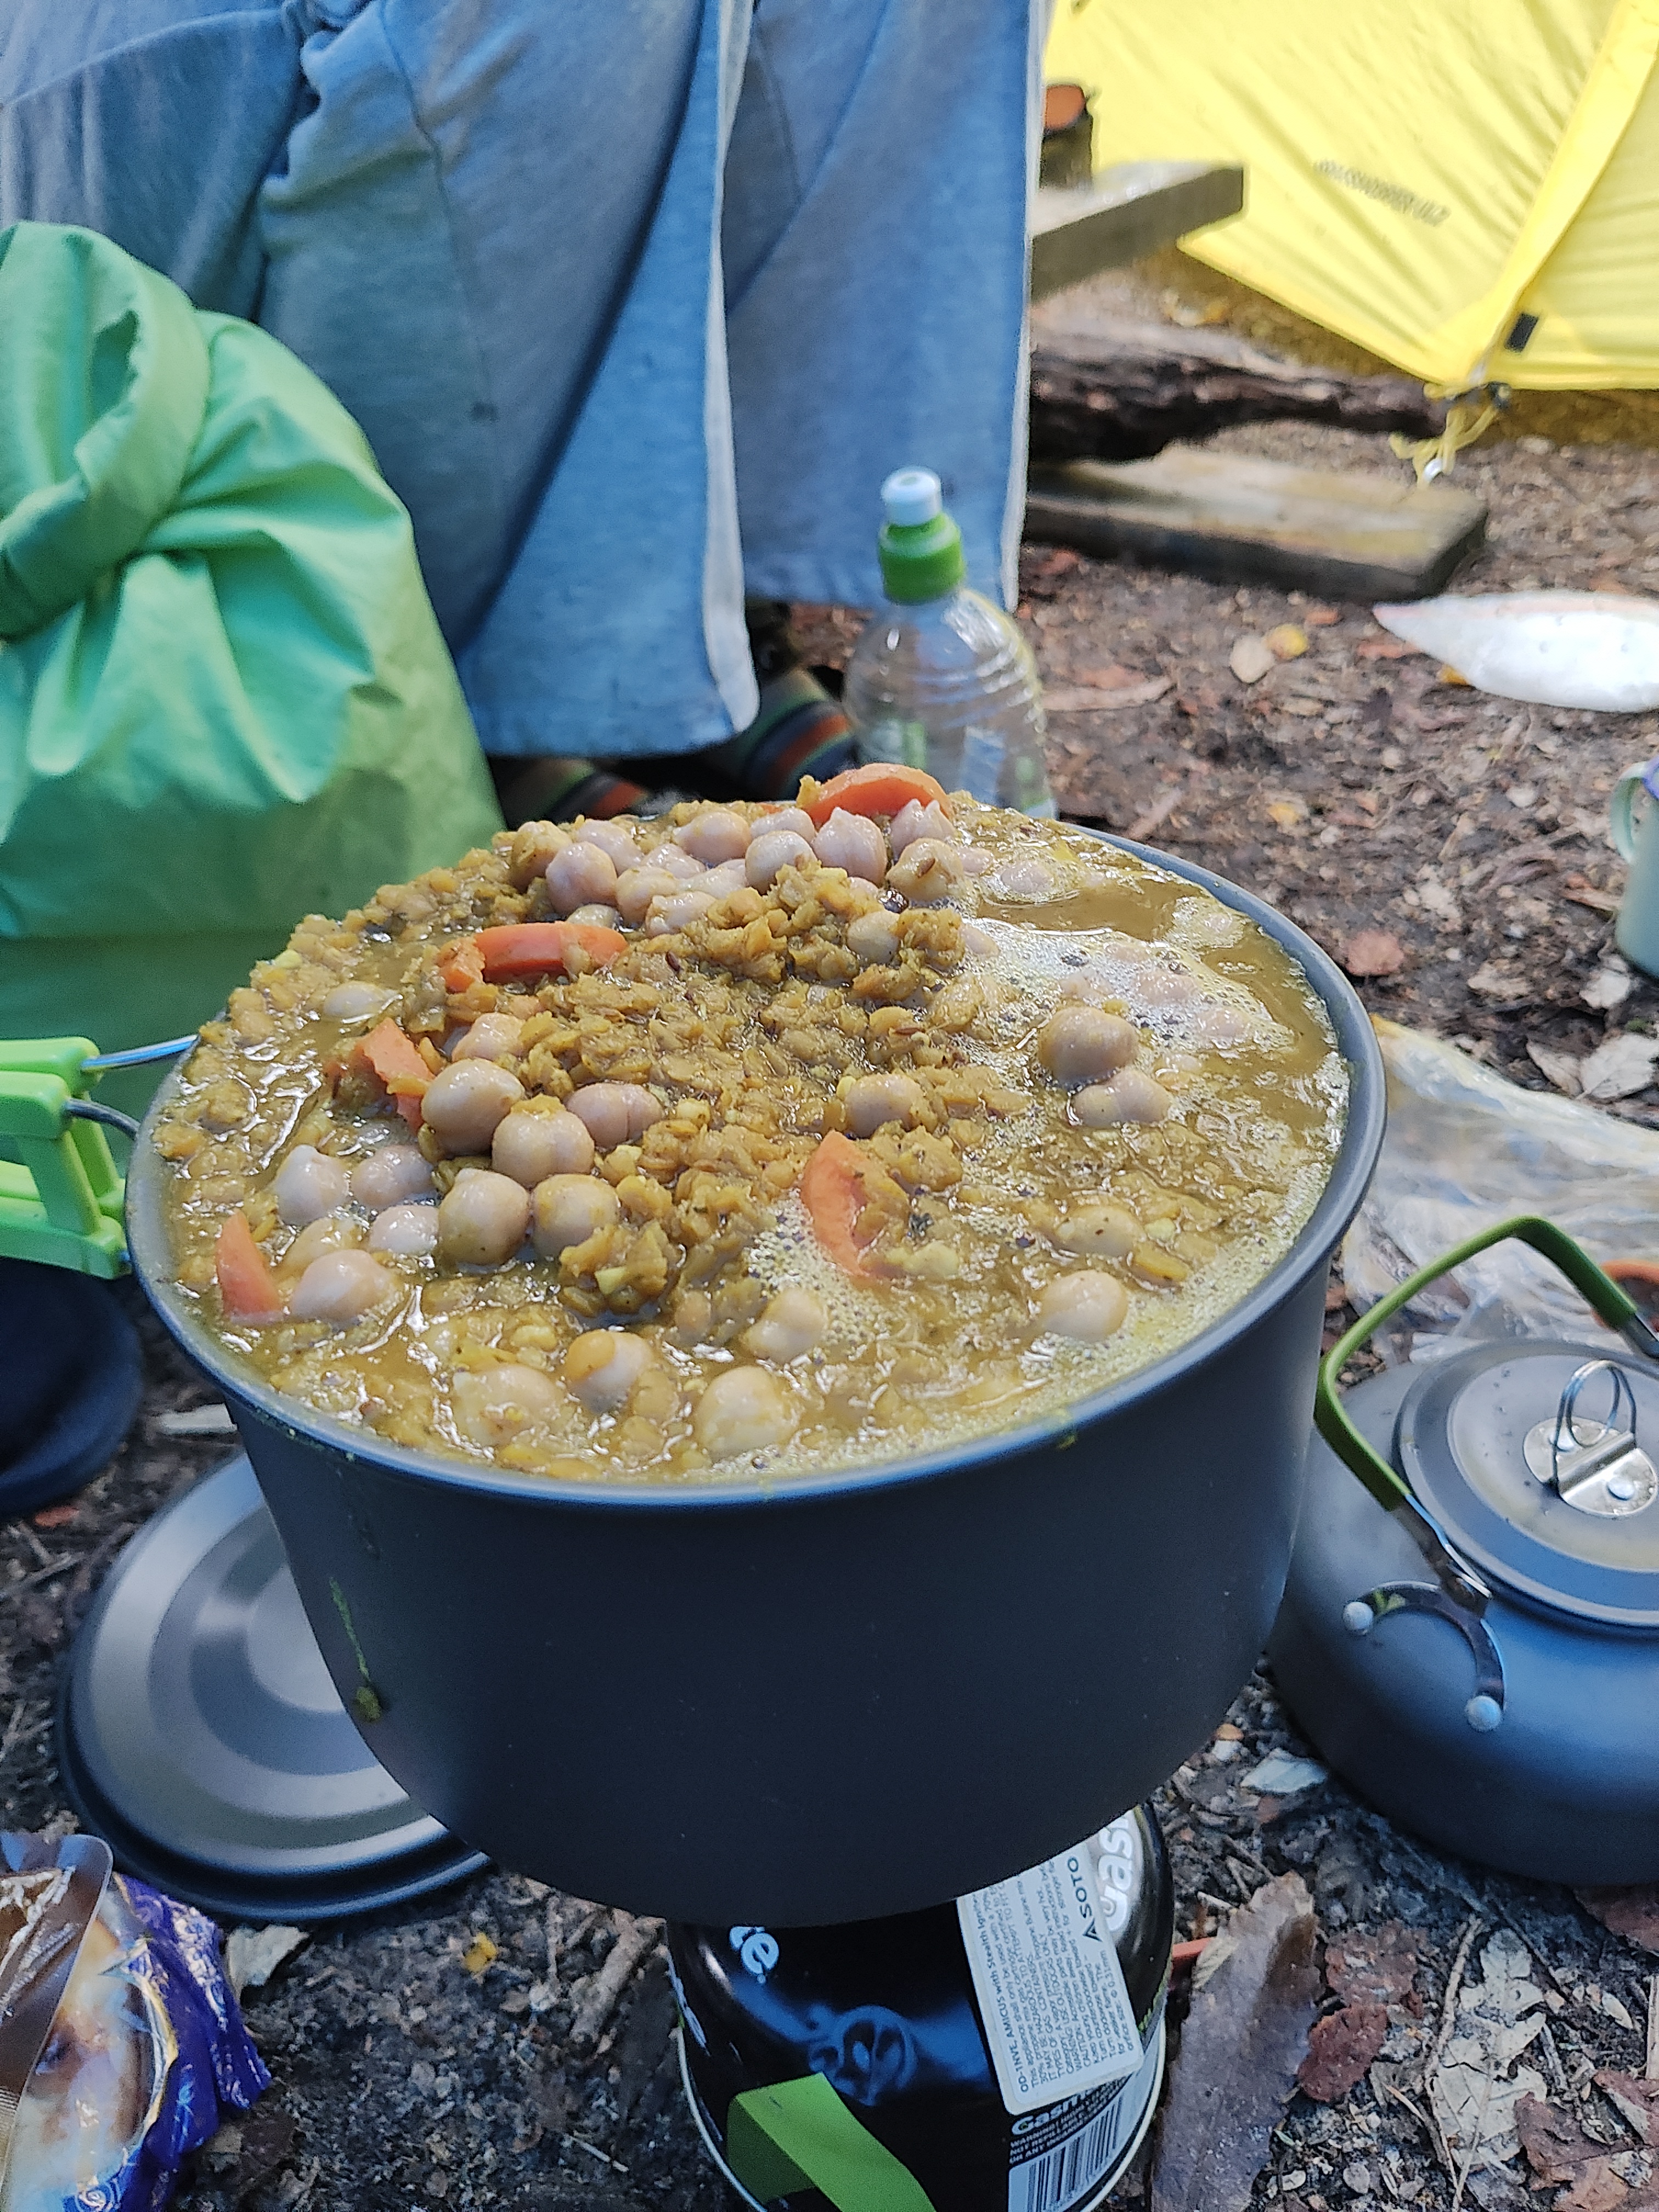
Hot and Nutritious Meals:
We took a small thermos which we filled with boiling water each morning. This meant that we could have a hot cup of tea or 2min noodles on the trail if needed. This was a bit of a hero on top of the Ironbound Range and was a big morale booster for the descent.
We mainly took ingredients to make our own meals, but we did also take a couple of dehydrated meals each as a back-up. This trek was physically tough, and it was good to have a fast high-protein option available as back-up if we were still hungry.
What we’d do Differently:
- Study up on river crossings, how to do it safely and how to recognise when it’s too unsafe to cross.
- Schedule in a rest day. The walk is doable in 7 days, but with the bad weather (and its impact on morale), our extra unplanned day was a game-changer. In future I will try to plan for a rest day if capacity allows.
- Bring more hot easy food such as 2min noodles to help warm up quickly.
- Bring a beanie and a buff.
- One team member wore trail runners, and ultimately it was a no from us. Boots all the way for this one.

Leave a comment